OBS
Open Broadcaster Software is very capable software to broadcast your stream to Twitch. I?ll walk you through the basics of what you need to know.
- Download OBS and install. If you are using Windows, right click on OBS and ?Run as Administrator? so it automatically grants the software permissions to capture your games.
- Open Settings and select ?Stream?. Select Twitch as the ?Service?.
- Open Twitch in your browser and select ?Dashboard? from your menu in the upper right corner. Select ?Settings? from the left nav, then select ?Stream Key?. Tap ?Show Key?.
- Paste the key in the OBS field called ?Stream Key?.
- Congrats, you can technically start streaming now!
Update August 2018
OBS and SLOBS (Streamlabs OBS) will be used interchangeably throughout this article. I did want to take a moment to point out their relationship to each other as well as their differences.
OBS is powerful open source software and if you want the most amount of flexibility it is probably the right choice for you. SLOBS is a version of OBS that is based off the original OBS, but the company Streamlabs have added a new interface to make it easier to use as well as providing additional features like built-in chat, pre-designed themes for your stream, and facemasks.
One distinct advantage OBS has over SLOBS is its use of plugins as I will mention later in the article. Regardless of what you choose to use, you can go back and forth between them fairly easily. SLOBS will import your settings from OBS, but in many cases you will need to recreate your work in OBS if you do it in SLOBS first because it supports additional features by default.
Something to Stream
Maybe you want to stream games, maybe you want to stream yourself working or maybe you just want to stream yourself on camera. You need something to stream. Here is how you set that up:
Games
It is likely that you are interested in streaming games. If it is not games you are interested in, most desktop applications can also be streamed using this same technique:
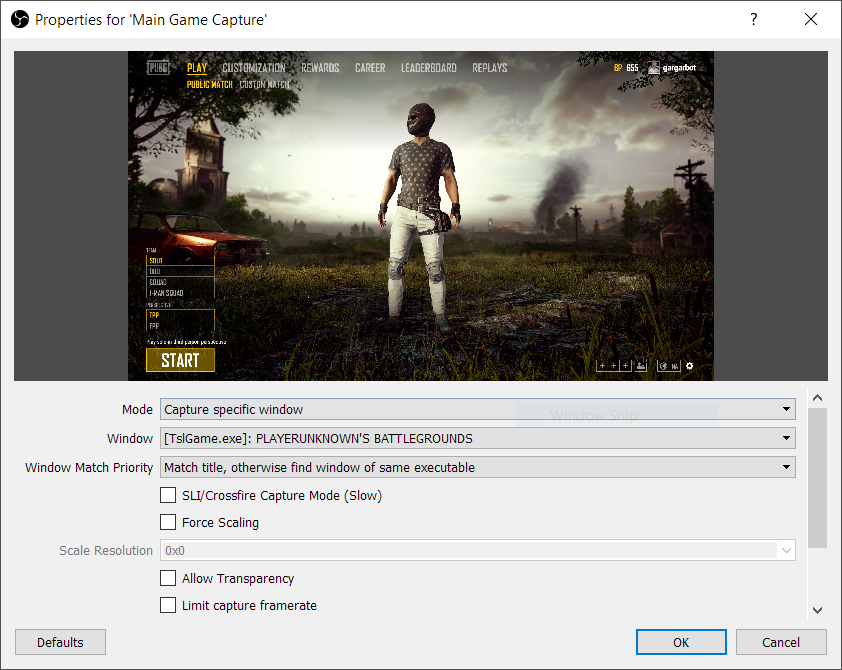
- Go to the sources panel in OBS and press the + button. Choose ?Game Capture? and enter the name of the game or application you want to stream in the ?Create New? field.
- Open the game or application and select ?Capture Specific Window?. Press OK.
- Choose your application in the Window drop-down. Press OK.
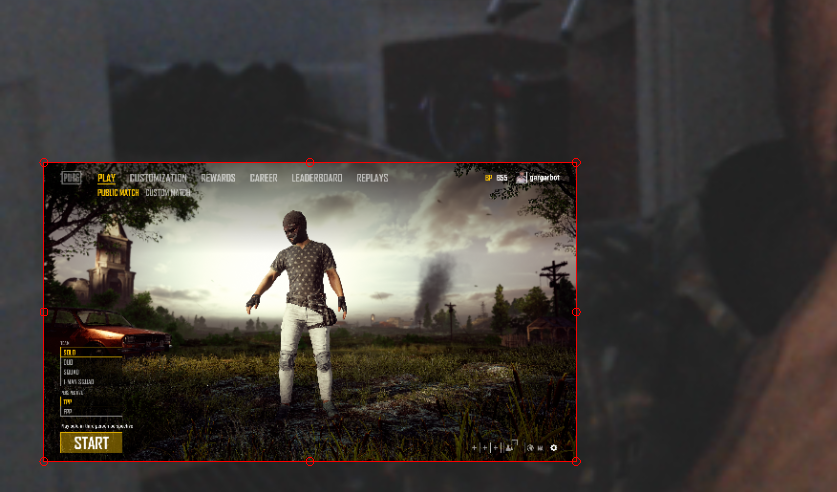
You will want this source at the bottom of your ?Sources? list. The list mimics the visual hierarchy of sources and you are going to want to overlay other sources on top. You may need to resize the source. You can do this by dragging a corner of the source and snapping it to the edges of the full window.
Desktop
Maybe you just want to stream your whole workspace. I usually don?t do this because it feels pretty dangerous. I prefer to not broadcast open browser windows and such, but if you like living on the edge you can stream everything your computer is displaying using this technique:
- Choose ?Display Capture? as your source.
- Enter a name and press OK.
Camera
One of the main enjoyments of watching a stream is seeing someone react and express themselves. I highly recommend streaming with a camera.
This may feel awkward at first but you will get over it. It?s really no different than how you present yourself all day long. Just be yourself.
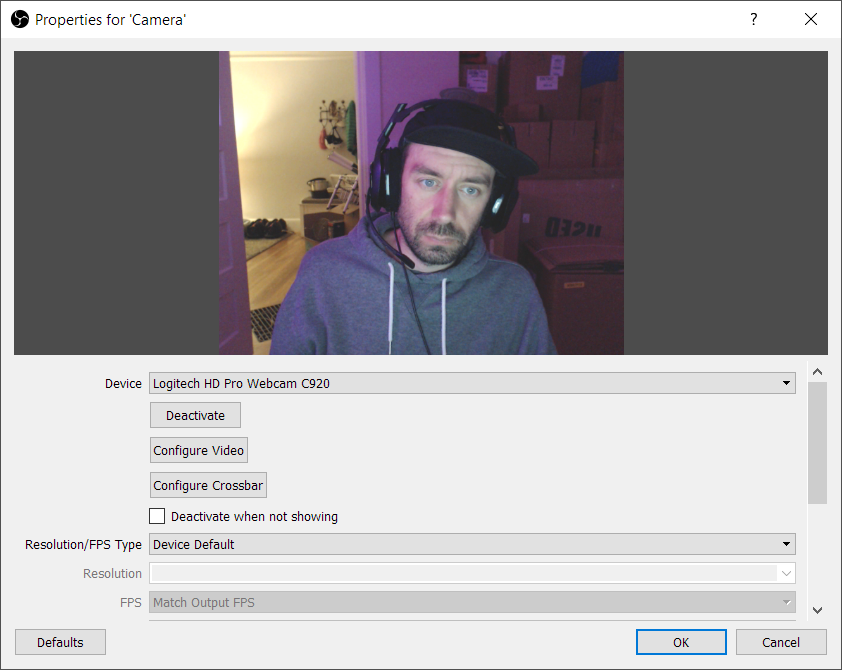
- Choose ?Video Capture? as your source. Name it ?Camera?.
- Choose your camera and press OK.
- Place the source above the Window Capture in the sources list and resize the source to your liking.
In most cases, you will also need to add your microphone as a ?Audio? source.
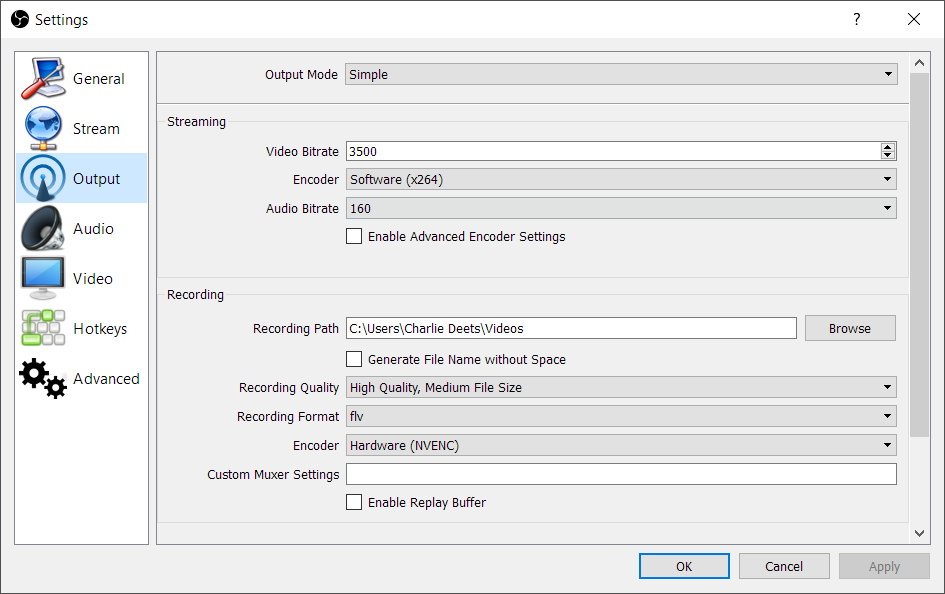
OBS Stream Settings
This section is likely to be the most contentious information I provide. OBS stream settings are a bit like black magic. The best settings vary widely with people?s particular setups. Serious streamers use a second computer to encode their streams so they don?t eat up resources from their main device.
I?m going to share with you my settings, which work for me. I encourage you to go check out the thousands of videos on YouTube about various other setups if you don?t find these to work to your liking.
- Open OBS and choose ?Preferences?.
- Tap the ?Output? category.
- Set your ?Video Bitrate? to 3500.
- The ?Encoder? should be set to be ?Software (x264)?.
- ?Audio Bitrate? will be 160.
- Set your ?Output? to 1280×720 with bicubic downscaling at 60fps.
These settings are fairly conservative but I think they are a nice balance point of performance and quality. I prefer frame rate to resolution but in certain situations you might prefer the opposite. Some streamers push a significantly higher bitrate, but keeping your bitrate lower makes it easier for people to watch your stream, especially on lower bandwidth connections.
With the basics out of the way, you can proceed in your streaming and probably have a good time, but the rest of this article is where I think all the fun is. Let?s add some functionality to our stream:
Overlays
Overlays let you place graphics and data on top of your stream. The point of an overlay is to give your viewers more information to latch onto so they don?t get bored and leave if the stream gets dull.
You can theoretically do anything but certain overlays are more obviously advantageous. Think of them as similar to how news tickers or sports statistics keep your mind active as a viewer.
Logo
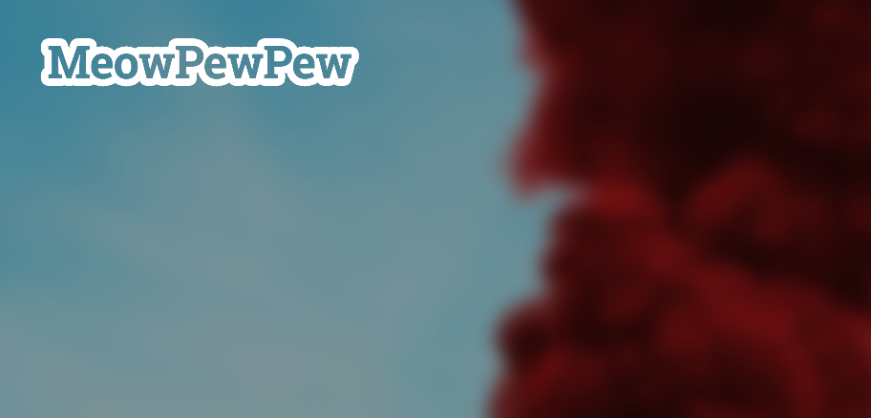
I believe putting some sort of unique mark on your stream helps you initially express a bit of personality but also allows your viewers to instantaneously recognize that you are serious enough not to be doing this by accident. To add a static image overlay:
- Go to the ?Sources? panel, tap + and choose ?Image?.
- Name the image source and press OK.
- Select the image from your local drive and resize.
Unless you specifically want a rectangular image, you will want to choose a PNG image with transparency. This can be created in most image or design tools.
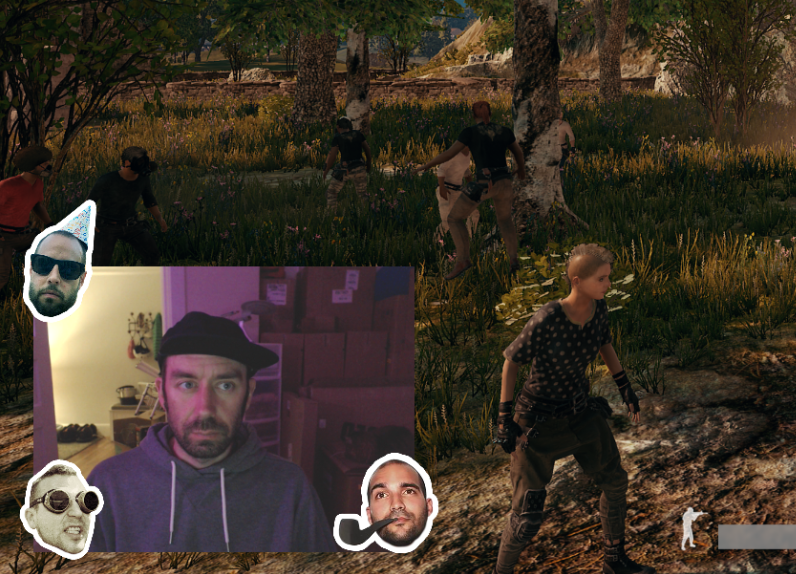
You can use this same technique for any sort of image. For example, I like to put little stickers of the people who I am playing with next to my video so people can have an idea of who are the voices on the stream.
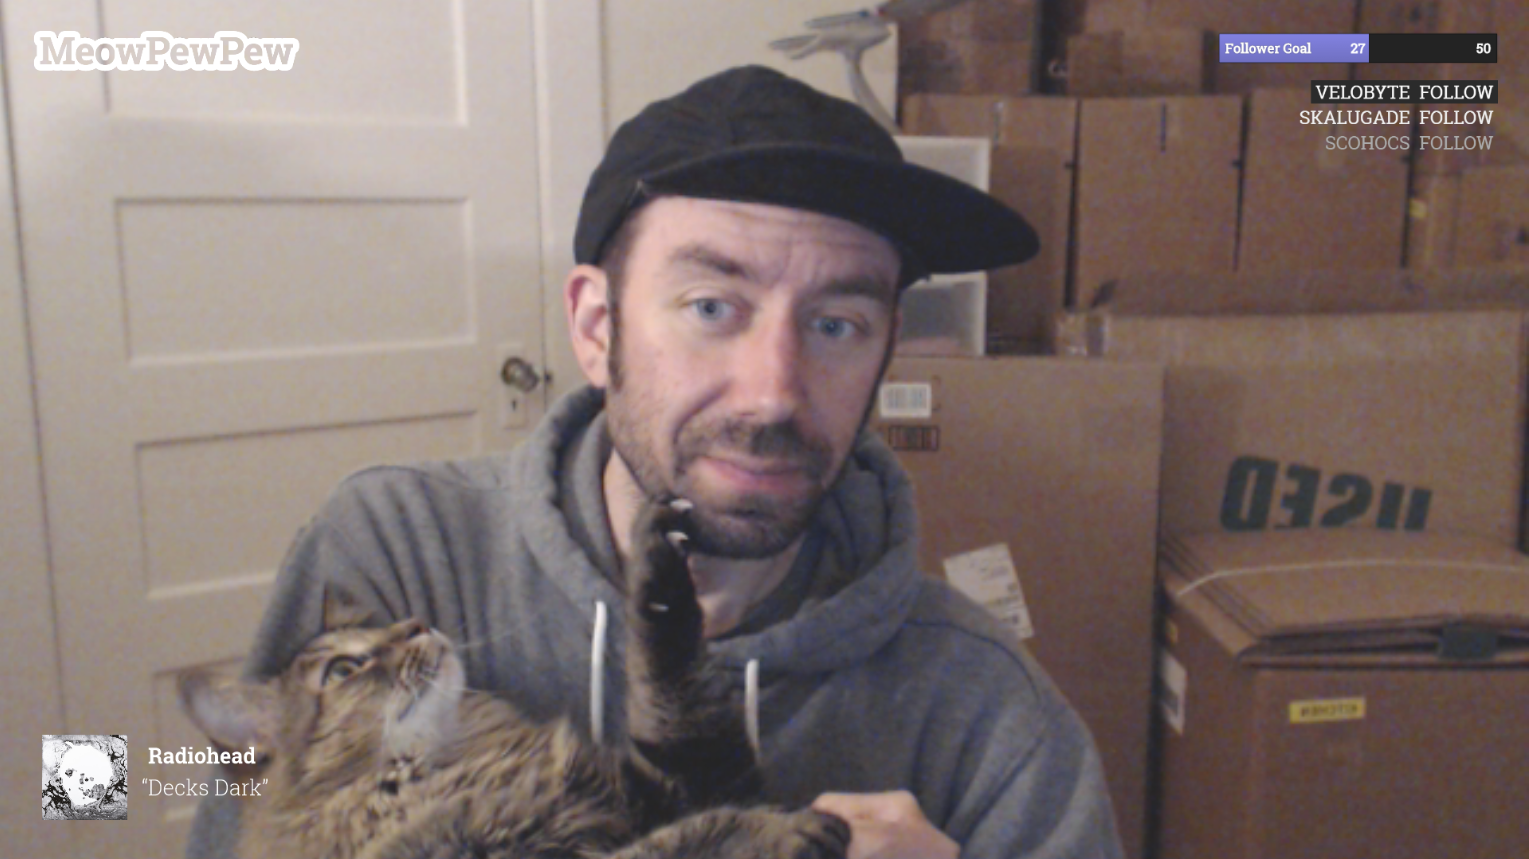
Alerts
If someone follows you, alerts allow you to celebrate it in real time with your viewers. You can let the person know you appreciate the attention and also let them bask in the glory of interacting with the televisual in real time.
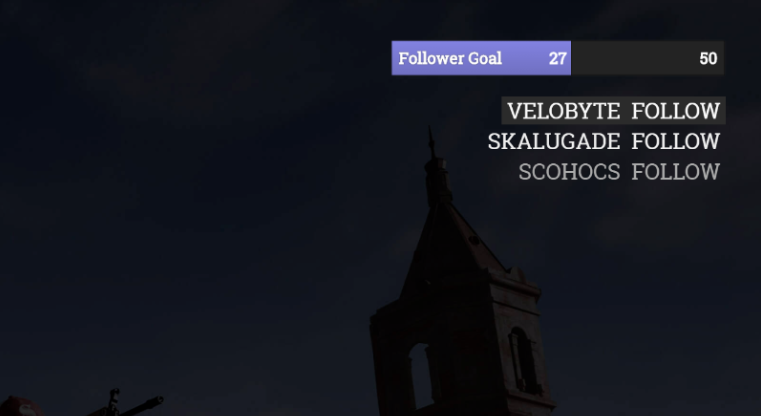
You can also use Streamlabs for a variety of other overlays such as a recent activity list, goals, chat box and viewer count. Take a peek through their widgets and set up ones that make sense for your stream. Adding these sources of activity to your stream can be helpful to show your viewers what you are interested in and also a source of things to chat about.
Update October 2019Added a Data Overlay section below. Also check out my new green screen setup in the image! 🙂 I?ll write about green screens and lighting in a future update.
Data Overlay
Sometimes you want to add some additional information over your stream to help people understand what is happening. Recently my Discord participated in a Destiny 2 Private Crucible Tournament. We wanted to have the leaderboard available on stream.
Snip
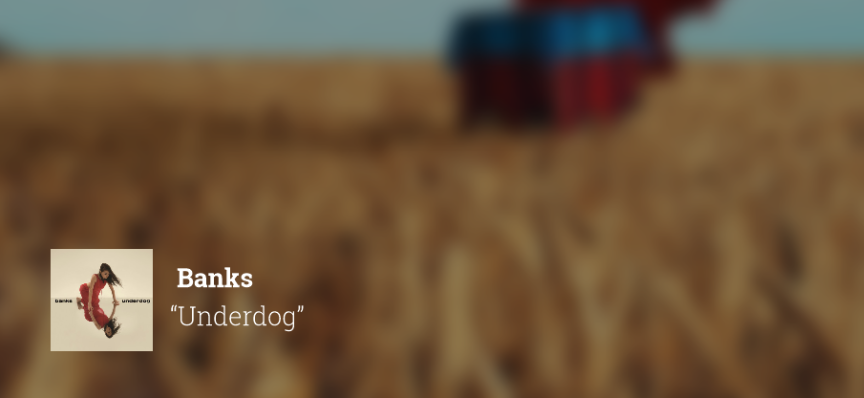
If you like to listen to music while you are streaming check out Snip (Windows only). Snip runs in the background and can create text and image overlays of the current song and artwork from many music services and apps such as Spotify and iTunes.
- Download Snip. Expand the package and launch the application named ?Snip?.
- In your taskbar, right-click on Snip. You can select your service here.
- Play some music and Snip should generate a file in it?s directory called snip.txt as well as an image file named Snip_Artwork.jpg.
- In OBS create a new ?Text? source. Let it read from a file and select the snip.txt file in the Snip folder. You can format how the text is displayed in OBS.
- If you would like a thumbnail as well, you can create a new ?Image? source and select the Snip_Artwork.jpg file.
There are also other cool options to Snip, such as breaking out the metadata into separate files which allows to set up layouts like the one I use. You can do this by selecting ?Create Separate Files?. Snip also supports useful hot keys in the settings.
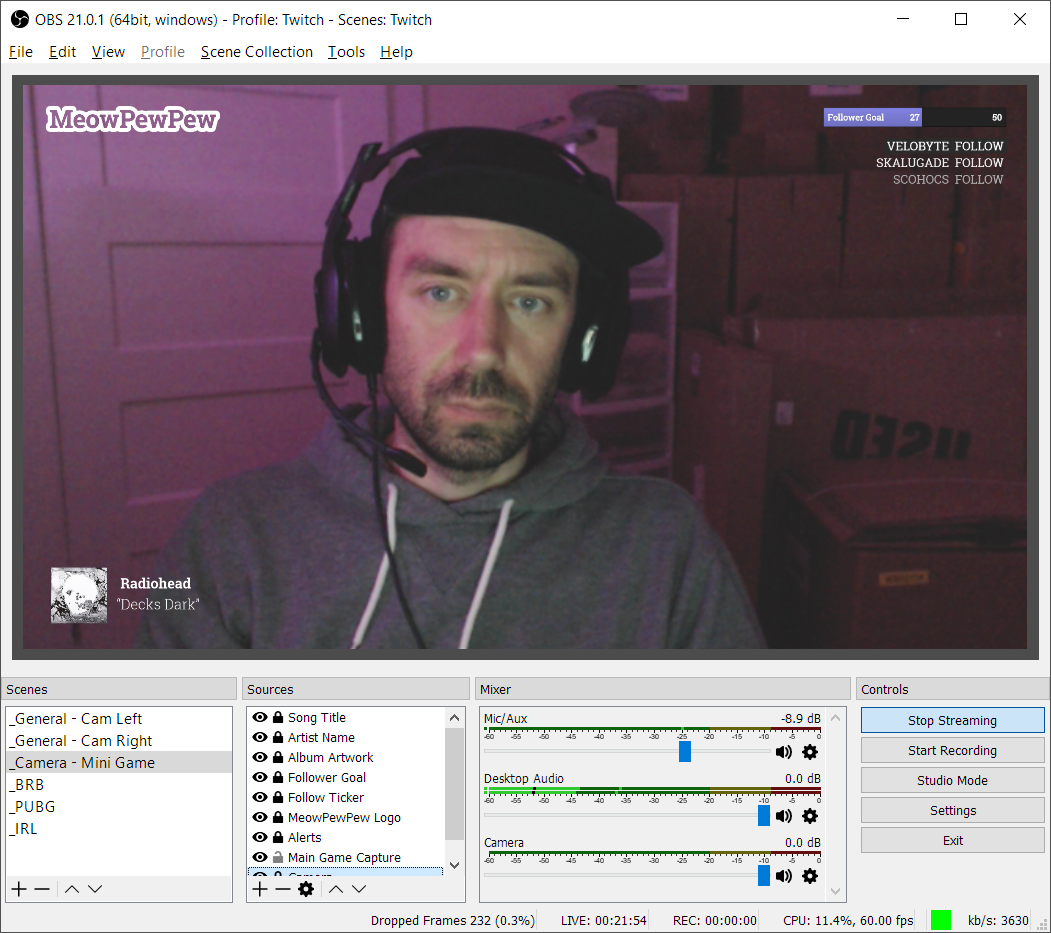
Scenes
You may have noticed you can quickly get overwhelmed with all the possibilities of these sources. That is what ?Scenes? are for. In OBS you can set up multiple scenes that you can switch to on the fly during your streams. I have 4 main scenes I use:
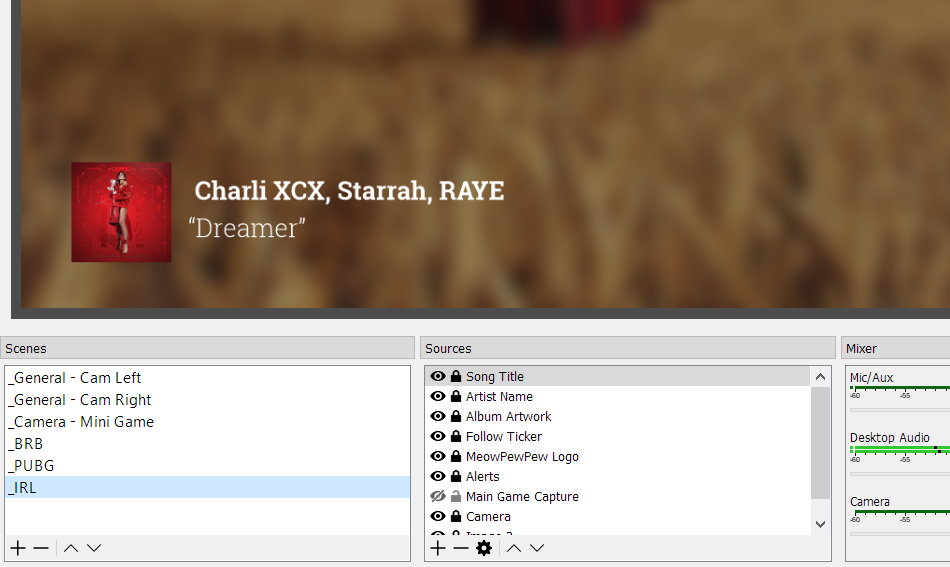
Camera LeftI use this one for games that have little information in the lower right corner.
Camera RightI use this one for games that have little information in the lower left corner.
Mini-gameThis makes my camera the full size of the screen and reduces the game to a smaller overlay size. If I am talking a lot or waiting for a game to load I can switch to this one for a break in the stream without losing context of what I?m doing.
BRBI use this screen when I need a break. I keep many image sources in this scene for different games I play so I can fire up the relevant BRB images.
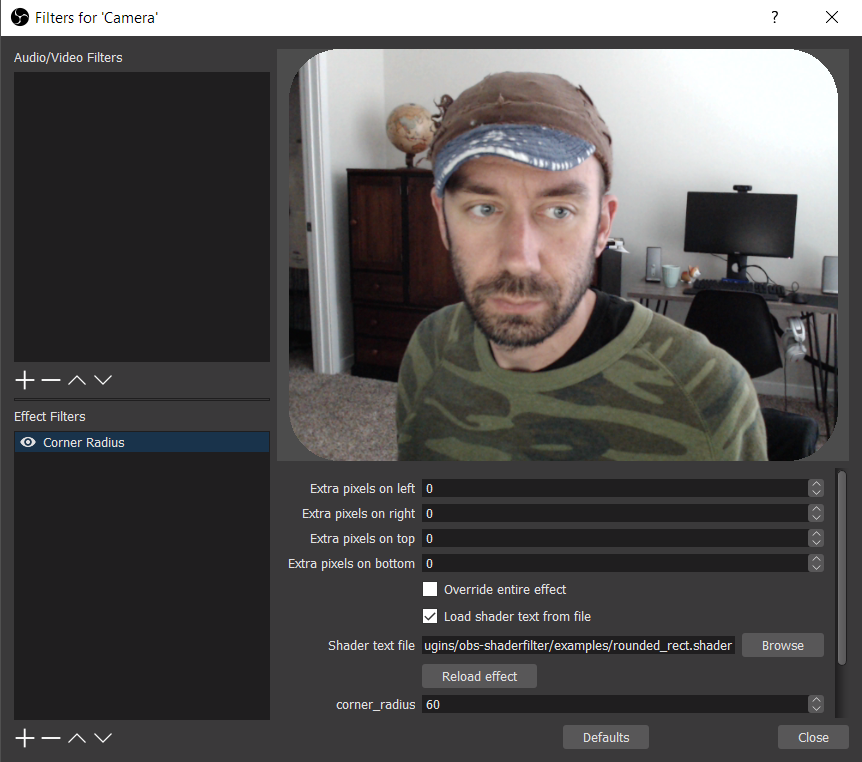
The key to getting it to work is to set the ?shader text file? as an effect on the video you want to round the corners of. There is a longer explanation video which I watched to learn how to do this.
Chat
I tried out a bunch of chatbots for my chat but most of them are mainly useful for very active chats. Something that did provide me immediate value is Chatty (Windows only). Chatty is so full of features it?s hard to describe. Here?s how to set it up:
- Download Chatty (standalone version) and install on your machine.
- Log into your Twitch account through Chatty.
- Choose your channel name, which is your Twitch username and connect.
- Make sure to select ?Rejoin Open Channels? so whenever you open Chatty it will reopen your chat.
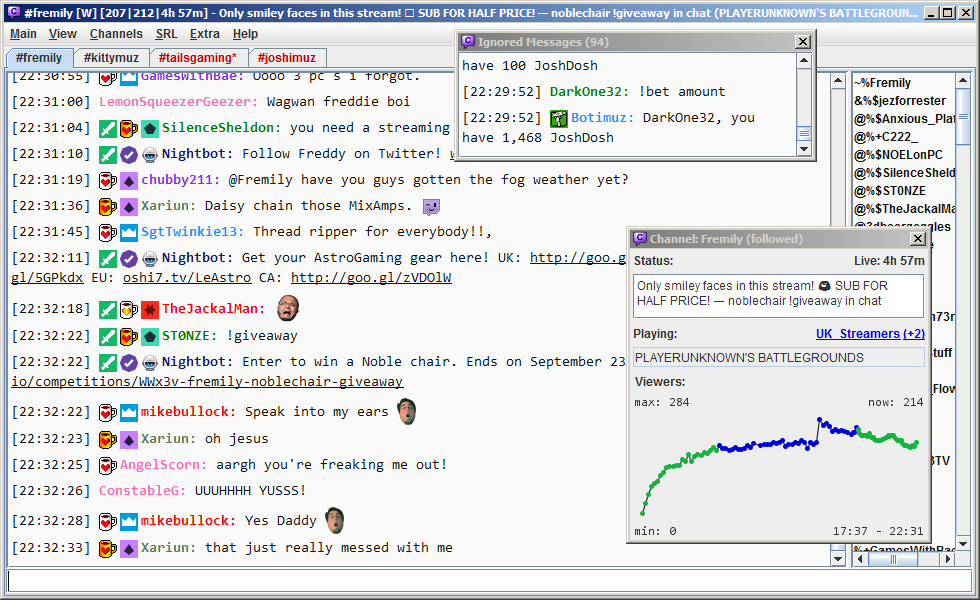
Since I only have one monitor, I wanted to avoid switching in and out of my game as much as possible. I set up notifications for new chat messages as well as when people joined my chat (tutorial). I can see these notifications over my game view and respond to them accordingly. I also added sounds to certain notifications so I wouldn?t miss them.

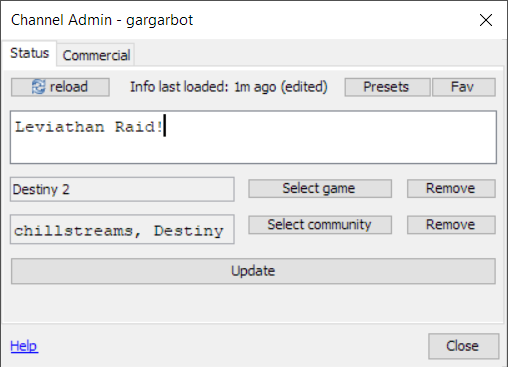
I also use Chatty?s Admin window to set up my stream information such as the title, the game I?m playing and associated communities. I use the Info window to keep track of how many viewers are in my stream over time. You can think of Chatty as a native replacement for using the Twitch dashboard.
Chatty can do so much more: moderation support, highlighting certain viewers in chat, and viewing all messages of a specific chatter. Play around with this one and see what it can do for you.
Videos
You can use a ?Media? source to set up scenes of video playback. This can be used to play intro, outro or transitioning video content in your stream.
Extensions
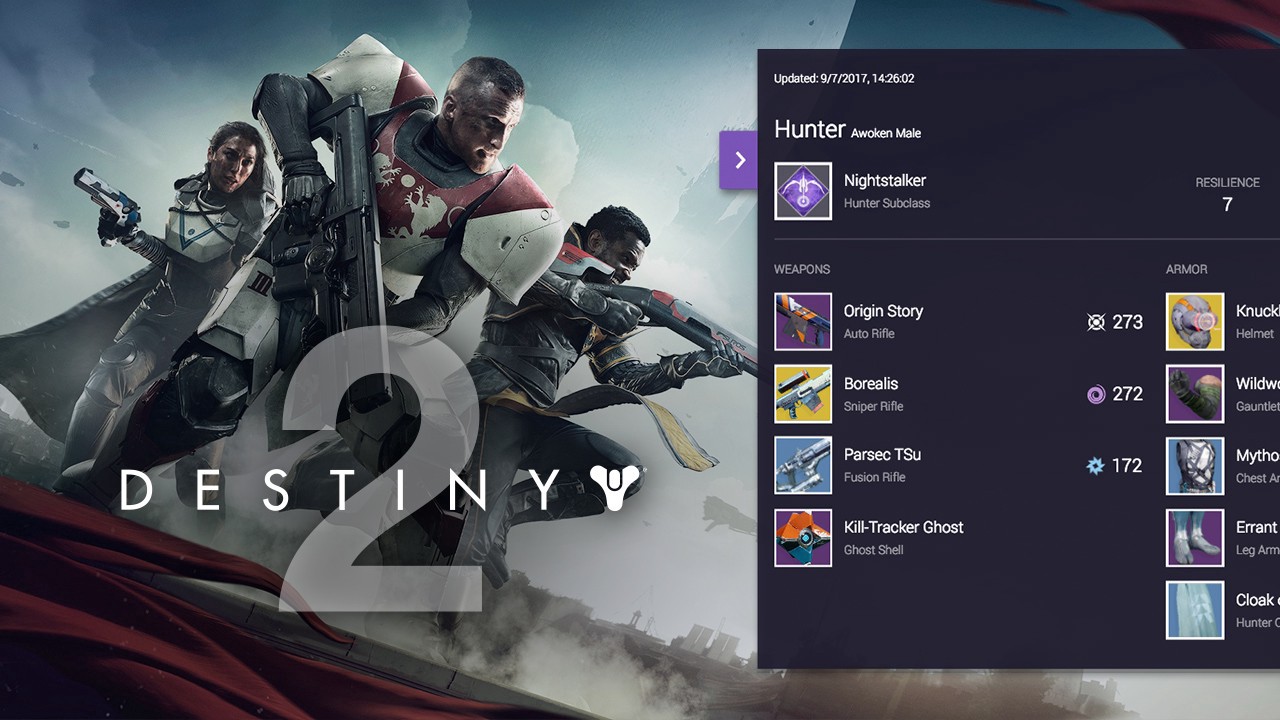
Twitch has a feature called Extensions. Developers can create extensions that you can enable on your stream. These extension allow interactions or display of data. For example, a viewer can look at your Destiny 2 loadout with the Destiny 2 Armory Overlay.
Profile
Another important experience to consider is your profile. People might come across your stream but not be sure why they should care about you. Indulge them with some good information to sink their teeth into.
I include an about section, games I am currently playing, my friends who also stream, other social profiles and information about my setup. I?d err on the side of overindulgence rather than being shy. People are looking at this area to find out more about you, give it to them.
Discord
If you are playing with friends, ask them if you can include their Discord audio in your stream.
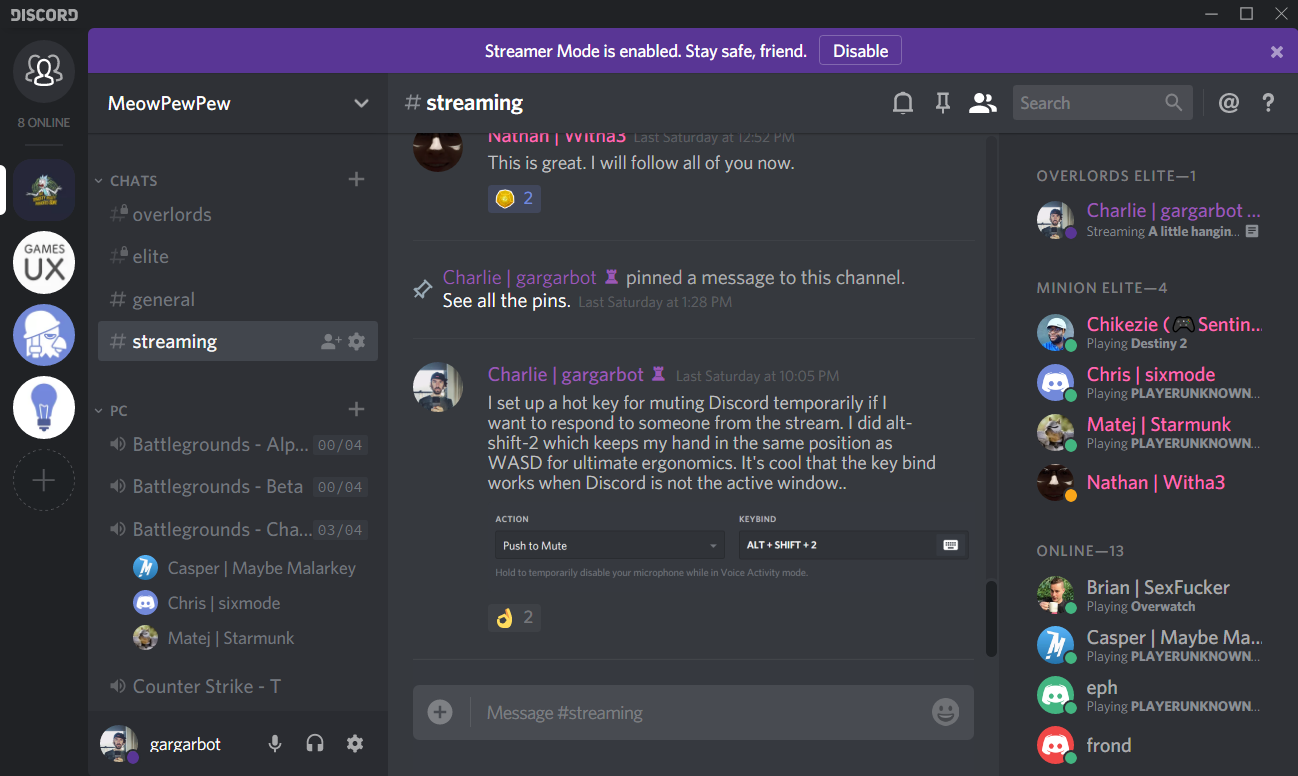
One issue I?ve already noticed is the awkwardness that can occur when responding to your Twitch chat while being in a voice channel with your friends. I got a tip from my friend Hauz to set up a universal hot key for muting your mic in Discord.
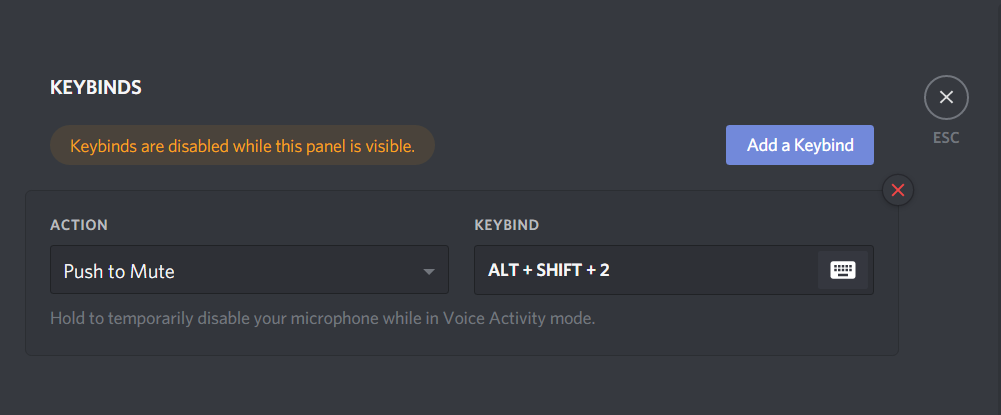
I set up Control-Shift-2 to mute my Discord mic, so when I want to respond to someone on the stream I hold those keys down. You can obviously set up a simpler quick key but I liked keeping my left hand in the same position as when I?m gaming.
Multistream
Now that you are excited about streaming, maybe some of your friends also got excited about streaming, and now the rest of your friends don?t know who to watch since everyone is streaming. Multistream lets you create layouts of multiple streams at once. You can share a custom link and let people view the action from multiple angles.
Update August 2018Streaming via an Additional Machine over NDI
I have a second PC and I wanted to try streaming from it instead of my gaming PC so I could save system resources for my games. The streaming PC is in another room and I didn?t want to spend money on a capture card so I figured this wouldn?t be possible.
Then I found an interesting plugin for OBS which allows me to broadcast my stream over my local network with a technology called NDI.
obs-ndi – NewTek NDI? integration into OBS Studio
This plugin adds simple audio/video input and output over IP using NewTek’s NDI? technology. Three integrations are?
obsproject.com
On the streaming PC, I have OBS set up and it is receiving the NDI signal and doing the encoding and broadcasting. I access the streaming PC from my normal PC using Remote Desktop to start and stop the broadcast. Check this video out for more info.
Wrap-up
I hope this information helps you get started with streaming on Twitch. It?s such an enjoyable process to customize your stream and profile once you get past the technical hurtles and find the right tools.
If you?d like to watch my stream or just hang out, you can follow me at twitch.tv/gargarbot. I?ve been streaming games like Destiny 2, Fortnite, Overwatch and older classics like Tetris.
Thanks for reading!
Update October 2019
I also made a really geeky 24 minute long video on the Elgato Stream Deck. I think this device is super great for streamers, but also people that just like to customize their computer experience. Check it out if you want a ton of super specific tips for setting up a Stream Deck.
You can also find me on Twitter.
Charlie Deets | Twitter
The latest Tweets from Charlie Deets (@charliedeets). Product Designer at WhatsApp and Facebook. I make a moon app. I’m?
twitter.com