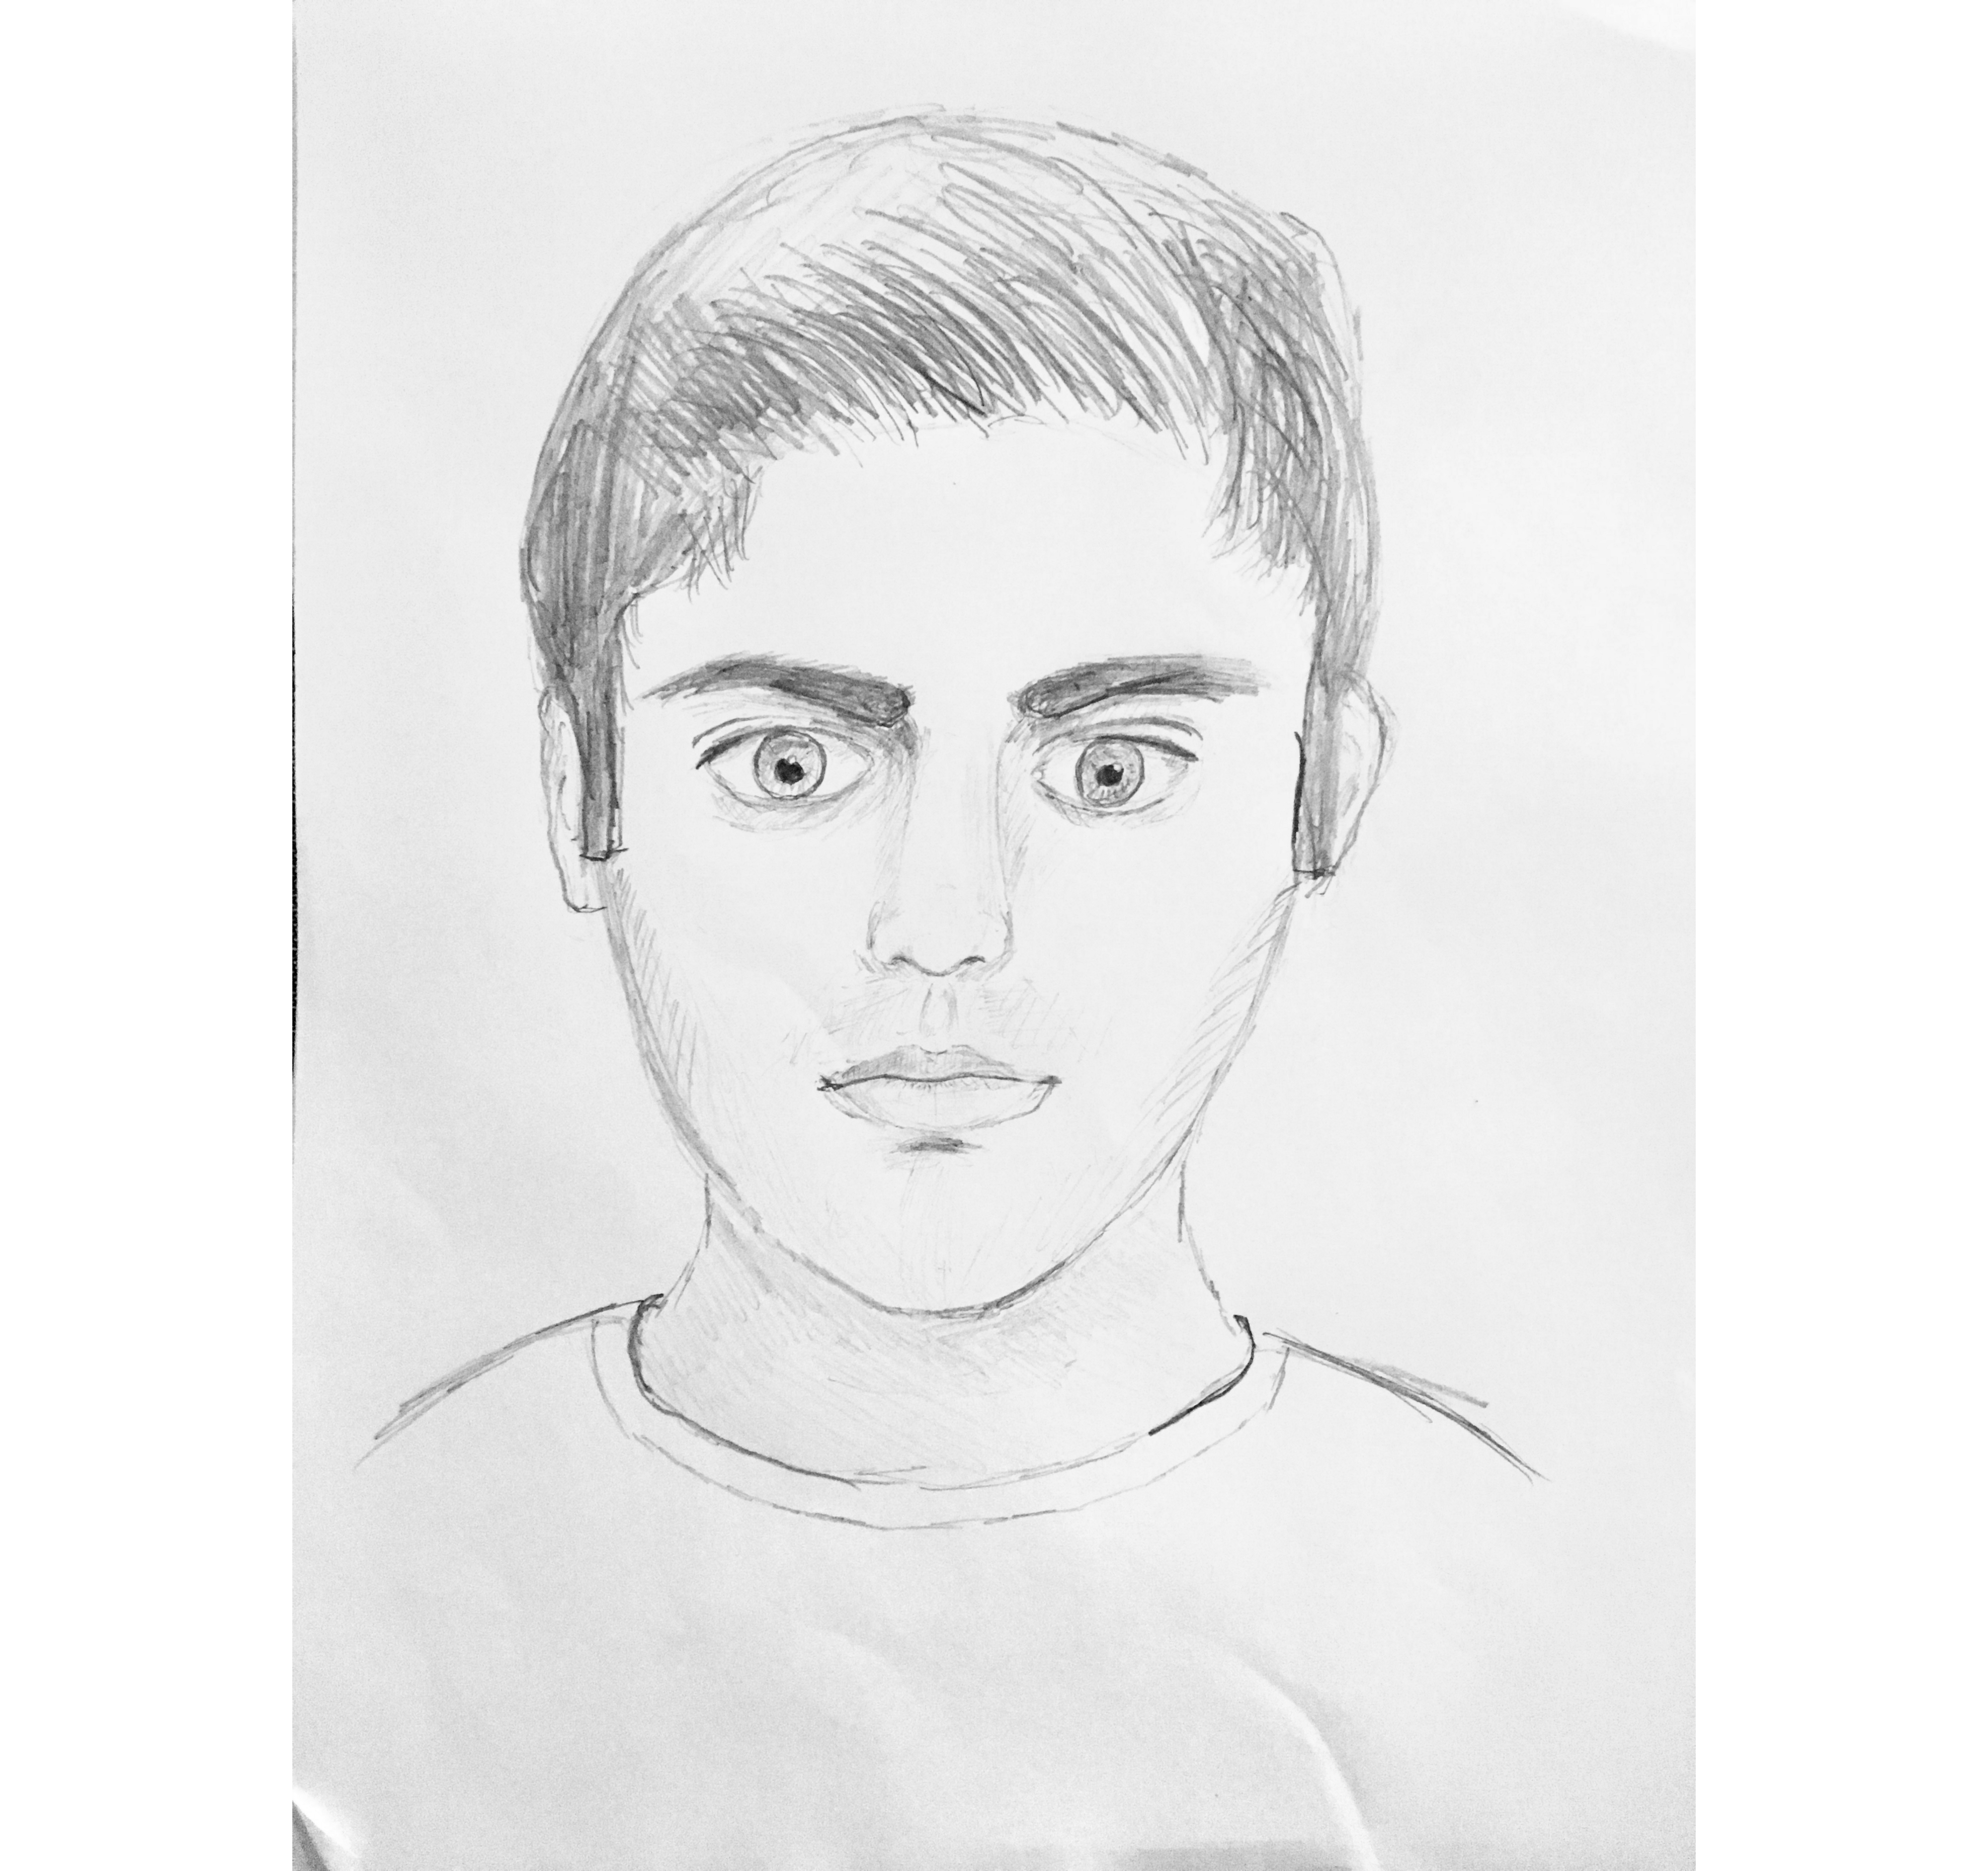
Measuring success for this challenge is certainly more subjective than last month (where I successfully memorized a deck of cards in less than 2 minutes).
In this case, the best I can do is show a photo that demonstrates the level of drawing I?m aiming to reach?
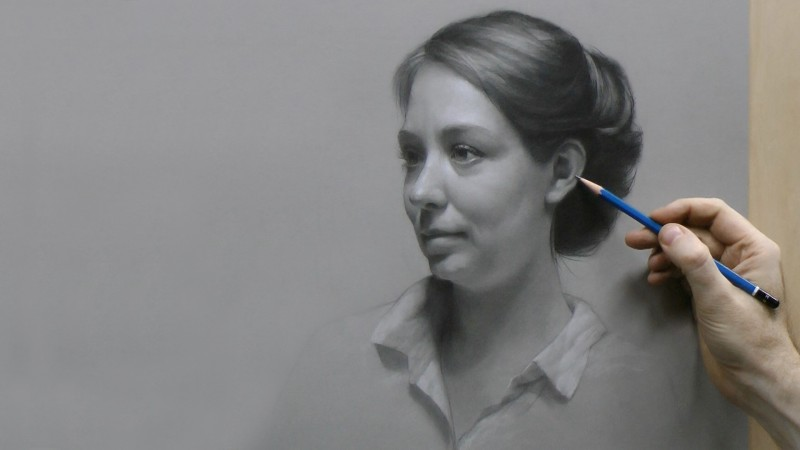
This portrait is the example drawn in the Vitruvian Studio Portrait Drawing Course, which is the course I?ll be following this month.
Clearly, there are major differences in realism between my starting drawing and this example portrait. So, if I can match the level of this example (which will be, of course, a subjective, but hopefully honest judgement), I will consider this challenge a success.
With my goal set, it?s time to start drawing?
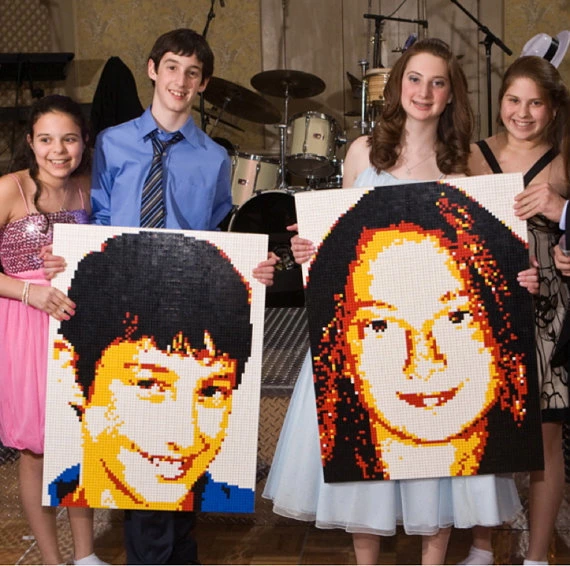
And another one I made for my grandparents.
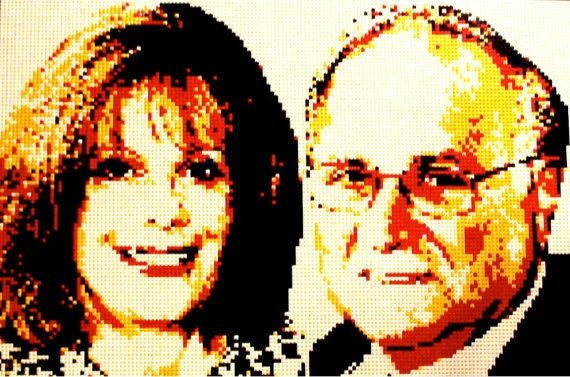
While these pieces may look like they required some amount of artistic genius to pull off (do they?), that?s really not the case. Instead, these pieces just required some clever computational analysis, planning in Photoshop, and executional patience (while glueing and placing each Lego piece).
The computer was the real artistic champion here.
2. Portrait painting (with the help of a projector)
In January, 2016, I was just starting to develop the itch to draw/paint portraits. In an attempt to make something that was commercially viable (to cover the cost of materials), I decided to paint a portrait of Donald Trump.
While the result is artistically interesting, much of the work was done by a projector. I created a paint-by-number blueprint (again in Photoshop), projected it onto the canvas, and traced it in pencil.
Then, I simply filled in the sketch with paint according to my computer-generated instructions.
3. Counterfeit paintings (using optical tricks)
I?ve also experimented using optical tools (like mirrors and lens) to mechanically create. Although, I haven?t invested enough time to produce anything worth sharing.
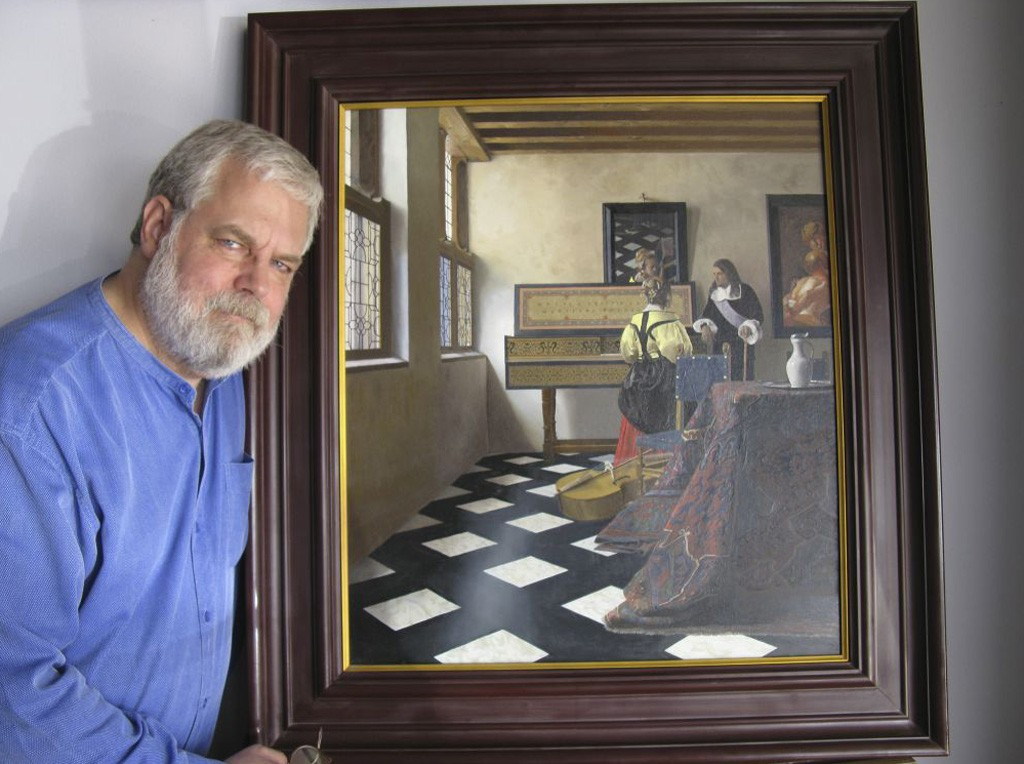
Tim Jenison, on the other hand, does have something worth sharing. Without any artistic training, he painted a nearly-exact replica of a Vermeer painting solely using optical techniques.
Tim?s journey is documented in the Penn and Teller-produced film ?Tim?s Vermeer?, which I highly recommend you check out.
Here?s Tim?s final painting.
This month I?m only using pencil and paper
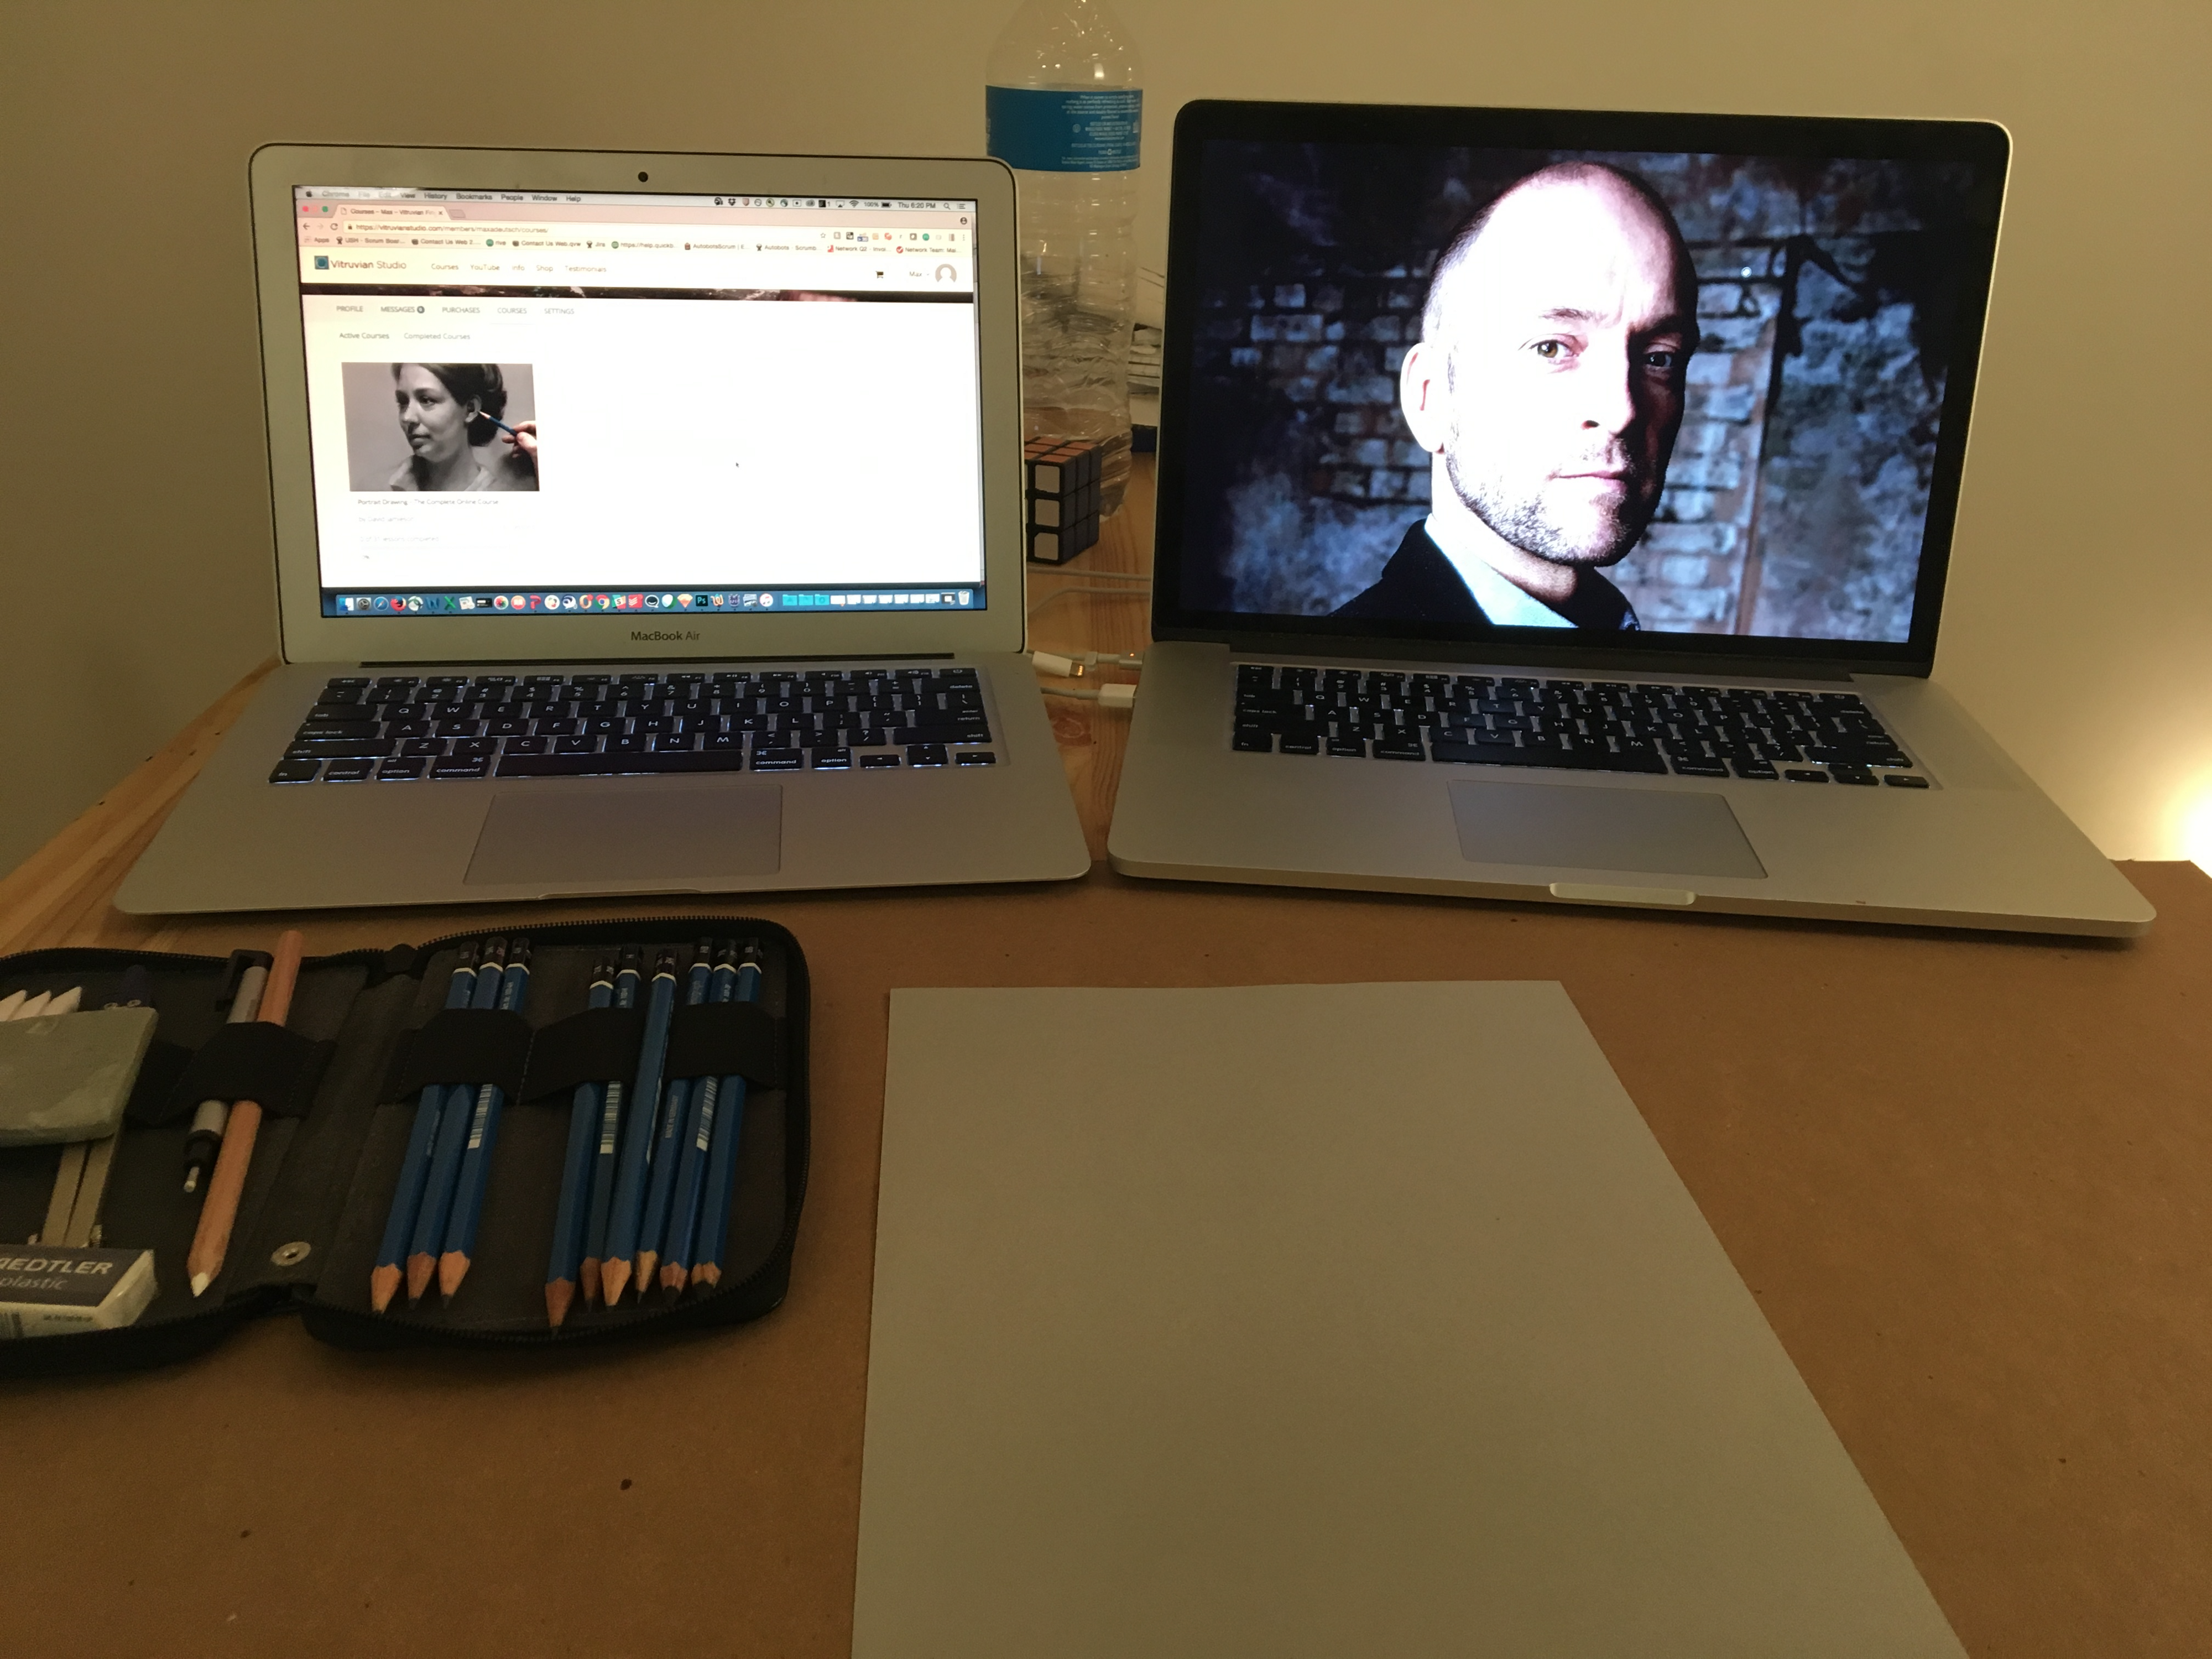
While technology-aided art still should probably count as art (in some capacity), this month, I?m committed to creating using only the tools shown below: 9 black pencils, 1 white pencil, a few different erasers, and a gray piece of paper (which I?ll explain another time).
It?s going to be hard, but that?s the point.
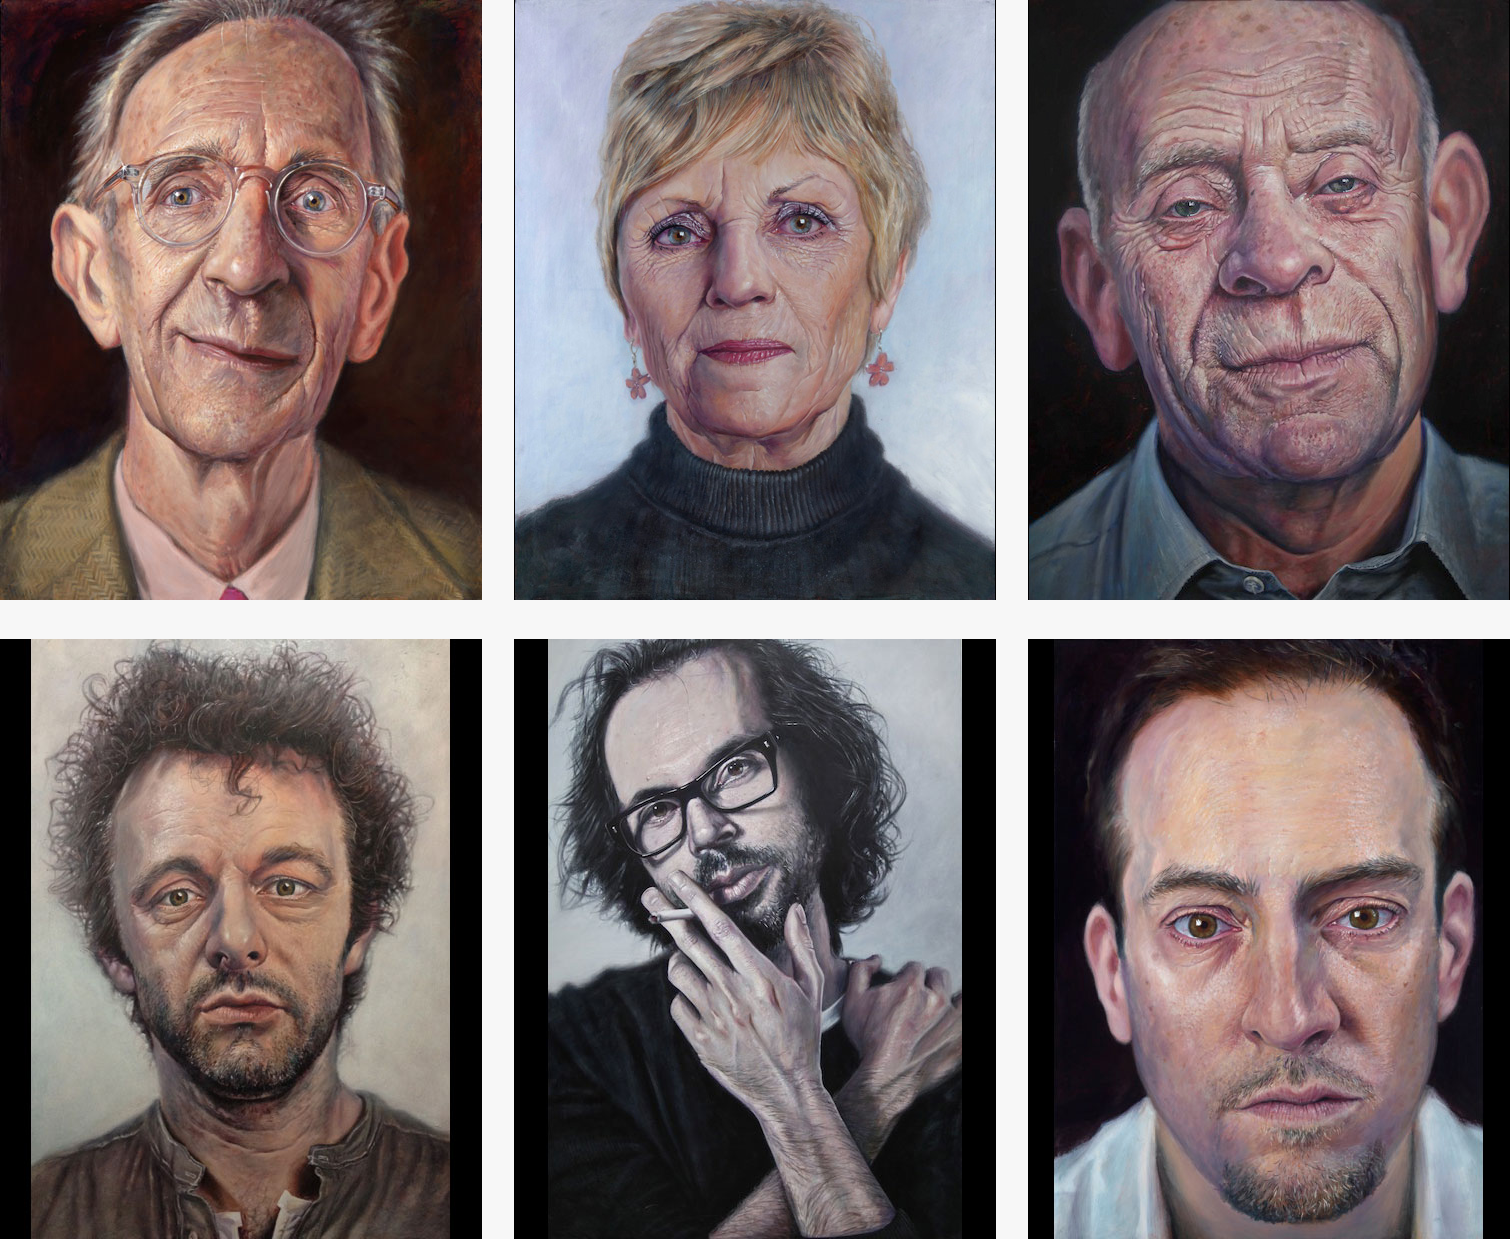
After seeing these, I decided I too would like to be the kind of person that casually paints impressively good portraits on the side.
For now, before I get to the painting, I?ll start off by mastering the drawing part of program.
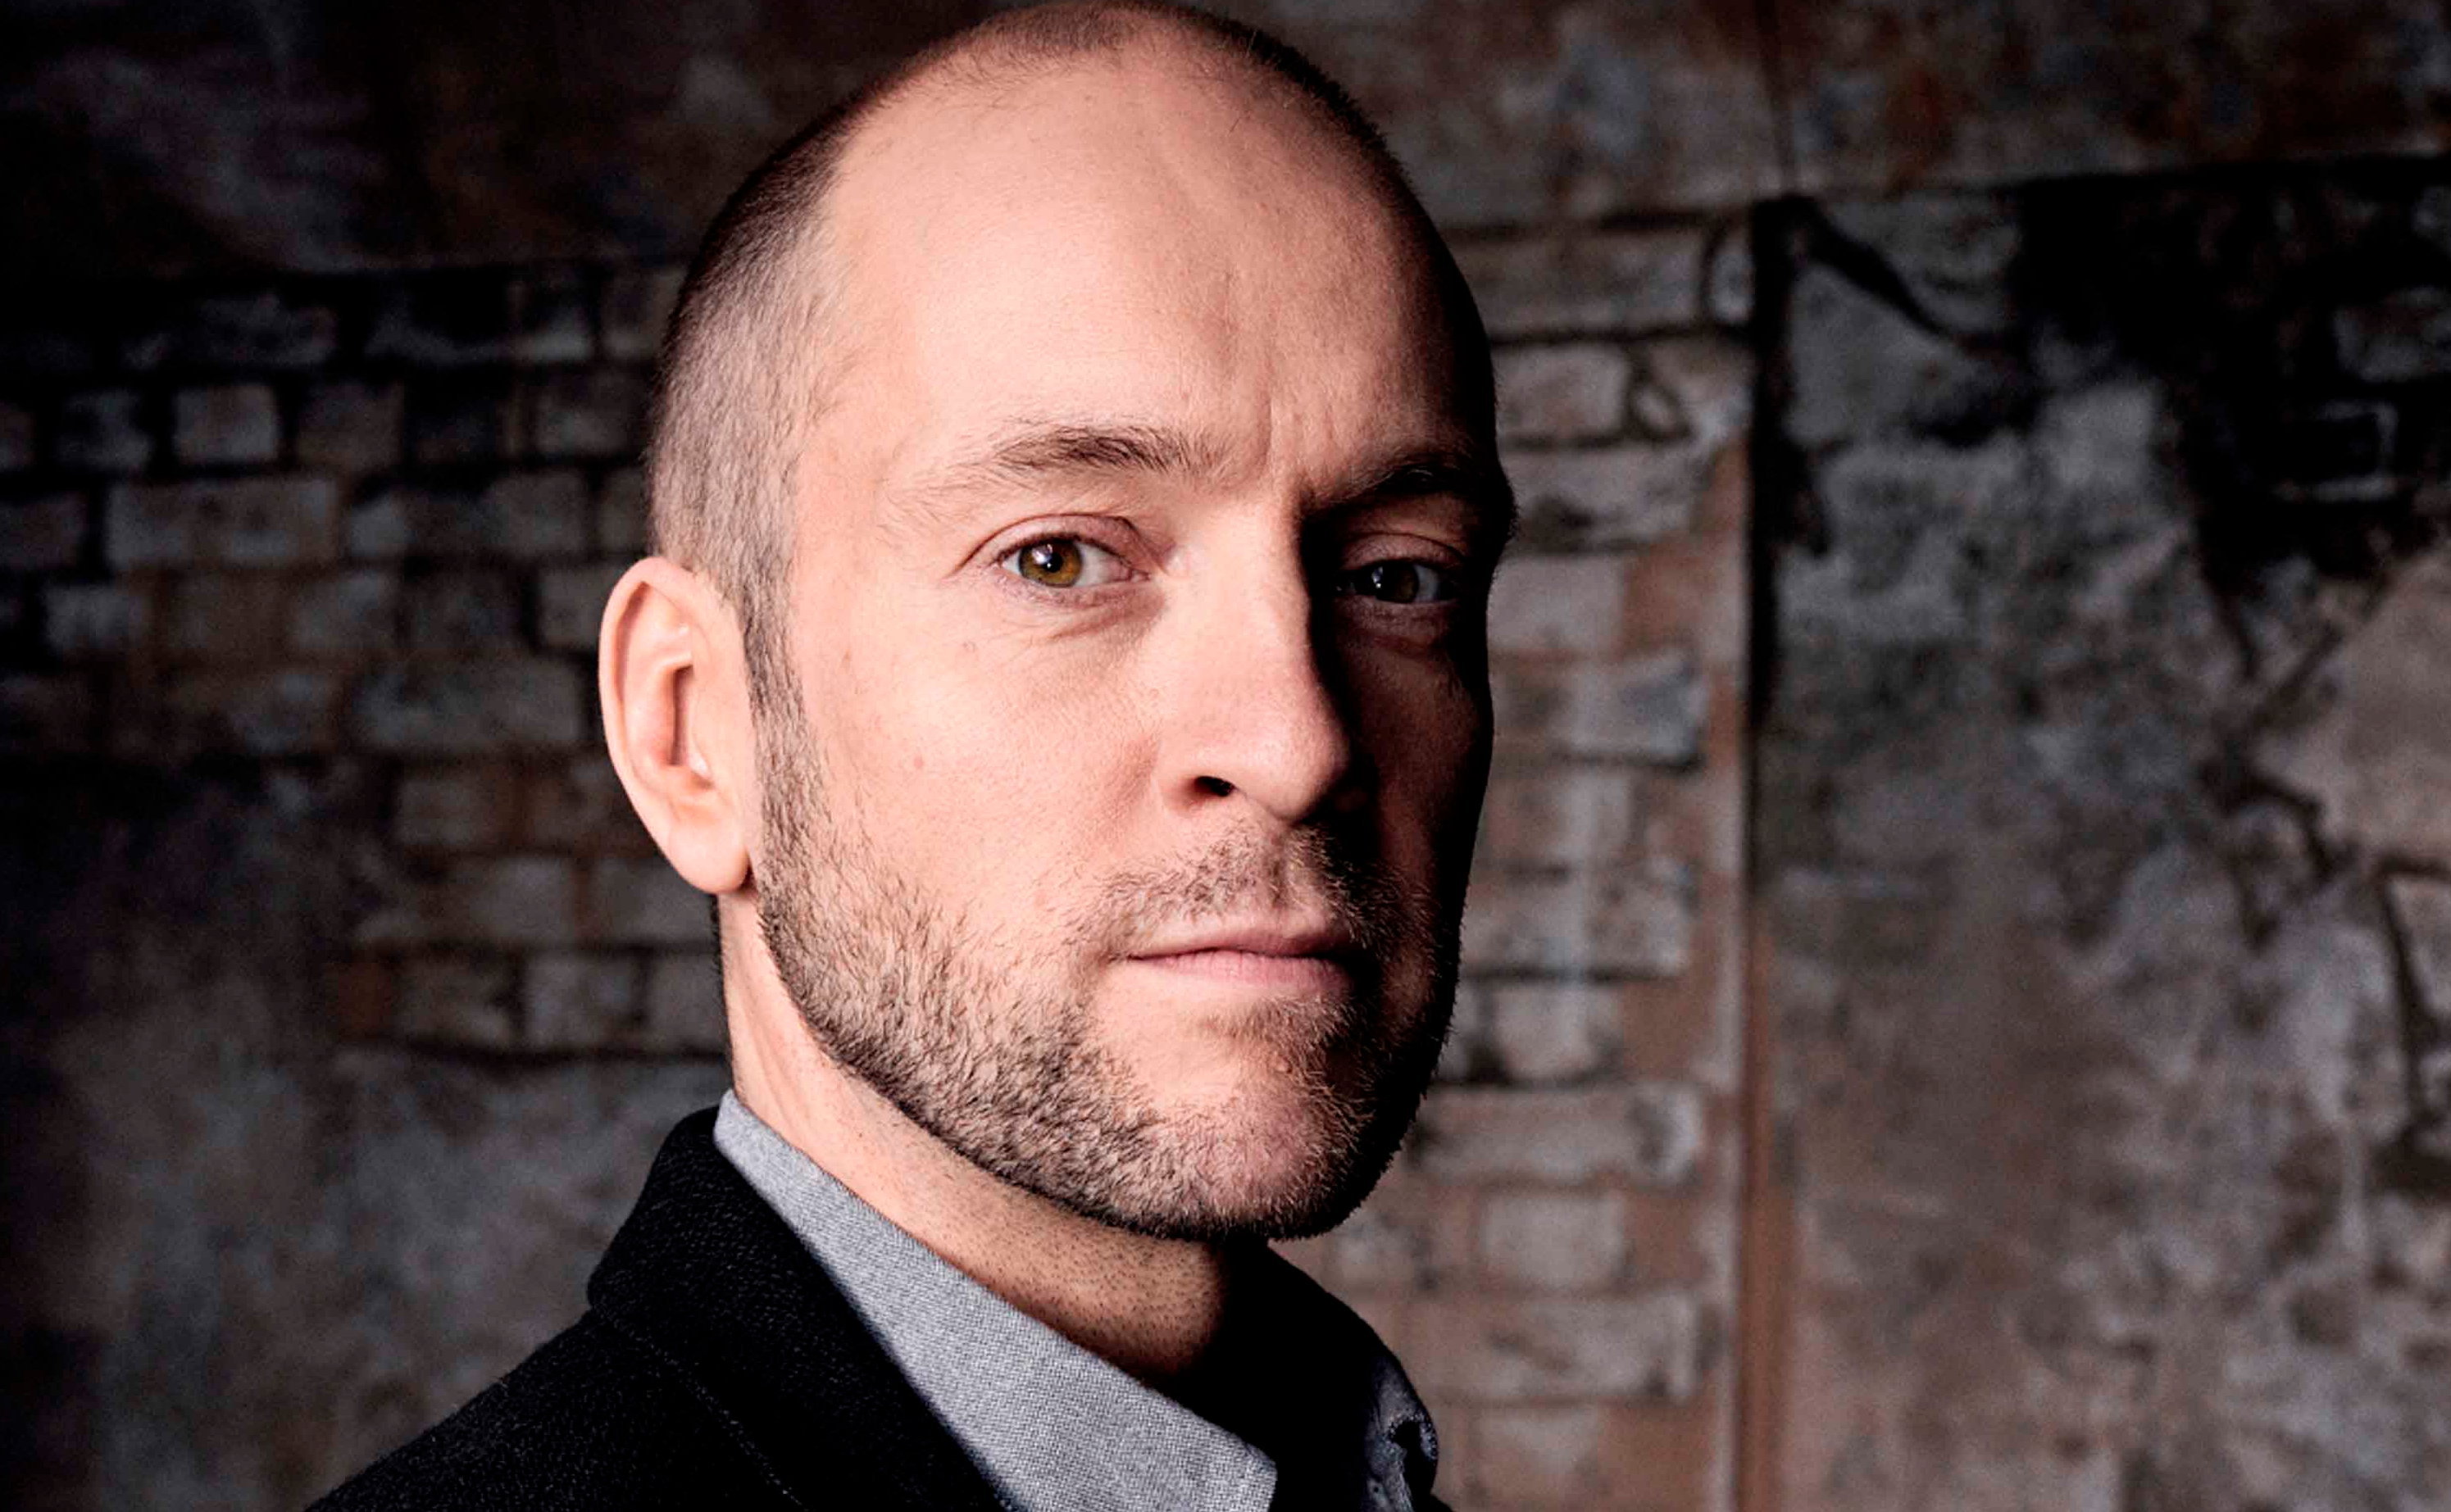
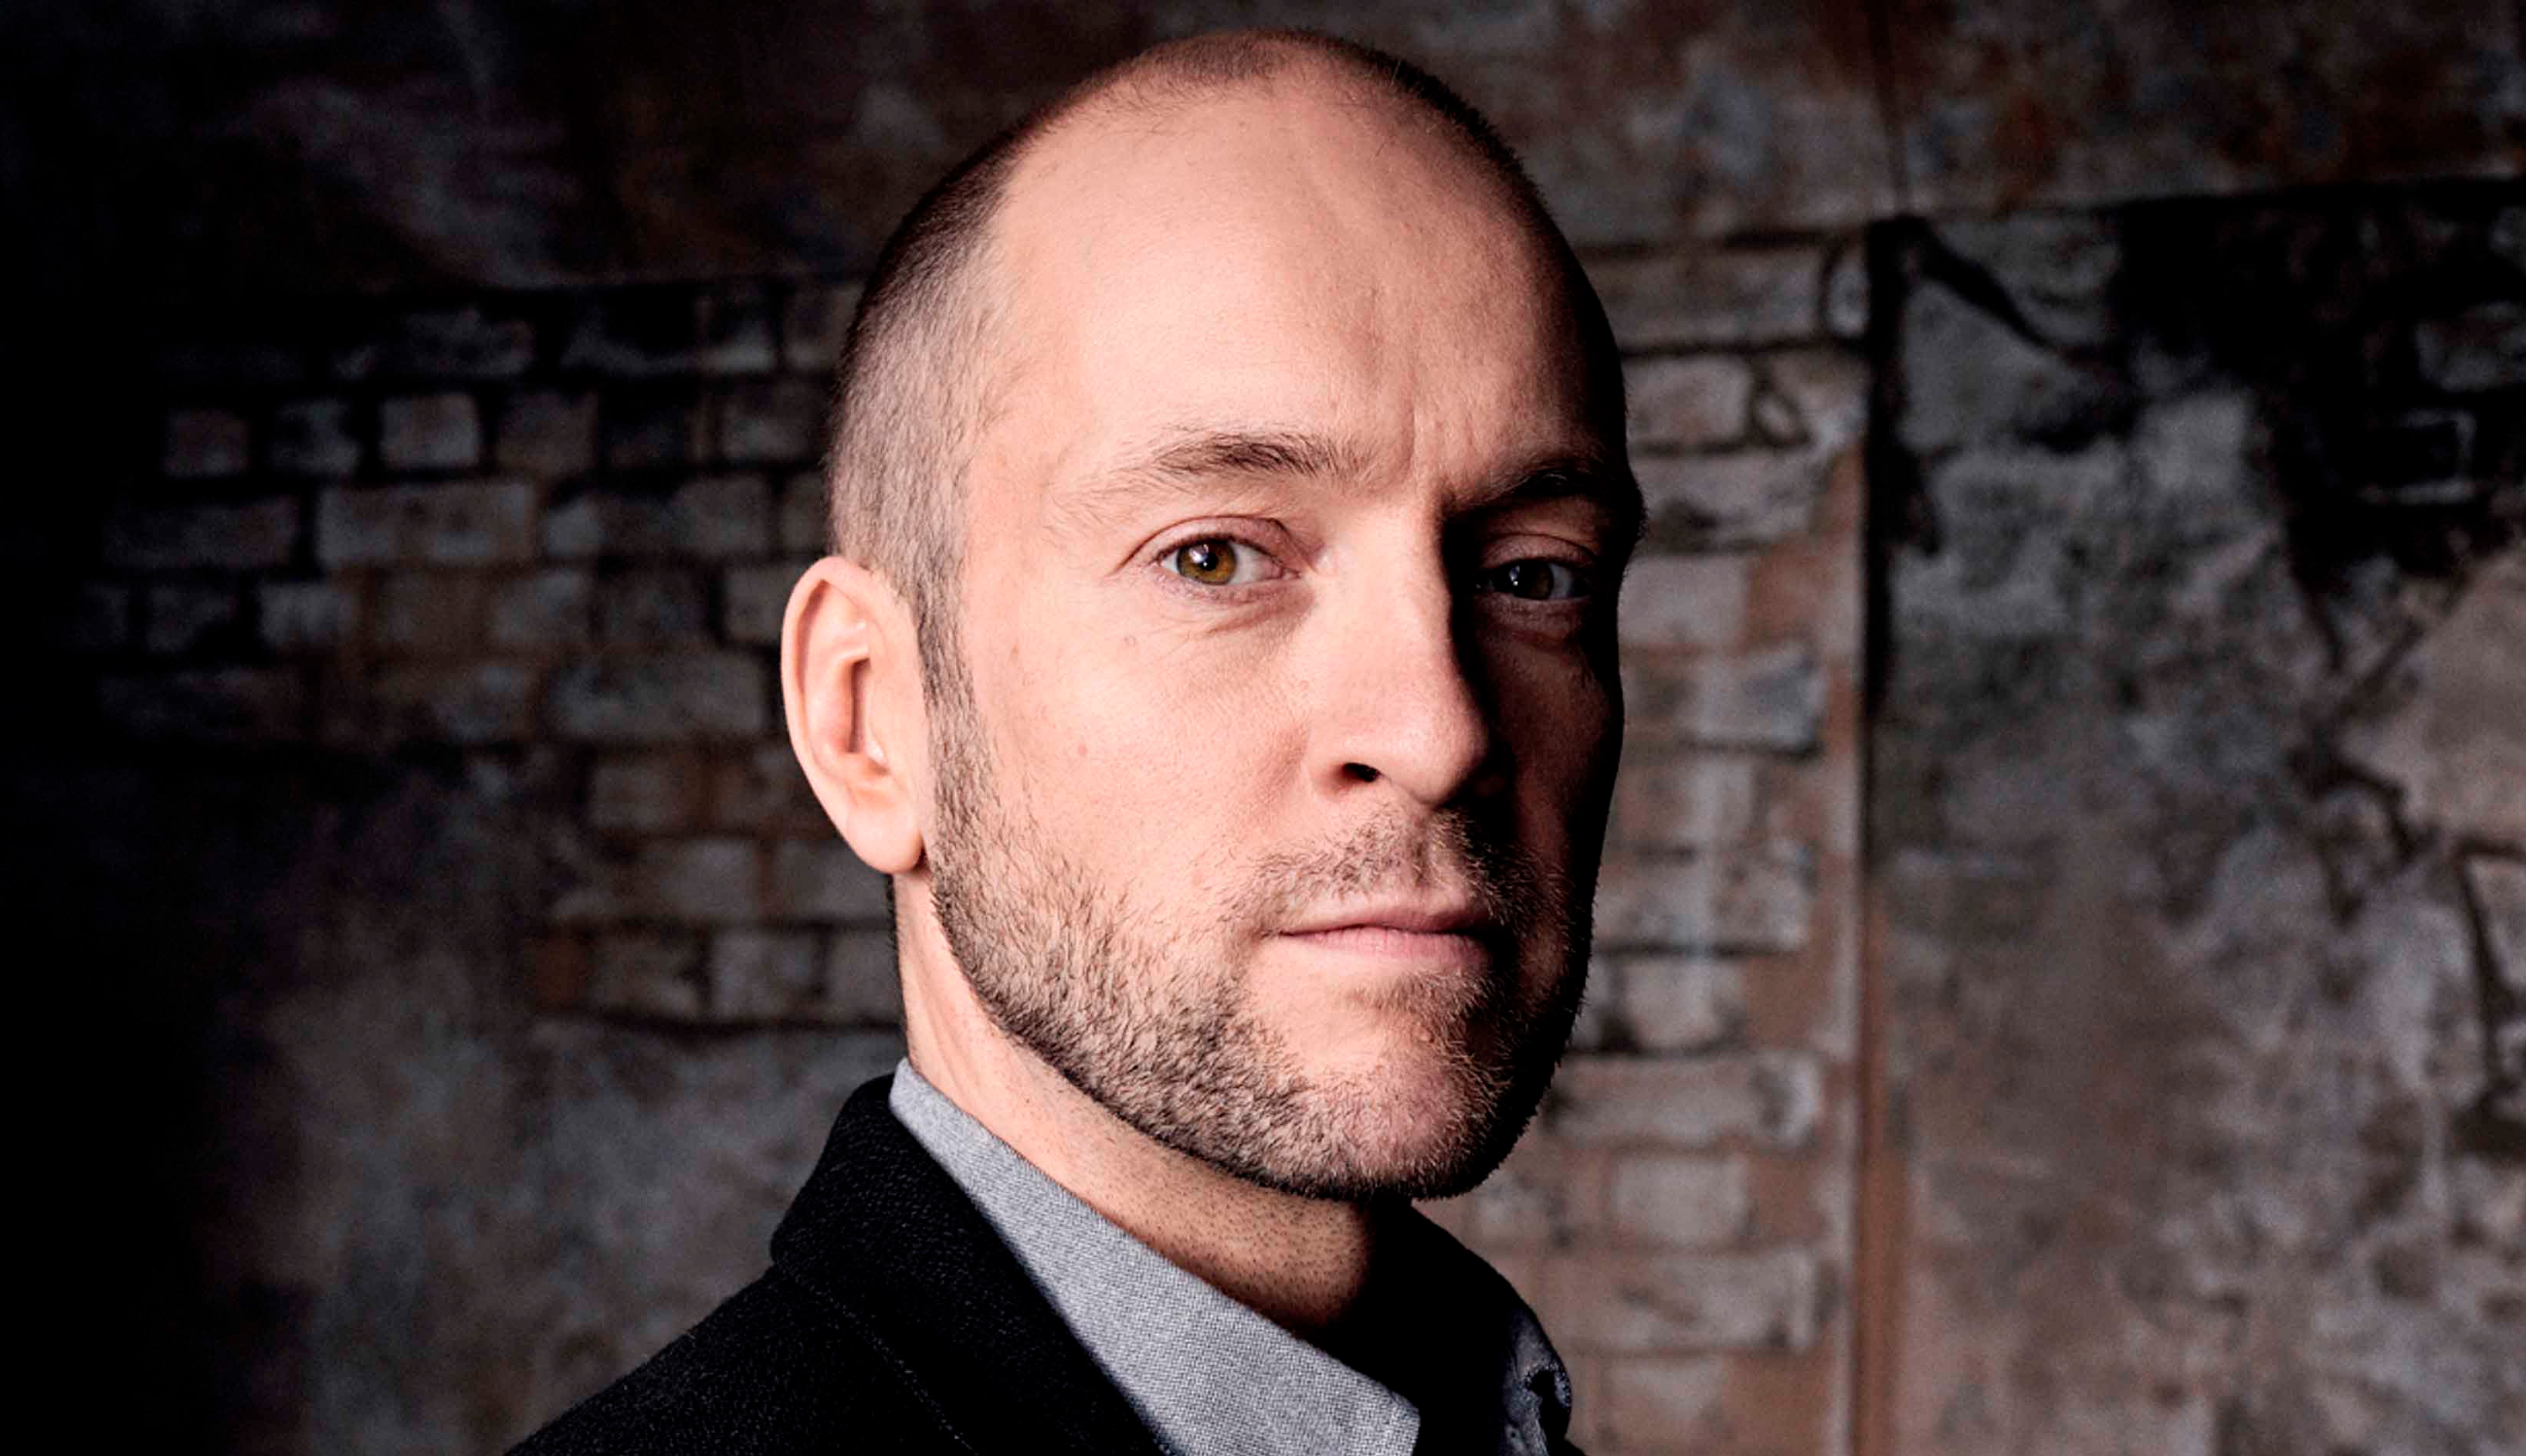
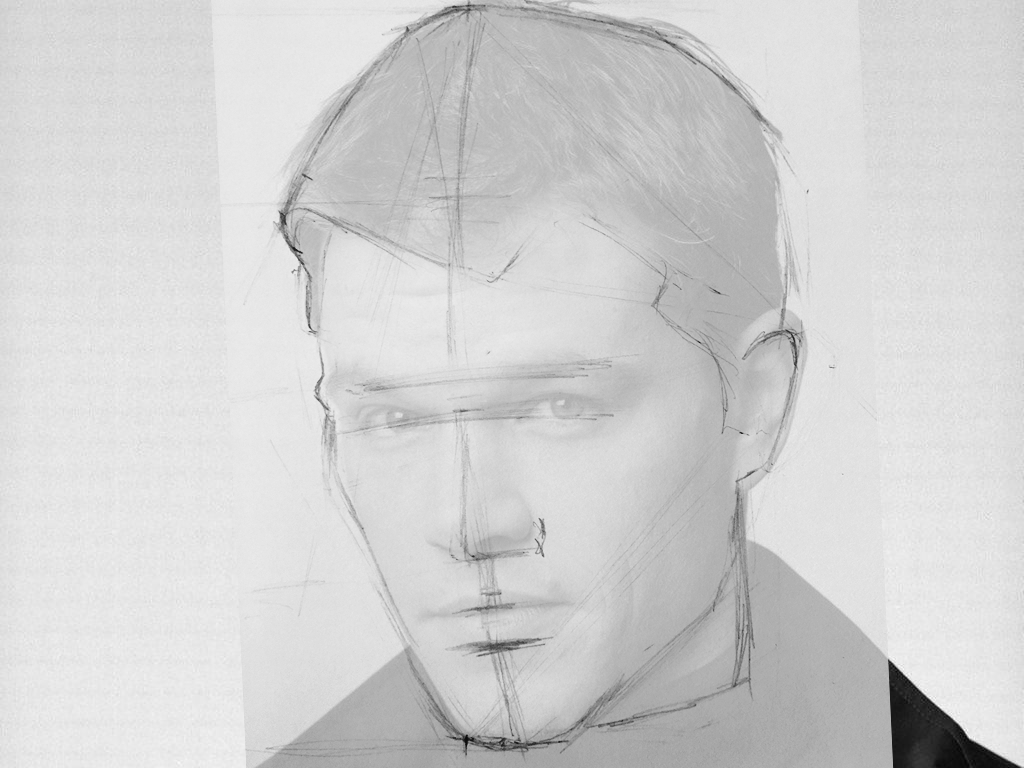
This is the picture of Derren I?m drawing.
And here?s my setup.
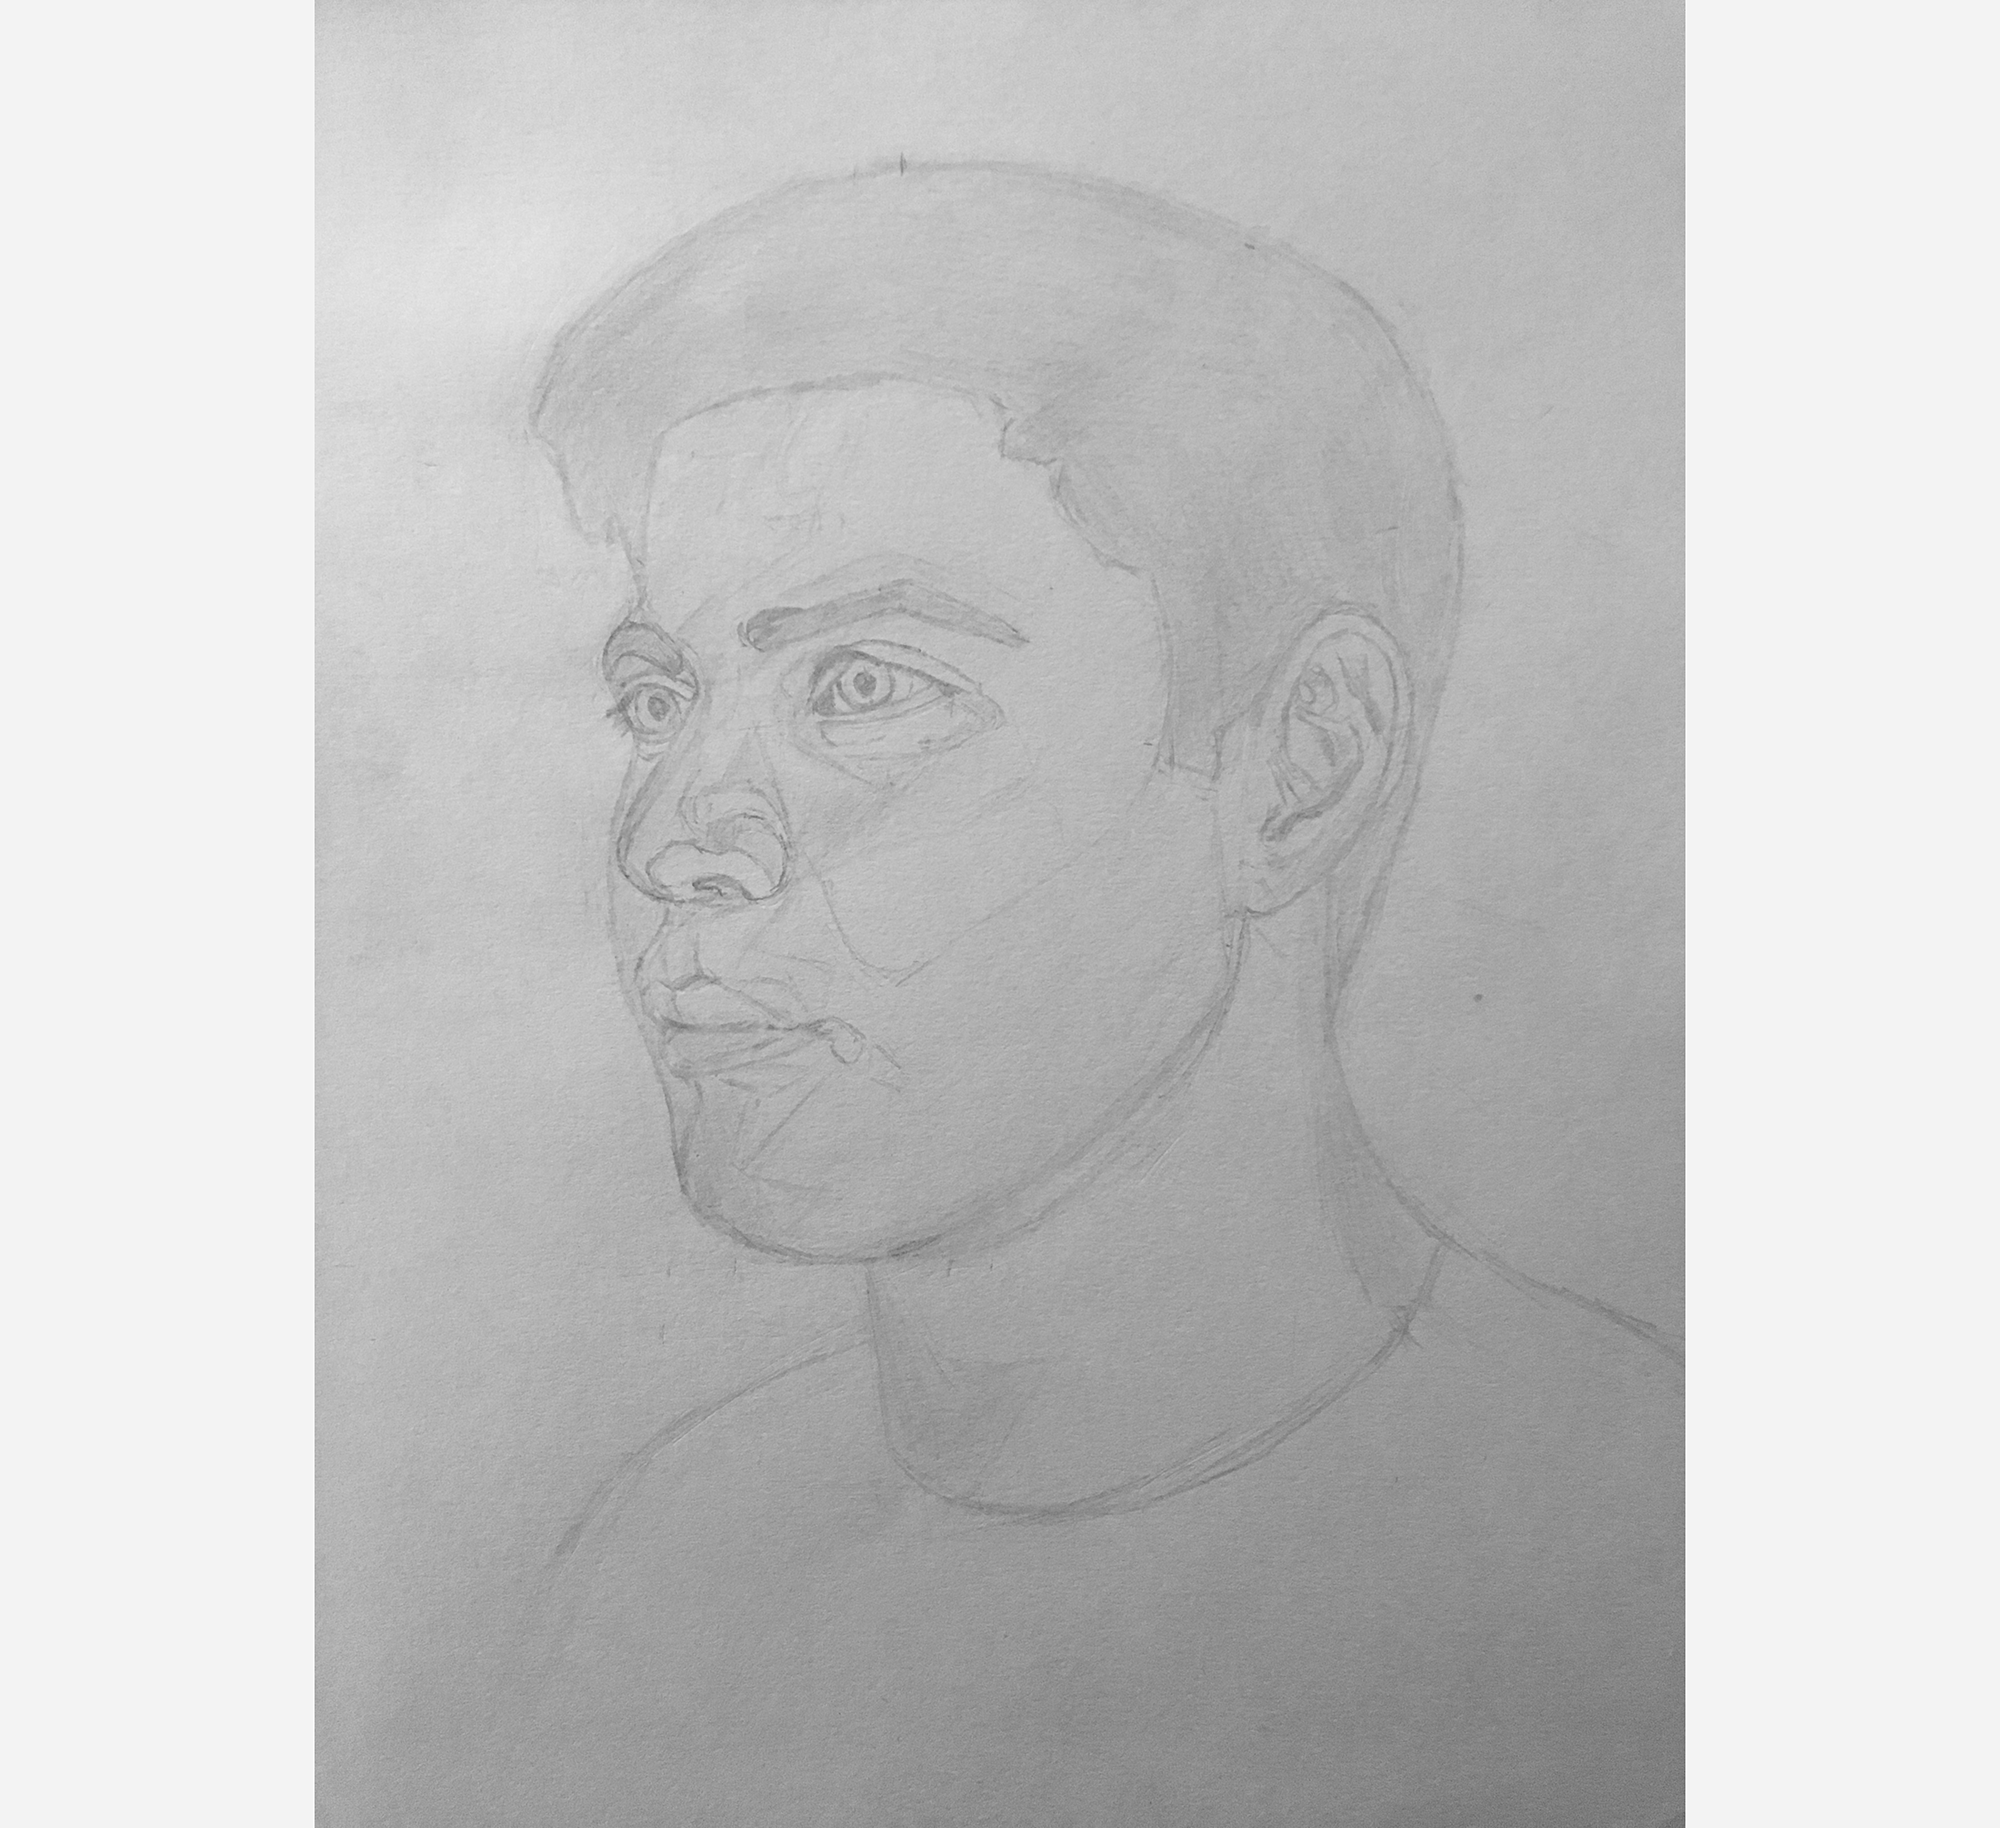
Starting the drawing
The first module of the course focuses on mapping out the portrait, which includes determining the shape of the head and locating the features.
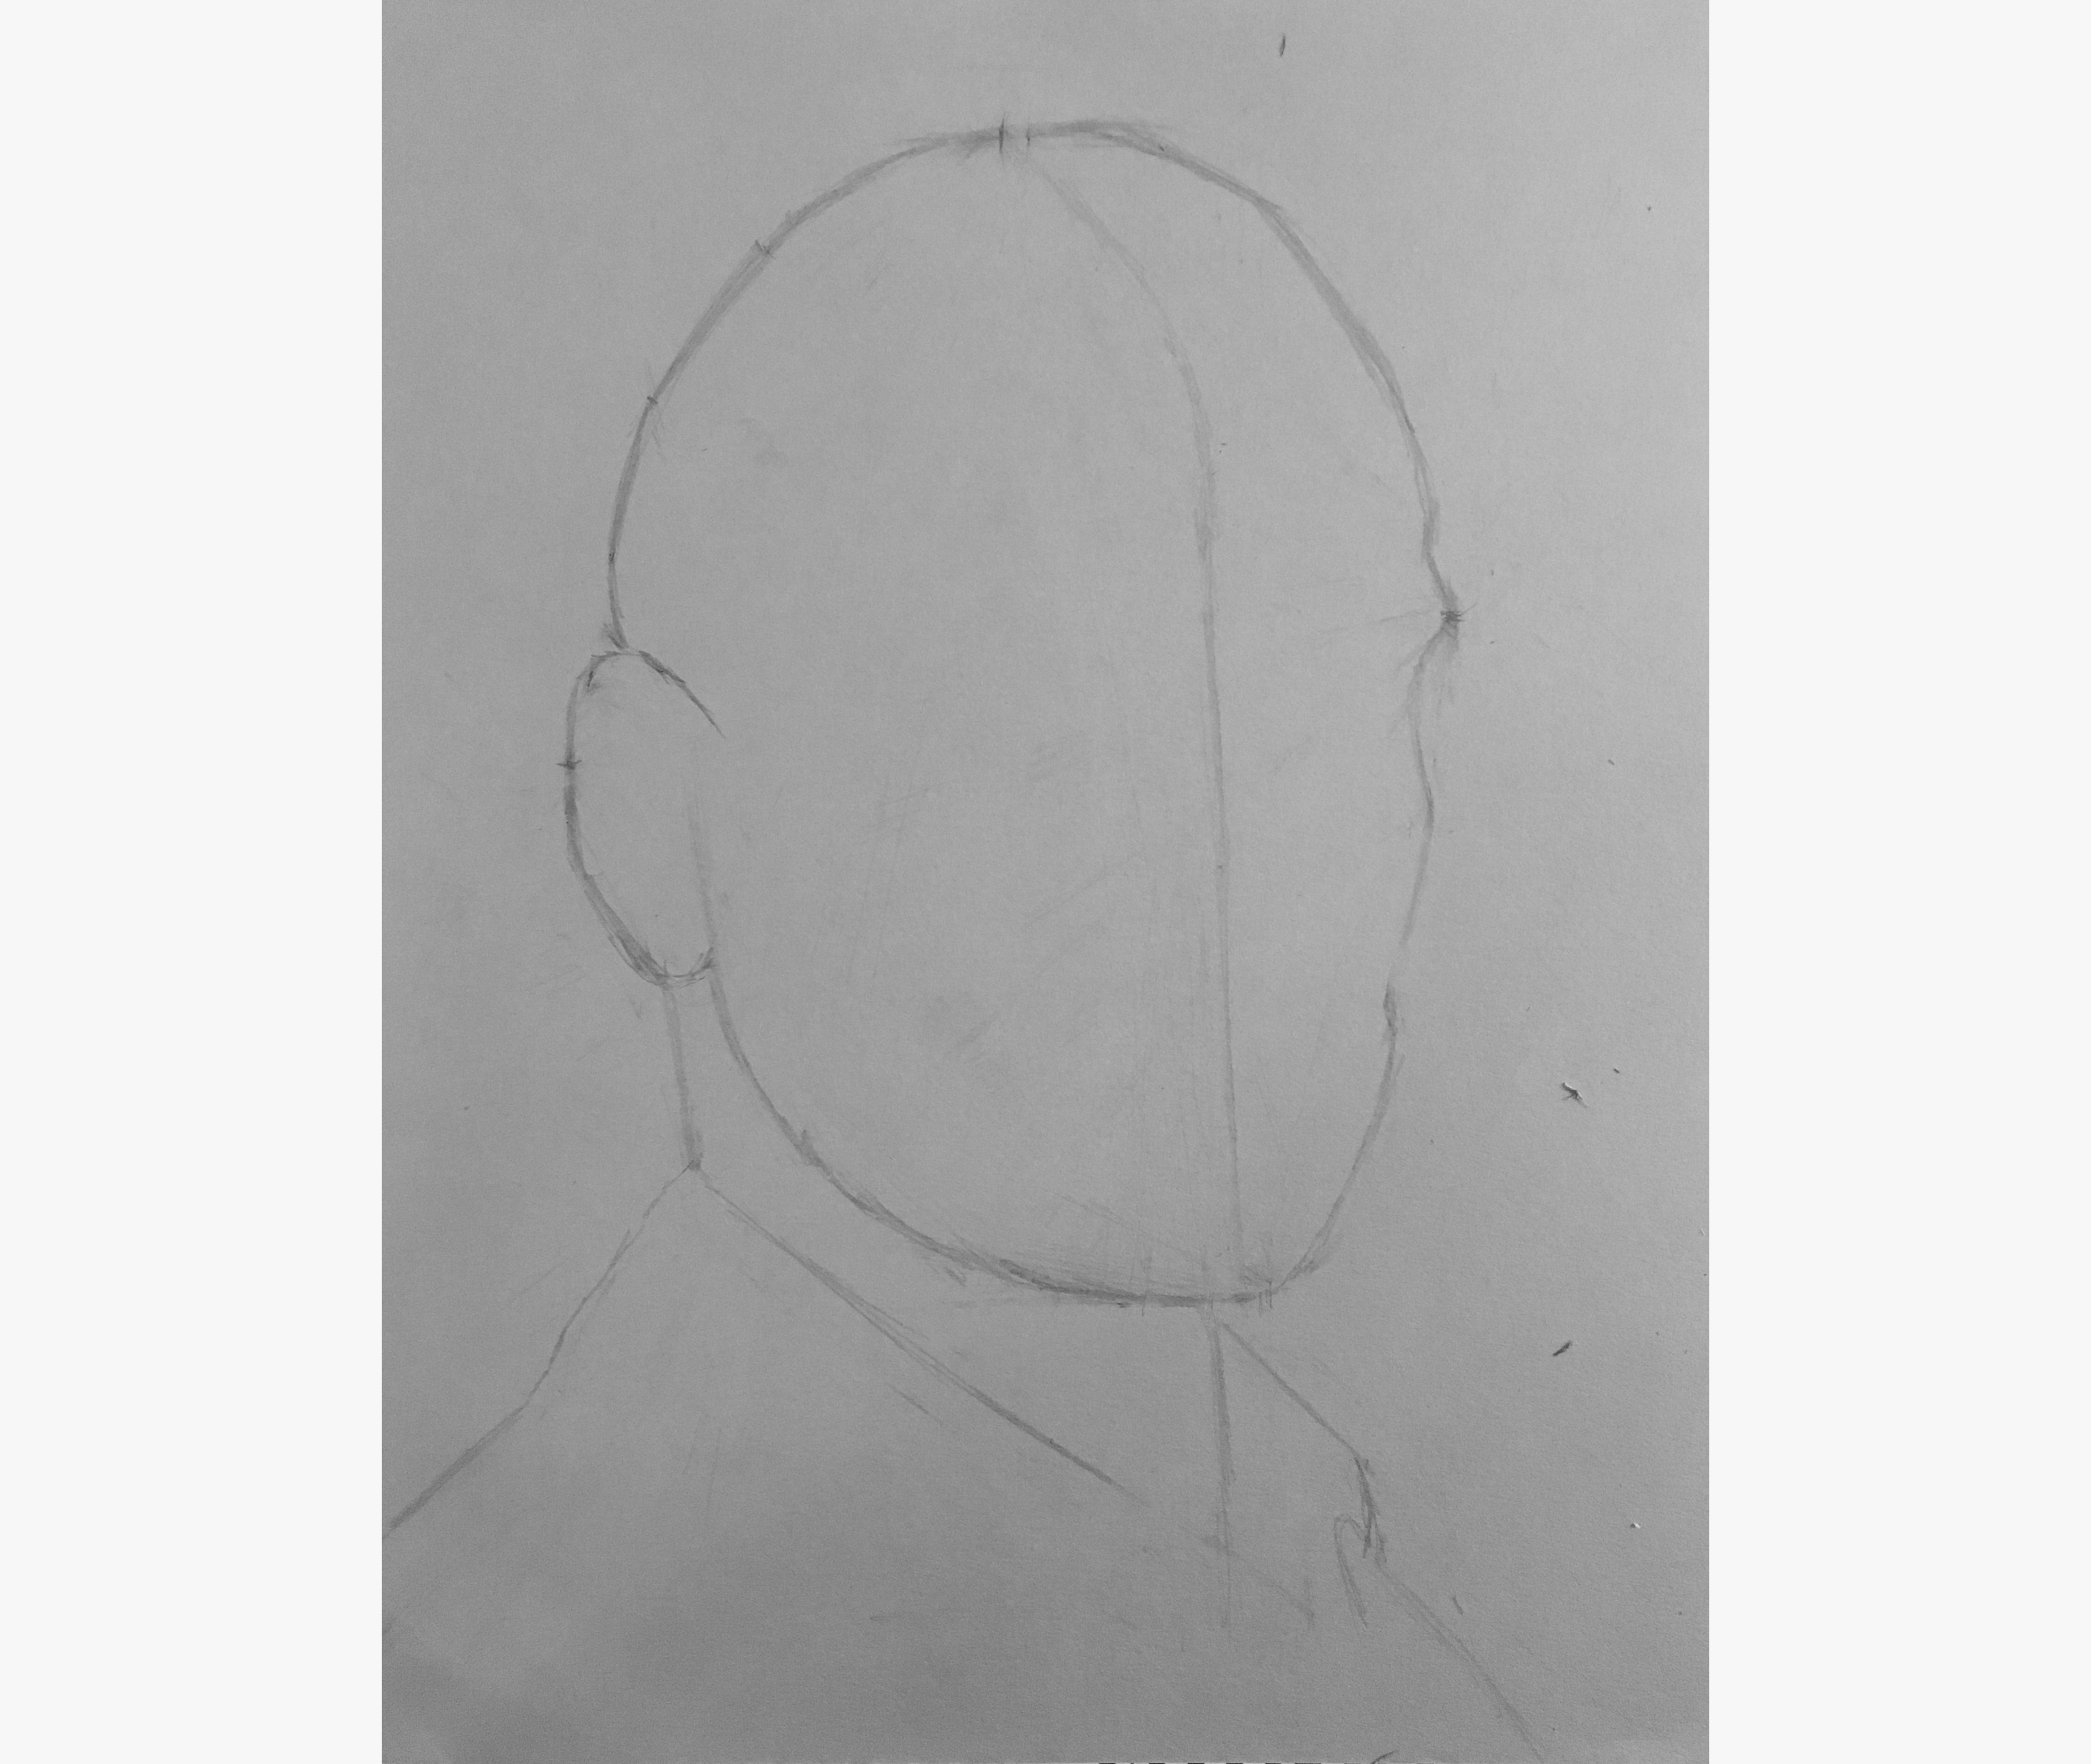
Finding the top and bottom of the head
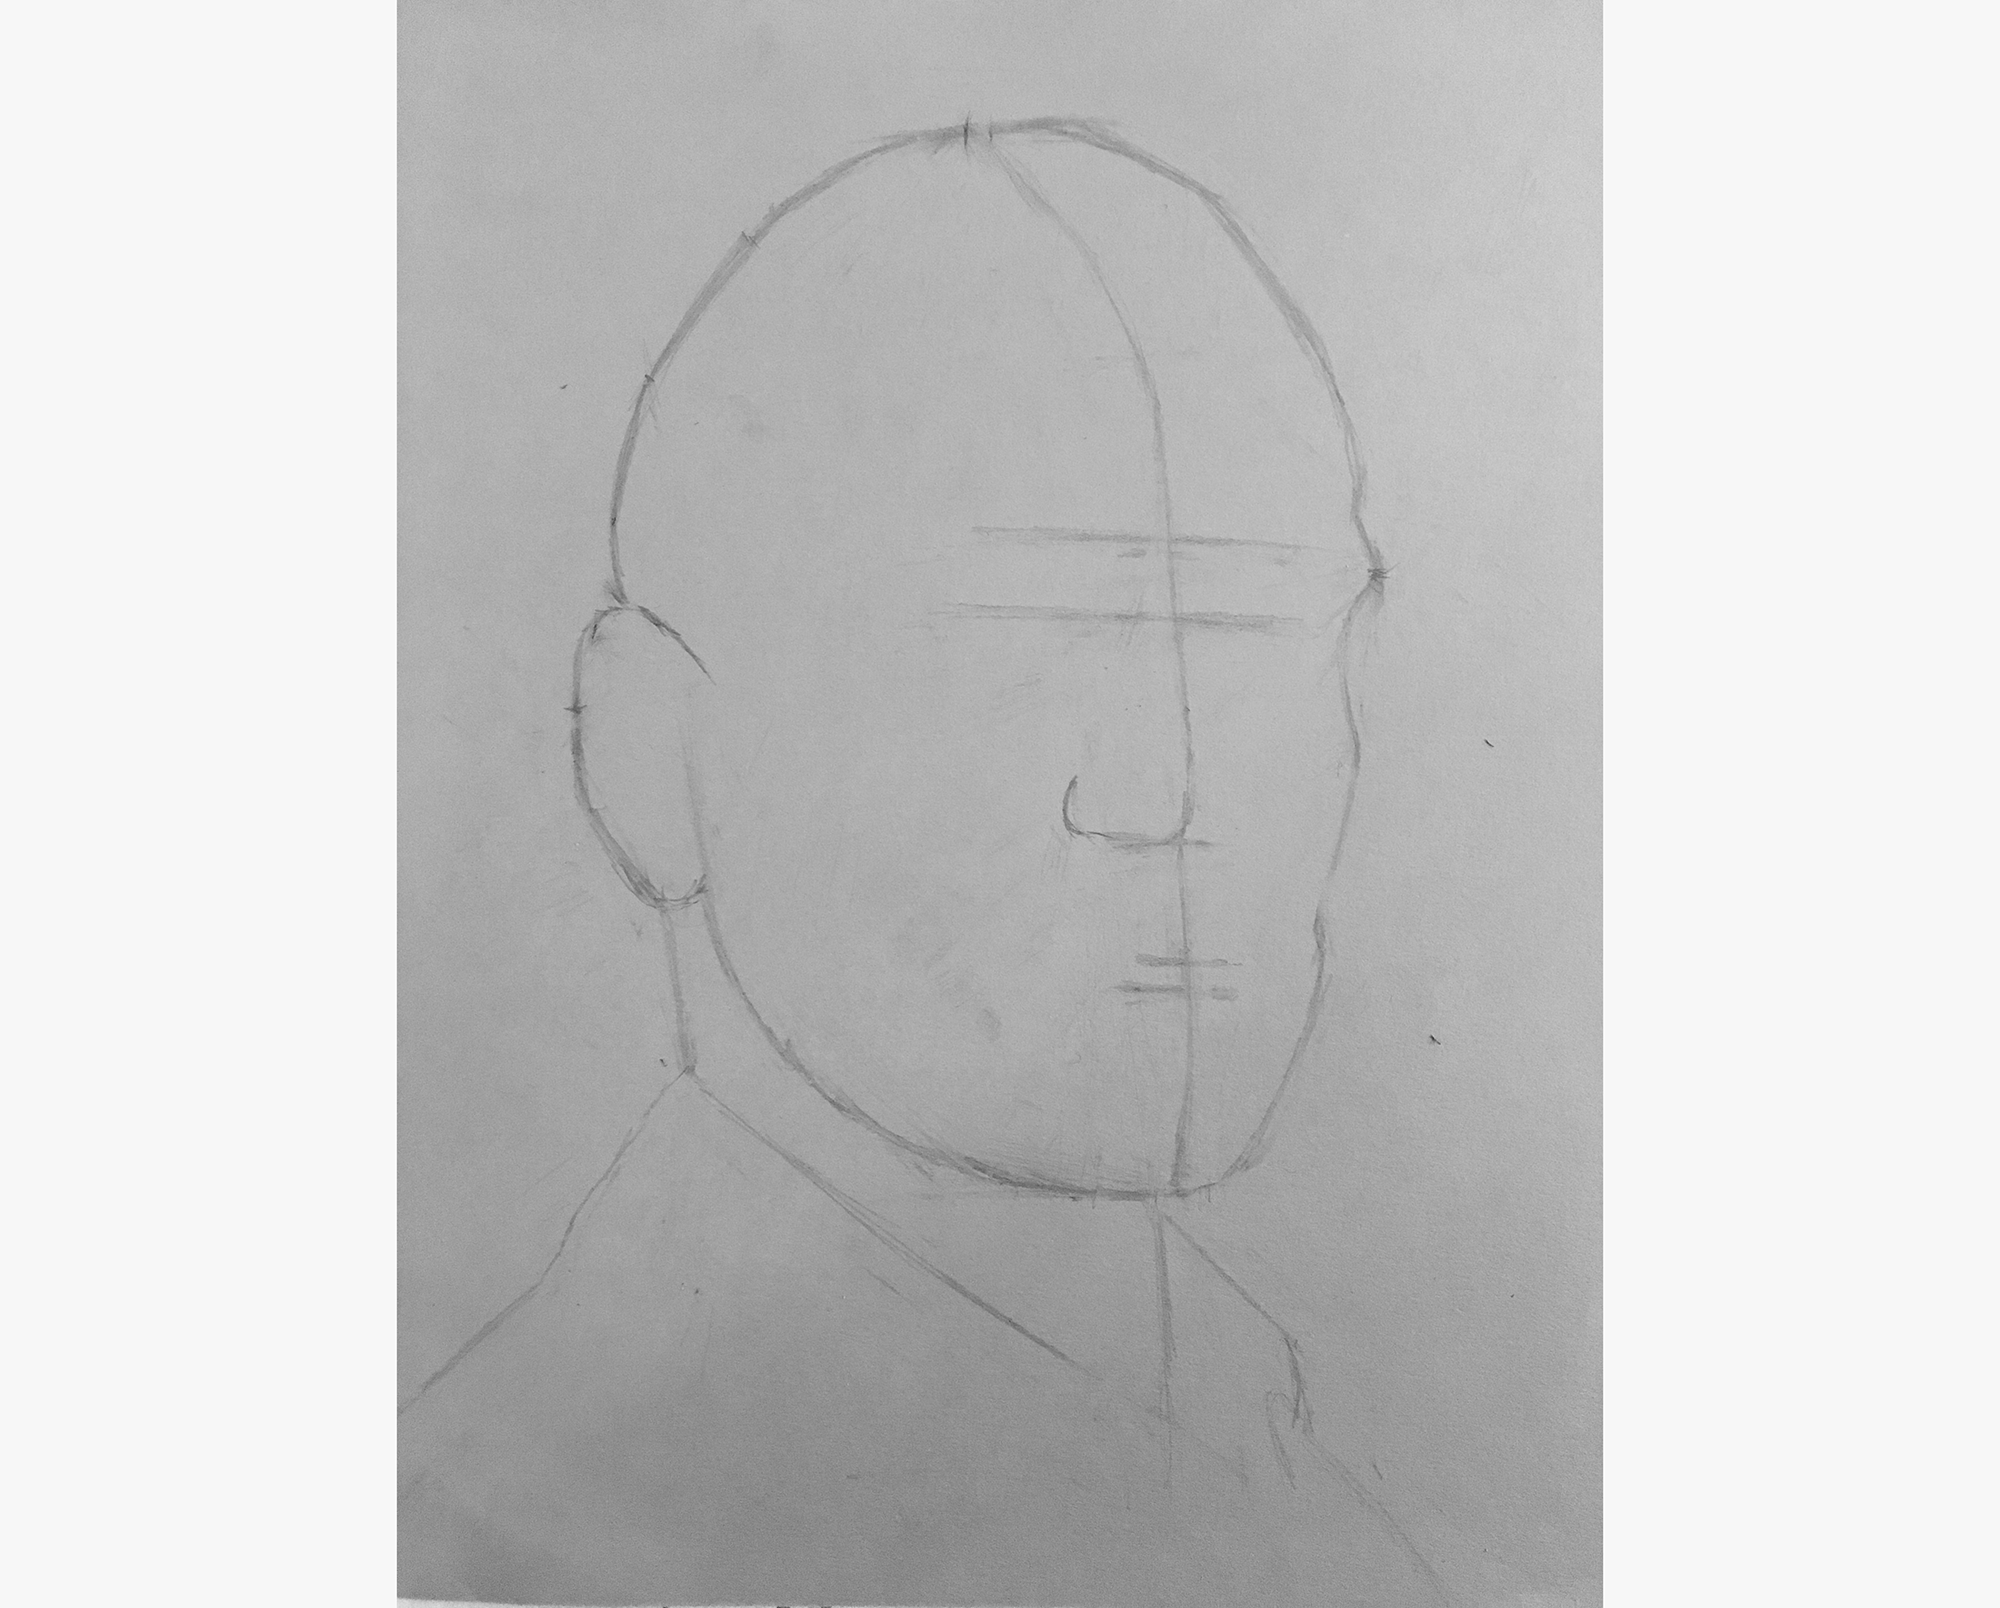
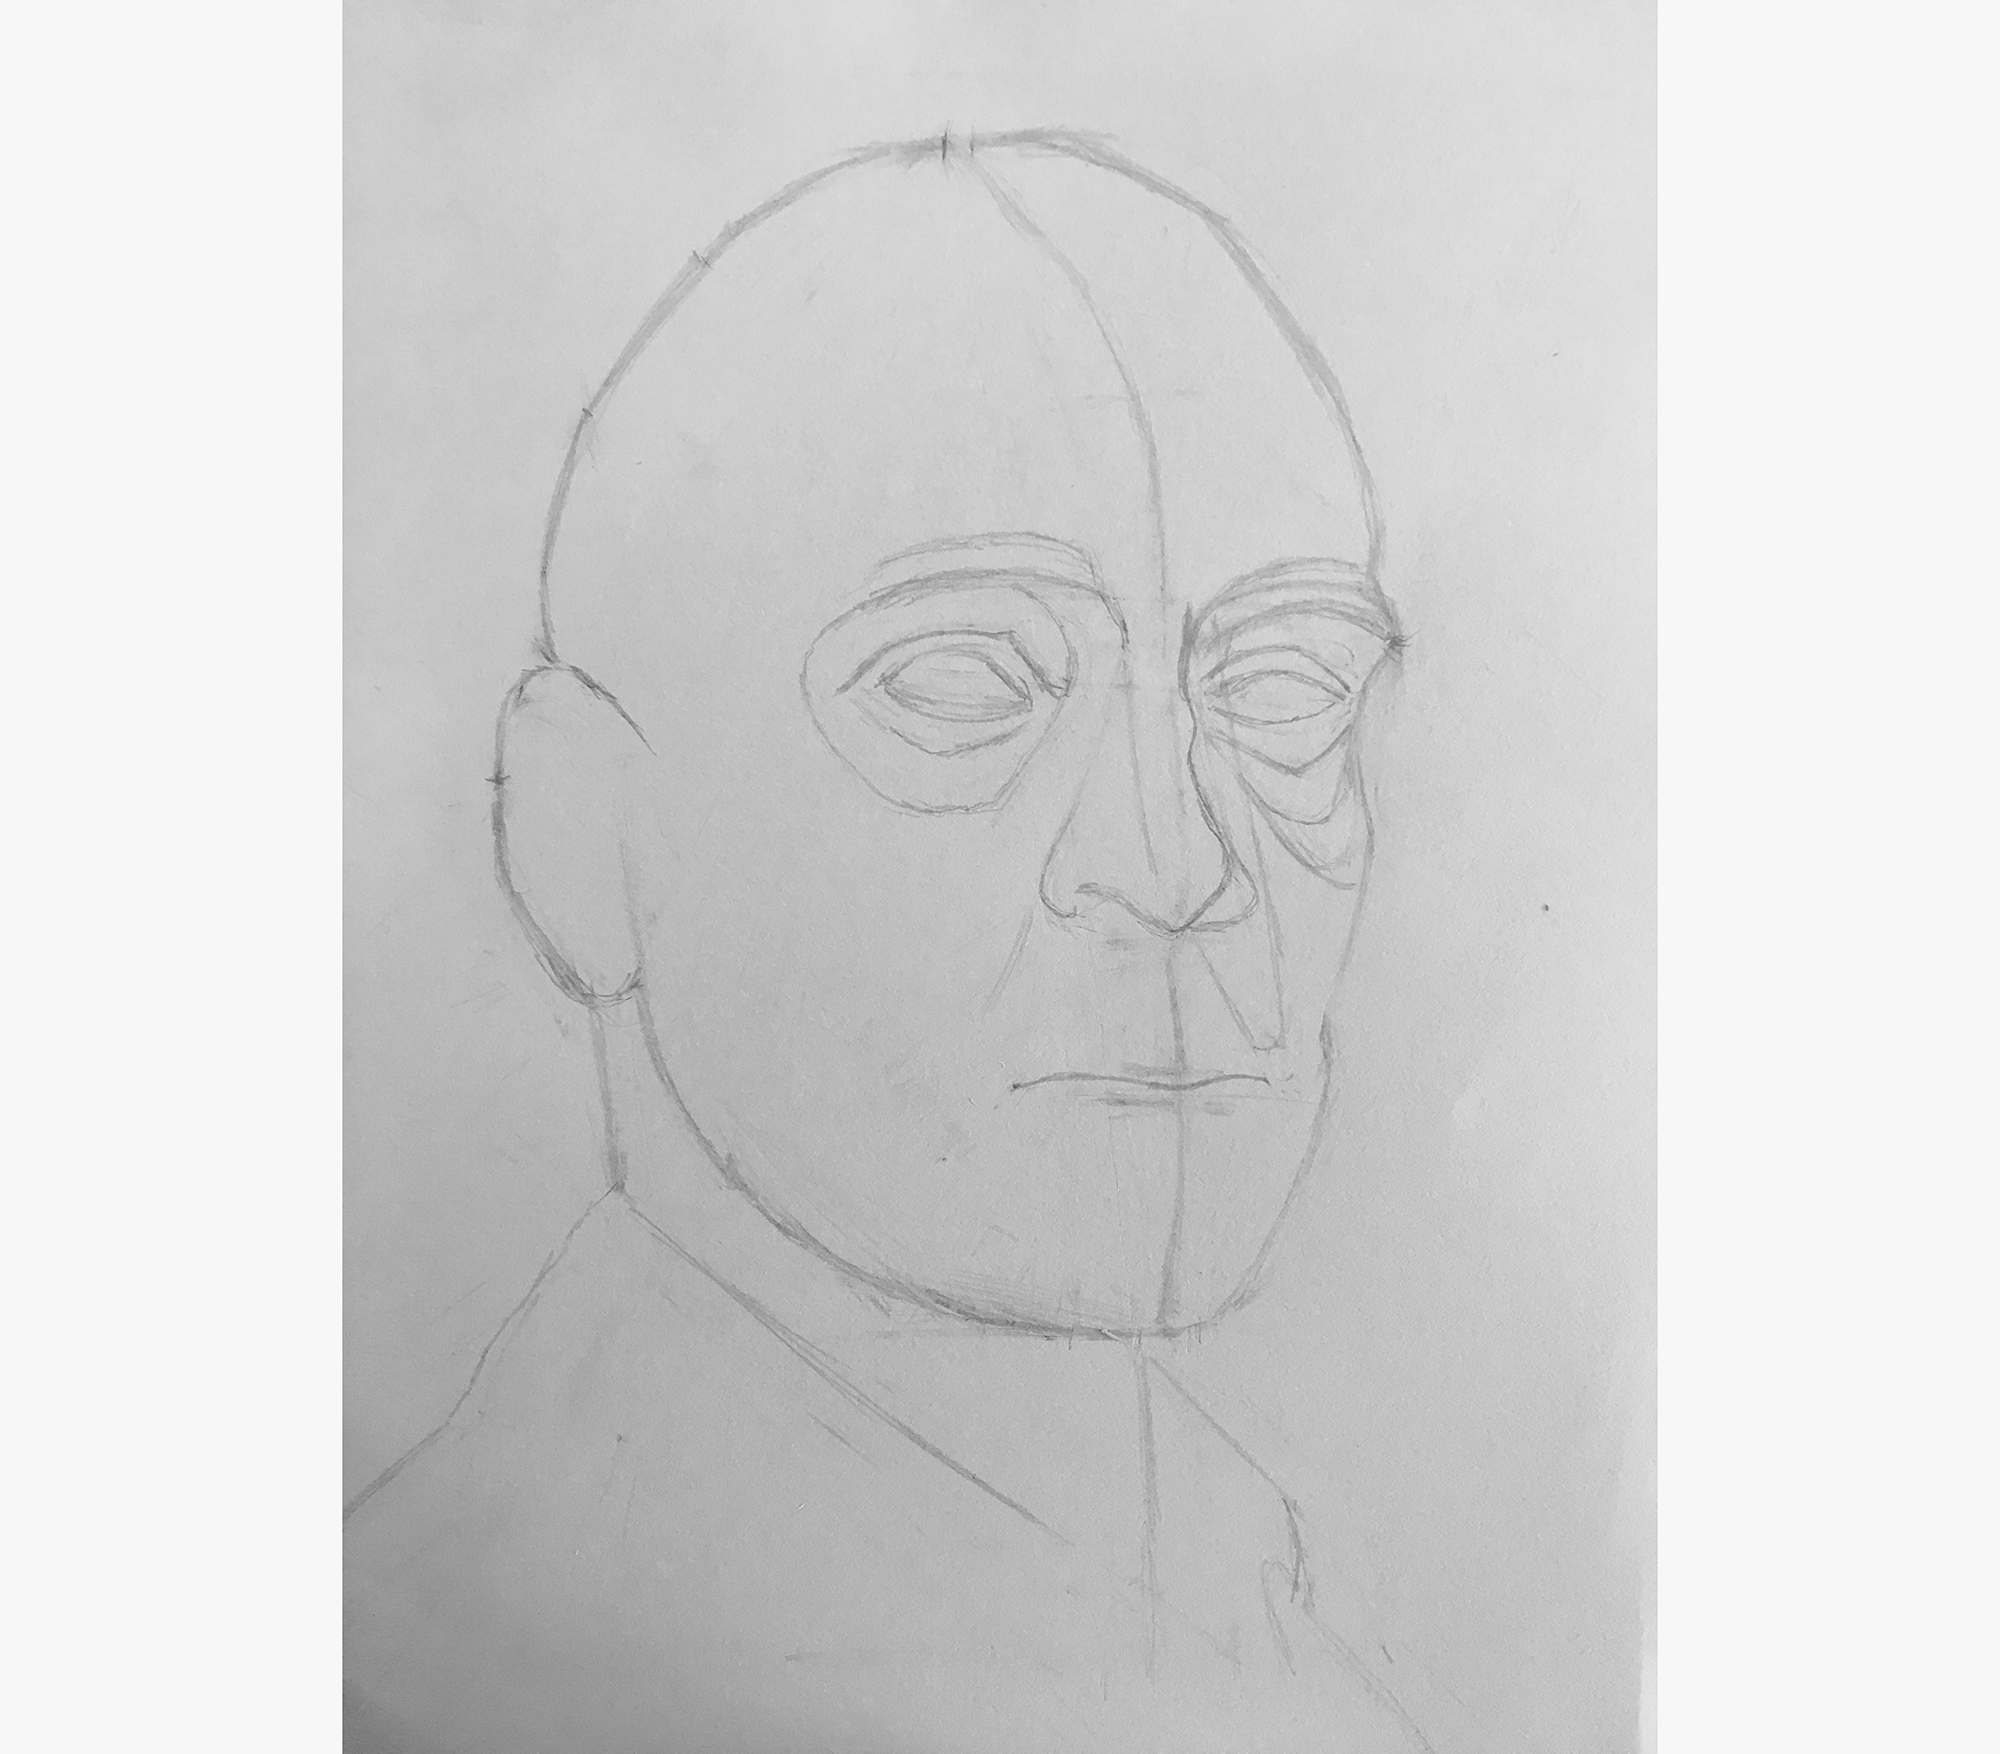
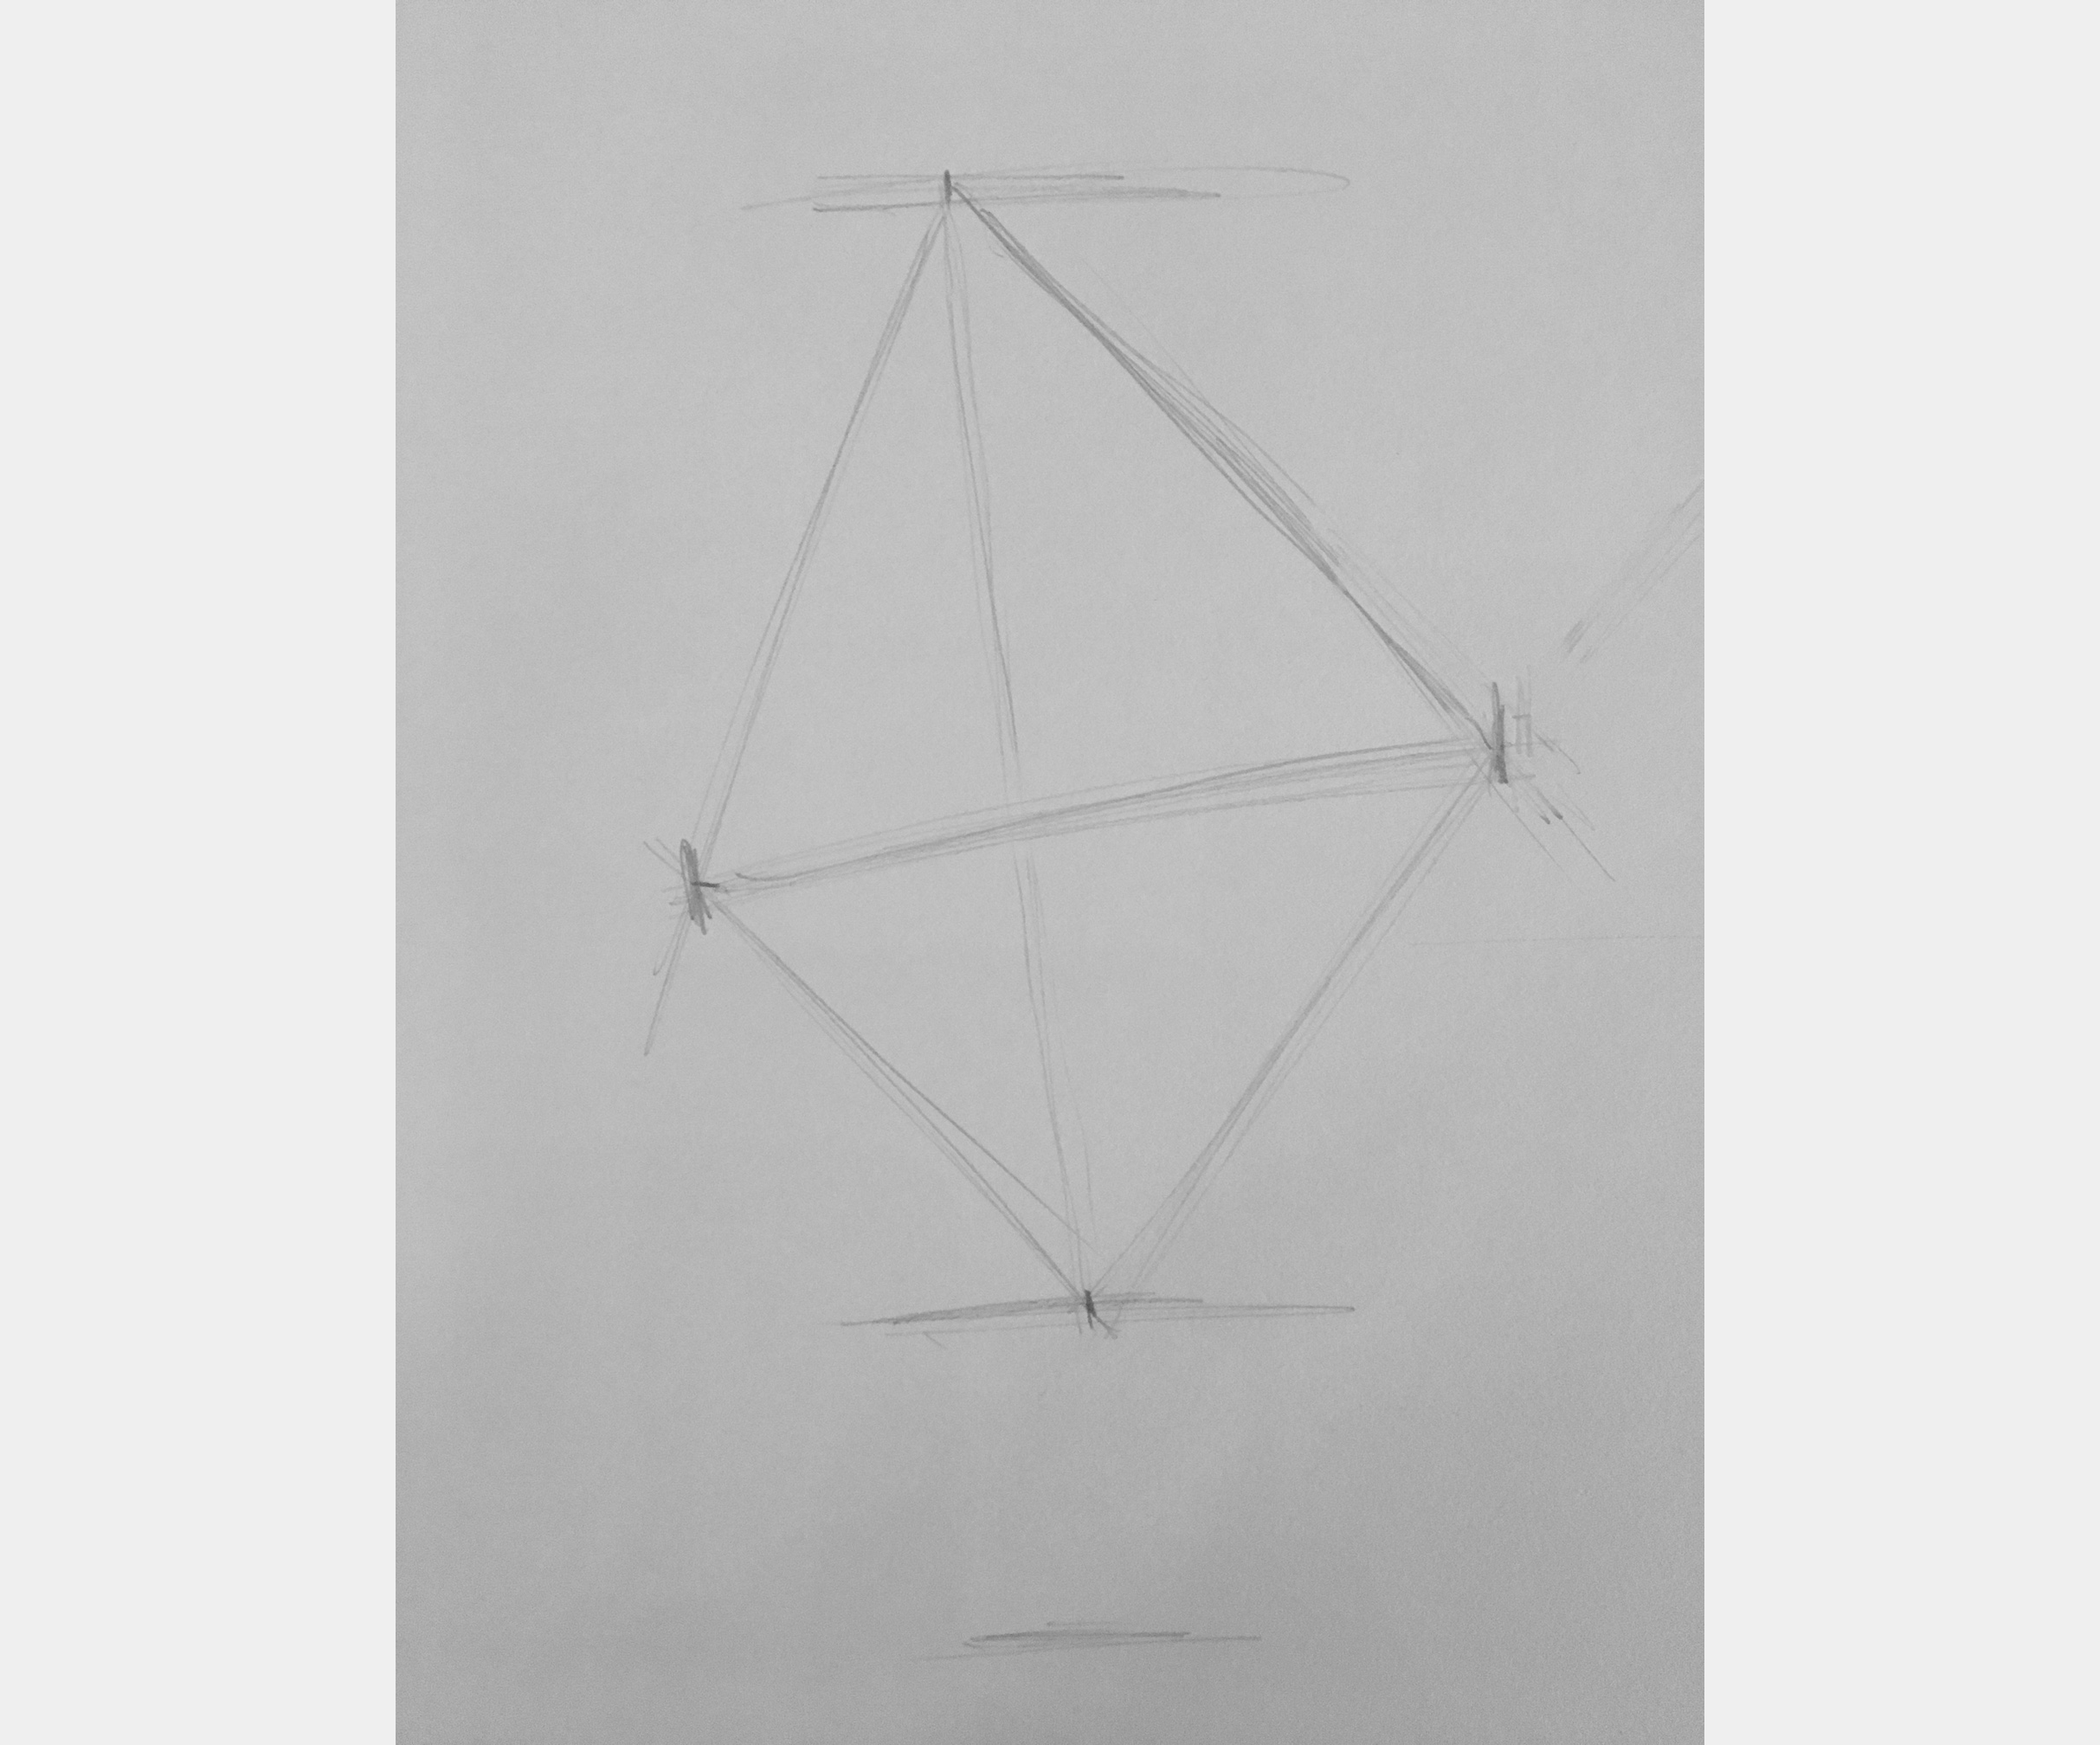
I started by arbitrarily drawing two lines on the page to indicate the level of the top of the head and the level of the bottom of the head.
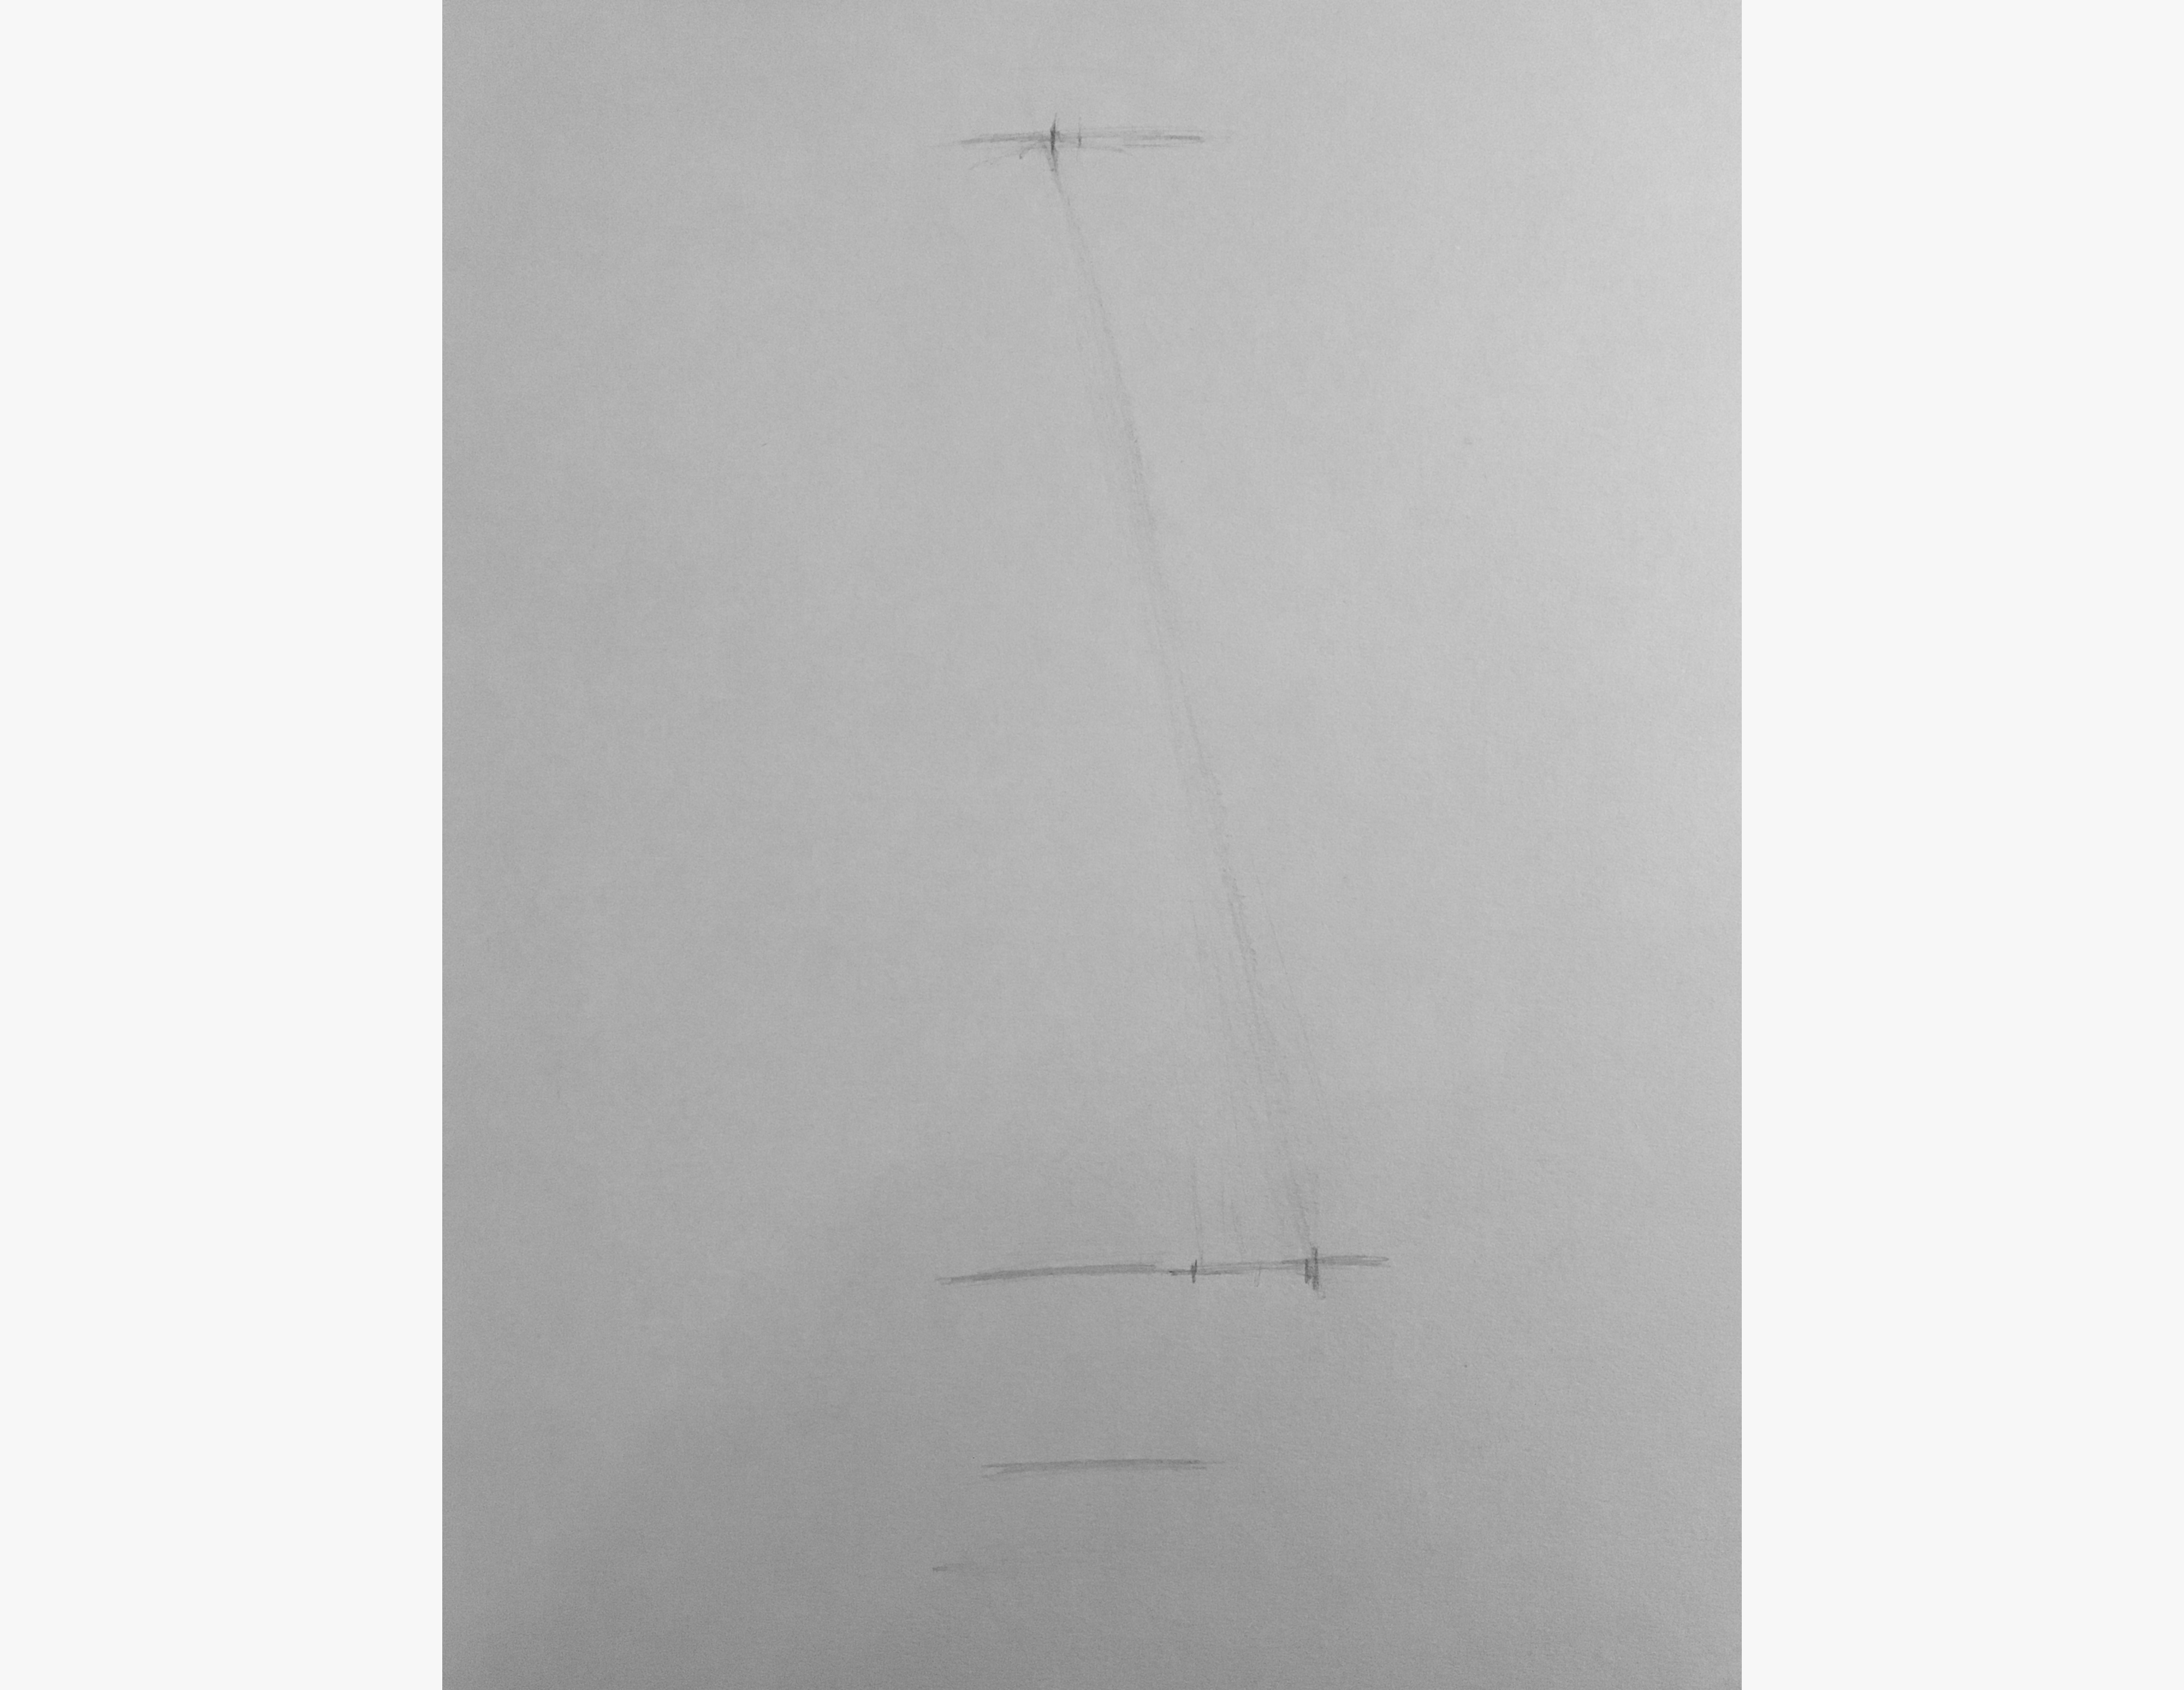
Then, I arbitrarily marked, on the top level, the highest point of the head, and then used the angle between this point and the bottom of the chin, to locate the bottom of the chin on the page.
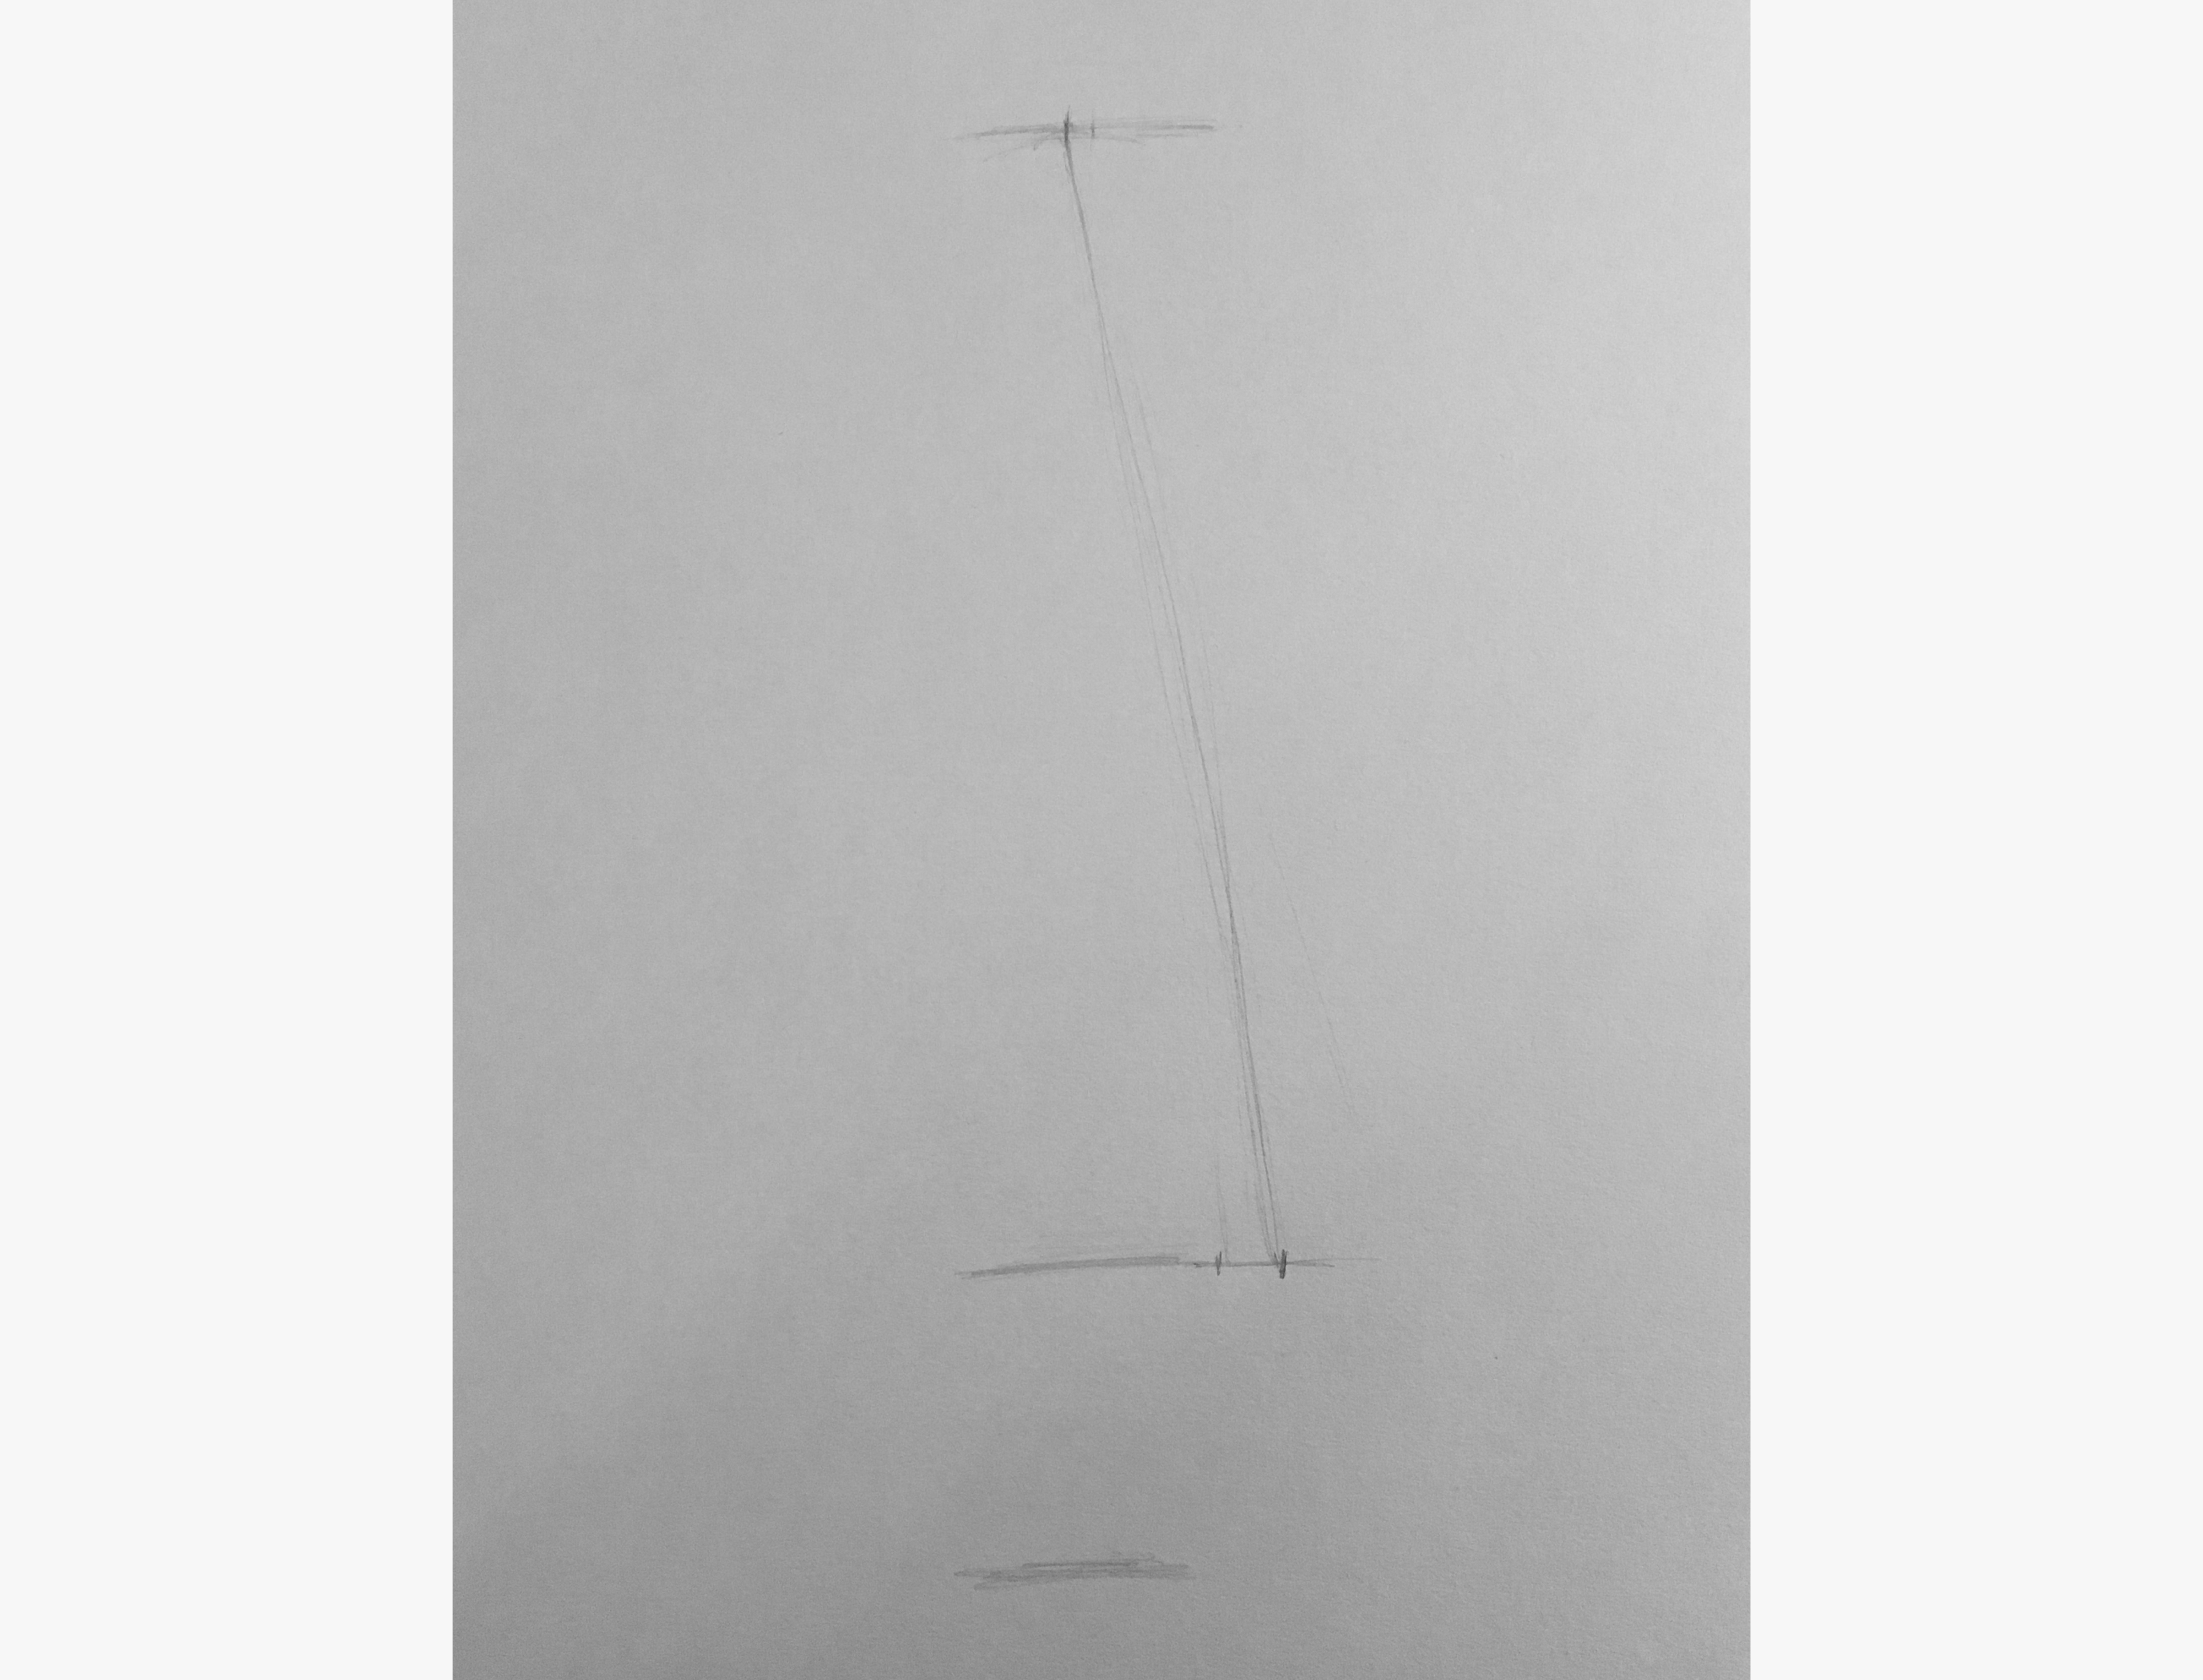
I also drew in the level of the notch of the neck. The first time, I drew it too low, so I moved it up. I gauged this distances as a proposition of the head length.
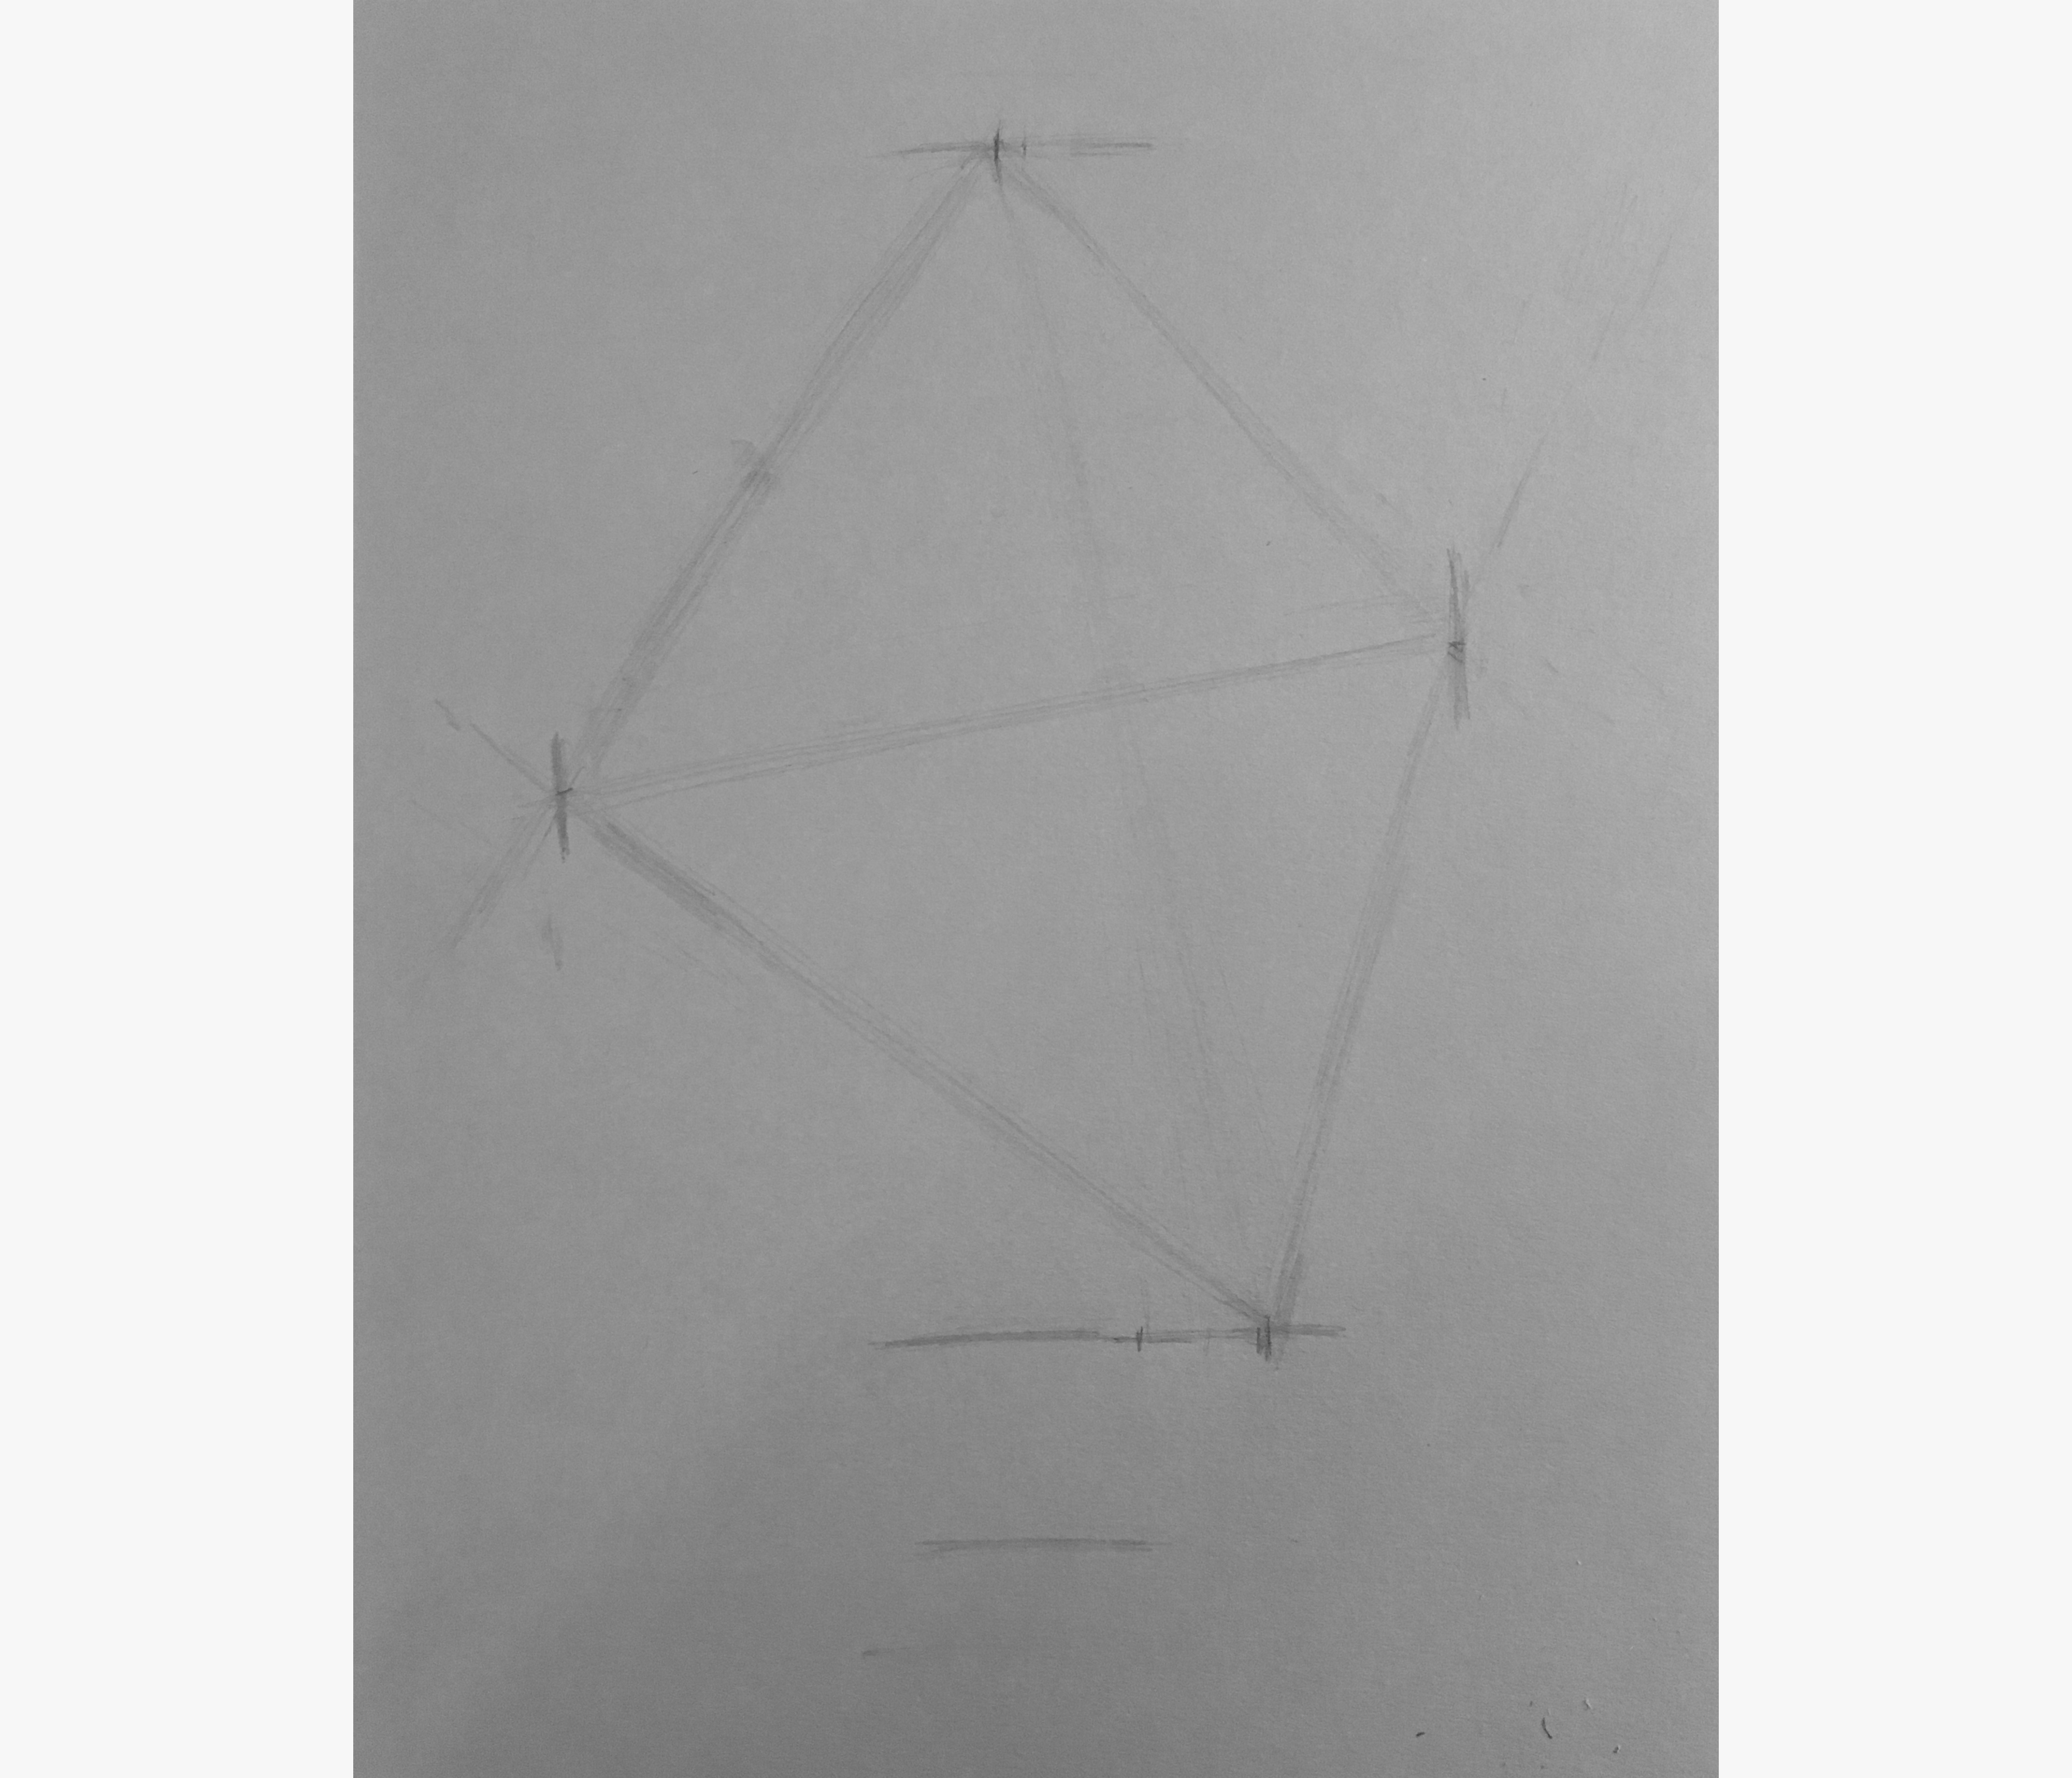
Find the leftmost and rightmost parts of the head
With the topmost and bottommost points identified, I then needed to identify the leftmost and rightmost points.
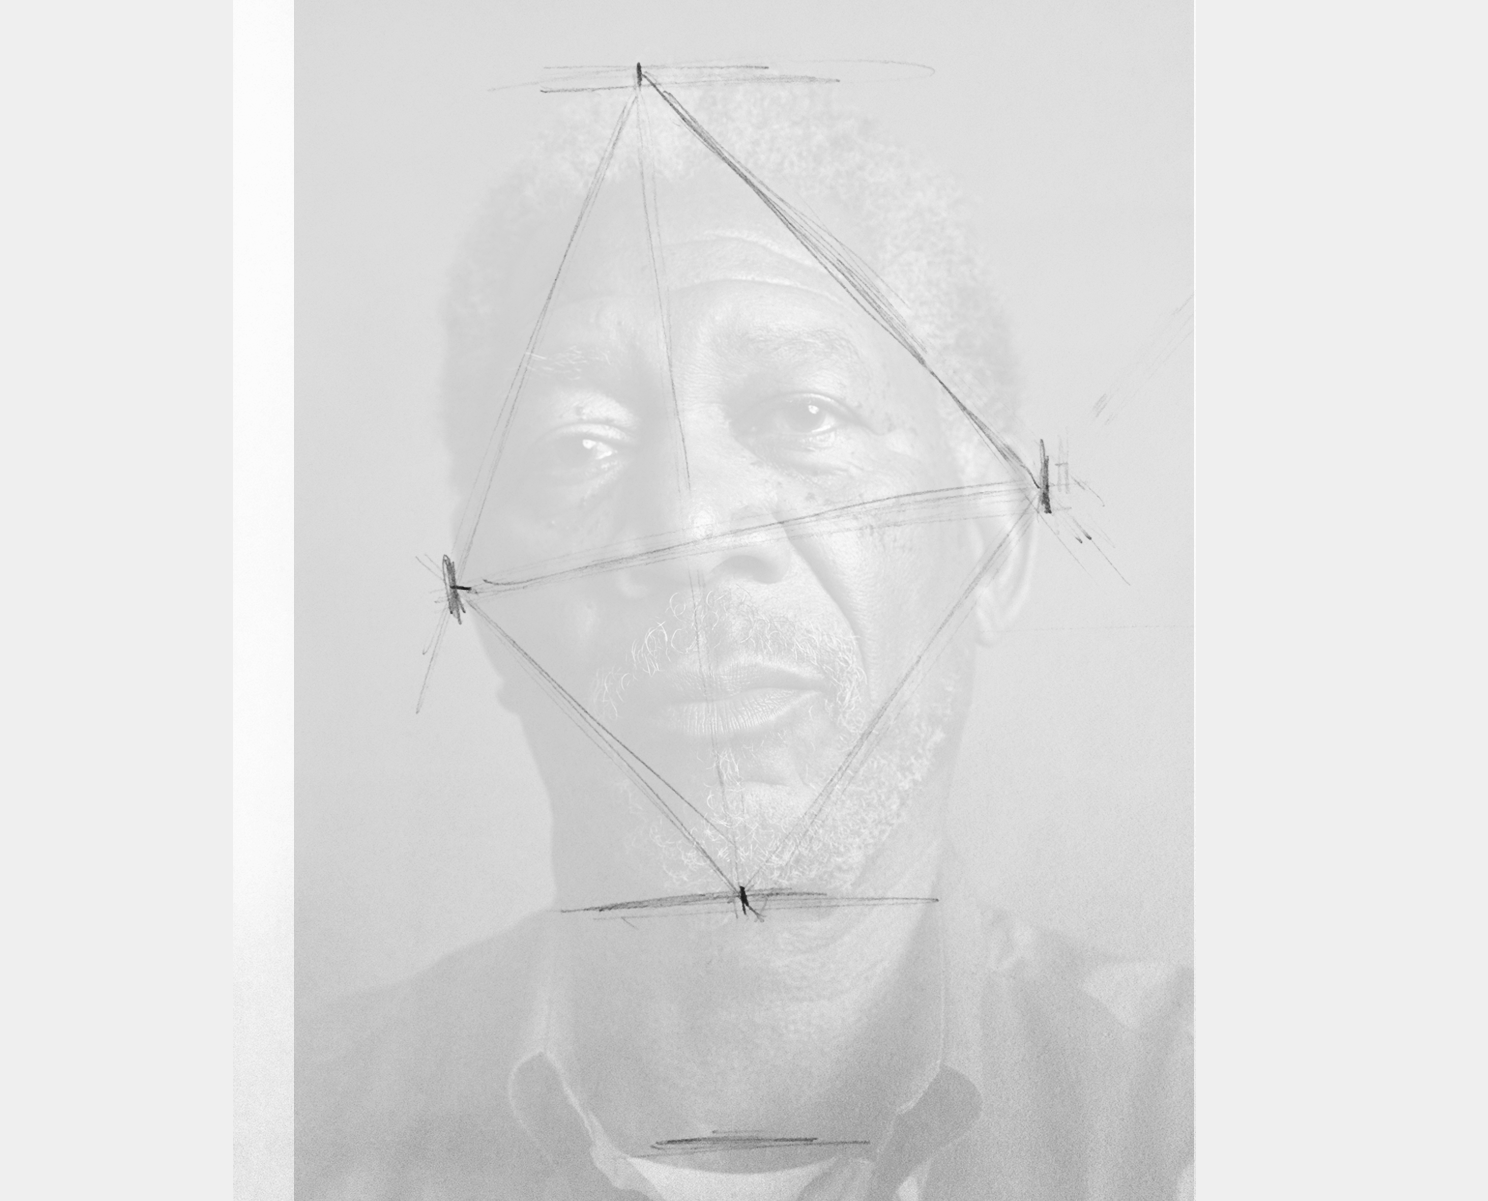
To do this, I used a new technique I learned called triangulation. To triangulate a new point, I first sight (try to visualize) the angles to this new point from two existing points. Then, I draw lines from the existing points in the direction of the new point based on the sighted angles. Finally, I mark the new point where the lines intersect.
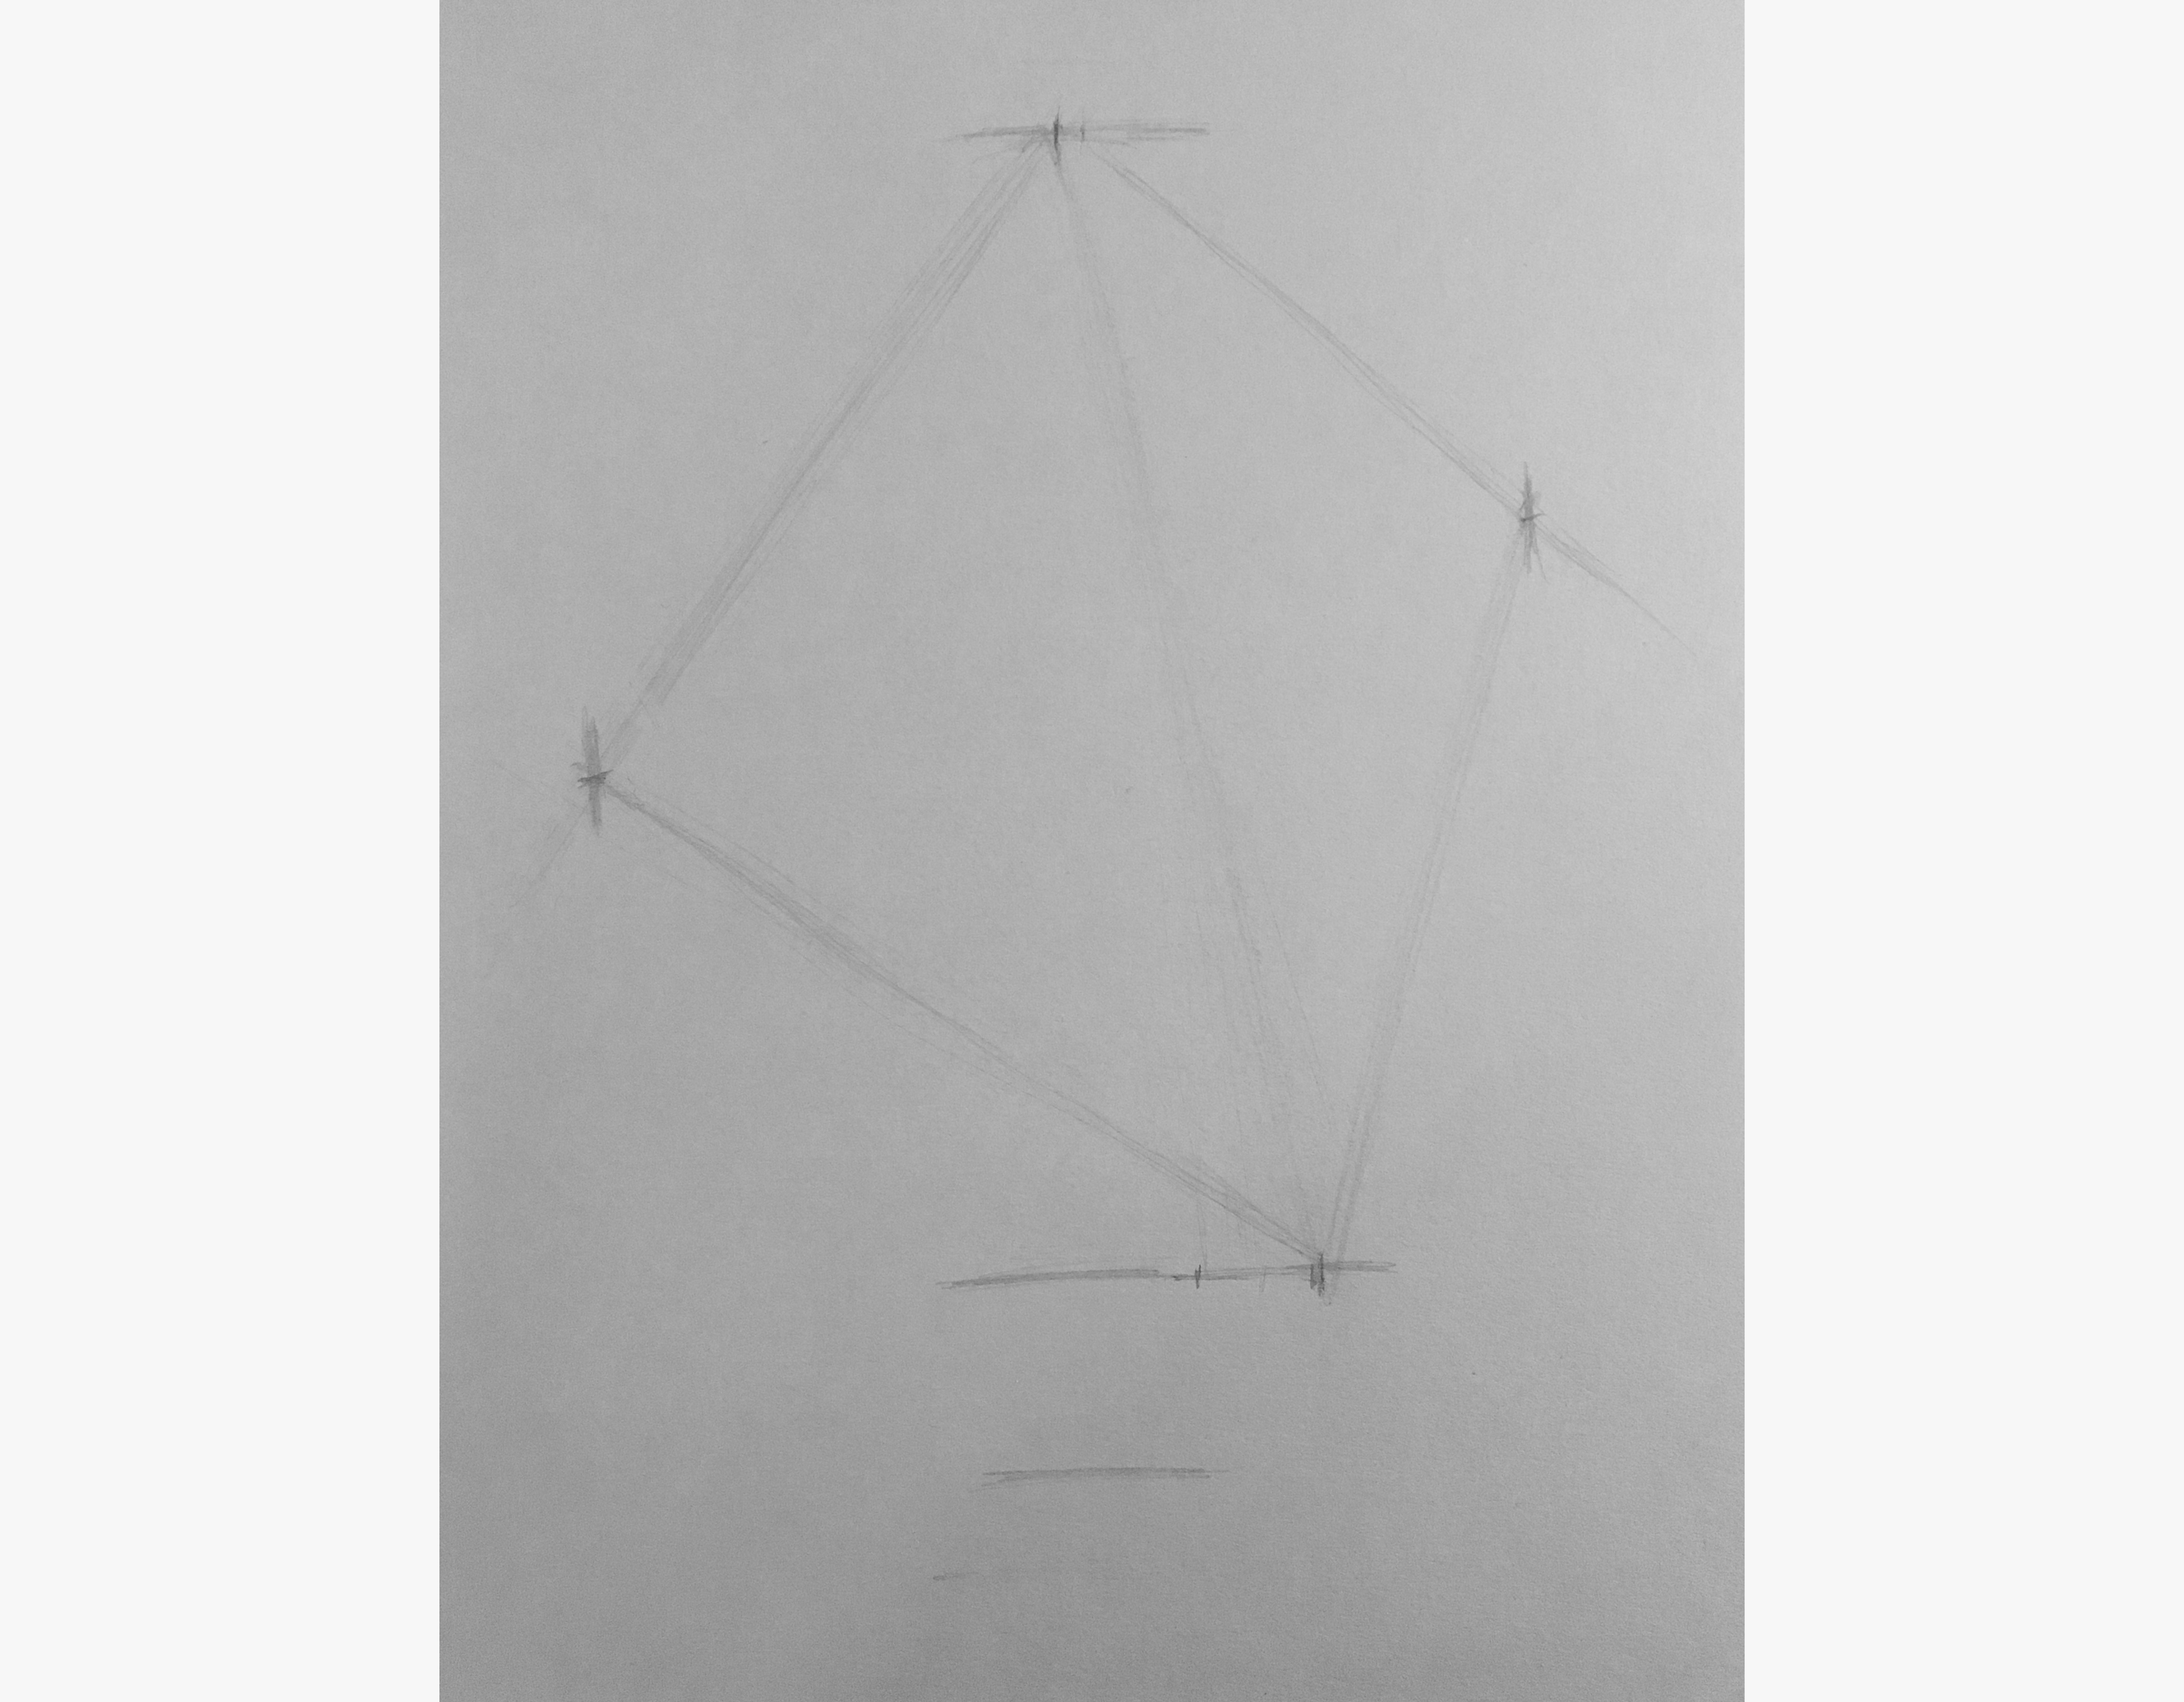
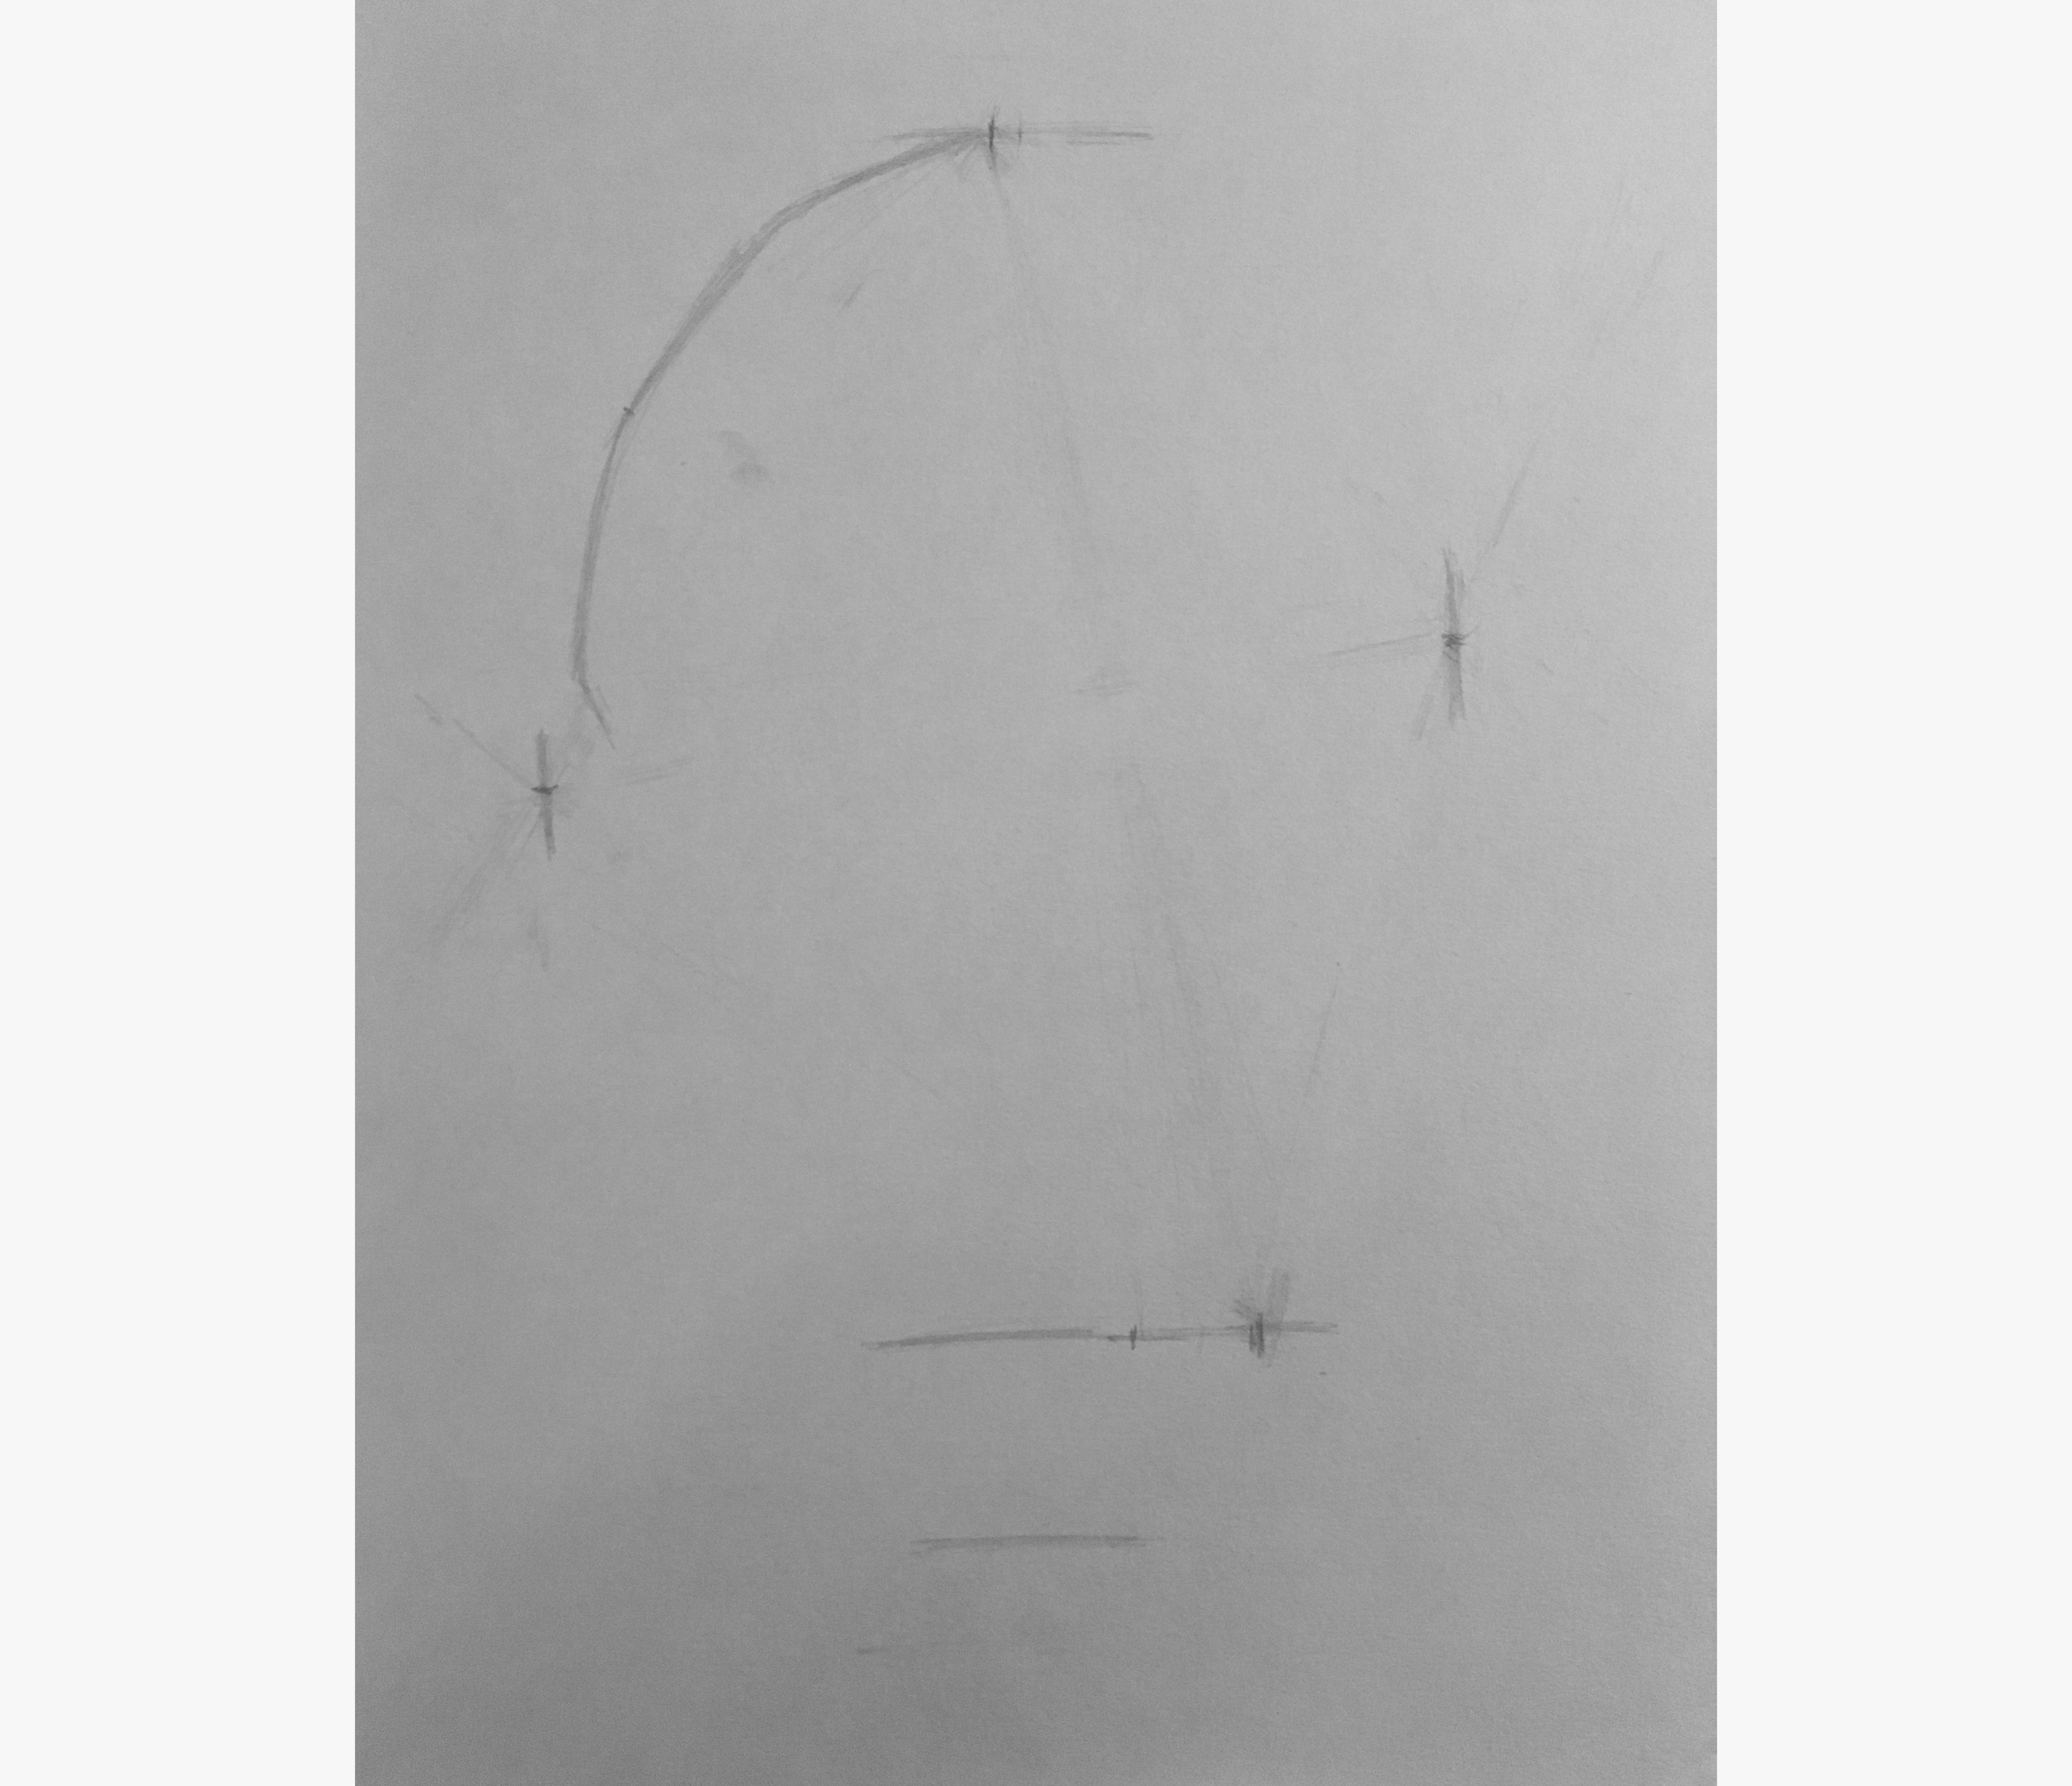
After checking the angles again, I updated these two new points.
To check, I then sighted the angle between the two new points, ensuring this angle matches what I see on Derren?s head.
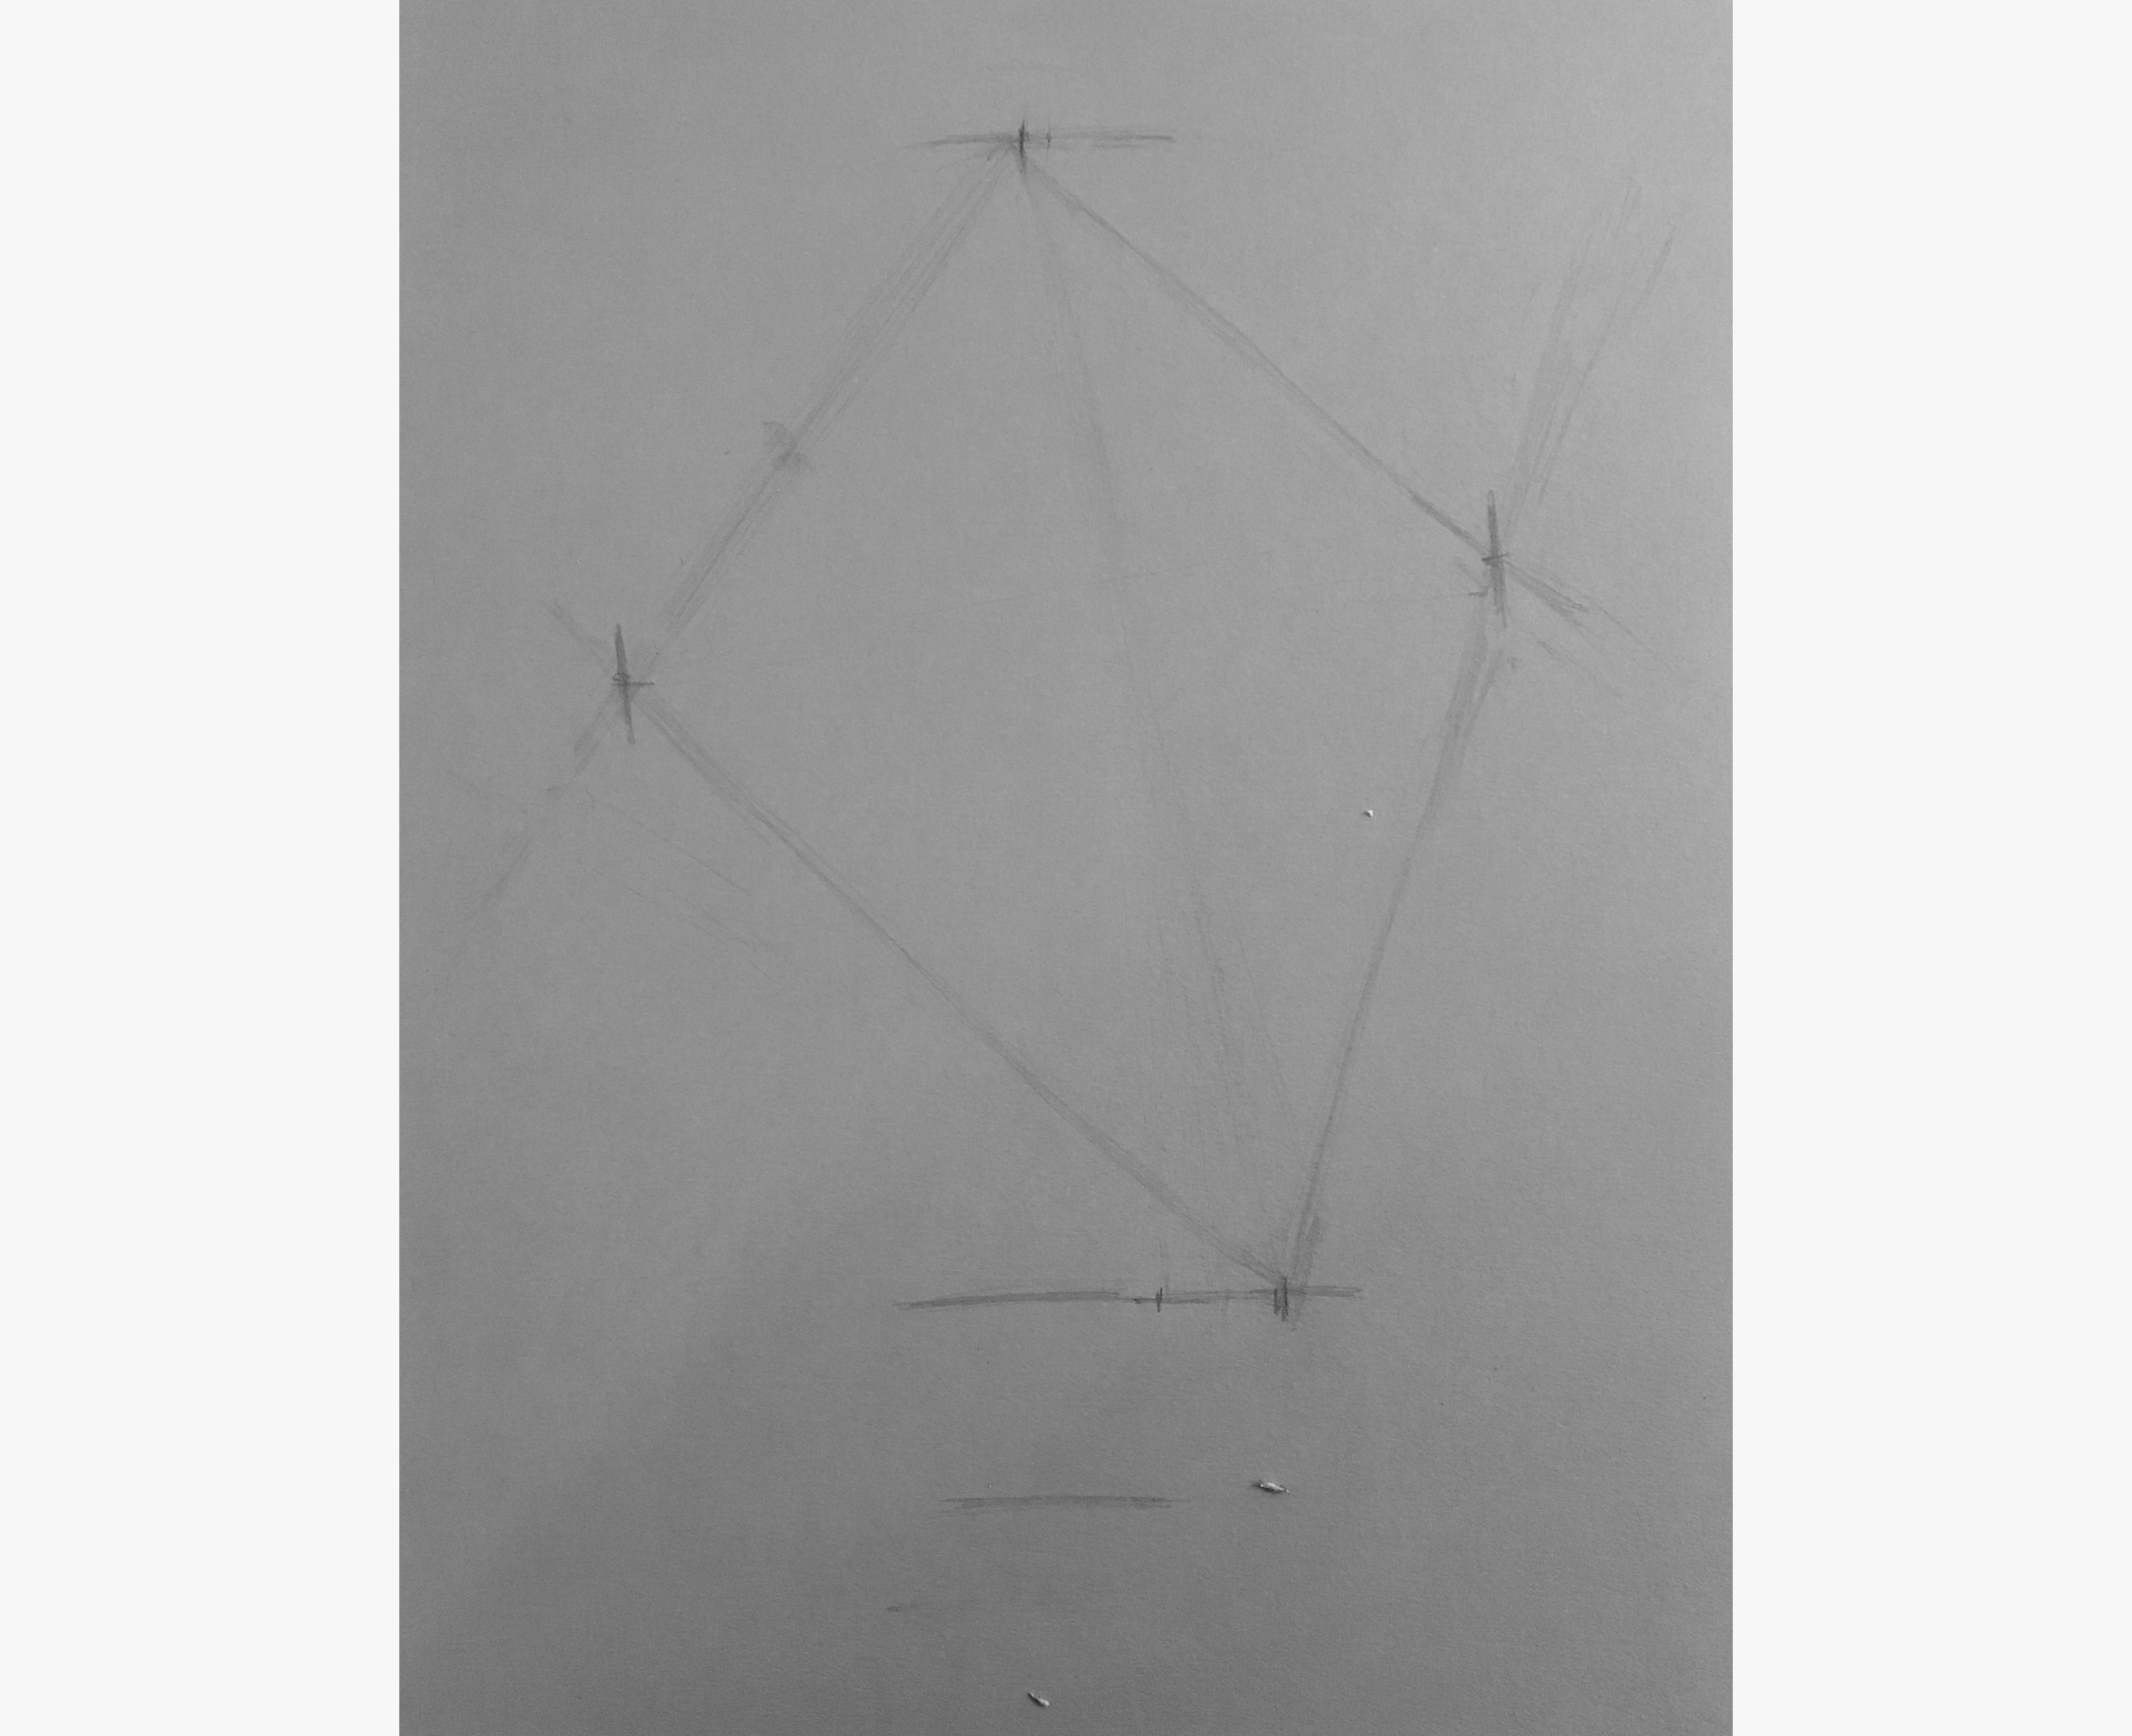
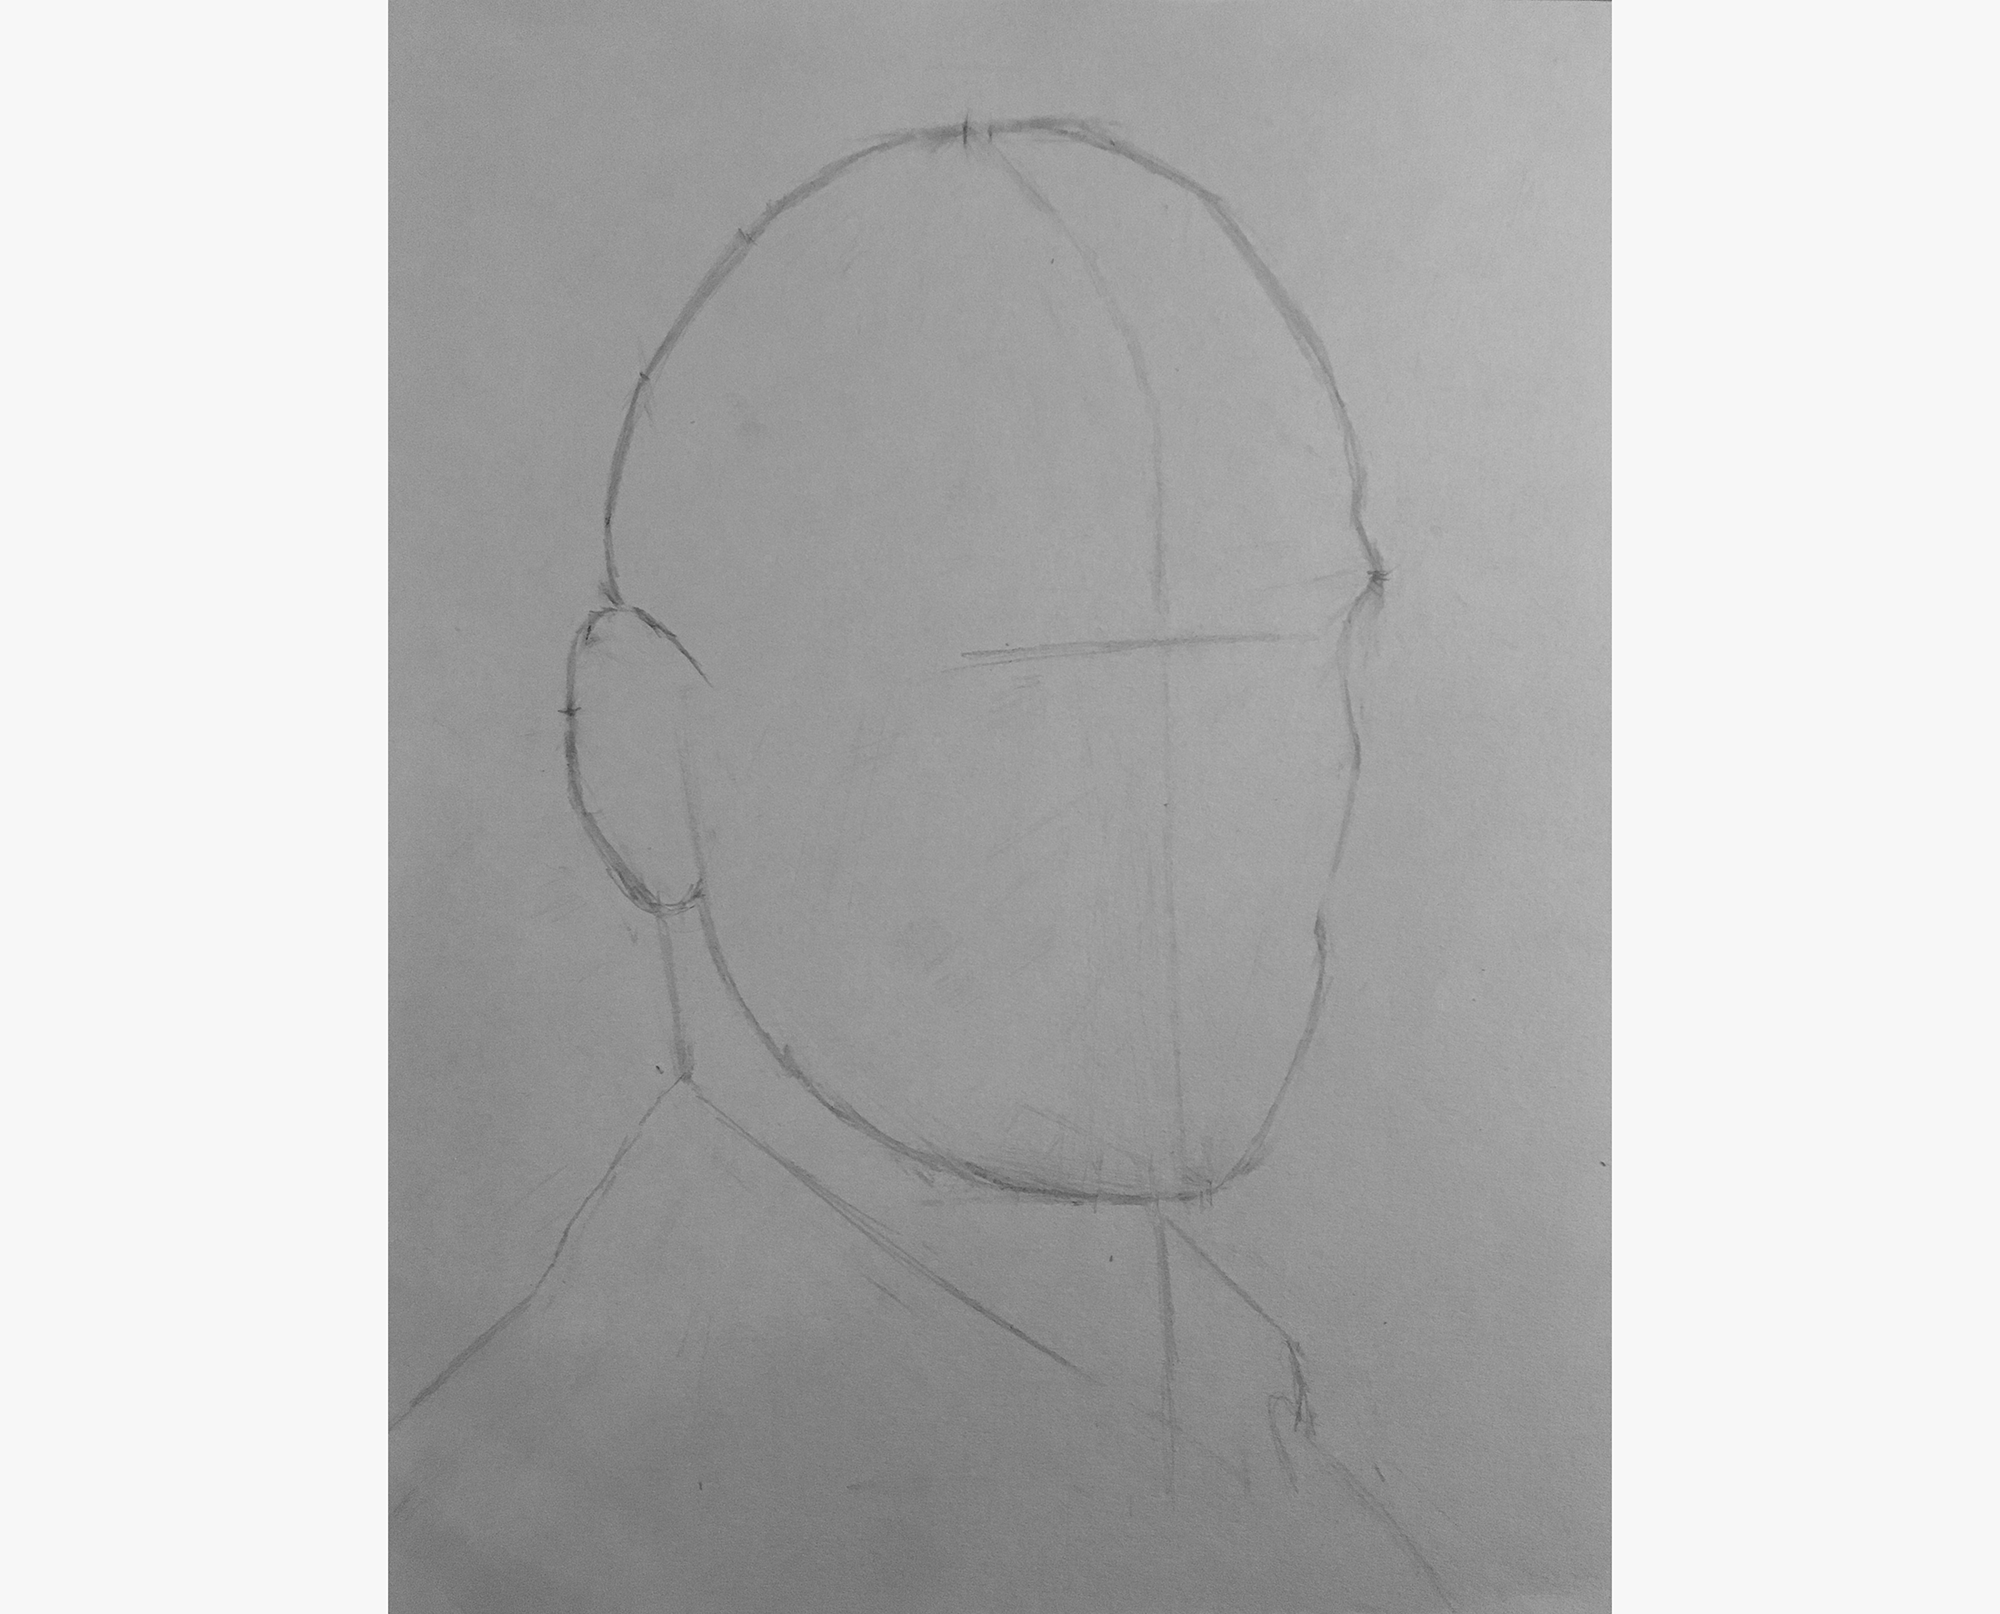
Drawing the shape of the head
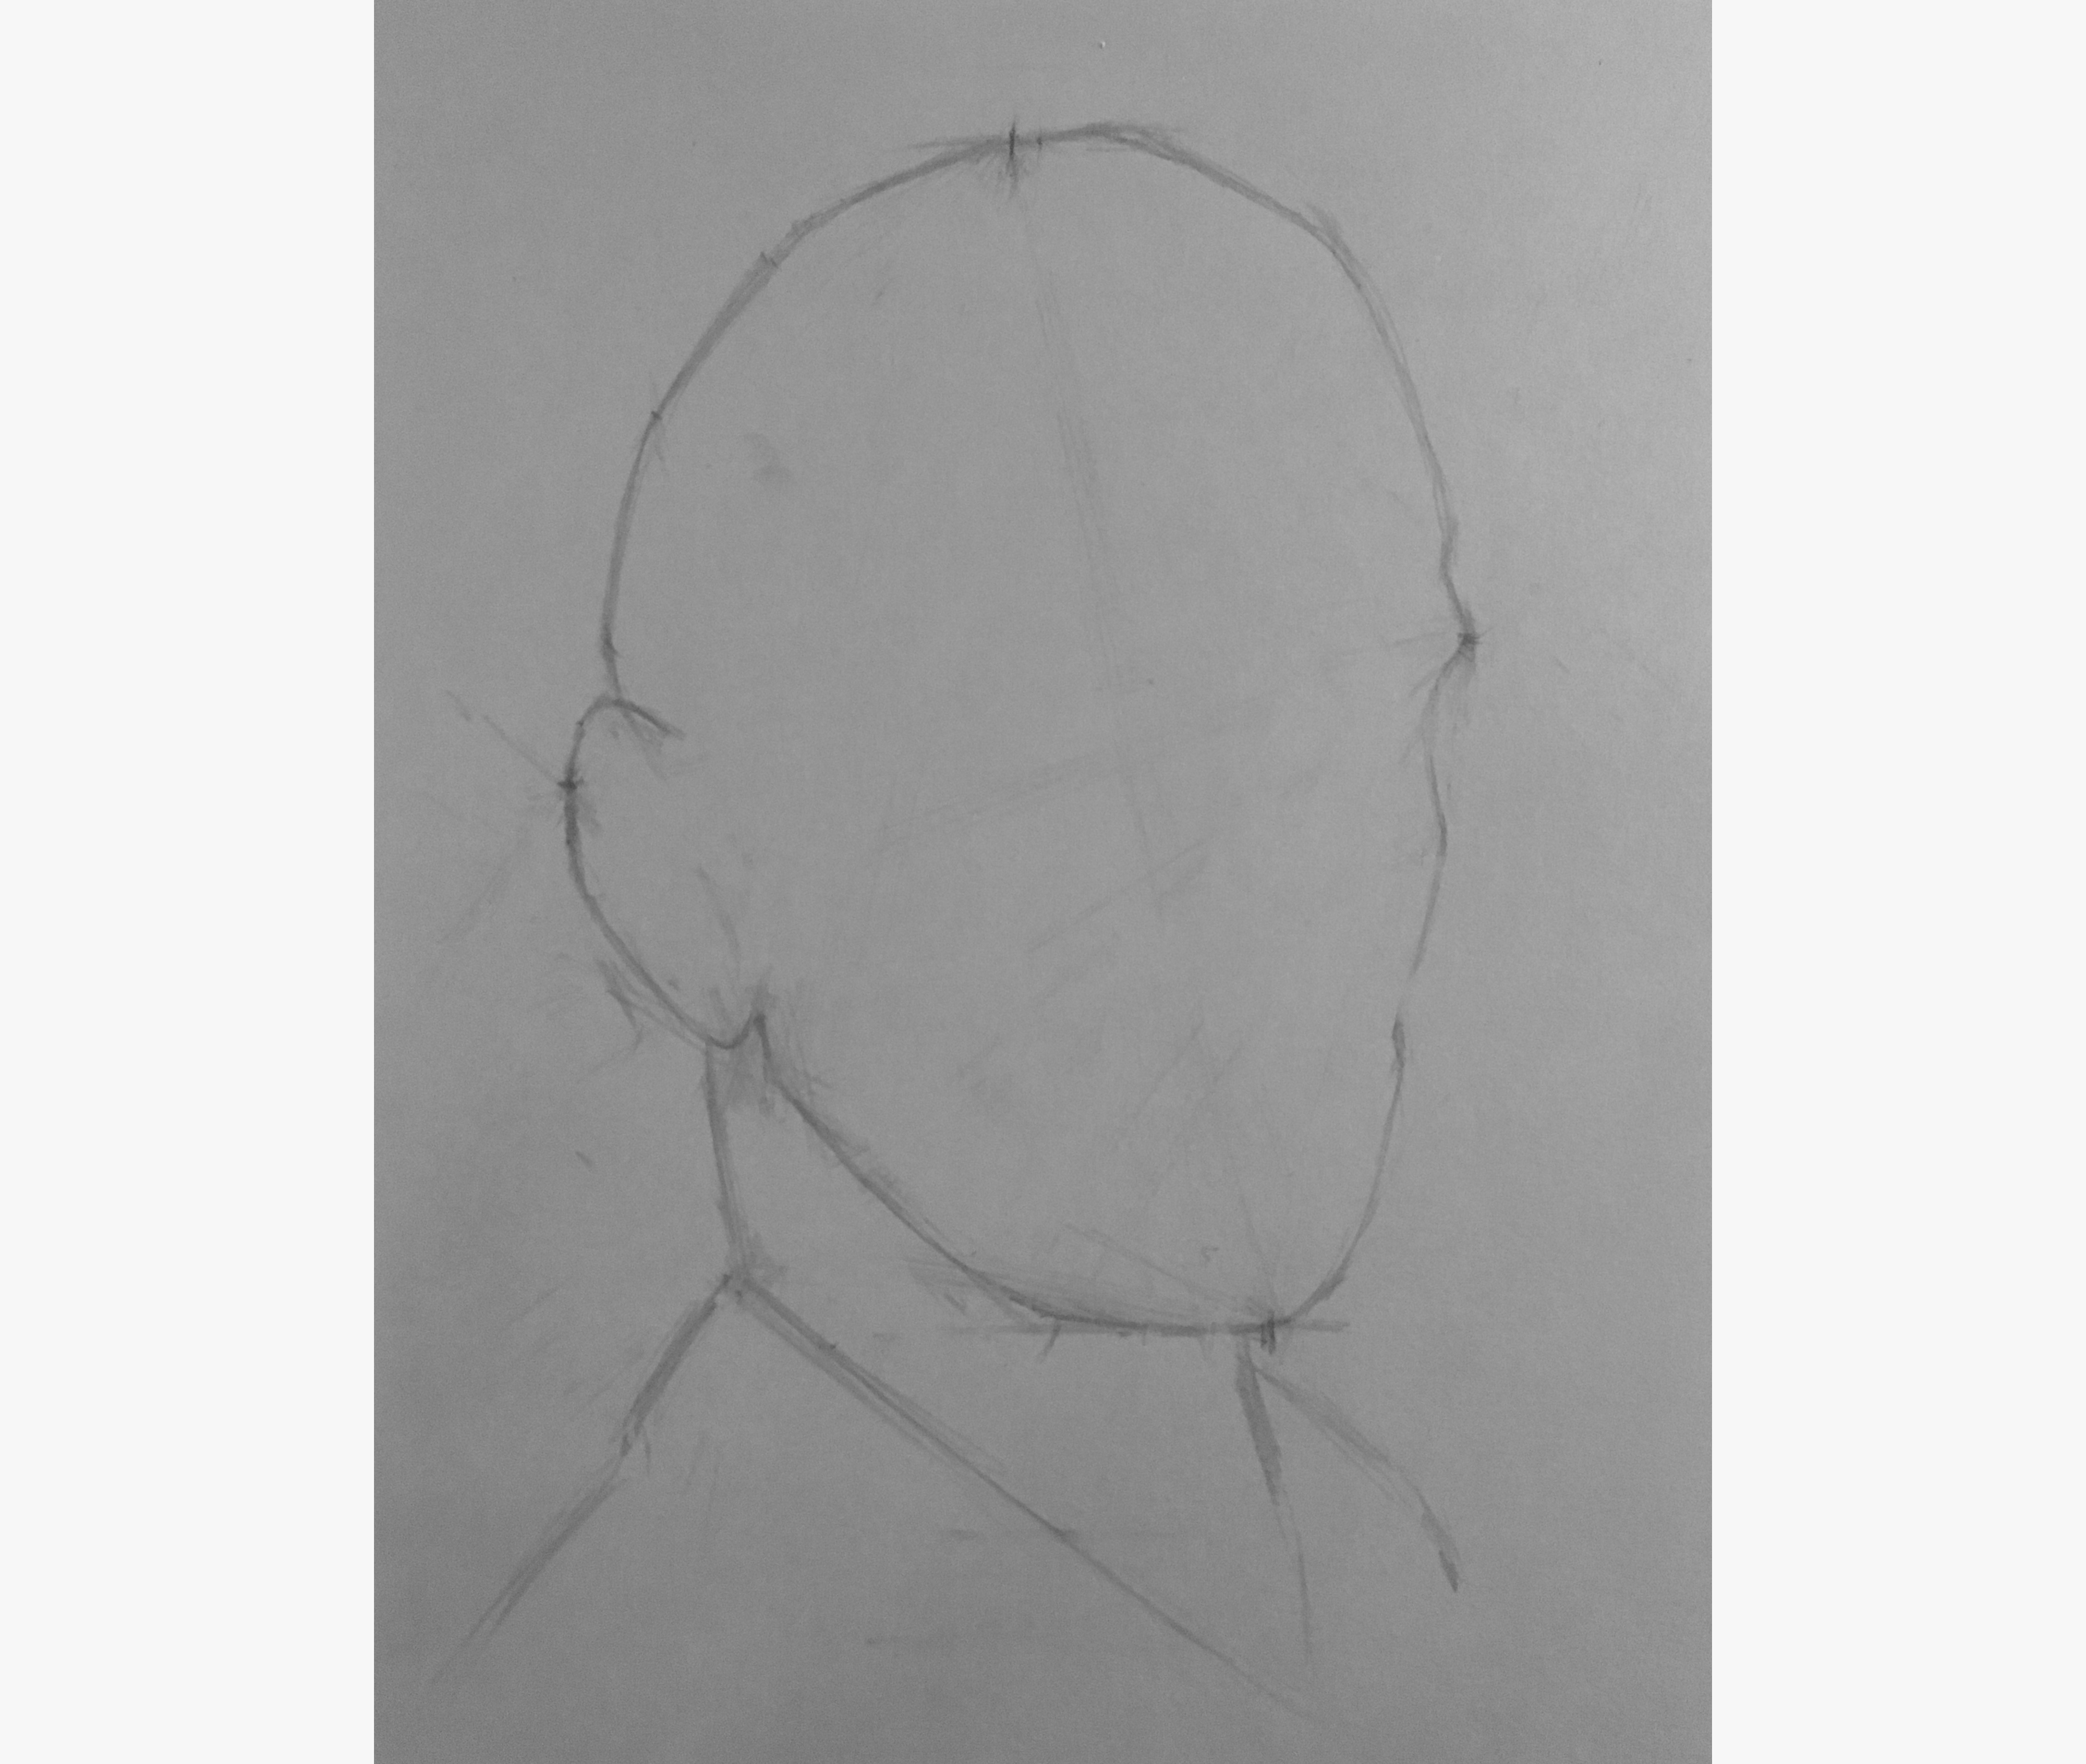
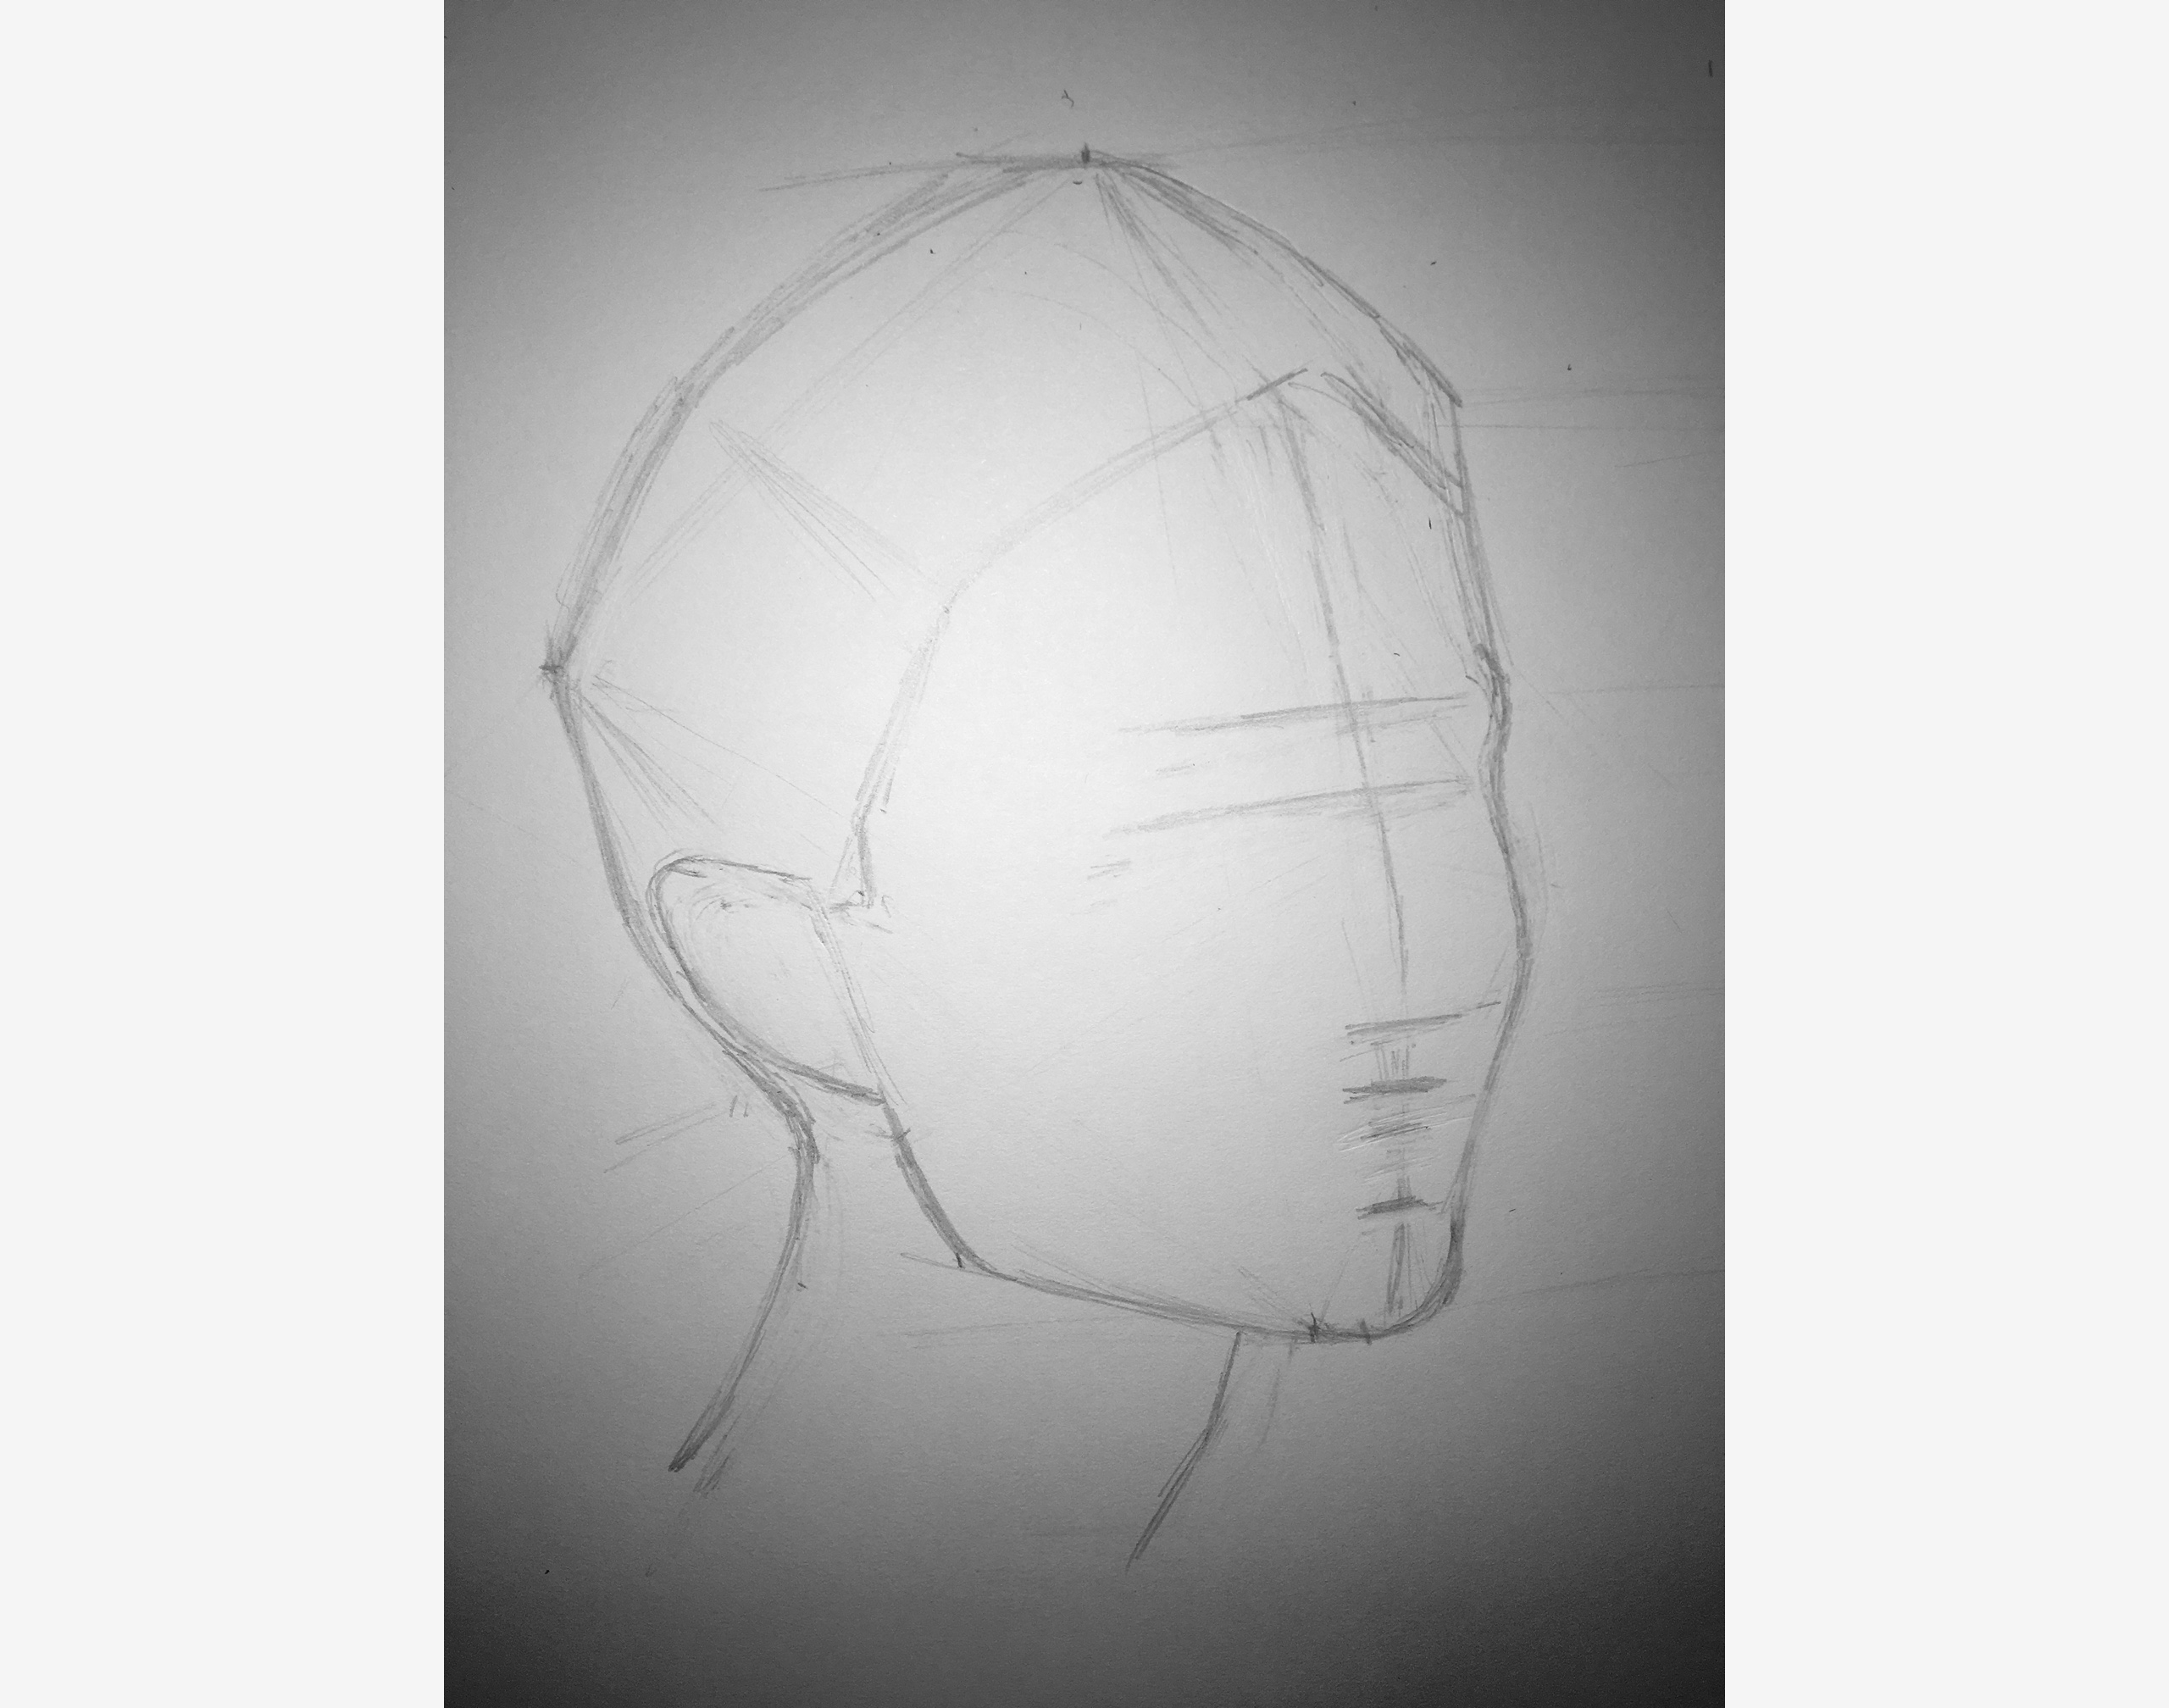
With these four outer points drawn, the next step is to draw in the shape of the head. To do this, I continued to triangulate more points, and draw in the necessary curves to connect them.
I continued in this way, until I outlined the entire shape of the head.
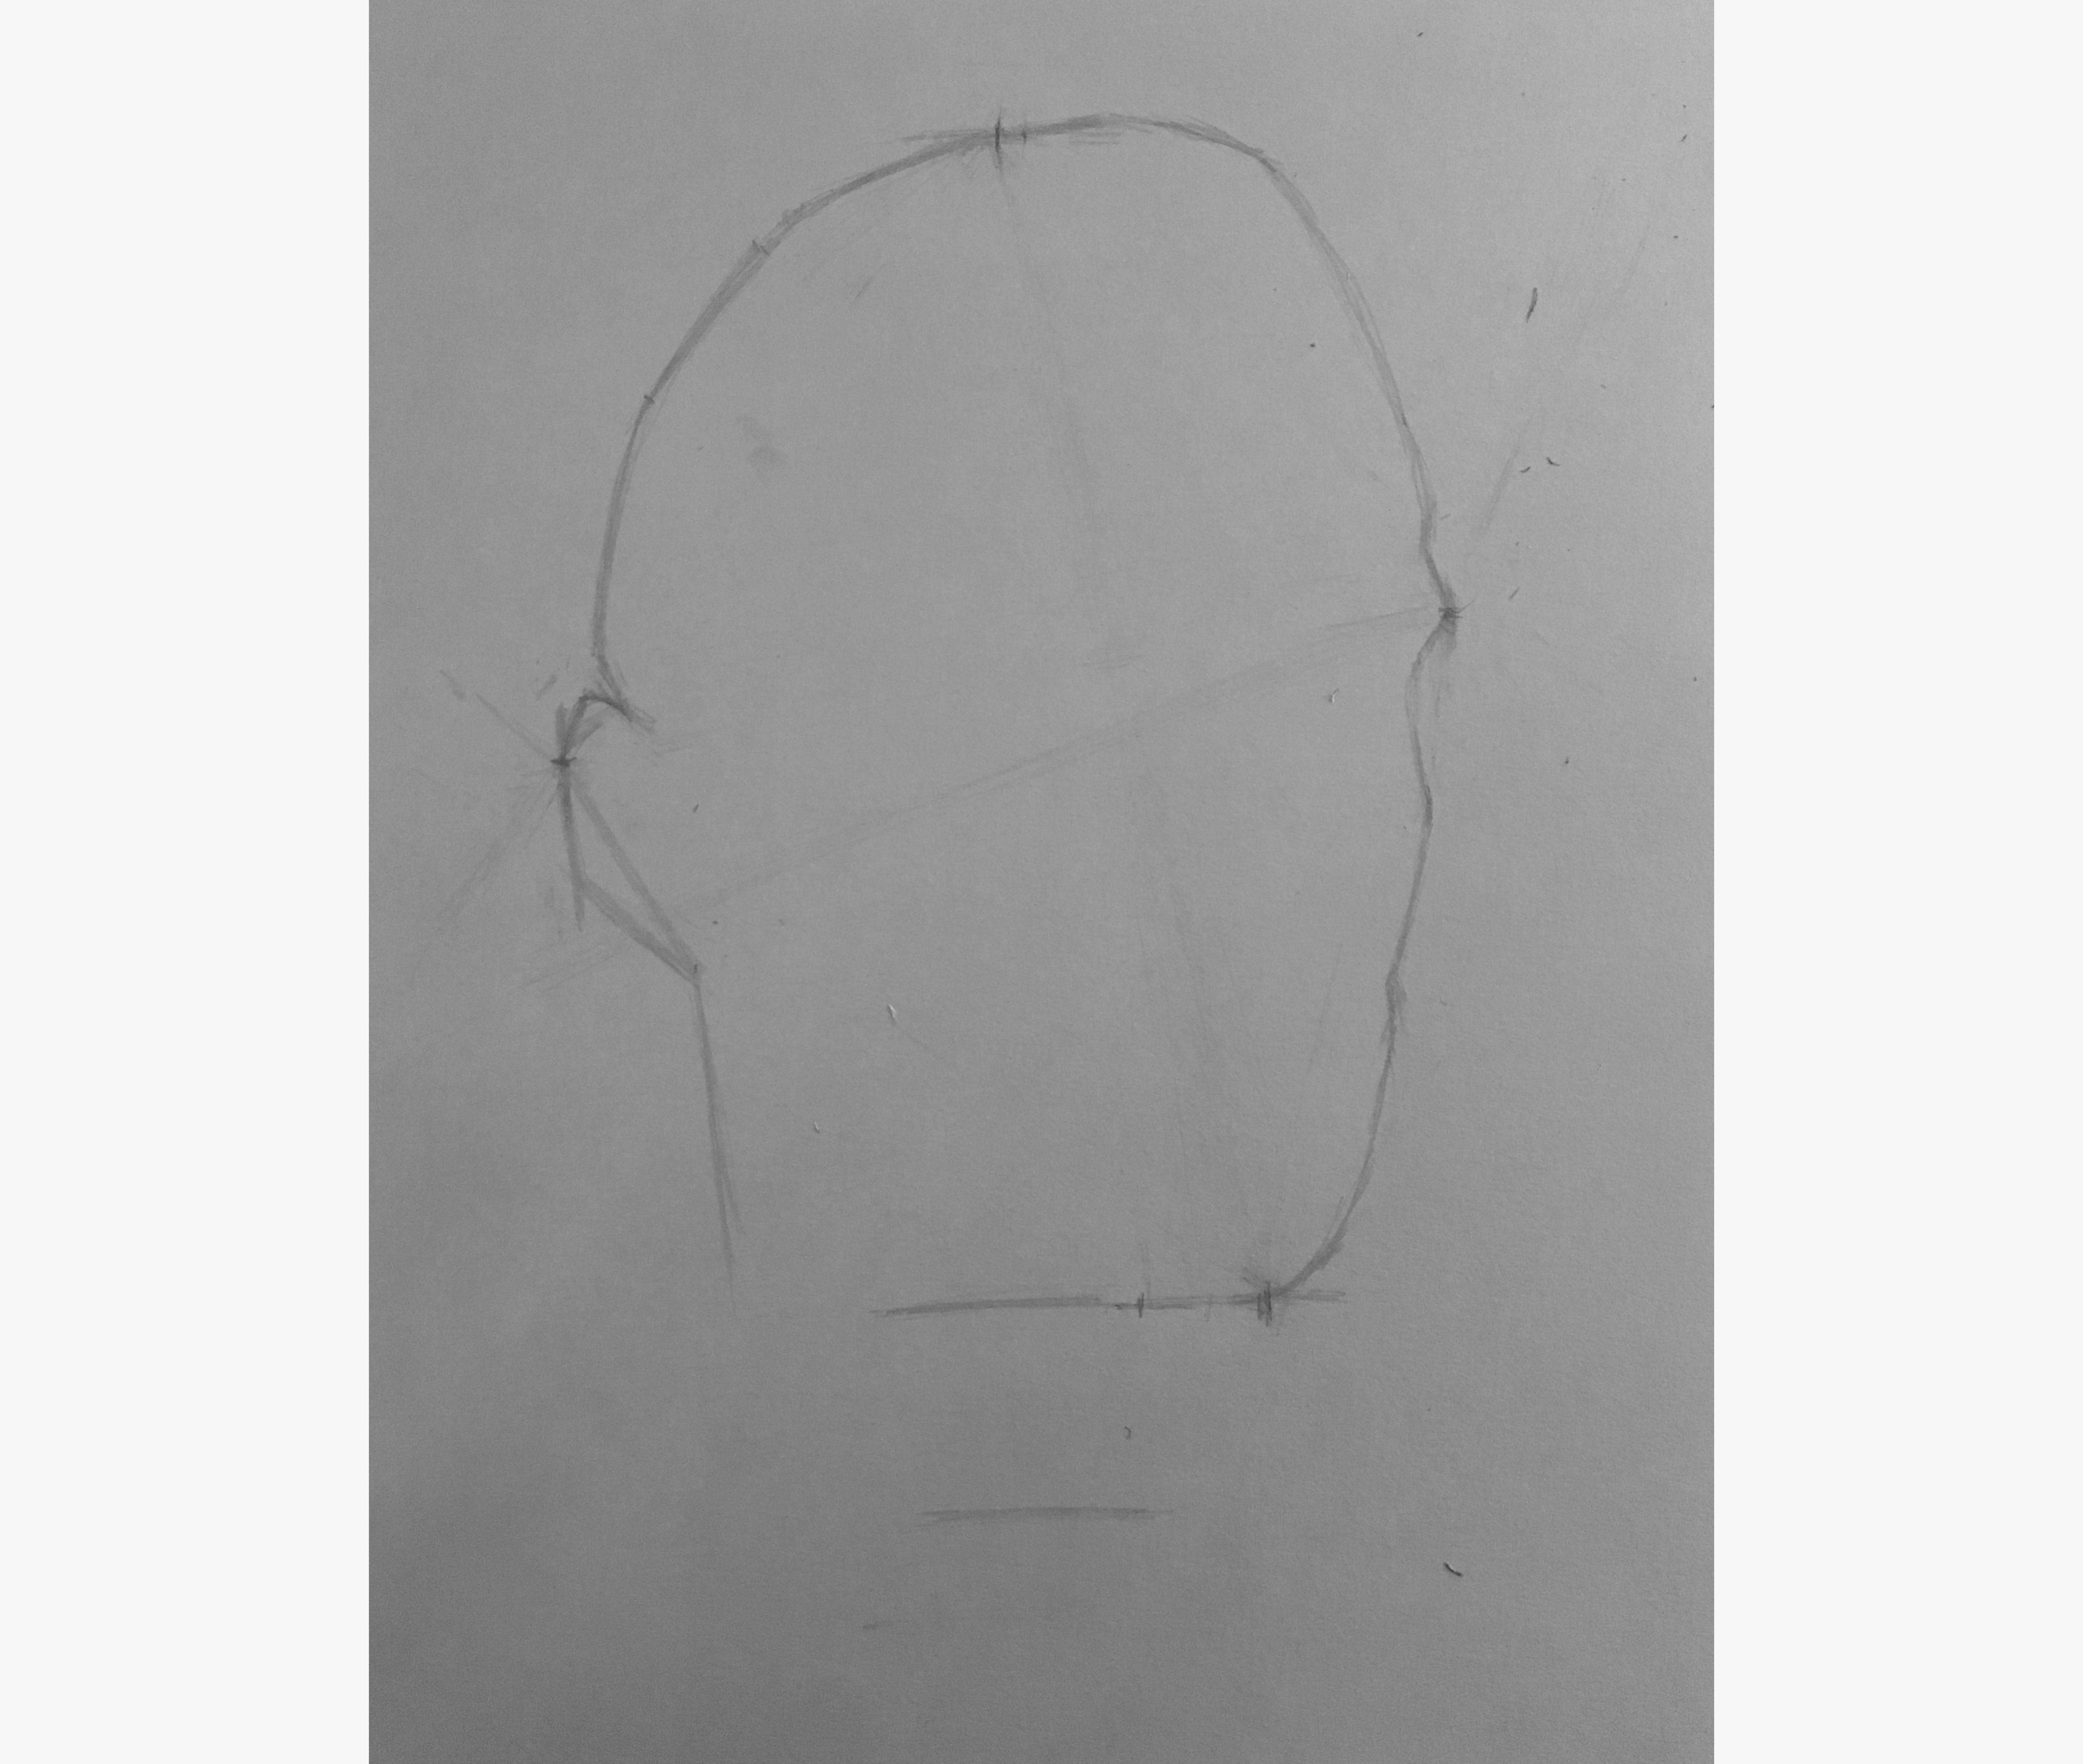
It didn?t look quite right, so I checked a bunch of angles.
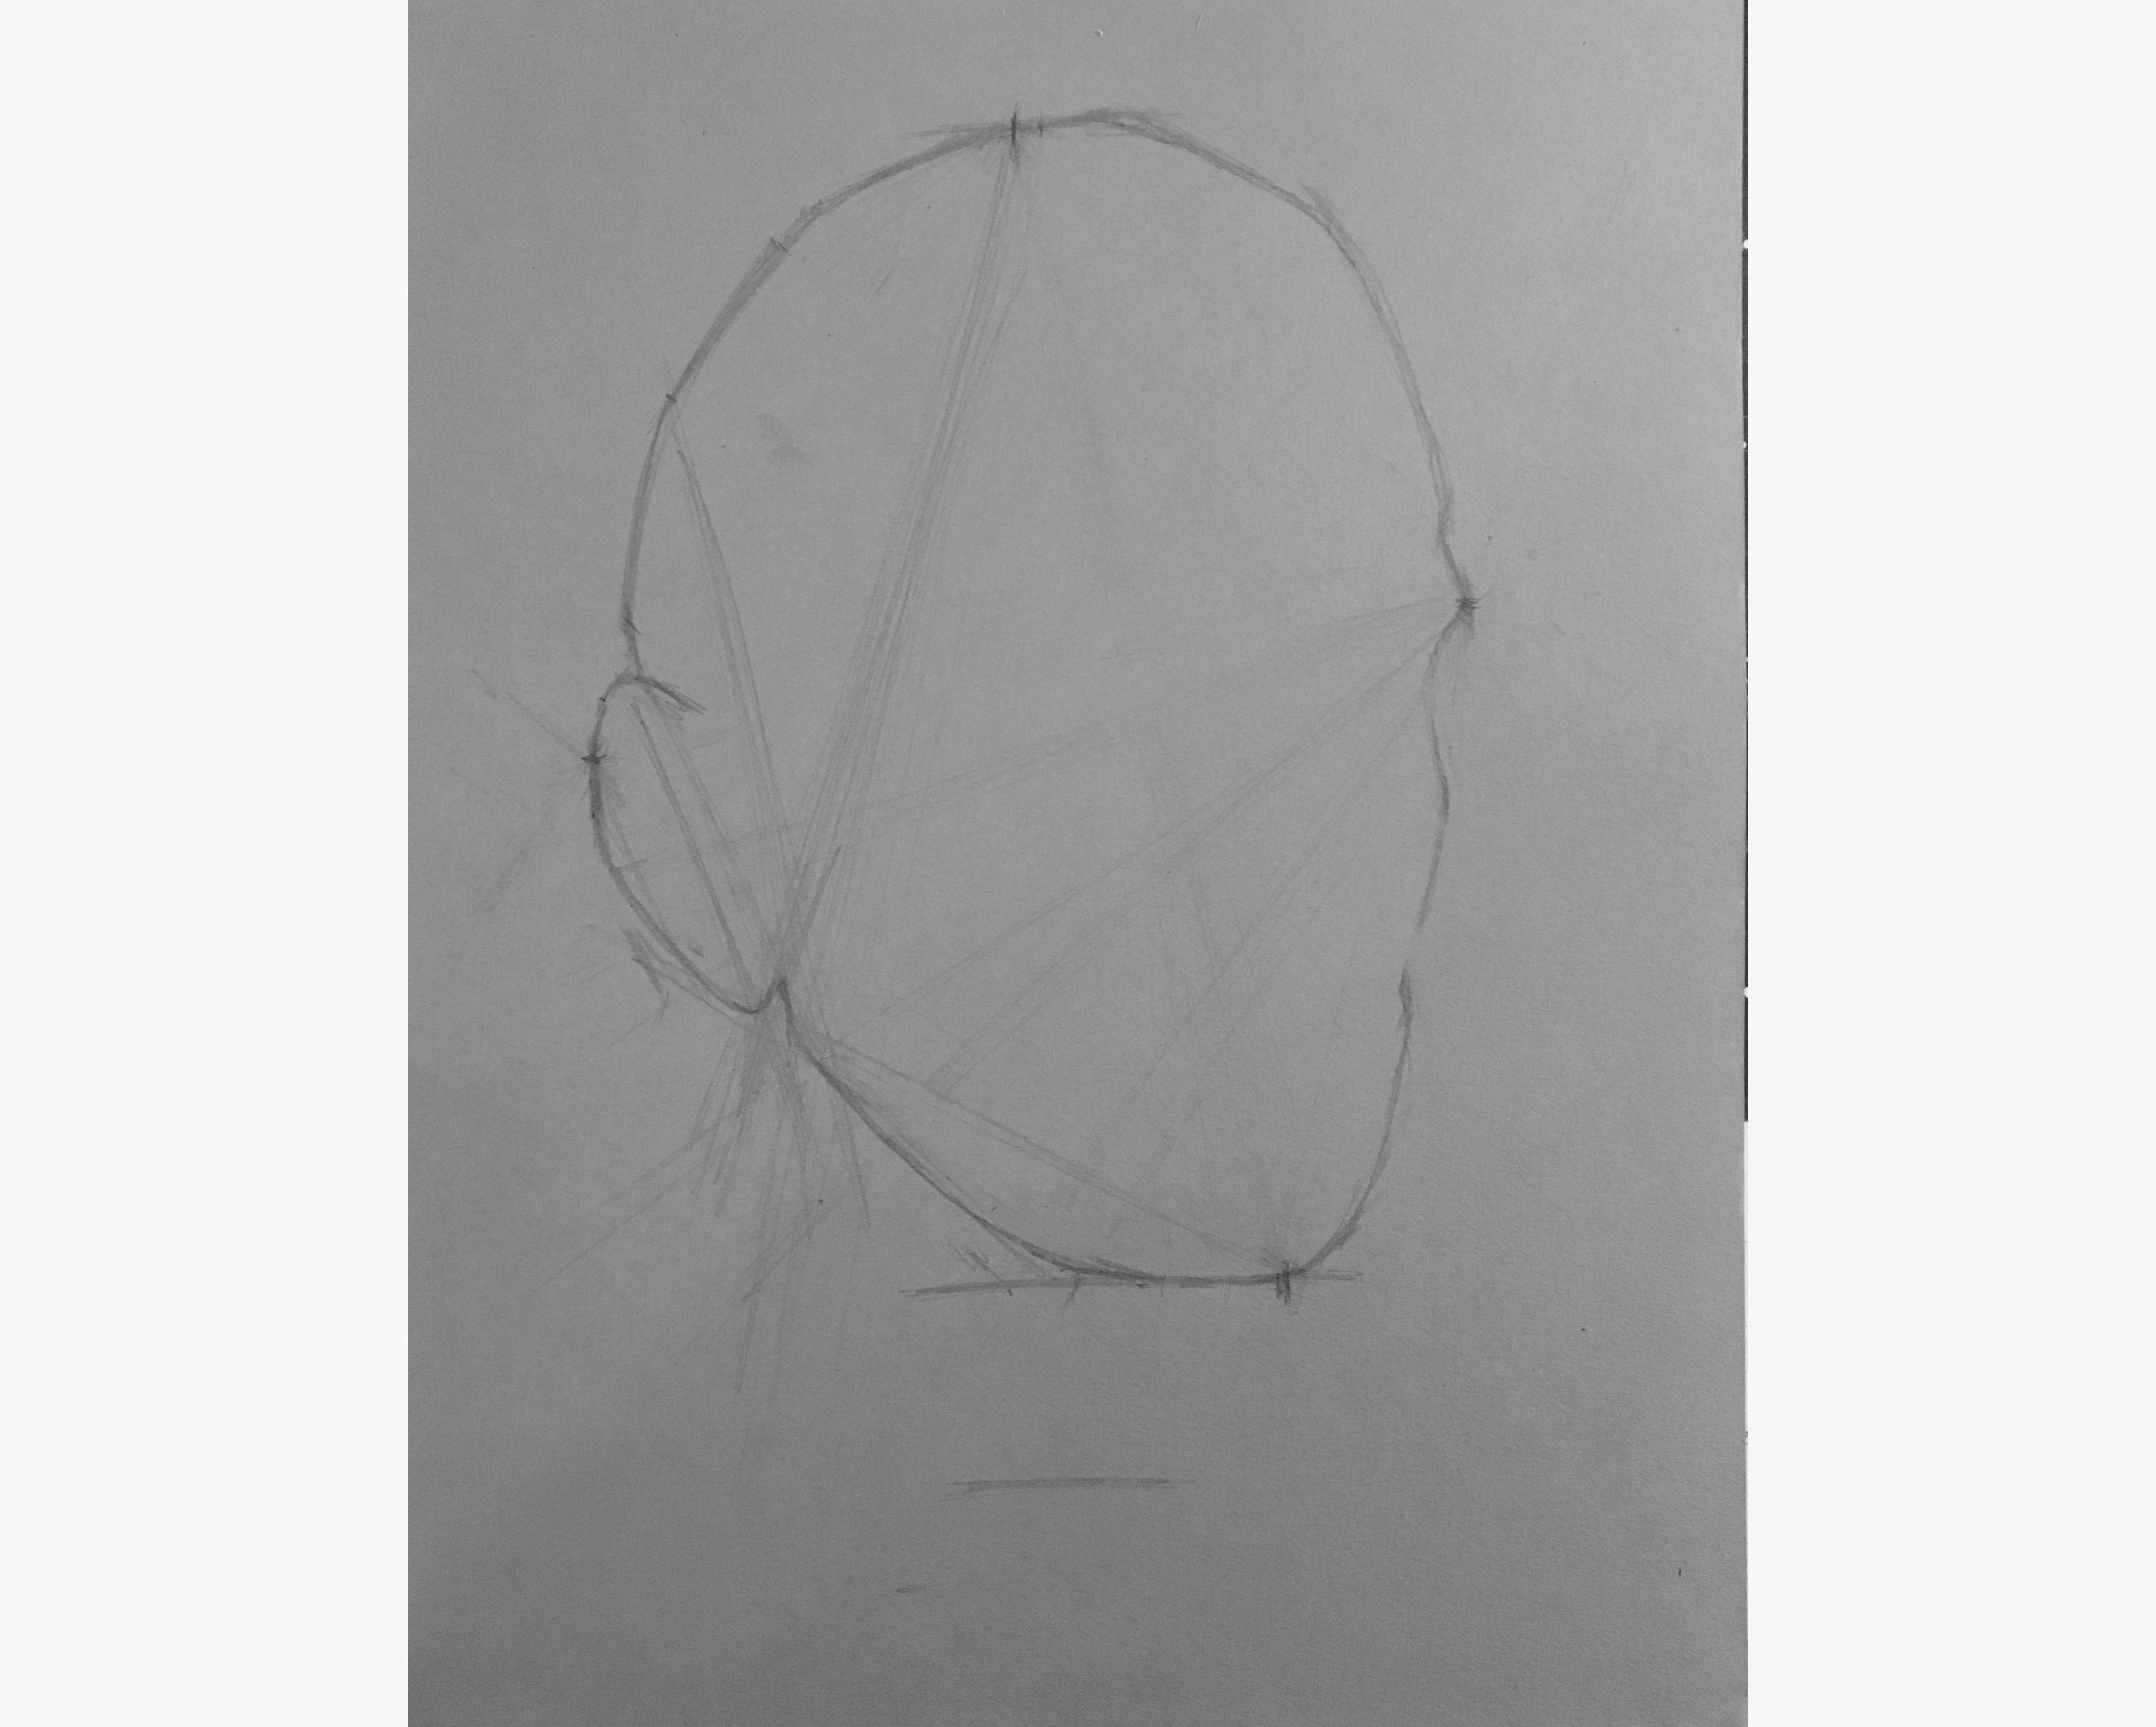
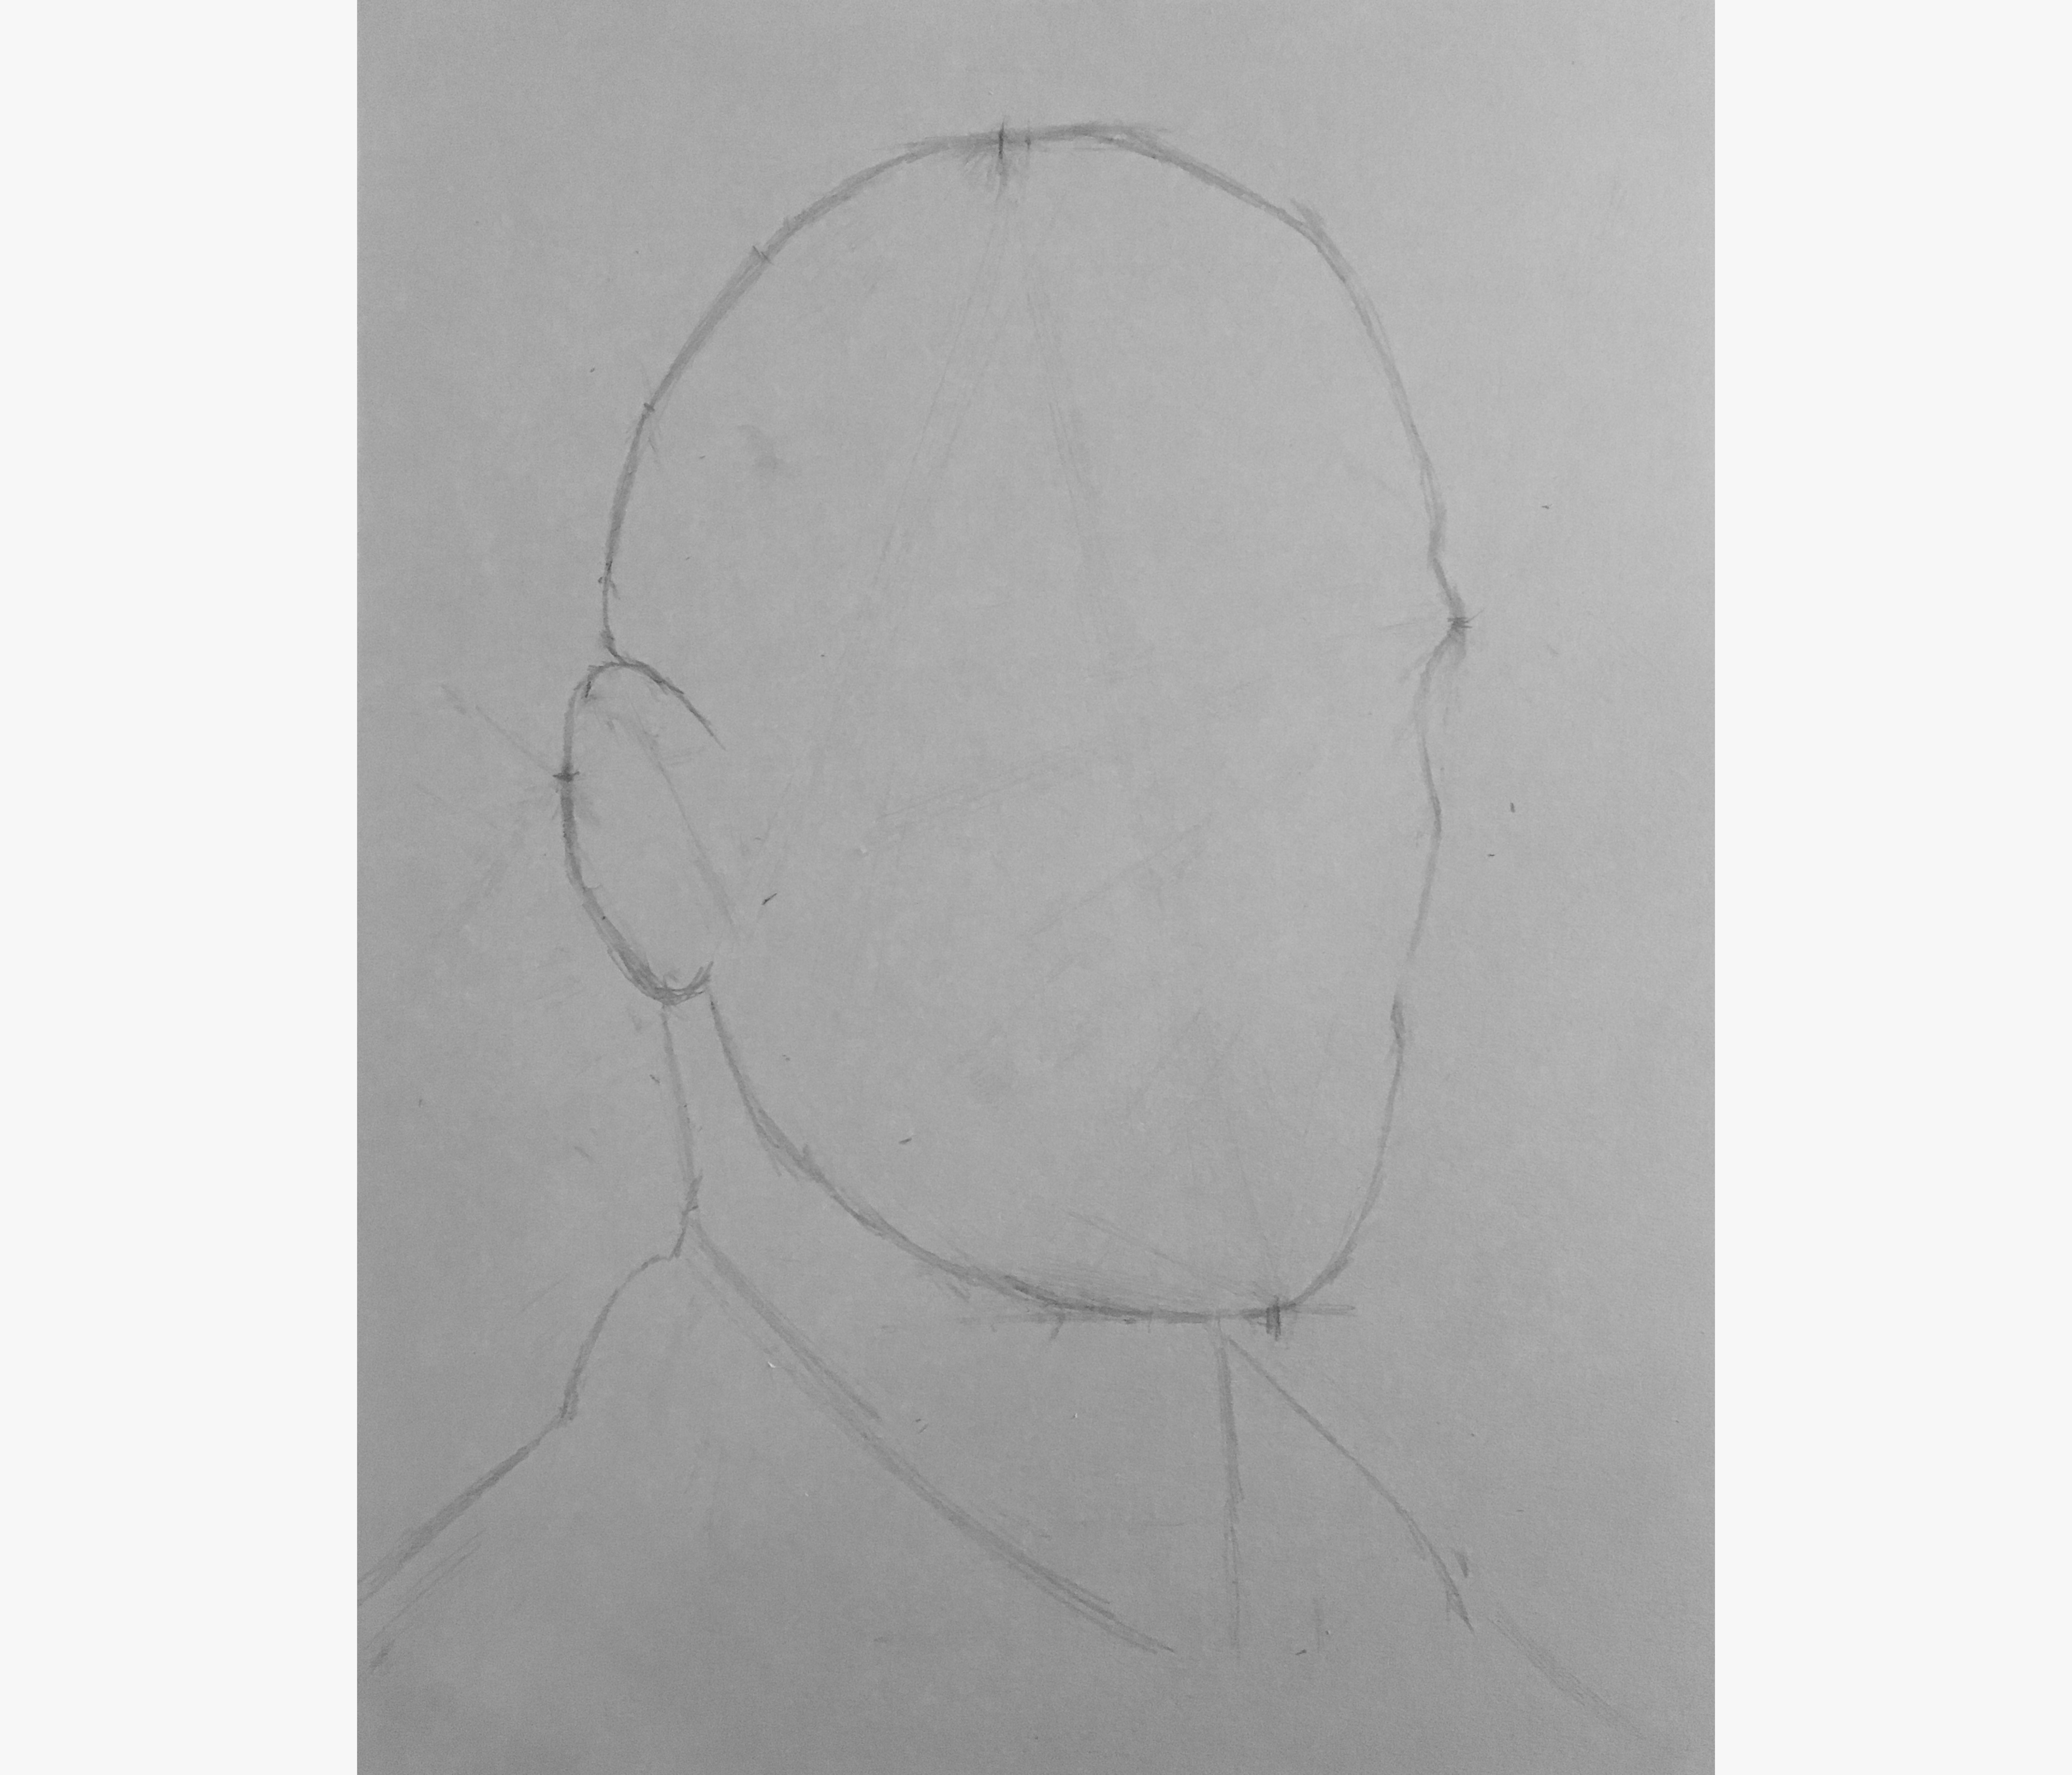
Once it seemed closer, I added in the neck and shoulders.
With the neck and shoulders in place, it again didn?t look right. So, I checked more angles and made adjustments as necessary (mostly to broaden the jaw)
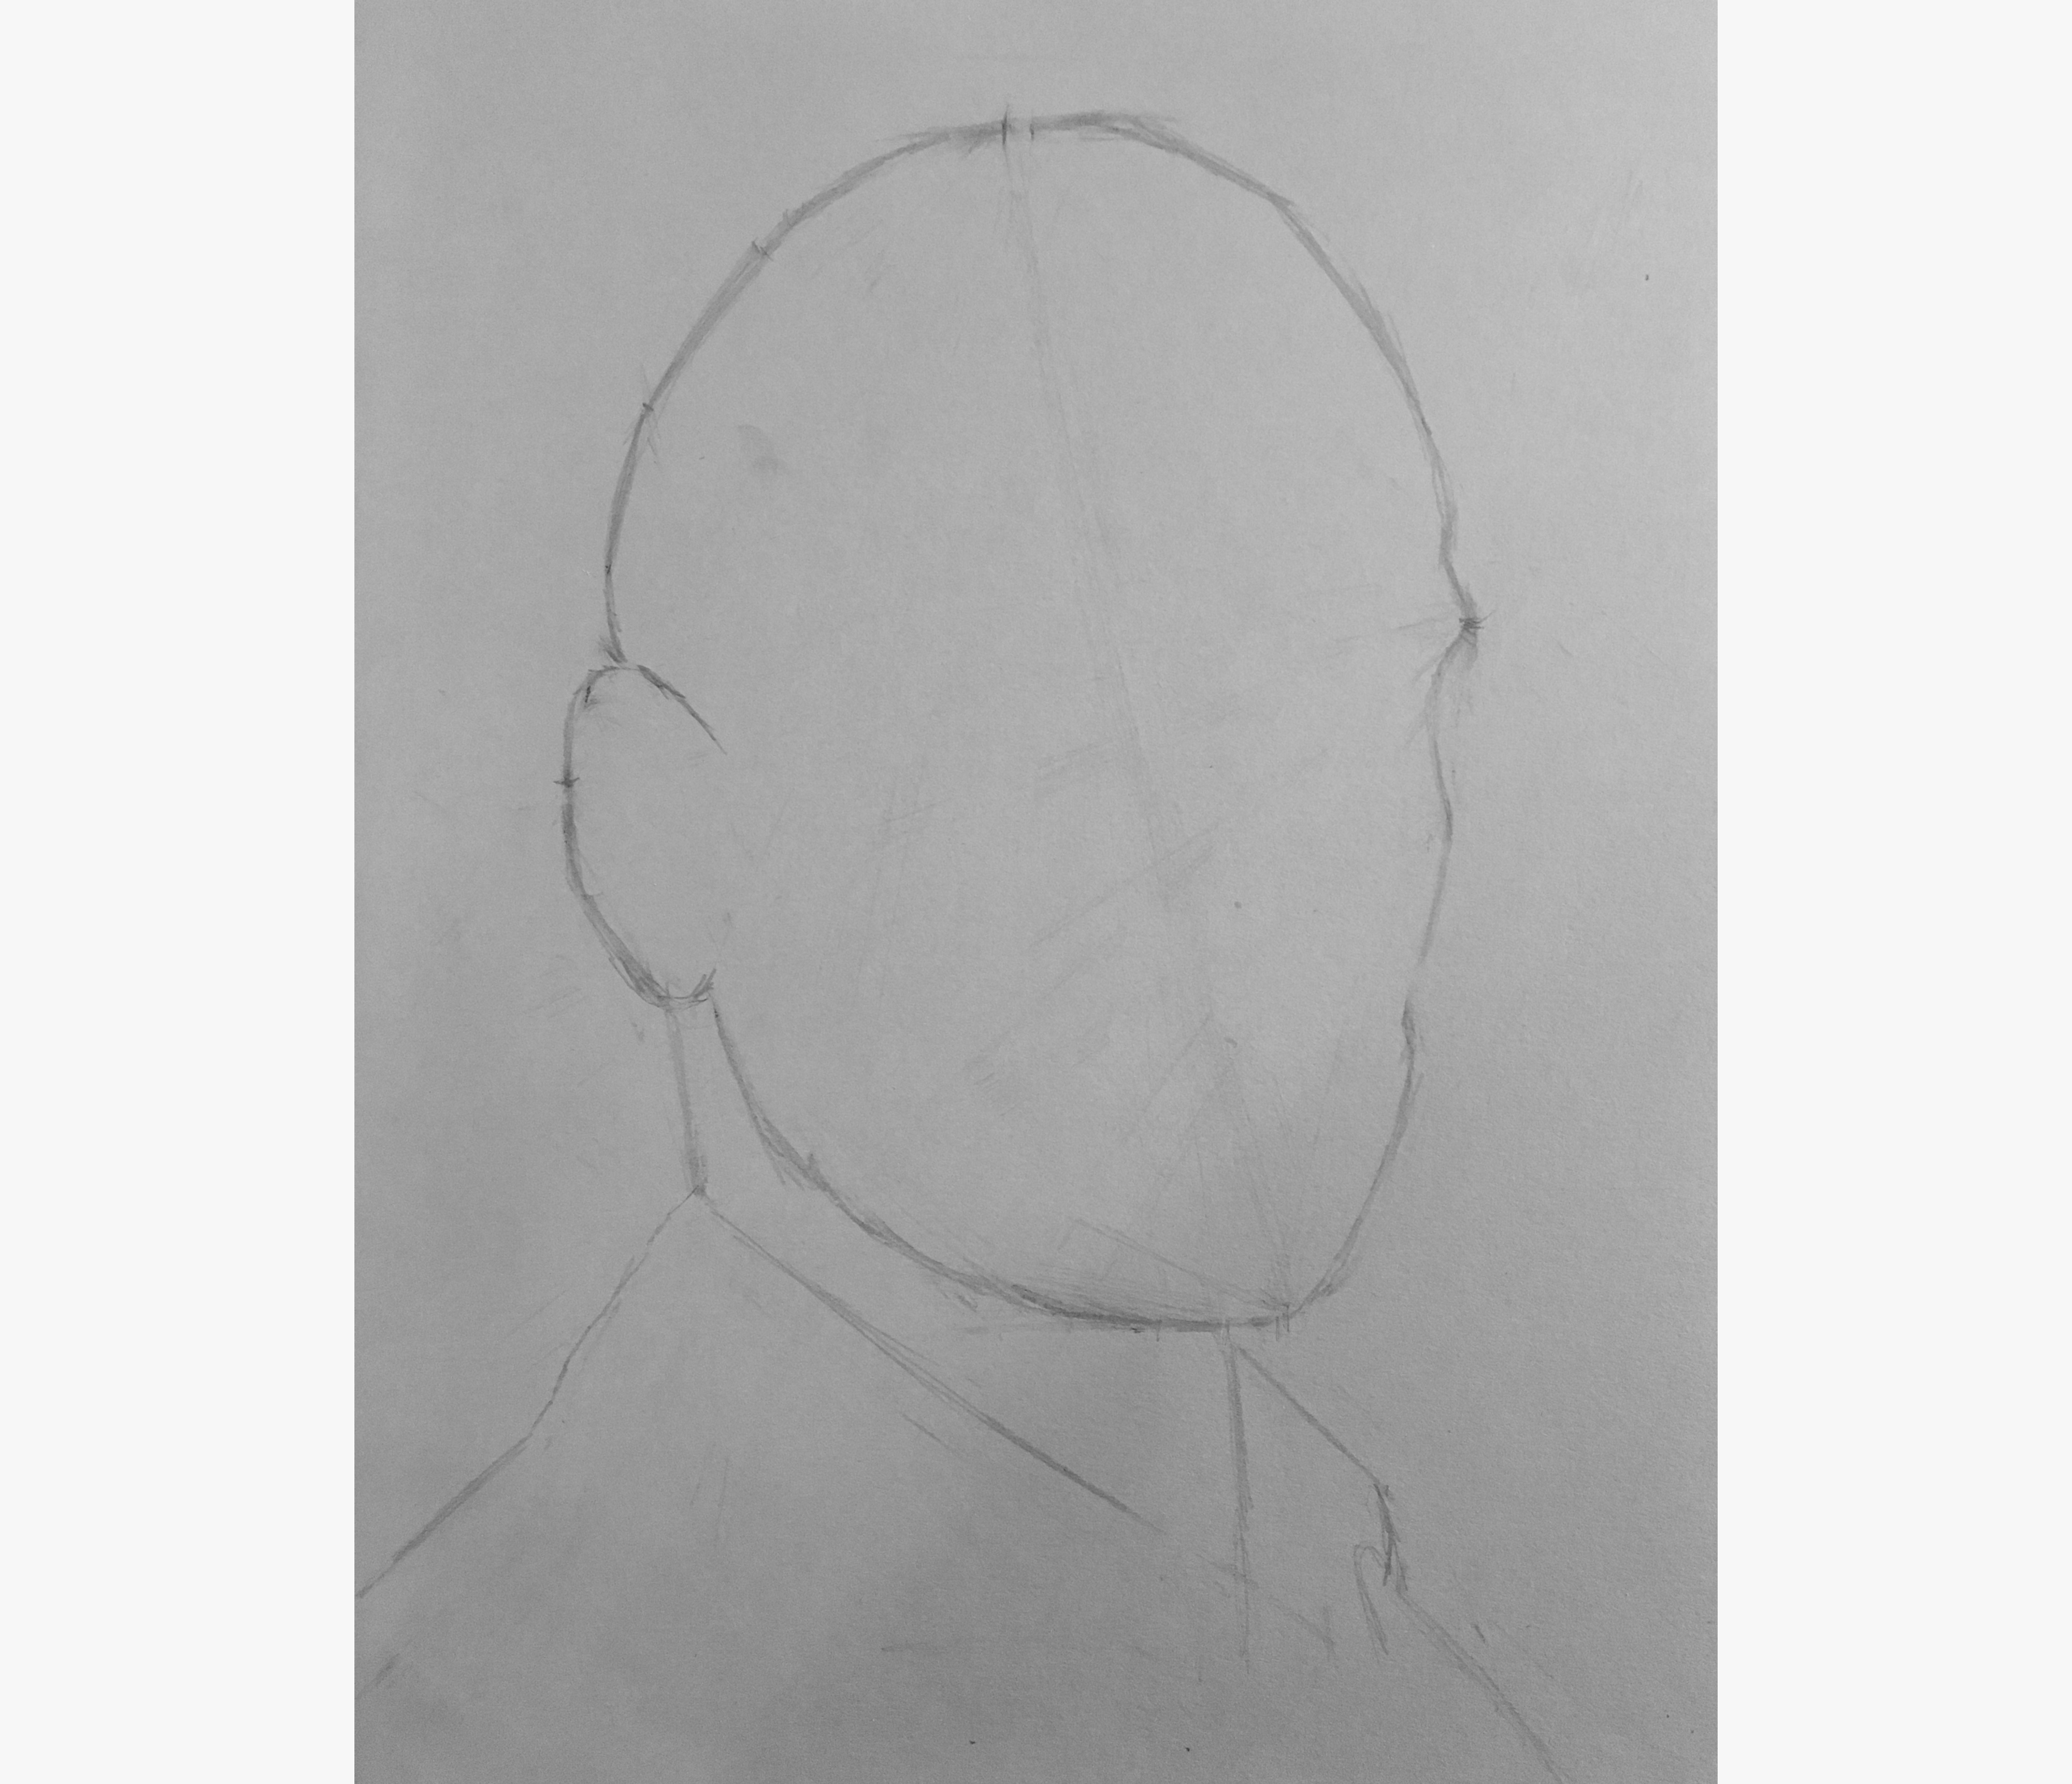
The head was now looking pretty good, but the neck and shoulders needed a few adjustments. I retriangulated, and adjusted the collar upwards.
That?s it for today
Getting to this point took me 2.5 hours, which was split between watching the video course and drawing my Derren portrait.
So far, the portrait doesn?t look like much, but I still learned a bunch today. I particularly like the triangulation technique, which makes drawing much more procedural and mathematical (a.k.a. easier for me).
Tomorrow, I?ll continue following the course, and start drawing in the facial features.
Today, I spent another 2.5 hours watching the course and working on the portrait.
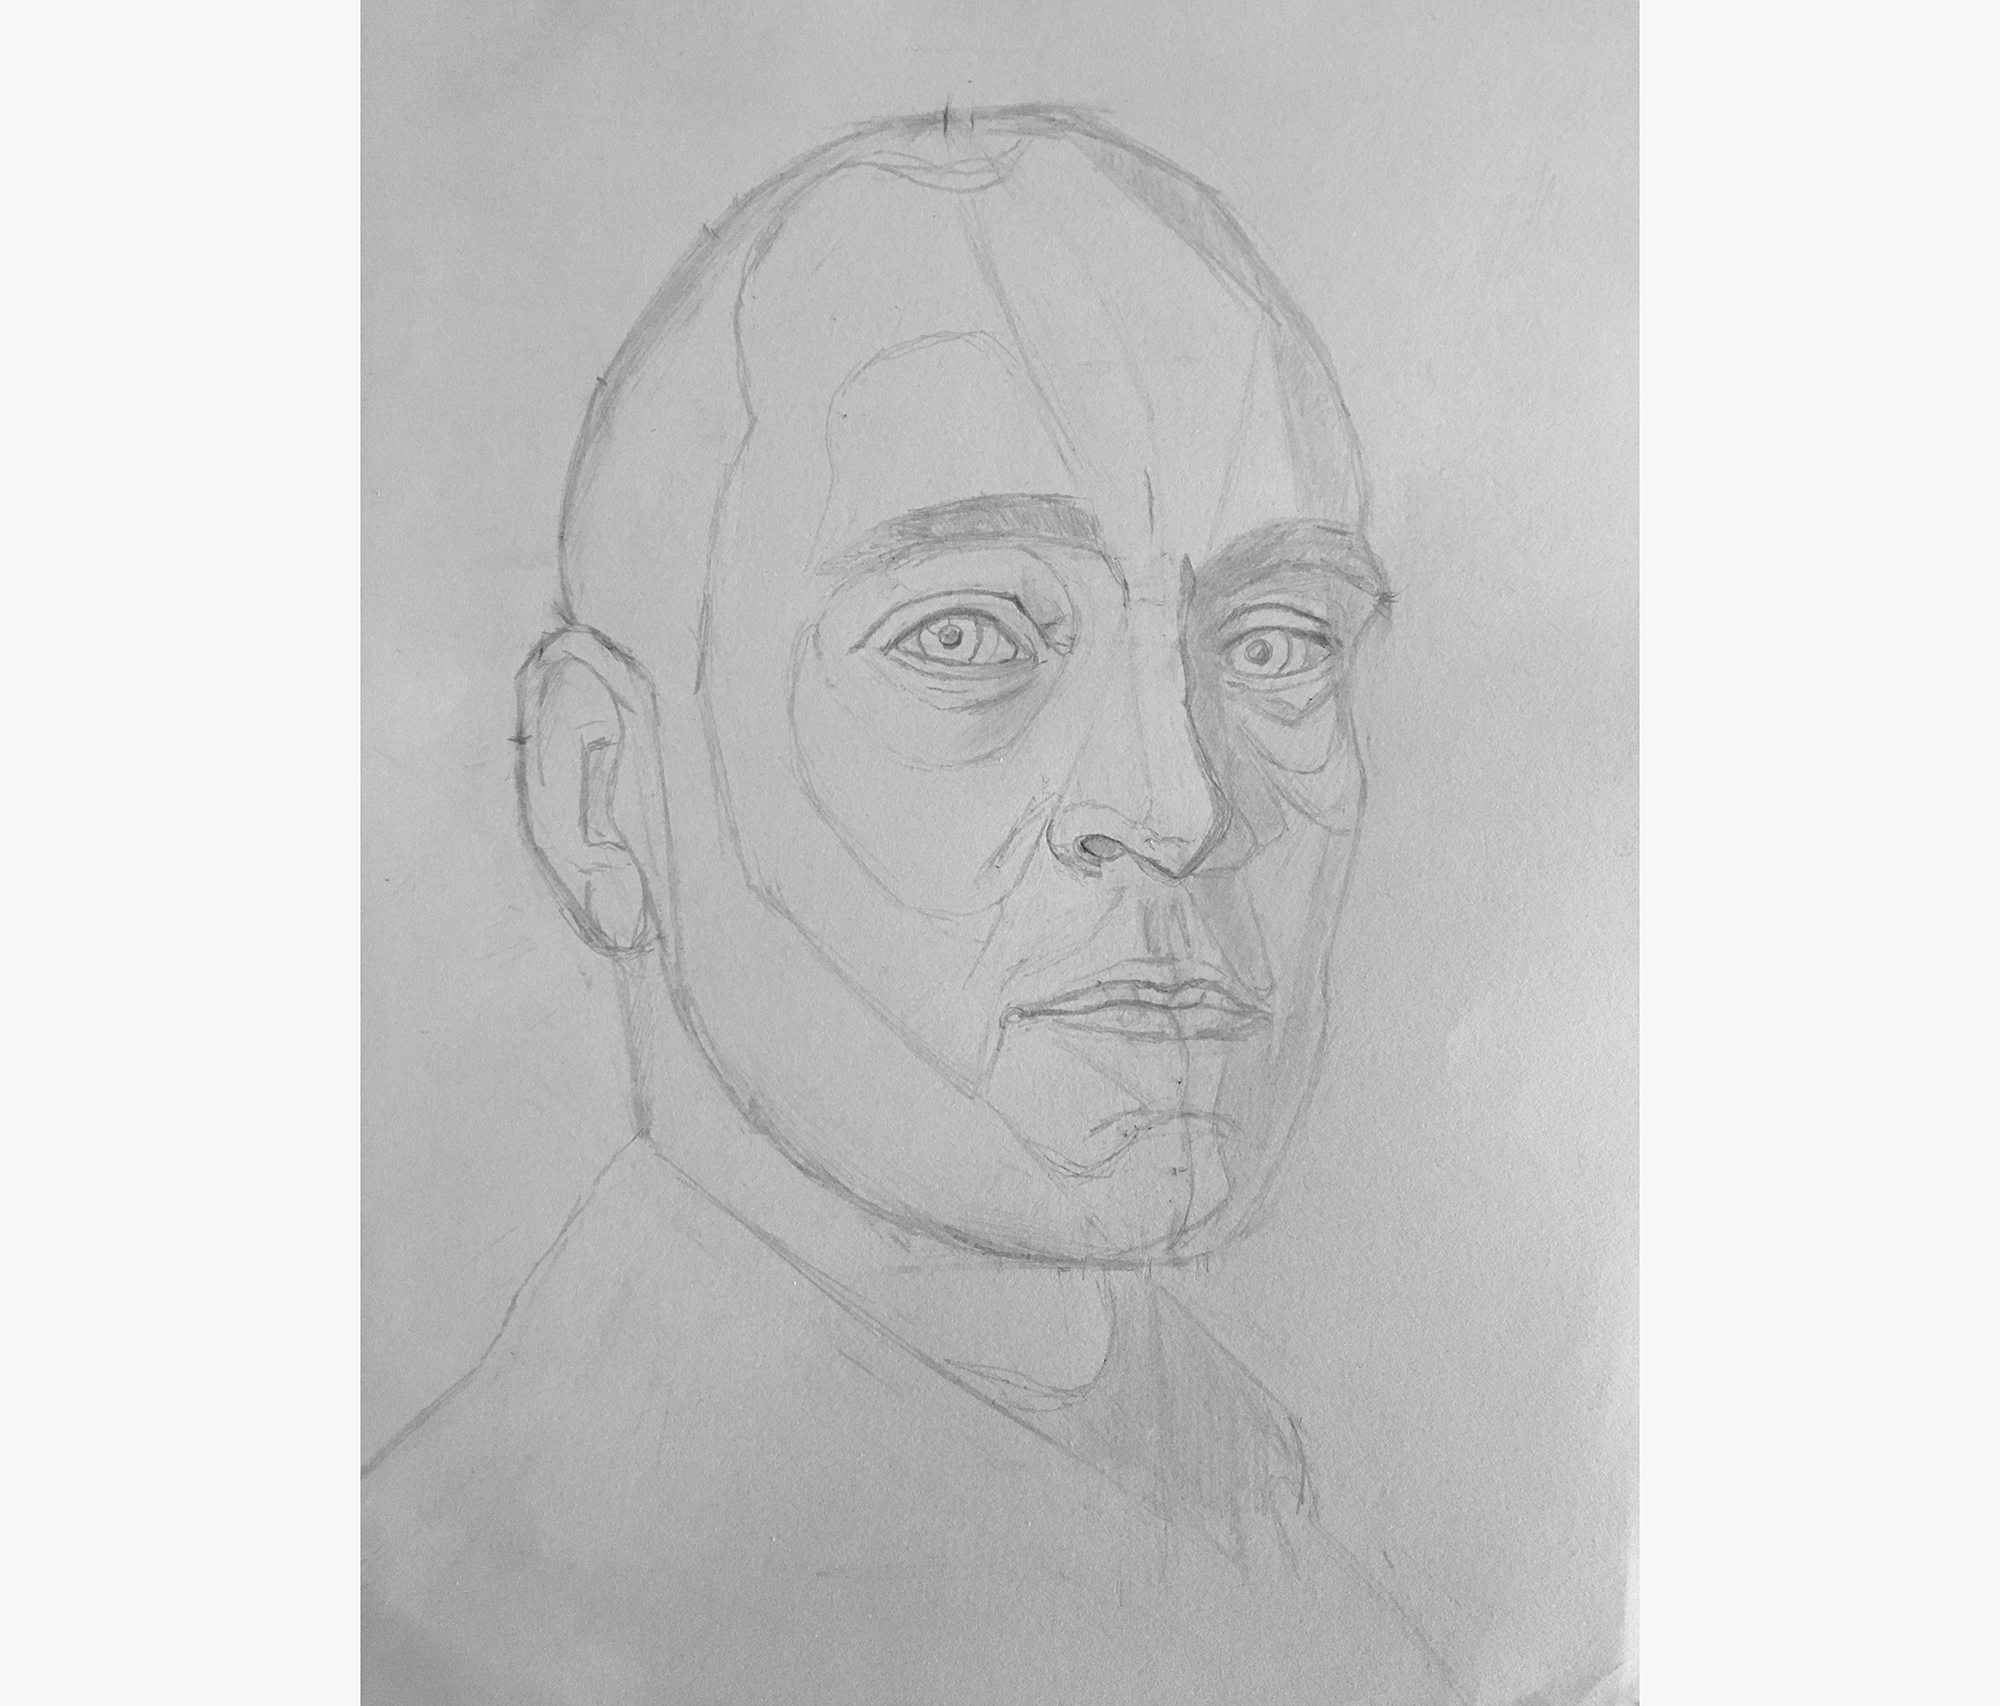
Today?s progress
Drawing in guides
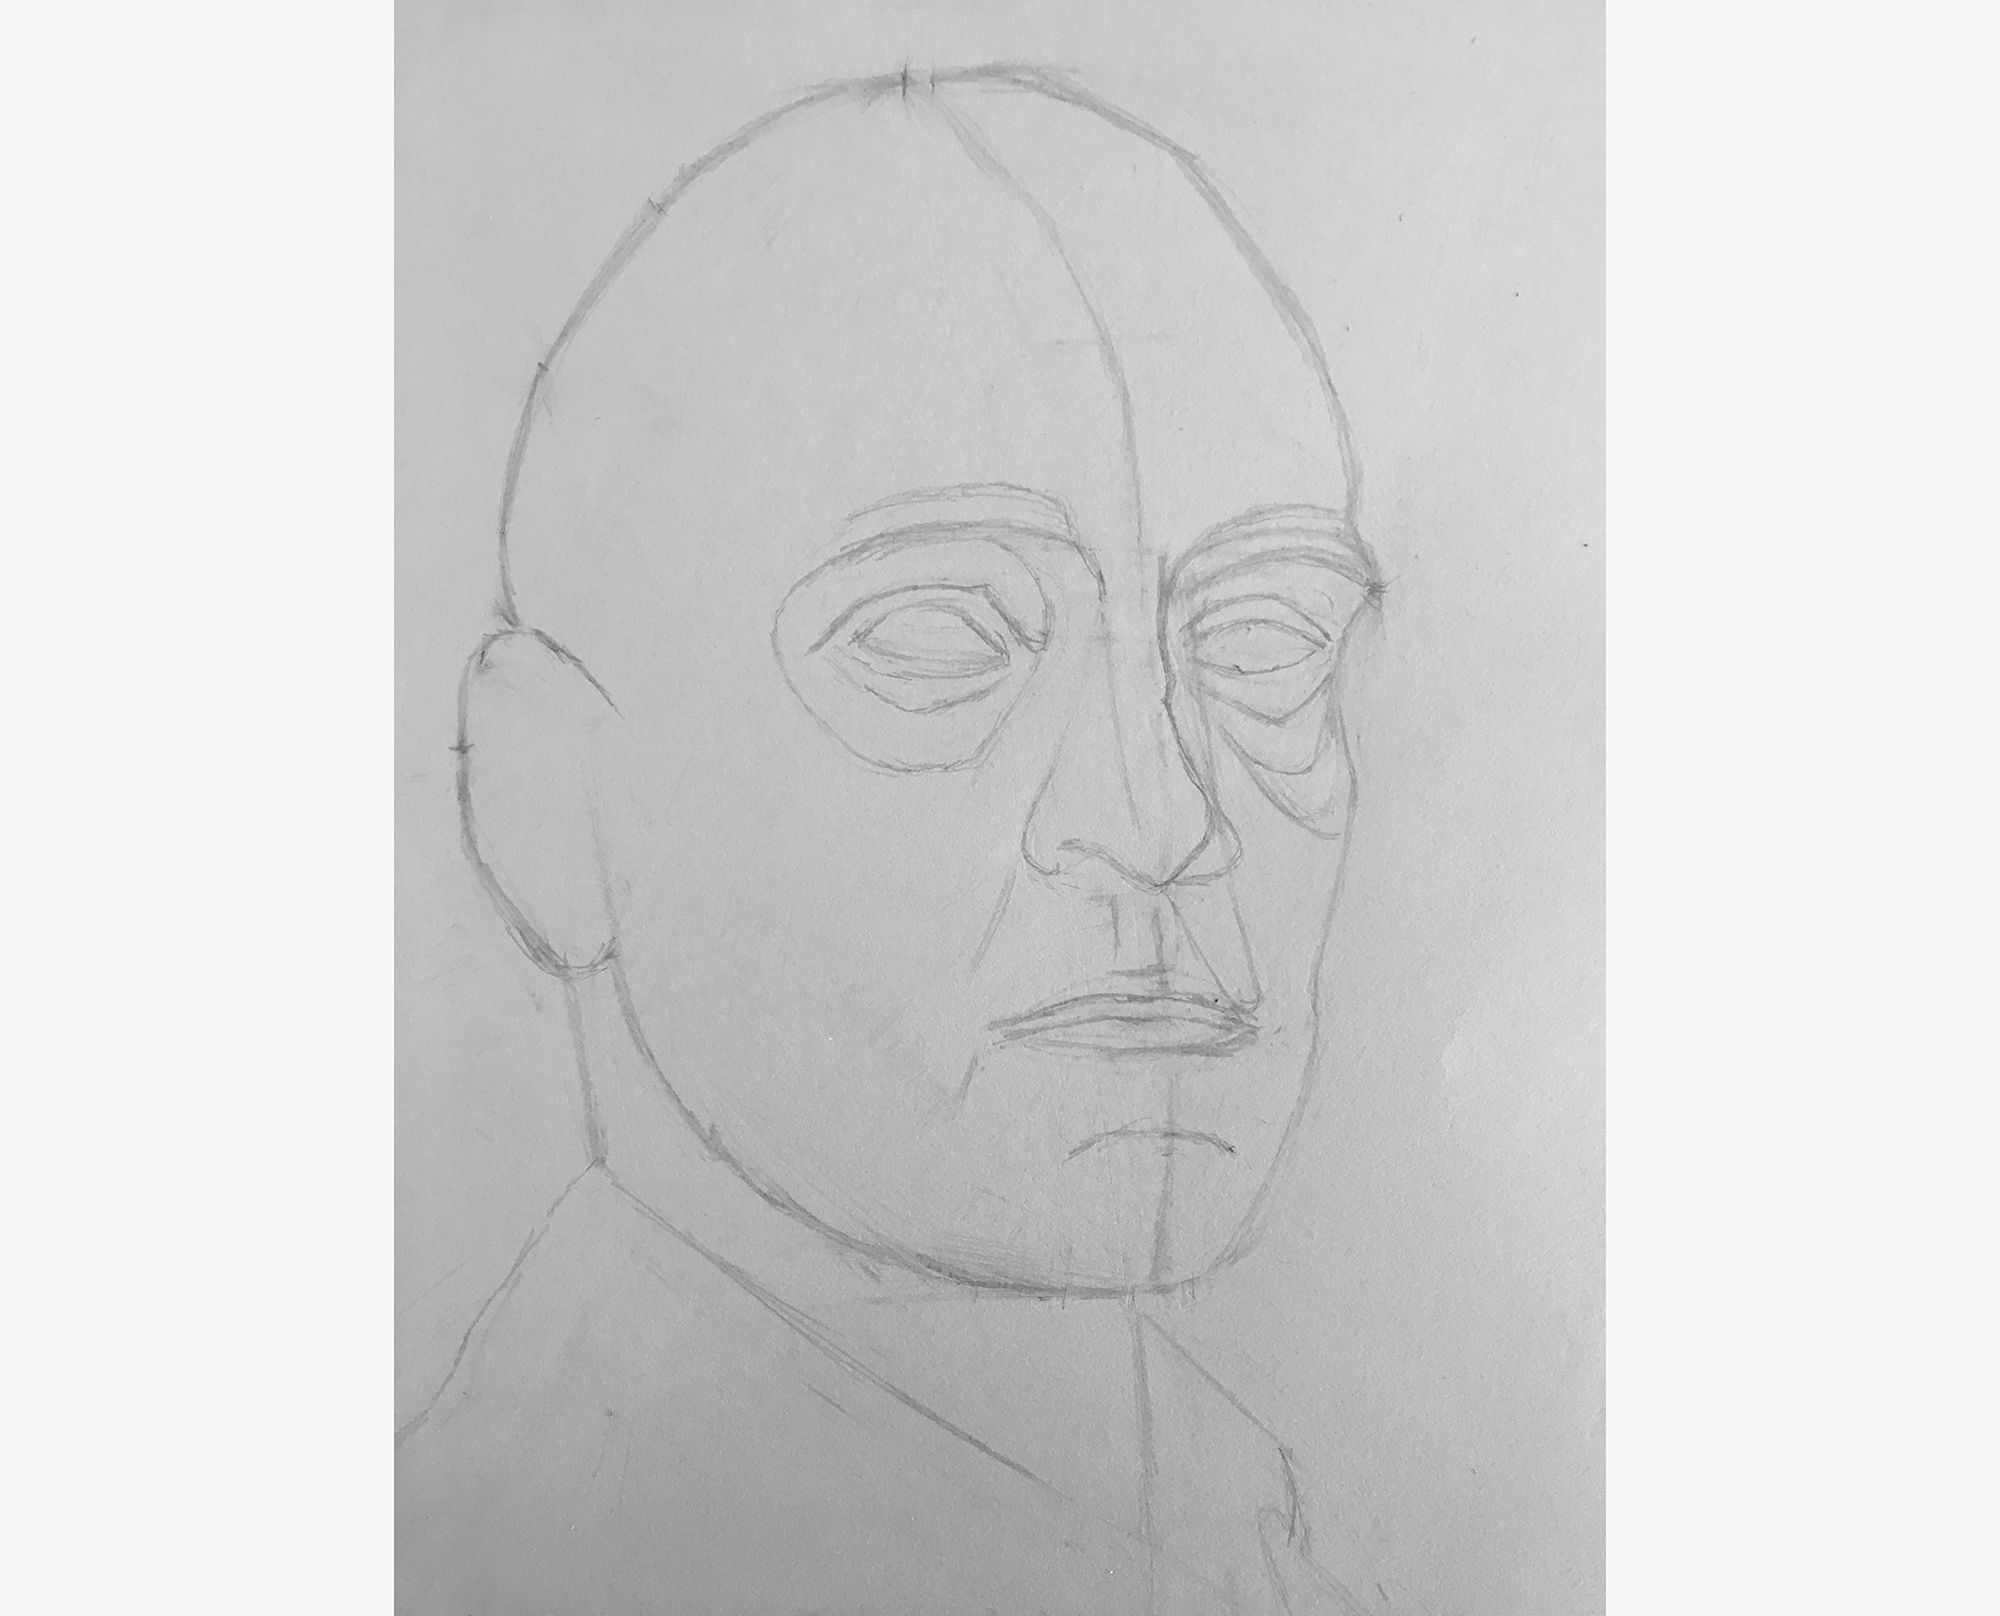
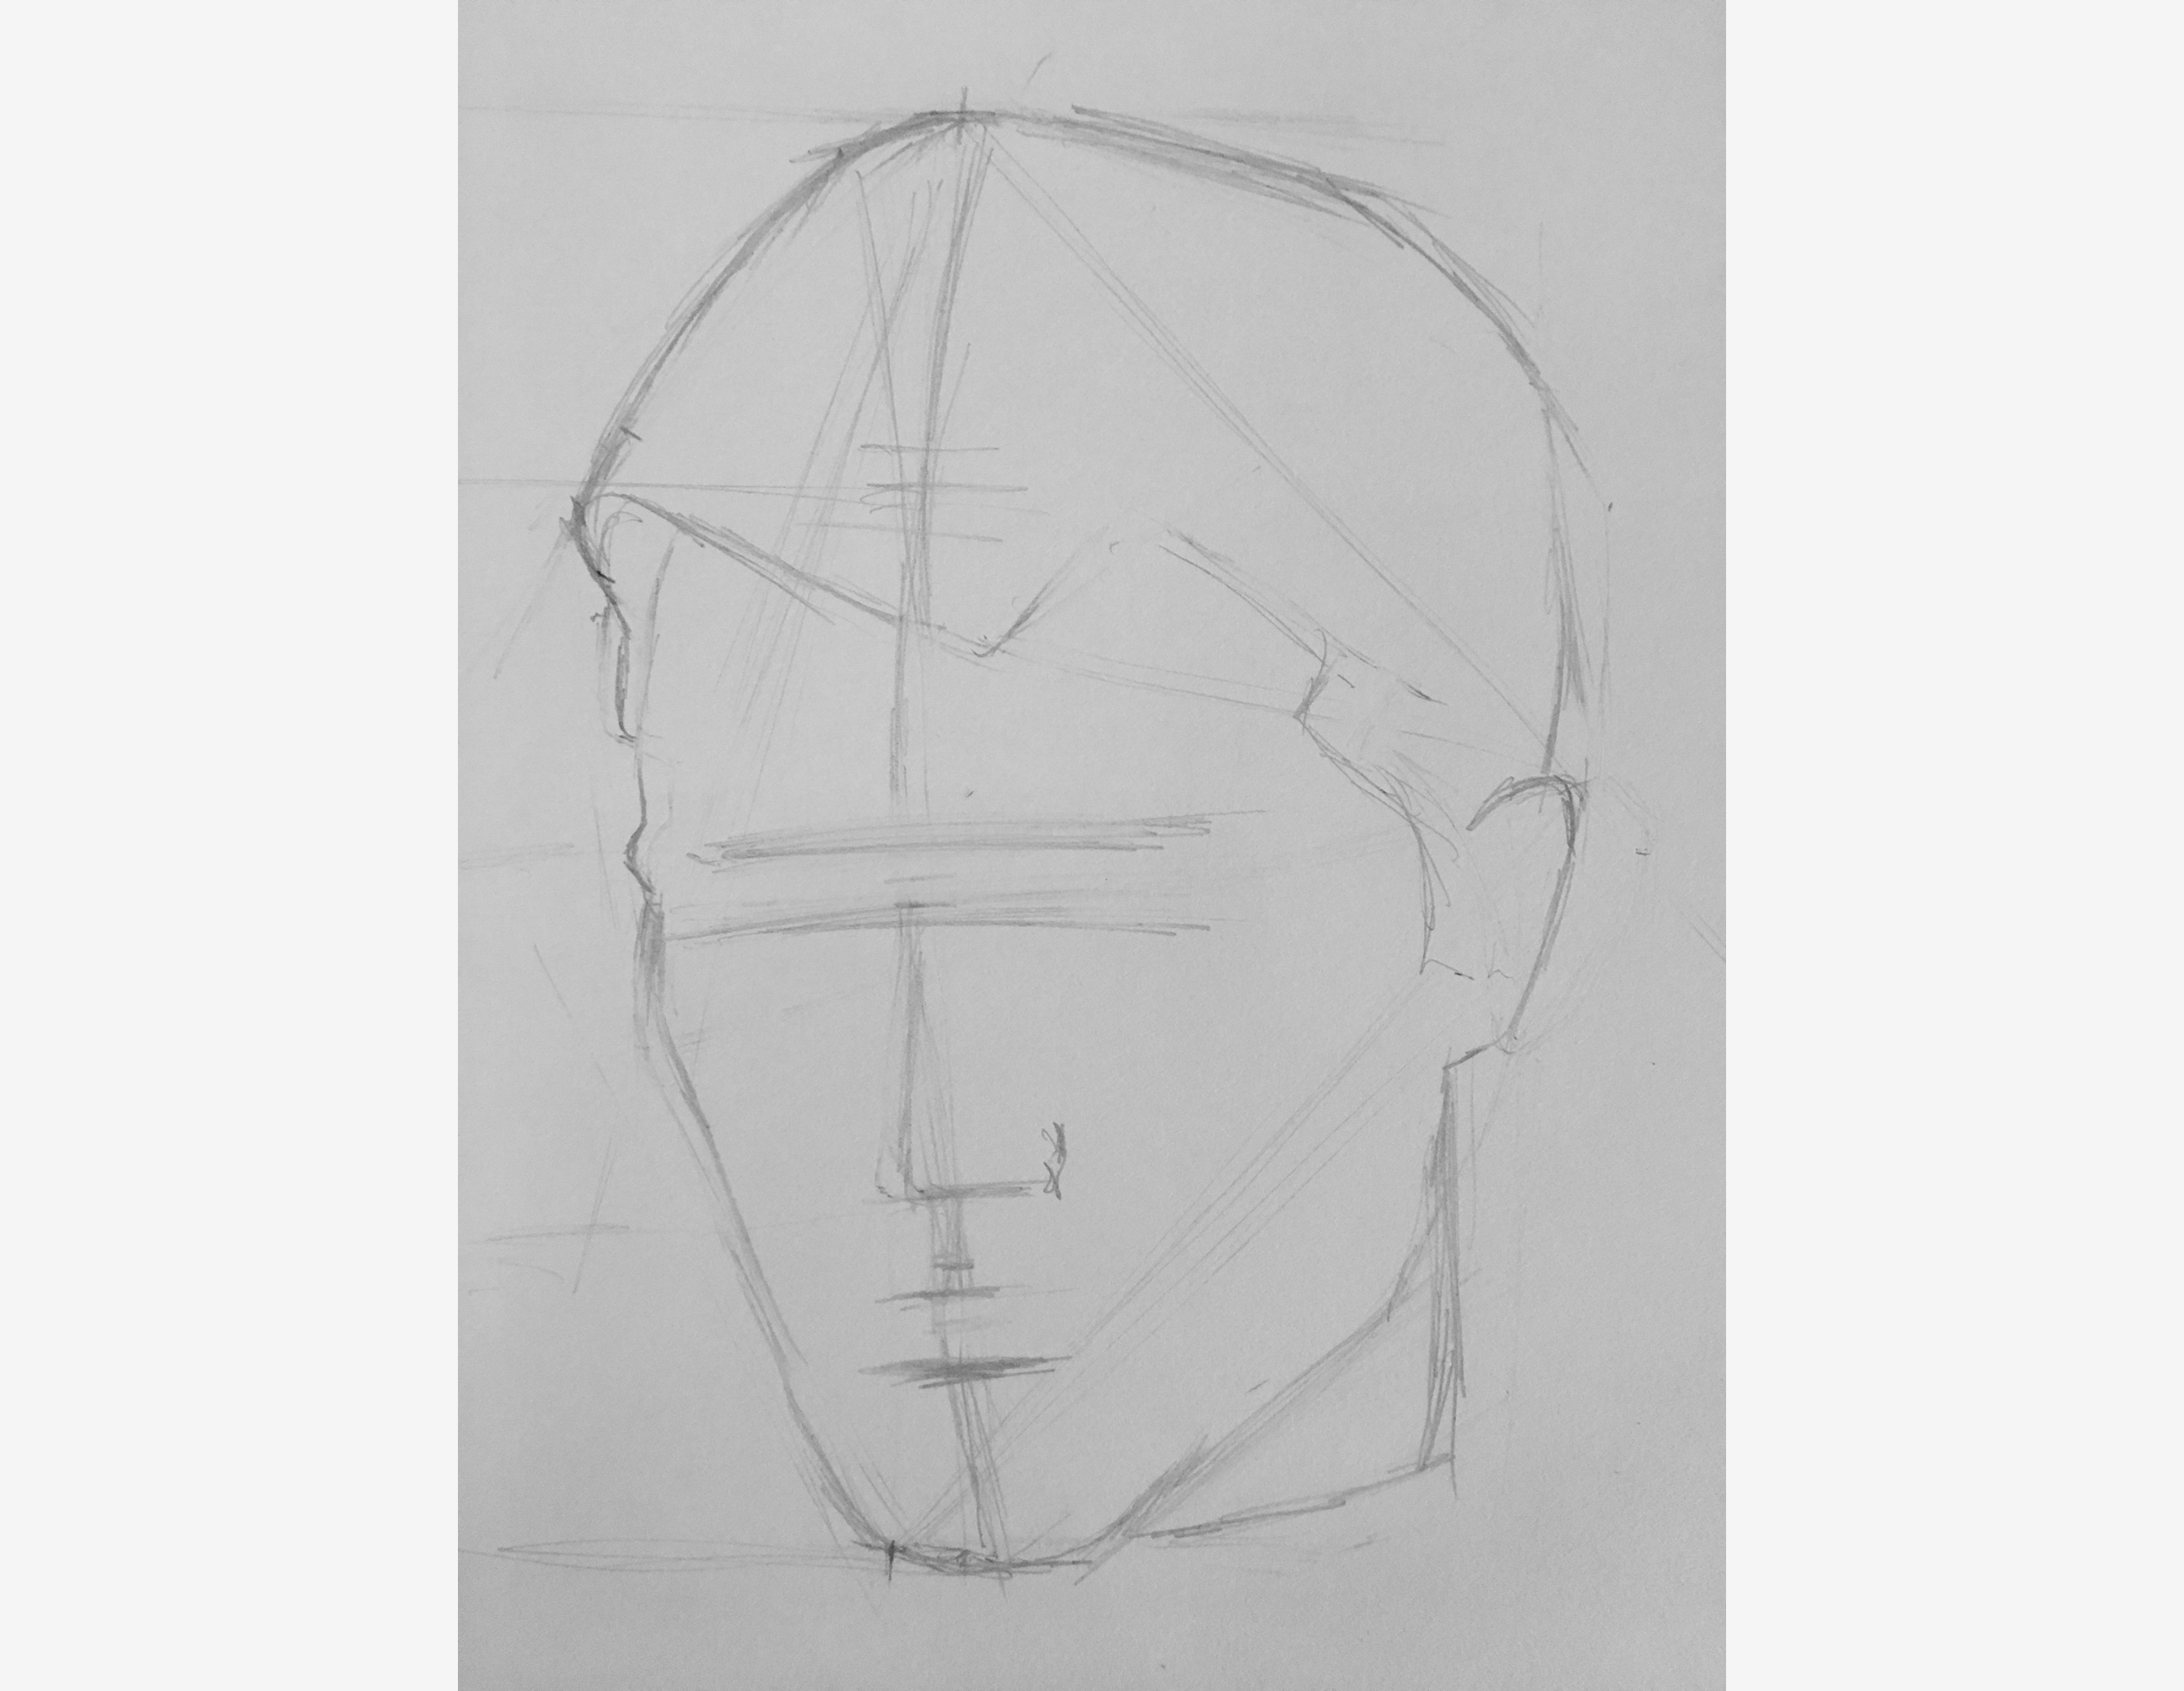
The first thing I did today was add construction lines to my drawing. These construction lines are designed to act as landmarks and help me eventually place the facial features.
First, I drew in the vertical center line, which will help me laterally place the features.
Then, I marked eye level, to start gauging the features? vertical placement.
I followed up with the levels of the brows, nose, and lips.
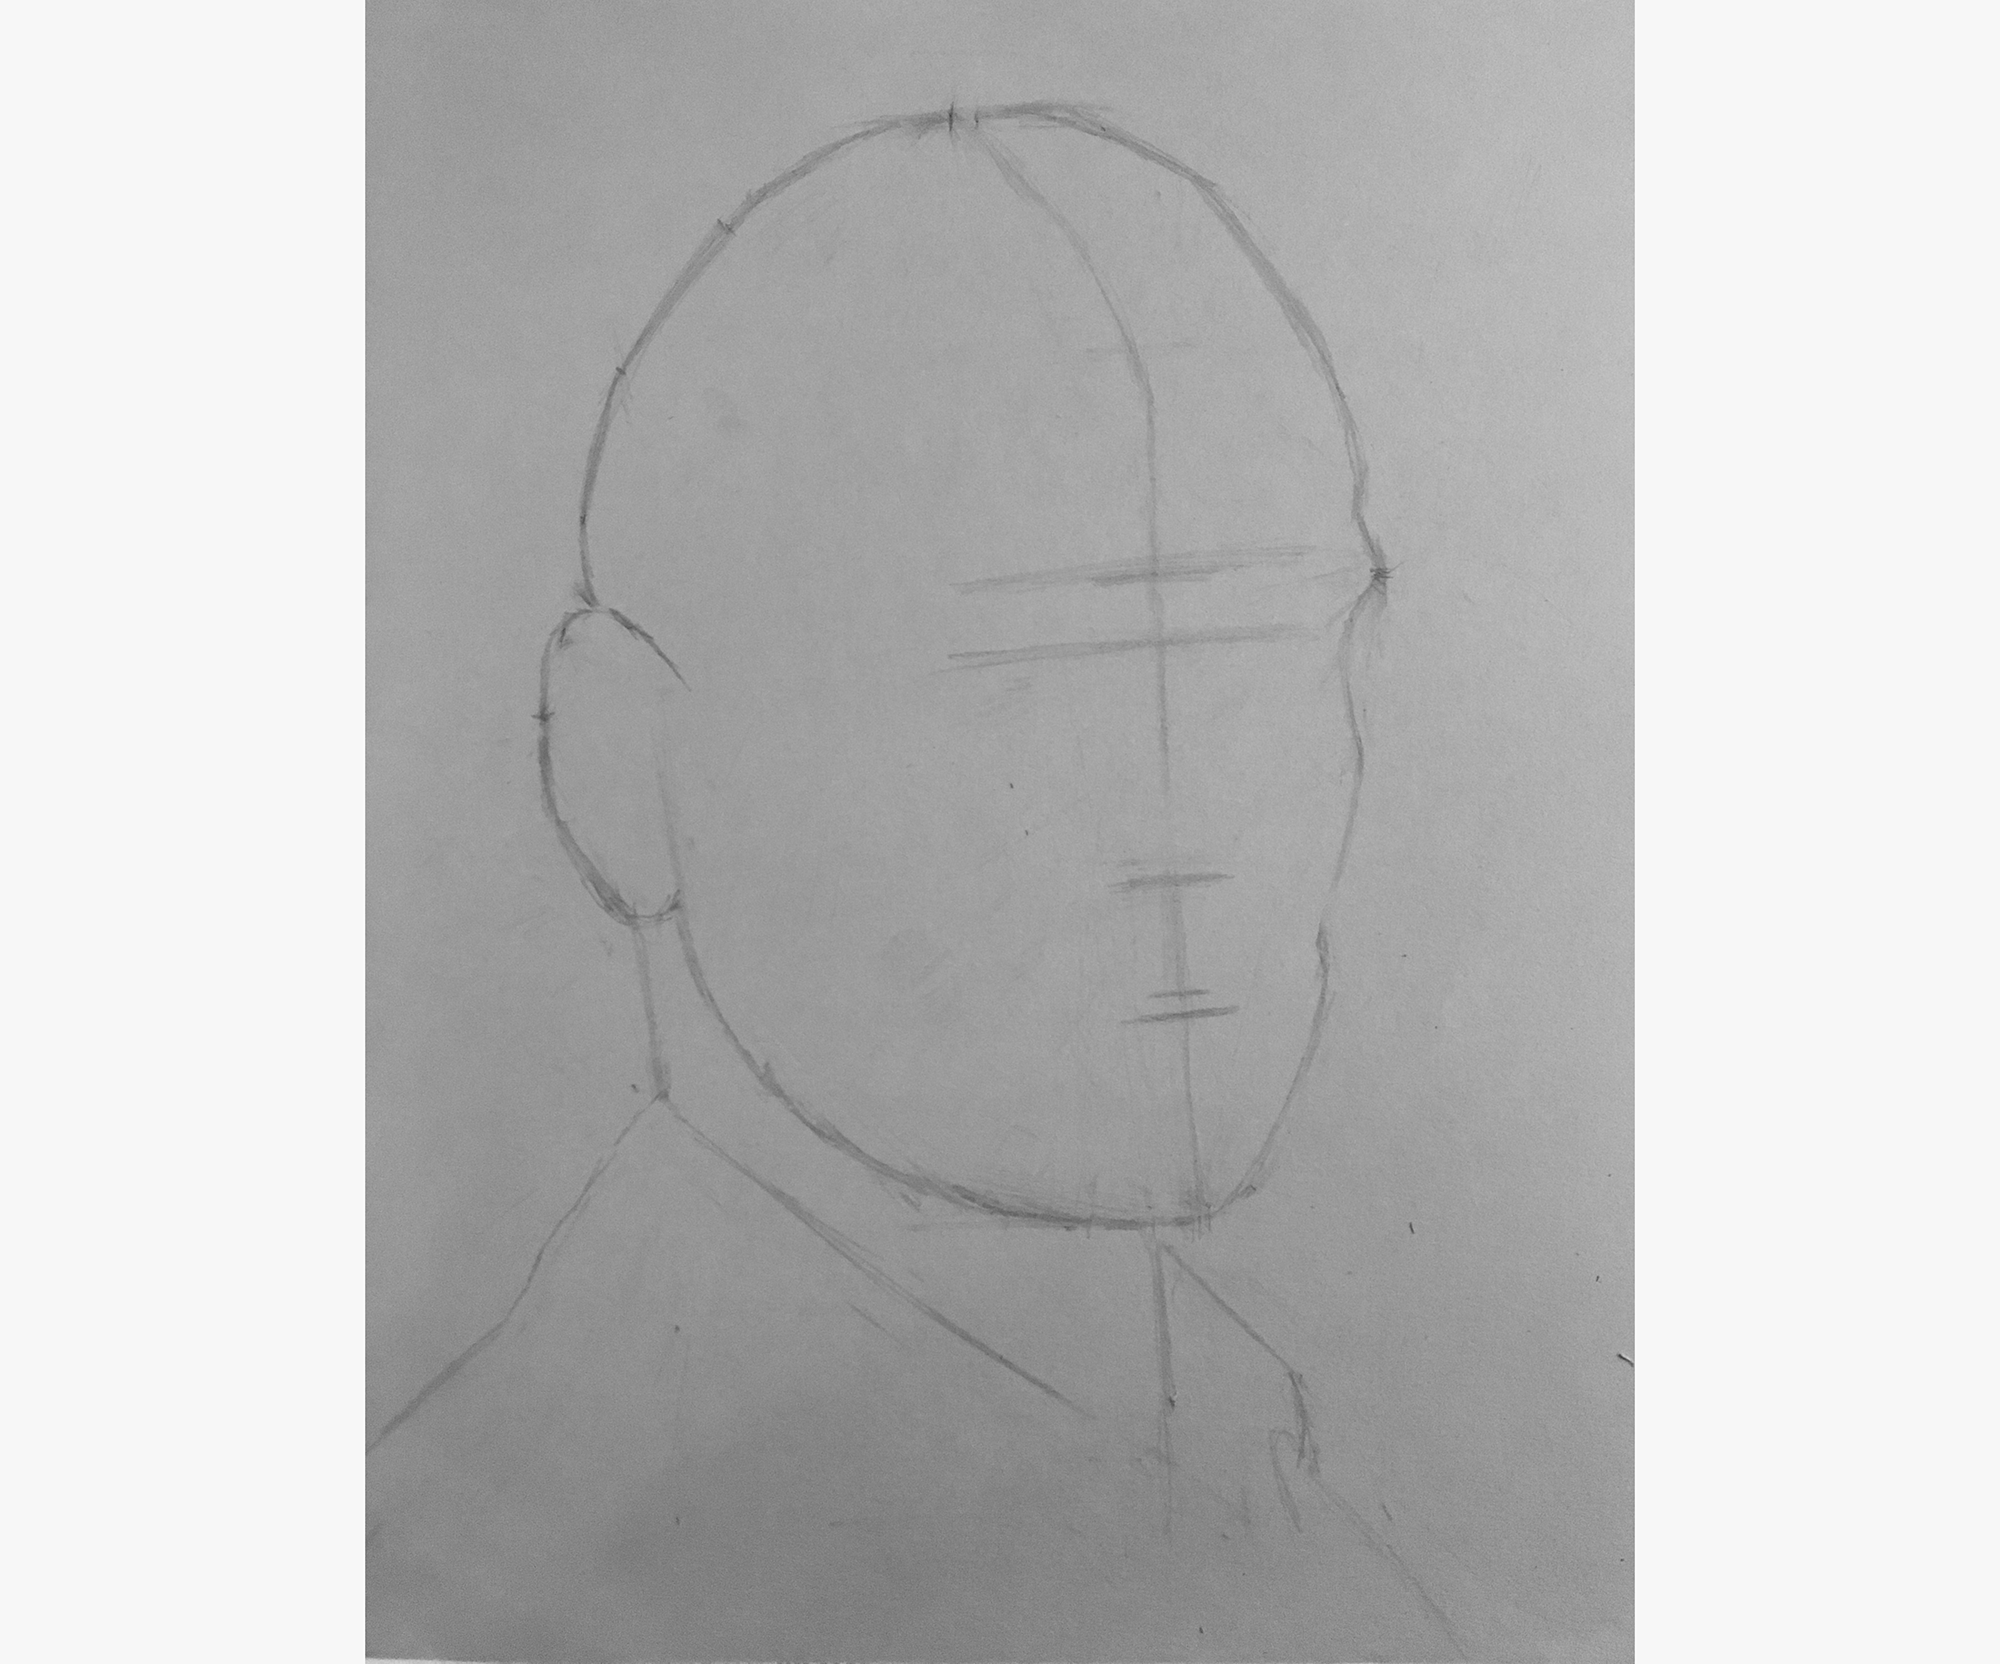
I made a bit of a mistake here. I drew the horizontal construction lines perpendicular to the center line (which seemed reasonable), but did not mimic the angle of the features in the actual drawing.
So, I sighted the correct angles, and adjusted the construction lines accordingly.
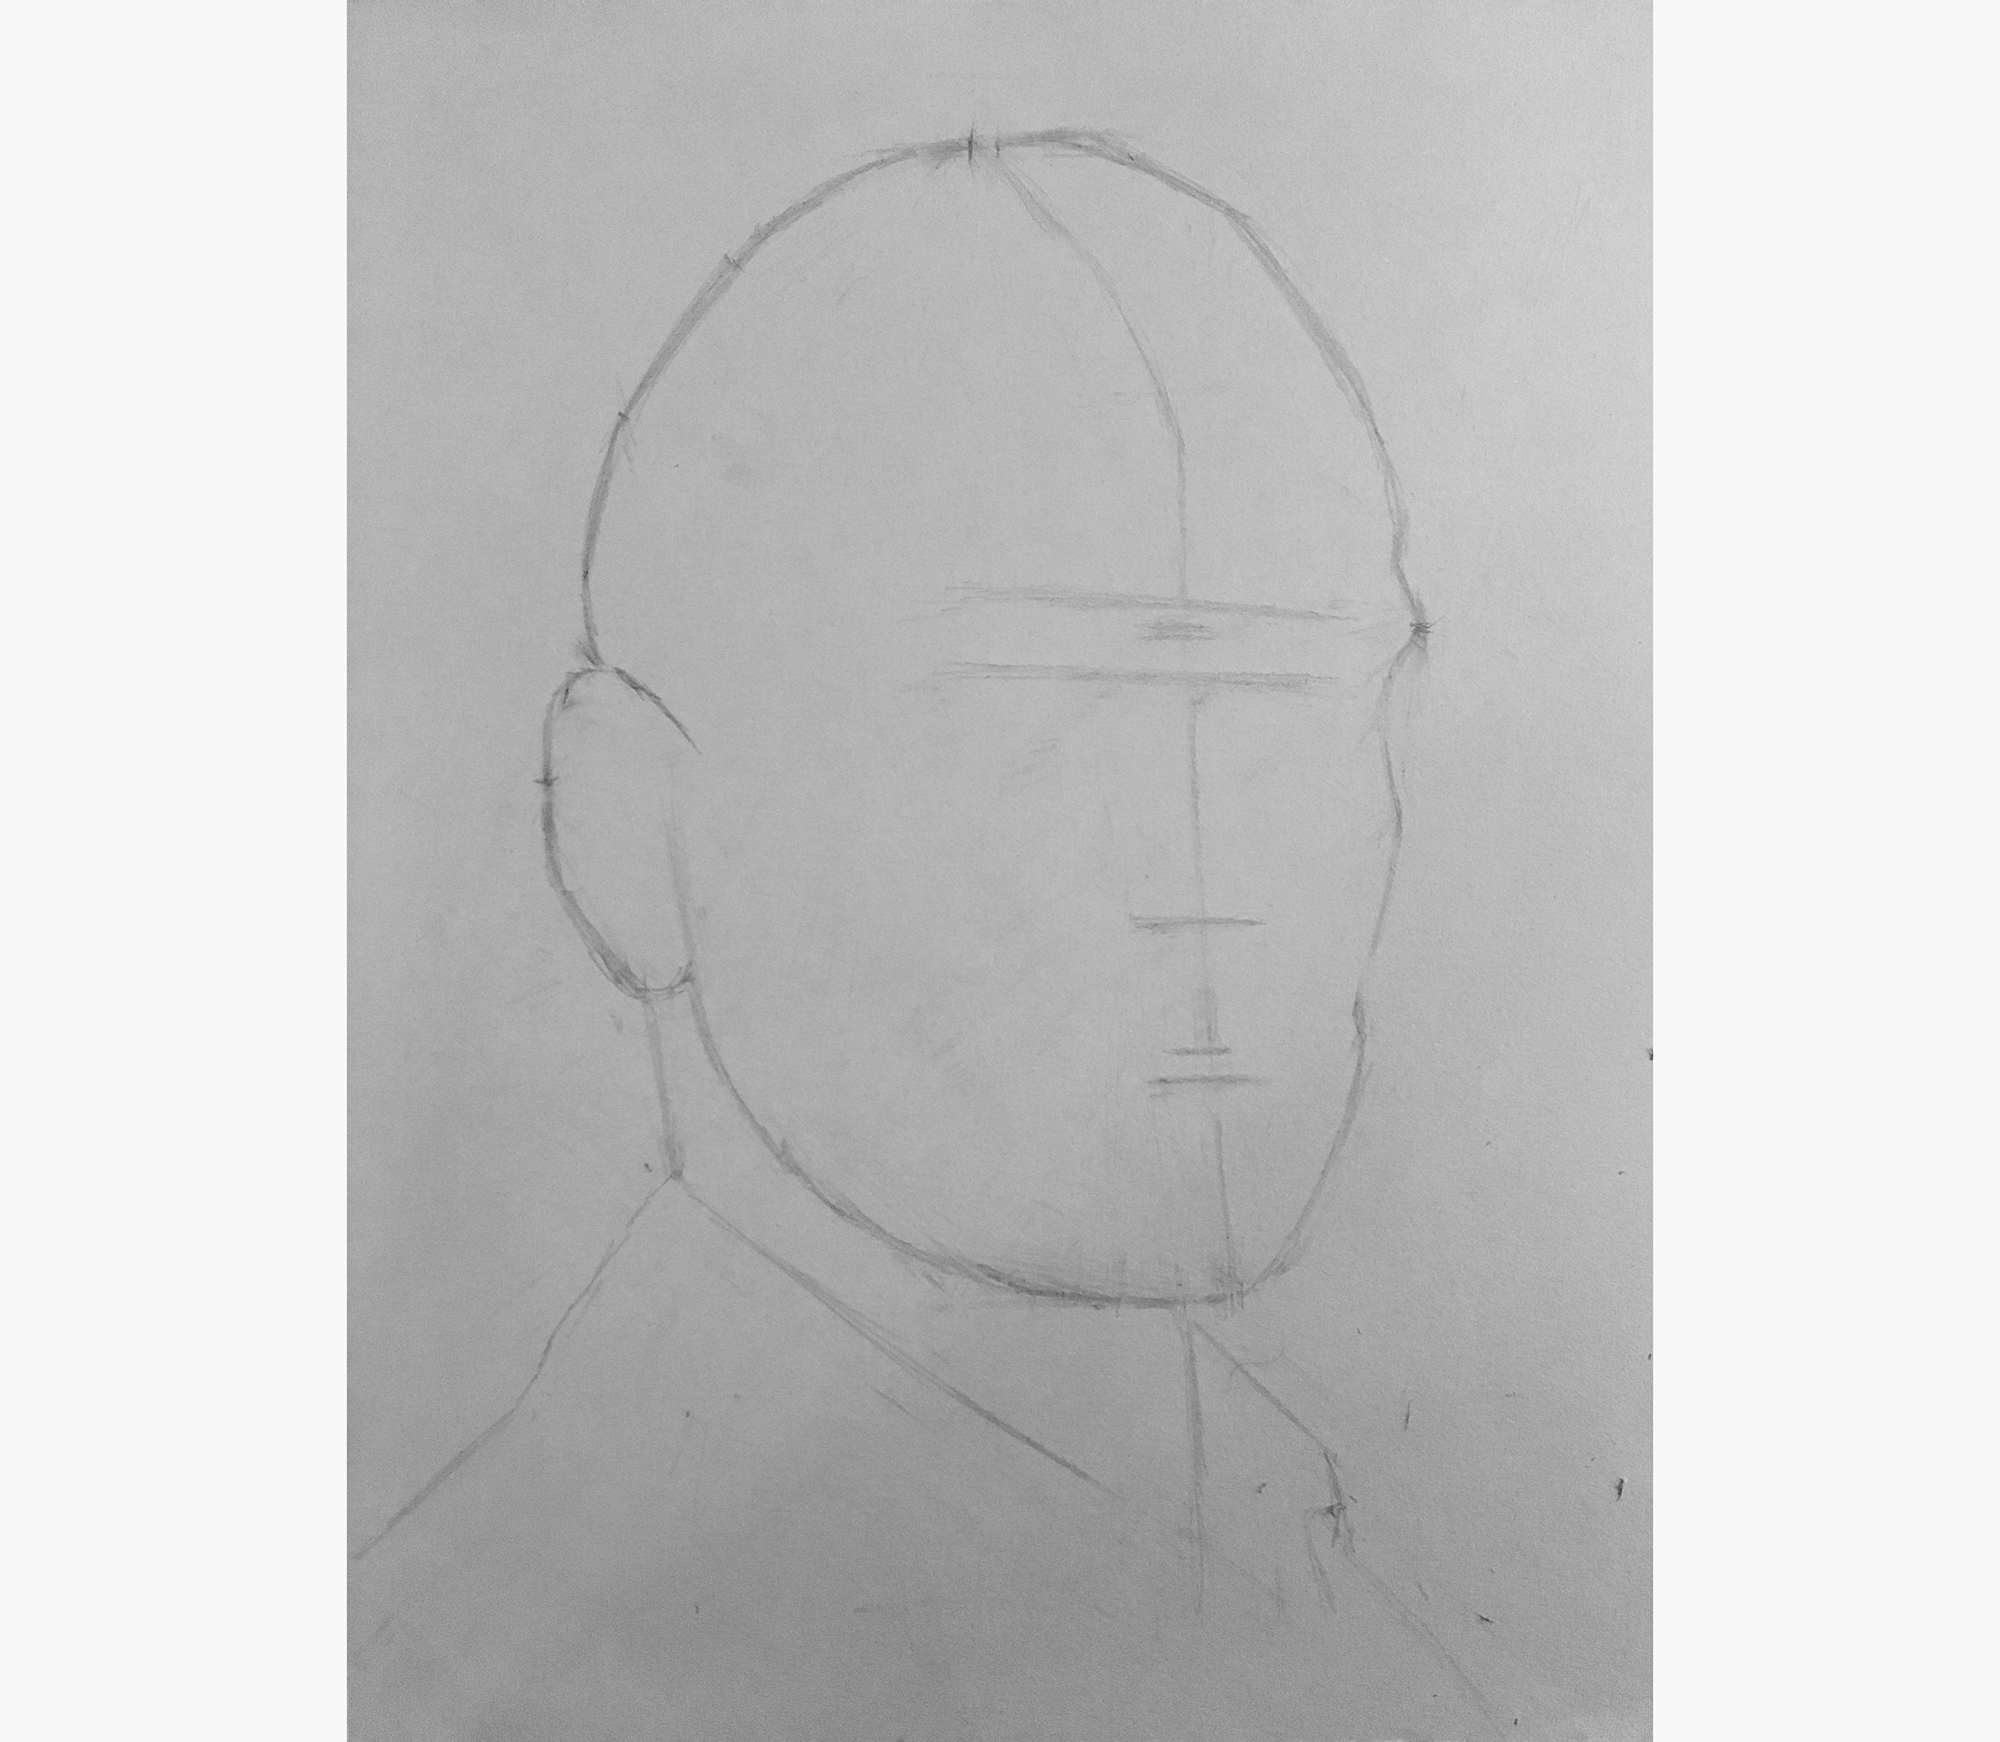
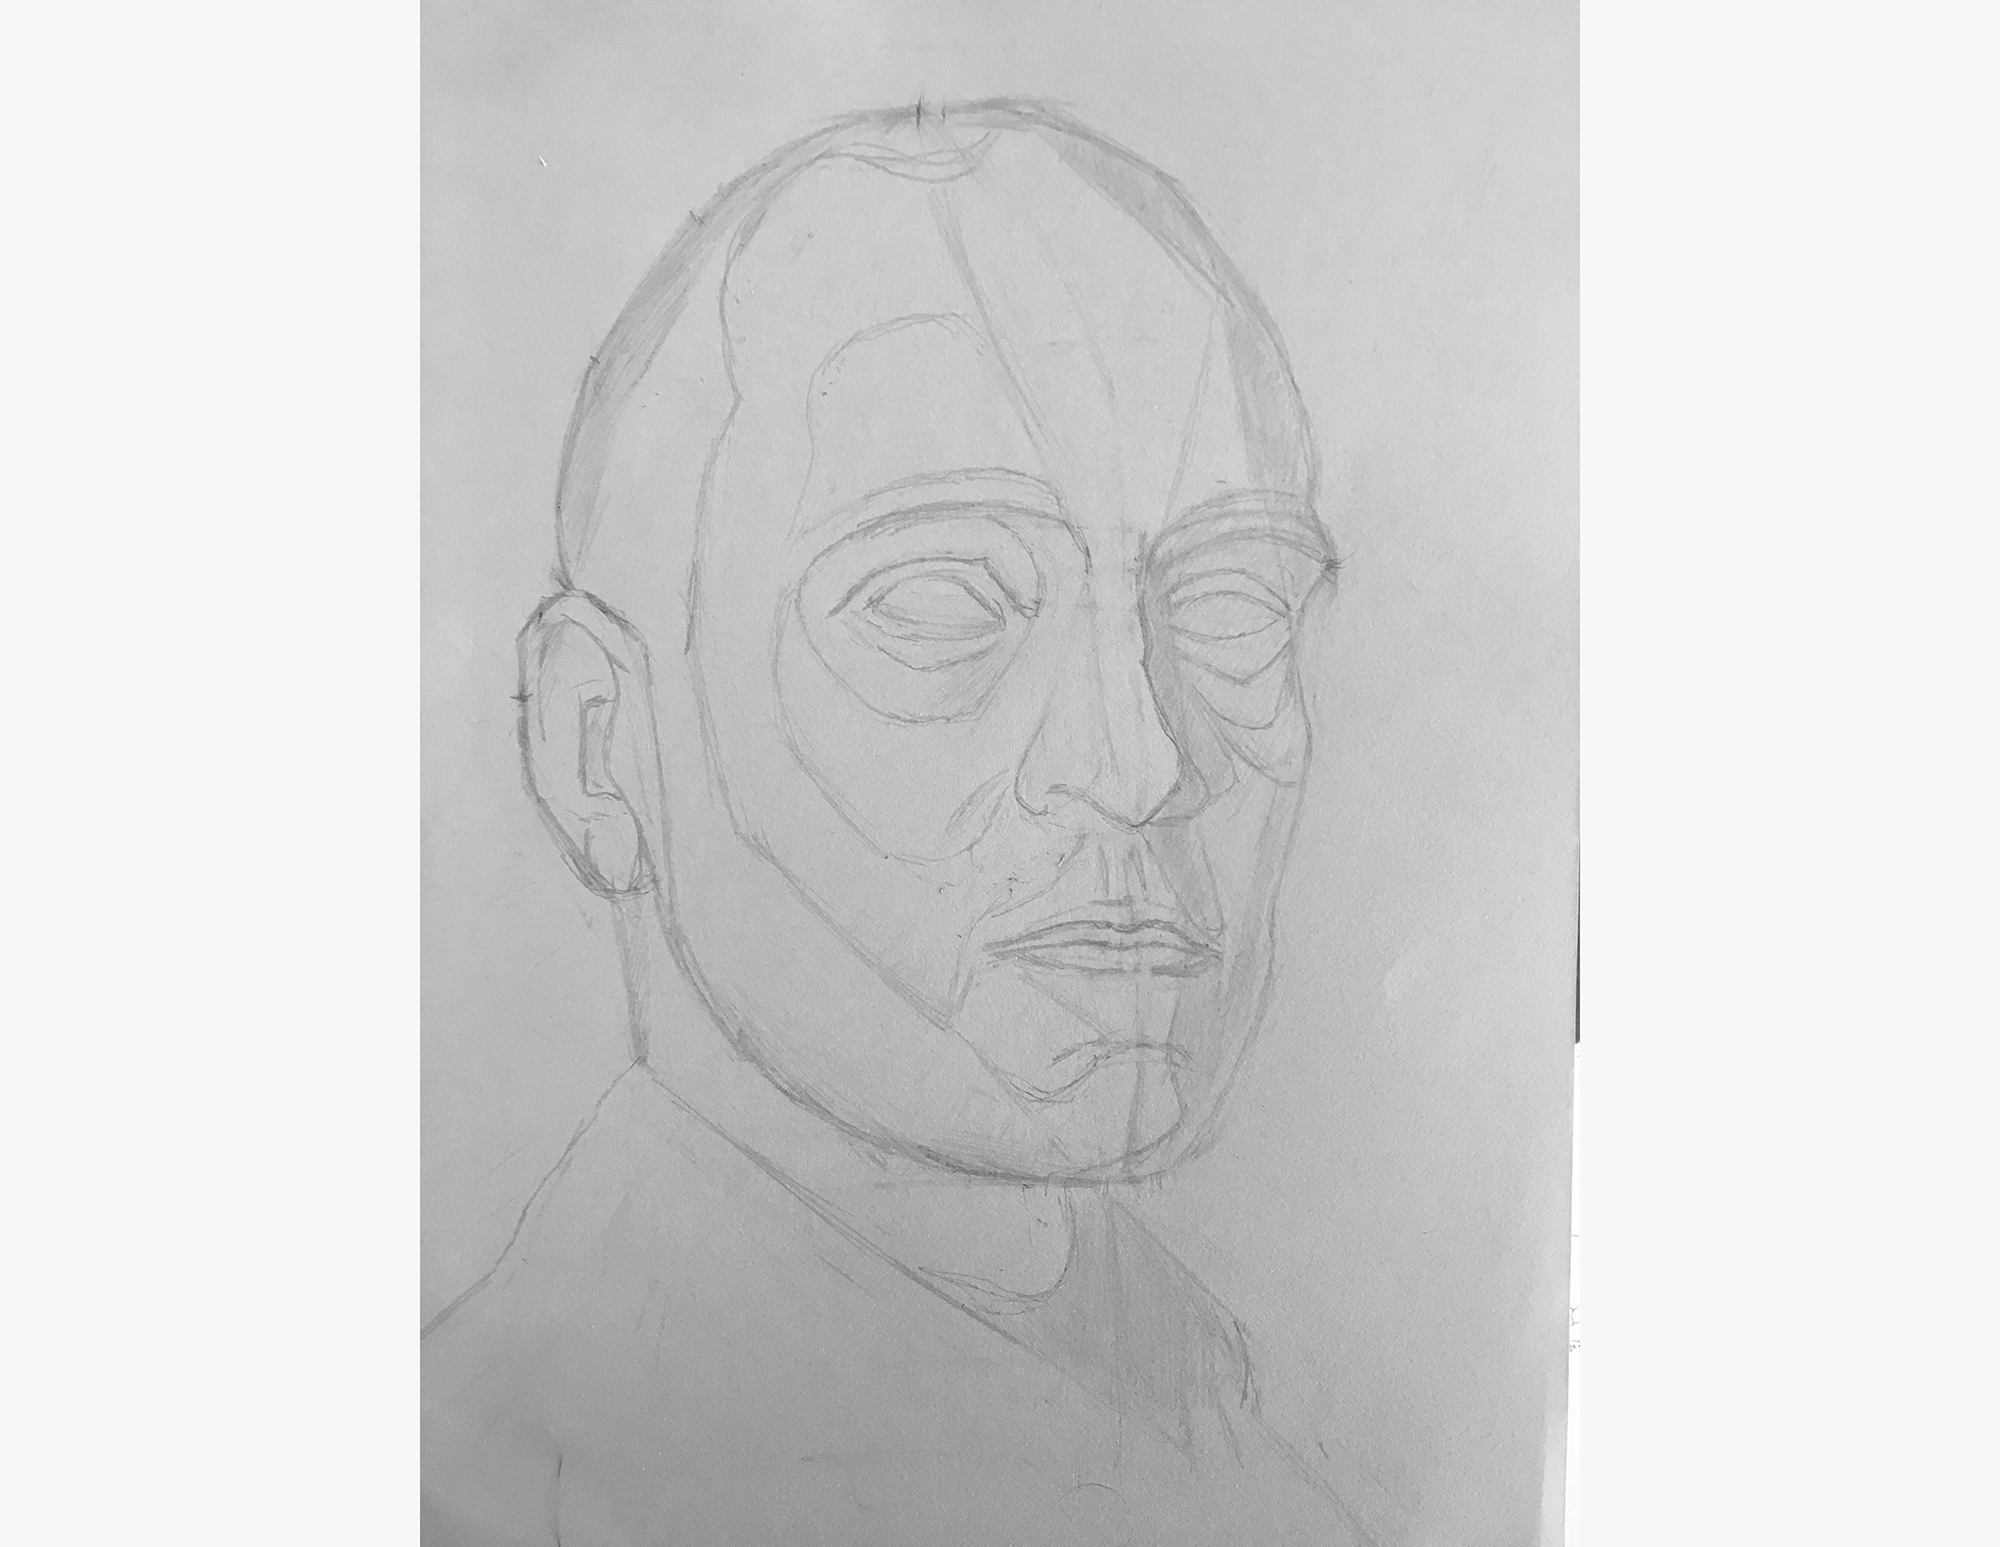
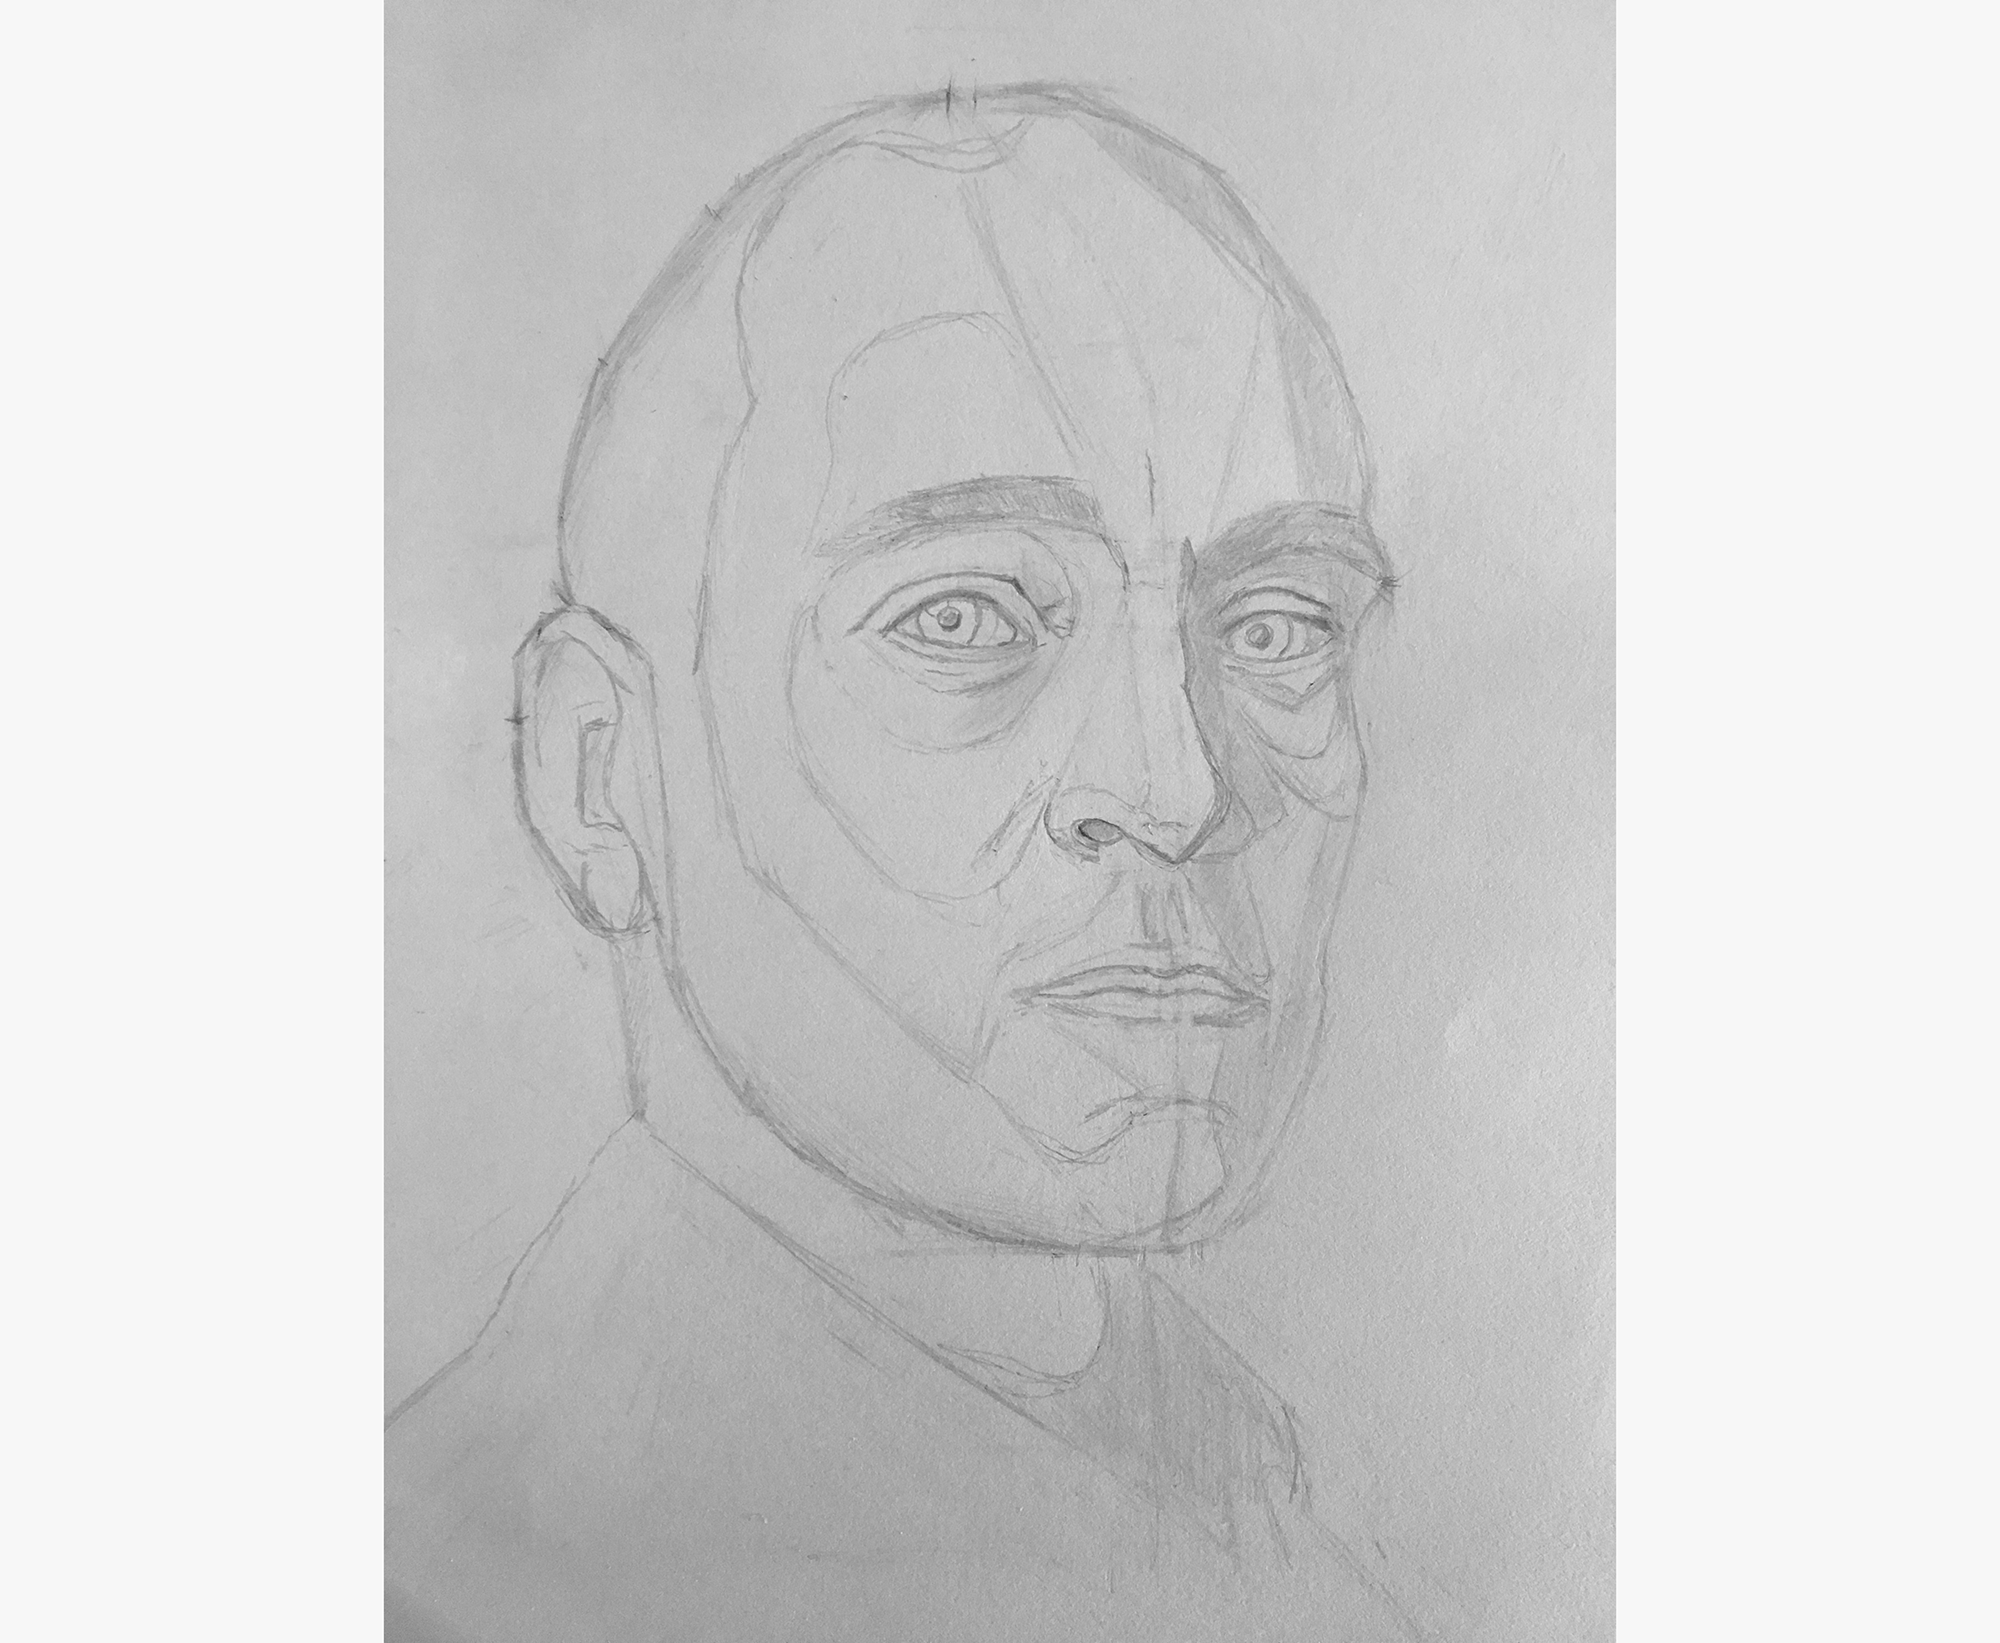
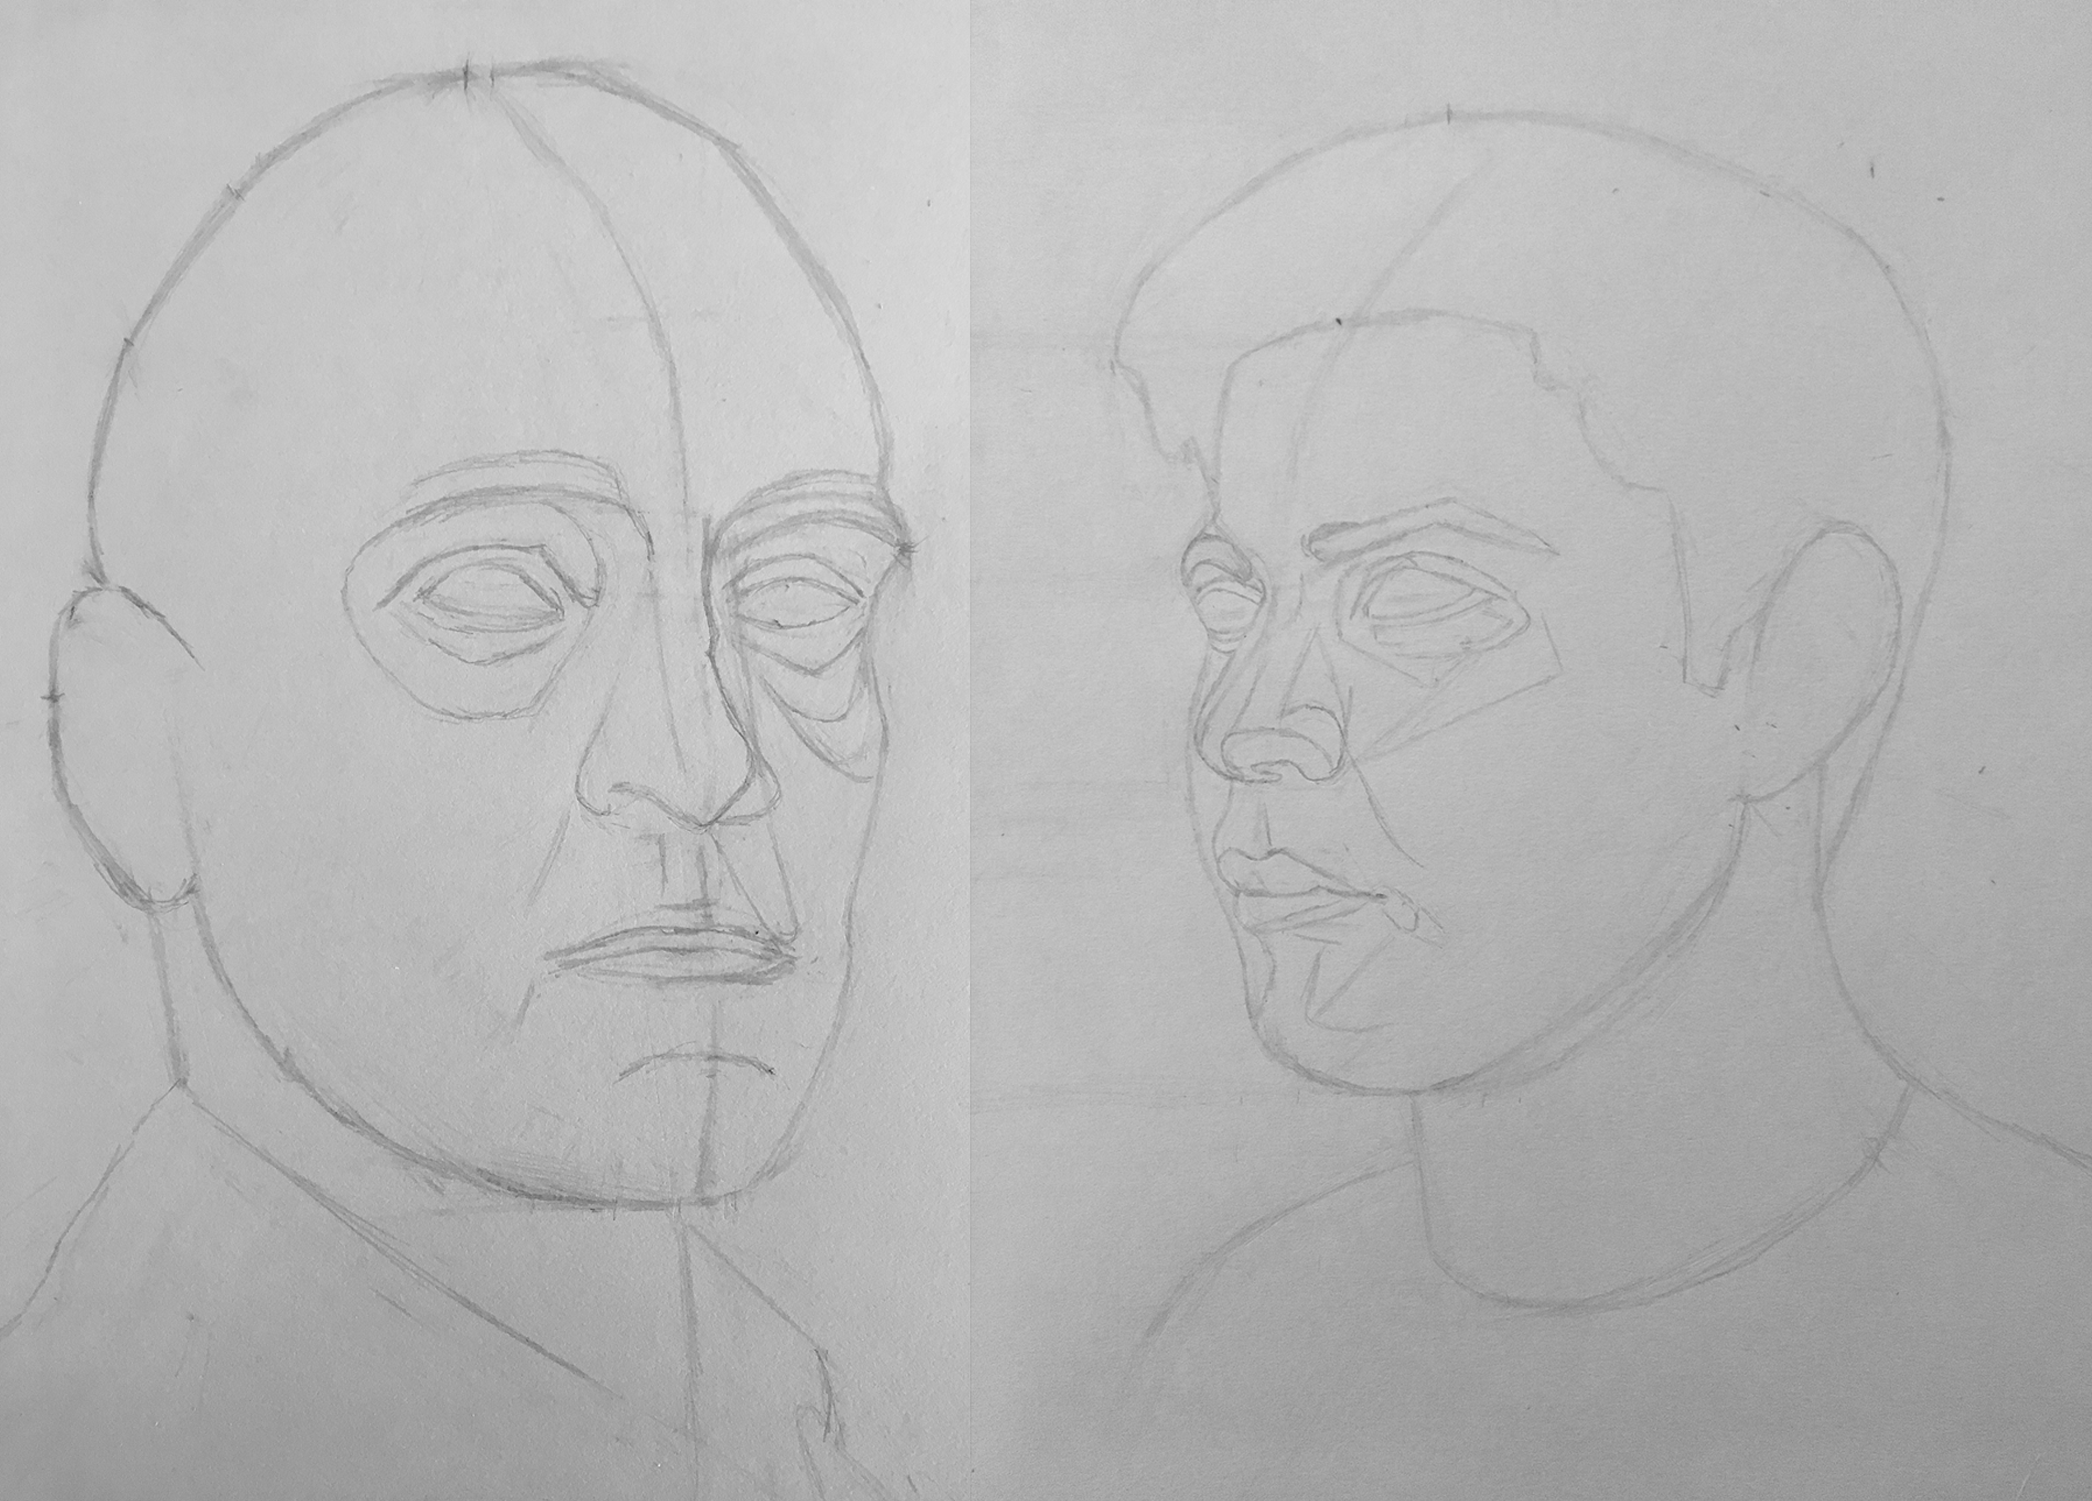
Blocking in the features
With the construction lines as references, I was then ready to start blocking in the facial features.
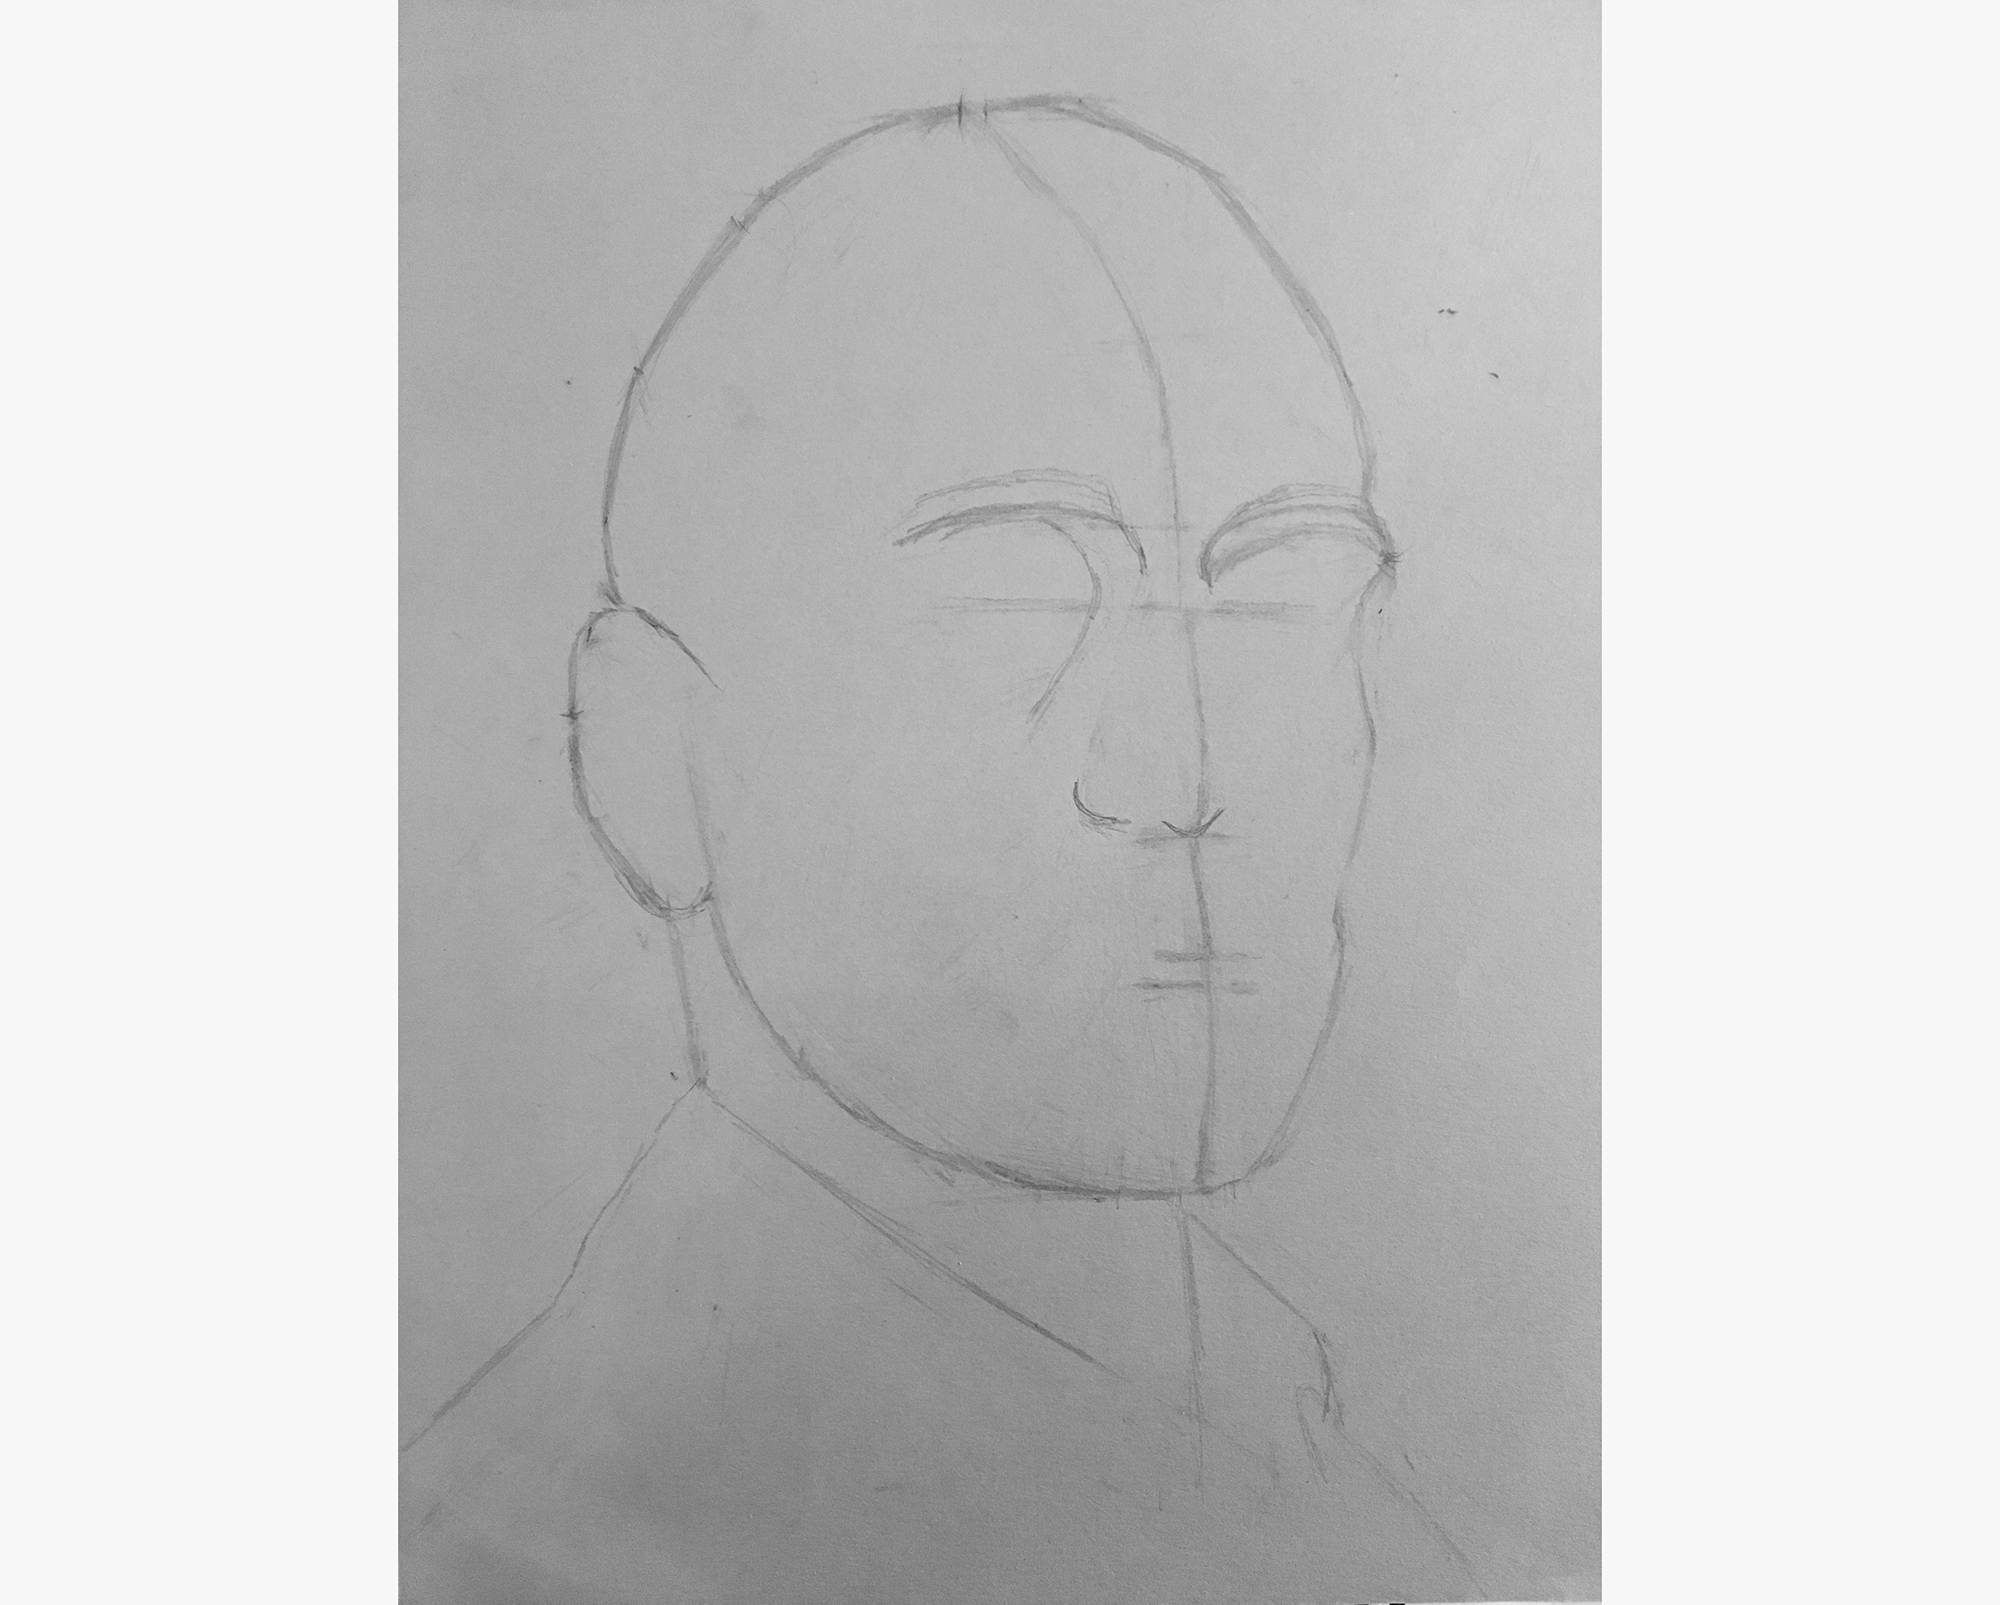
I started by adjusting the center line slightly for the nose, and marking the nose?s outer boundary.
Then, I drew in shapes for the brows.
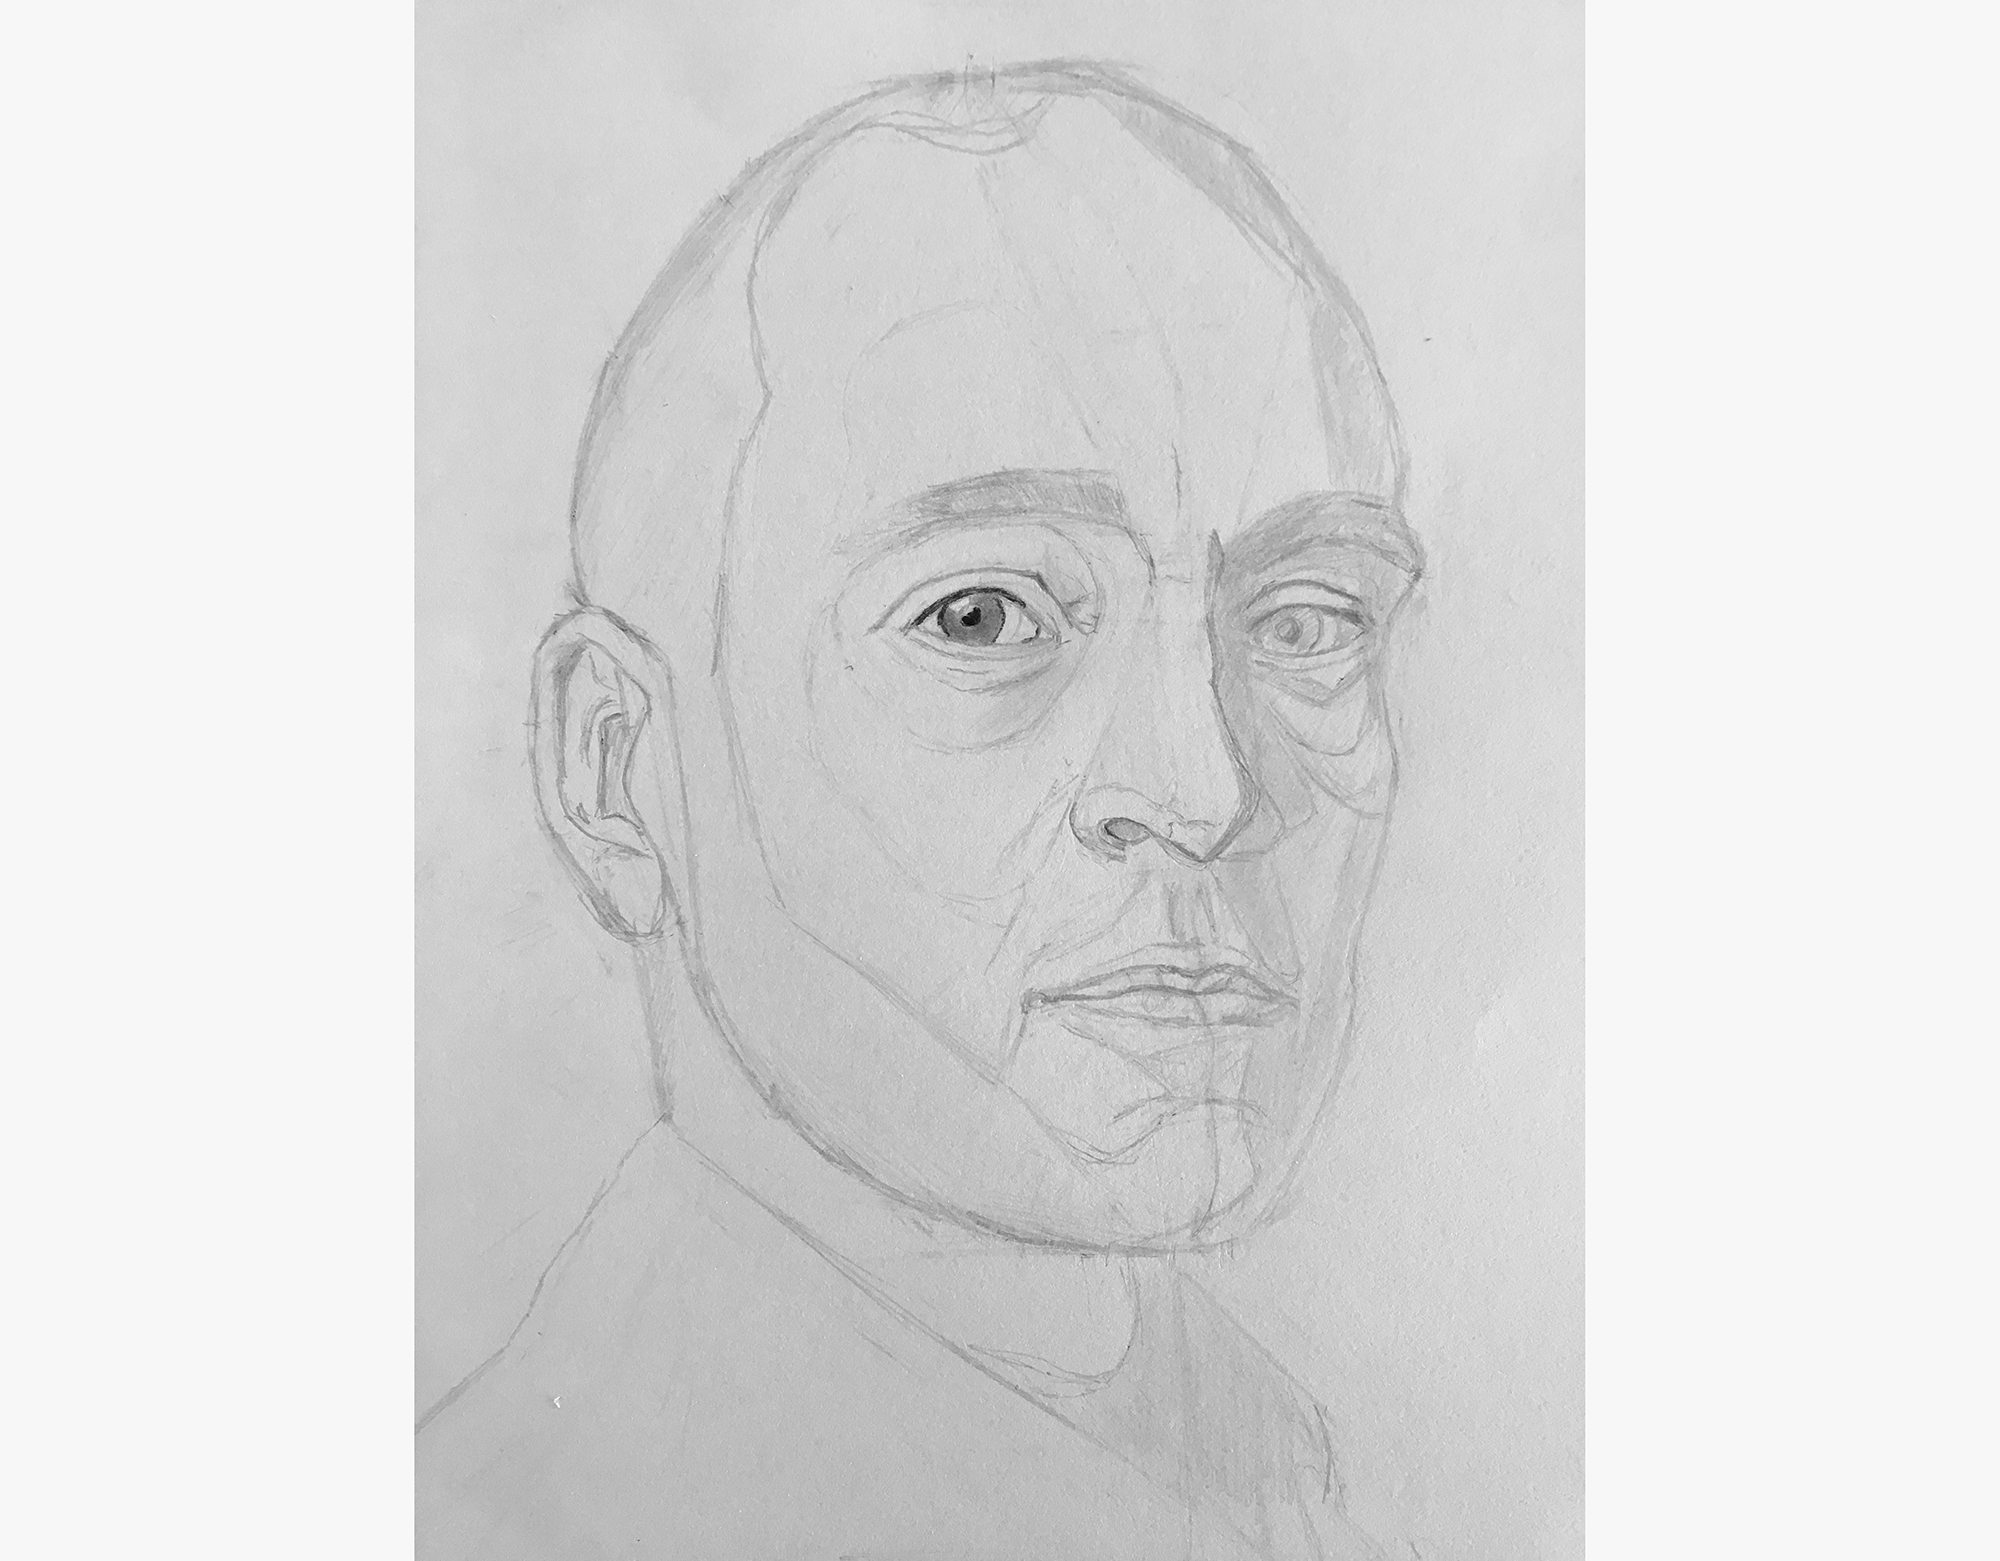
Next, I included the eye sockets and some more detail around the nose.
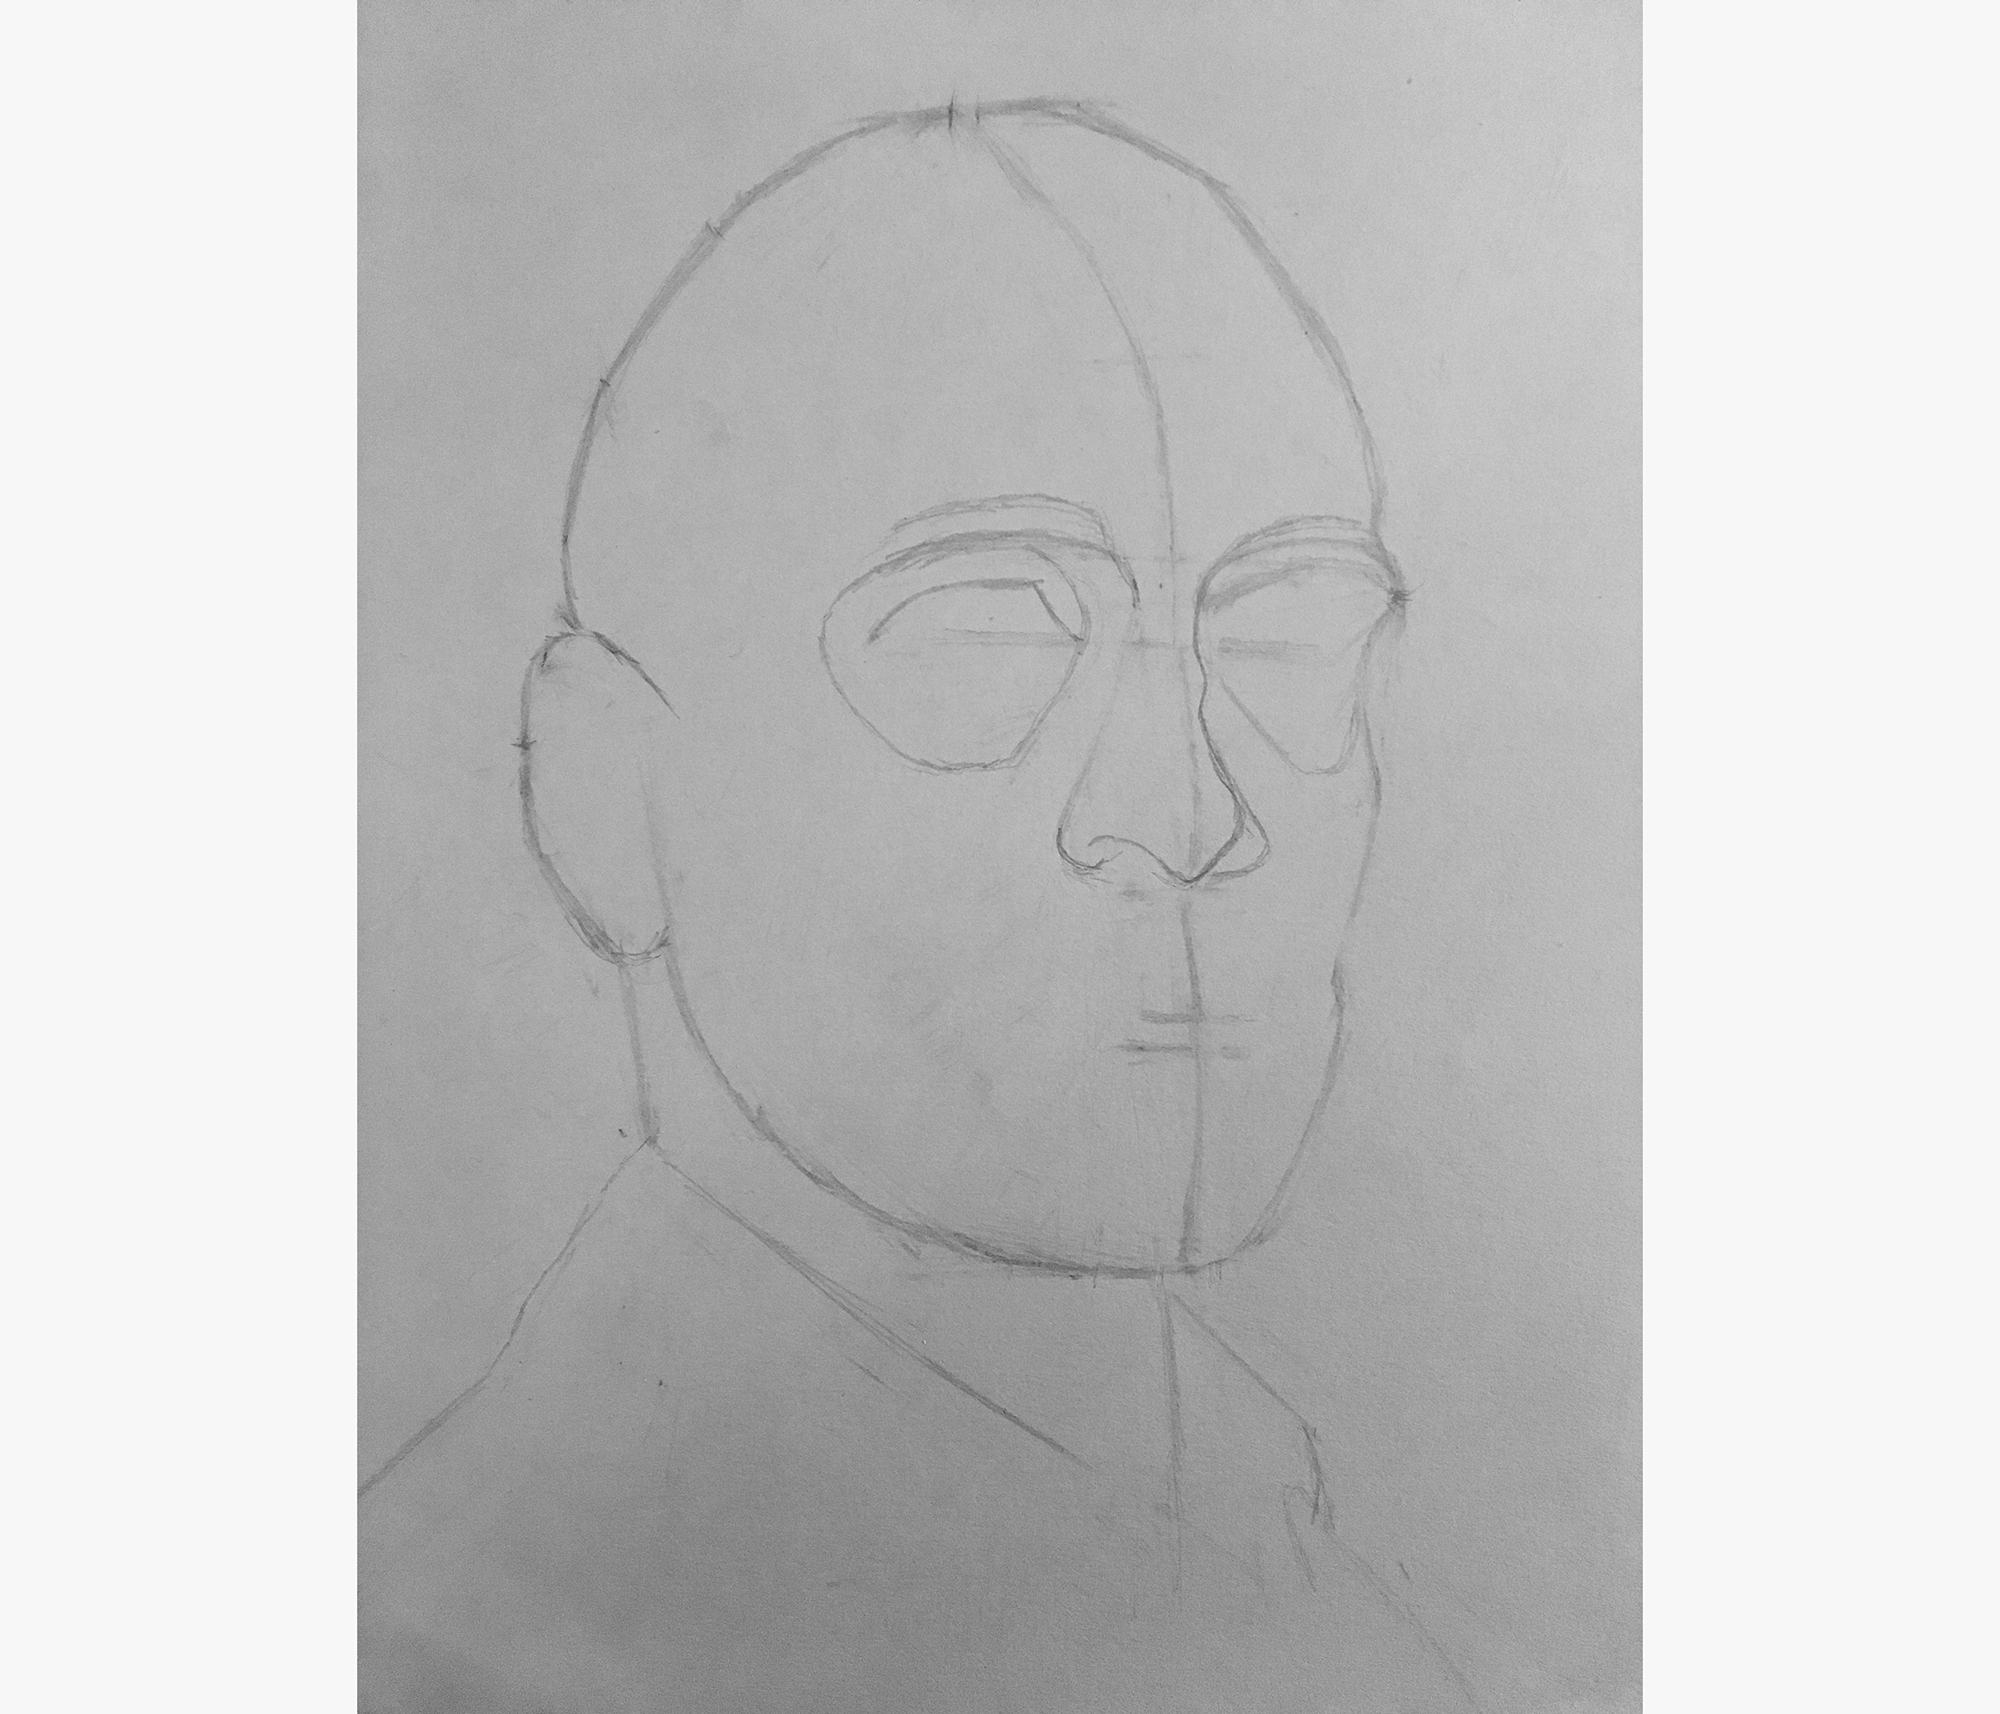
Finally, I added in shapes for the eyelids and eyes, and finished up for the day.

Reaching this point took another 2.5 hours.
Progress still seems fairly slow on the drawing, but I?m making a conscious effort to work carefully through the blocking in phase (so I can practice what I?m learning, and so I can ensure the portrait is built on a strong foundation).
I?ll start detailing the features tomorrow.
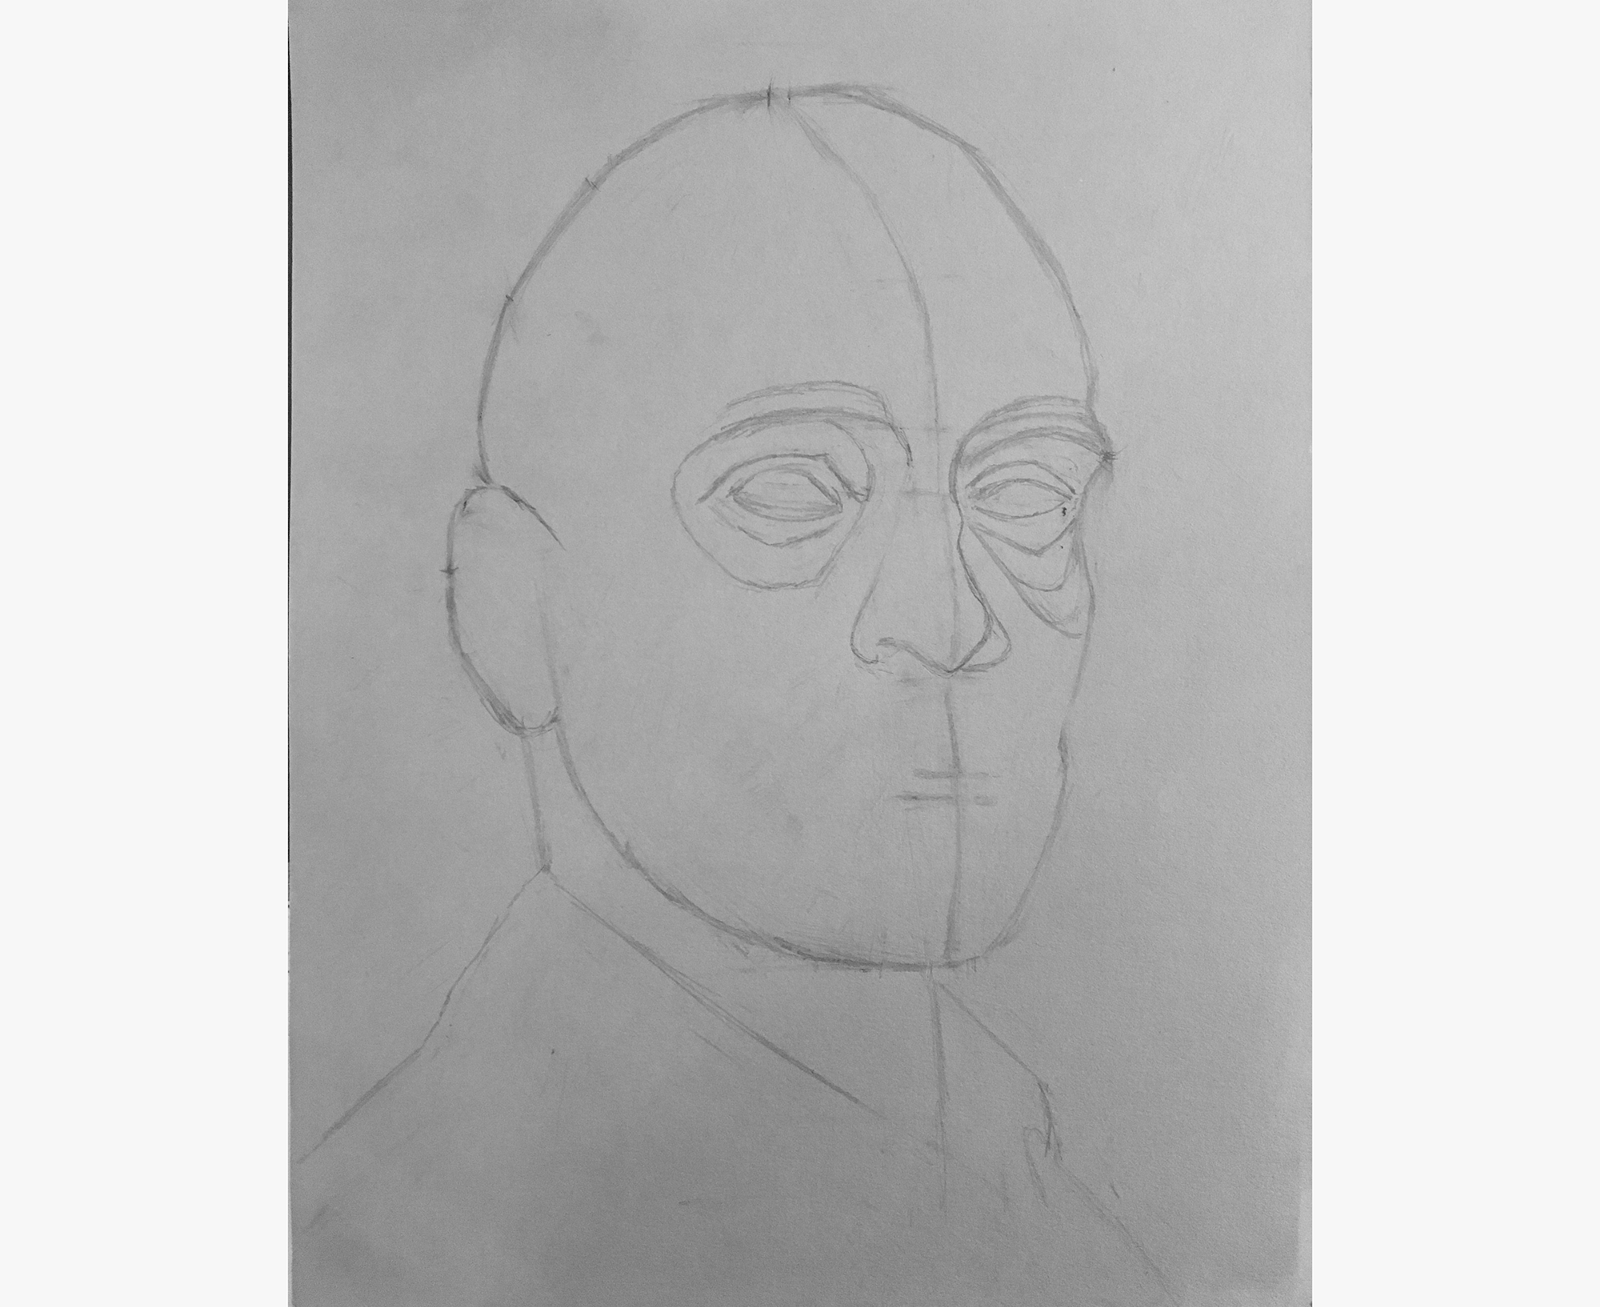
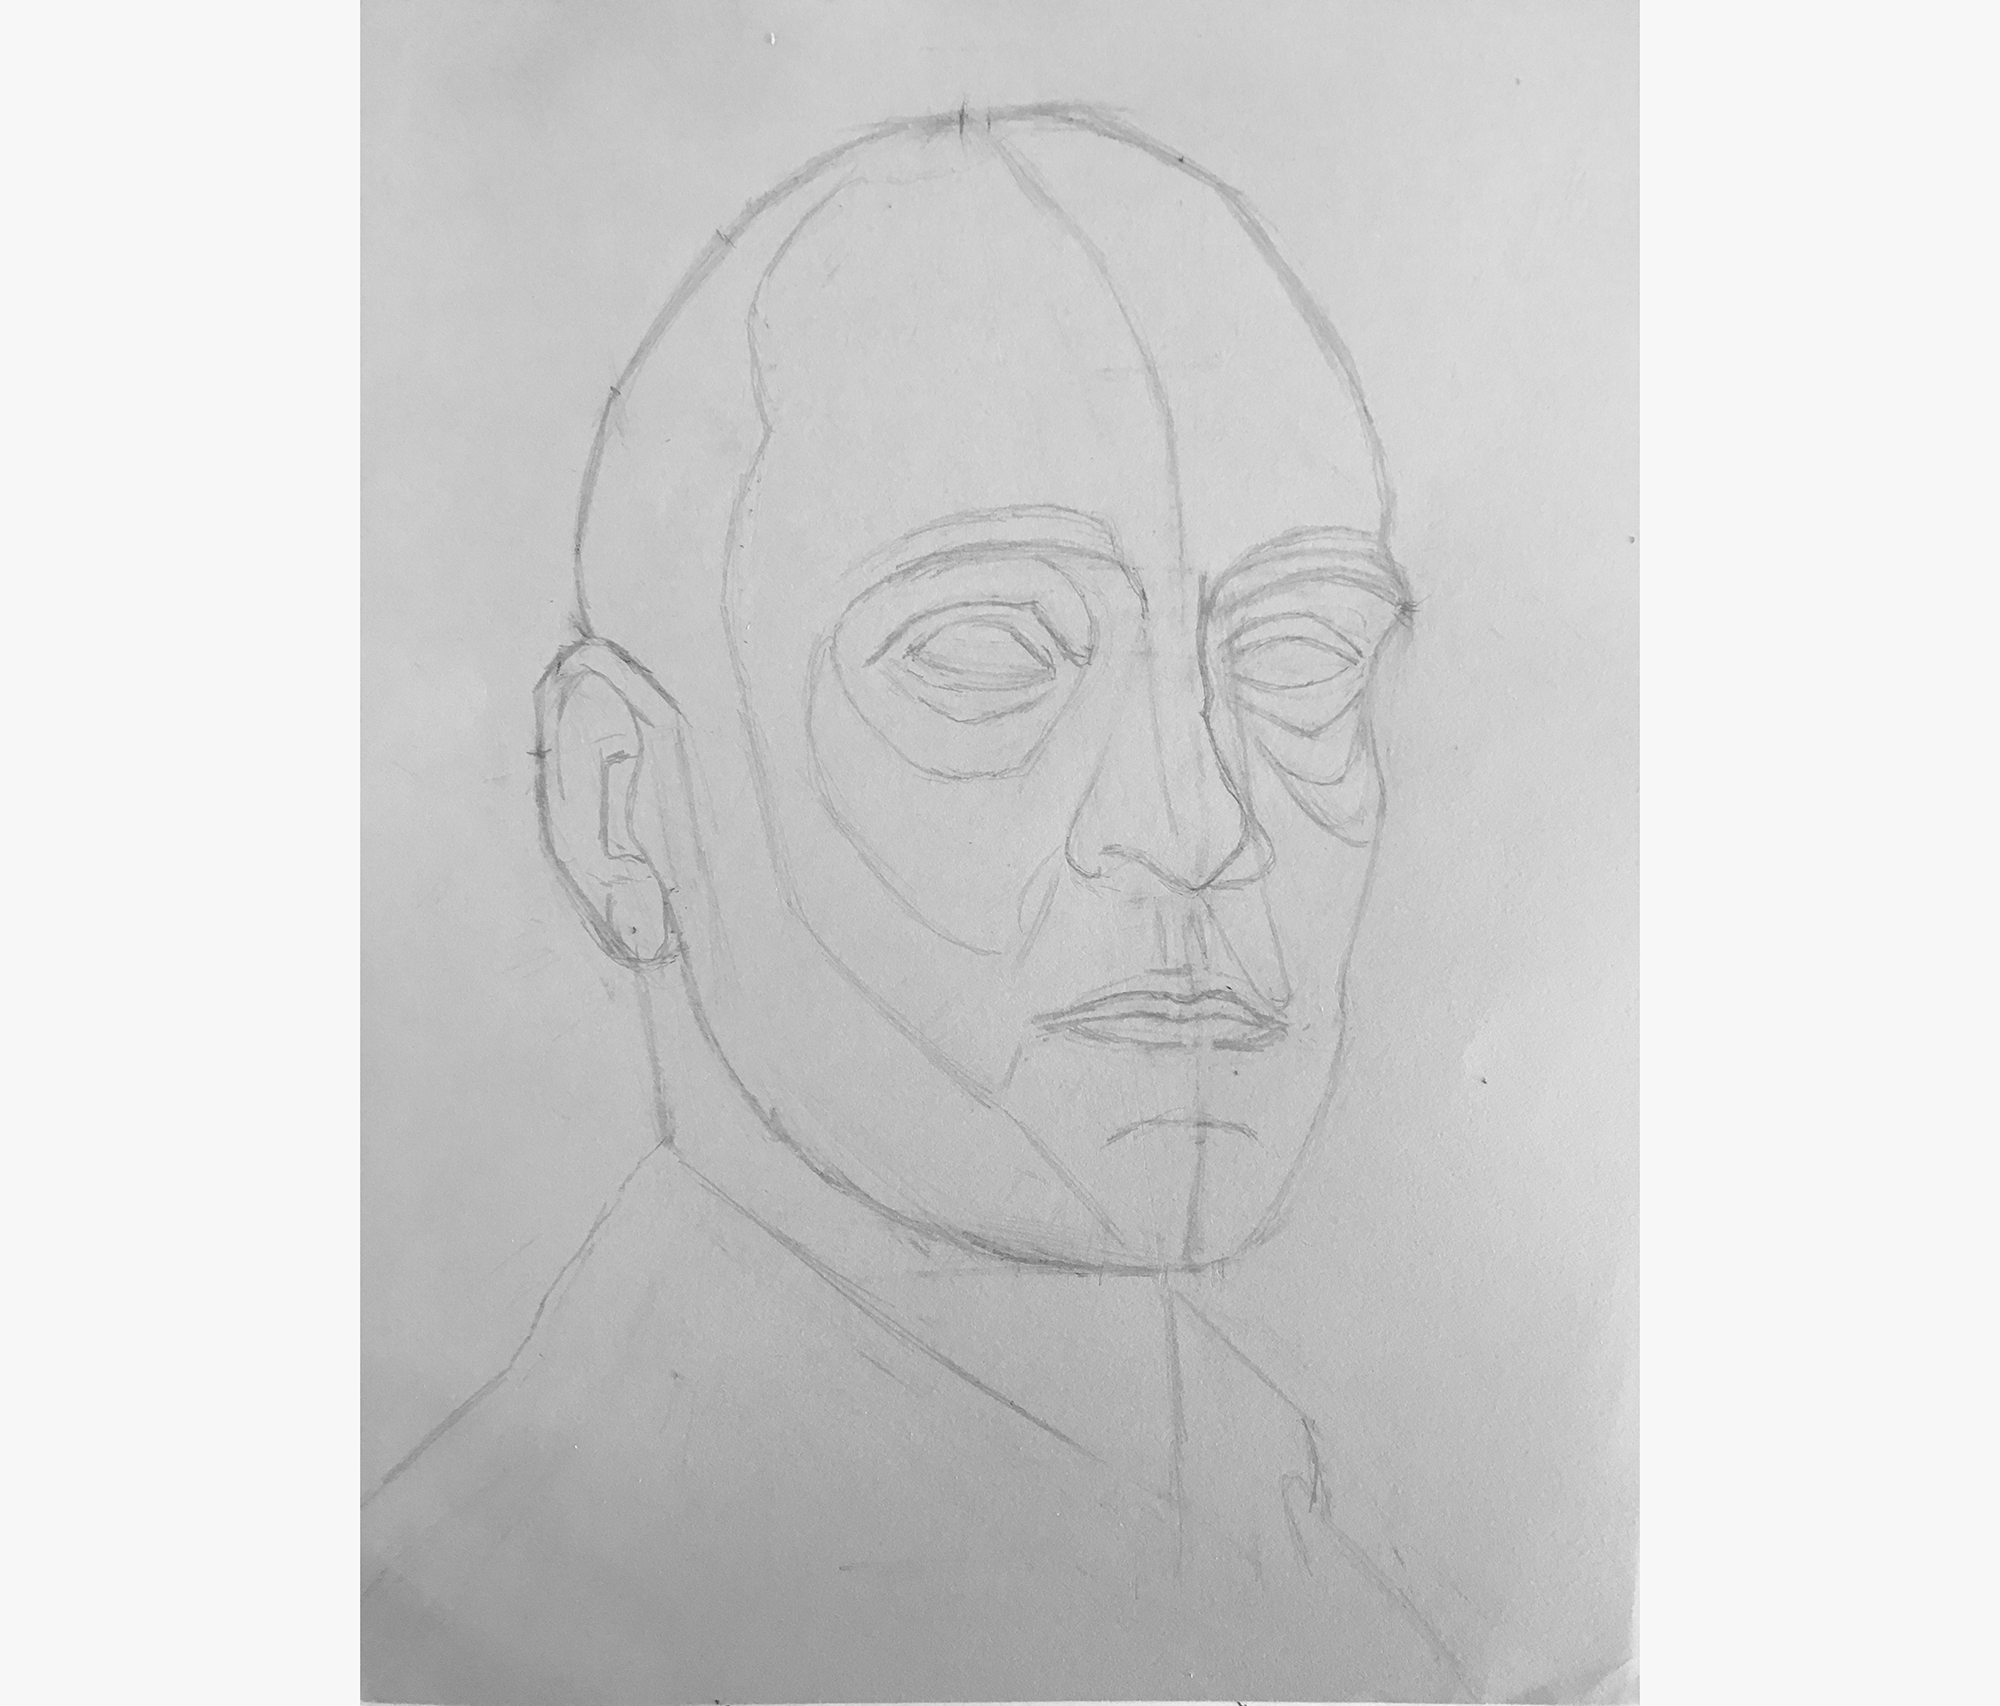
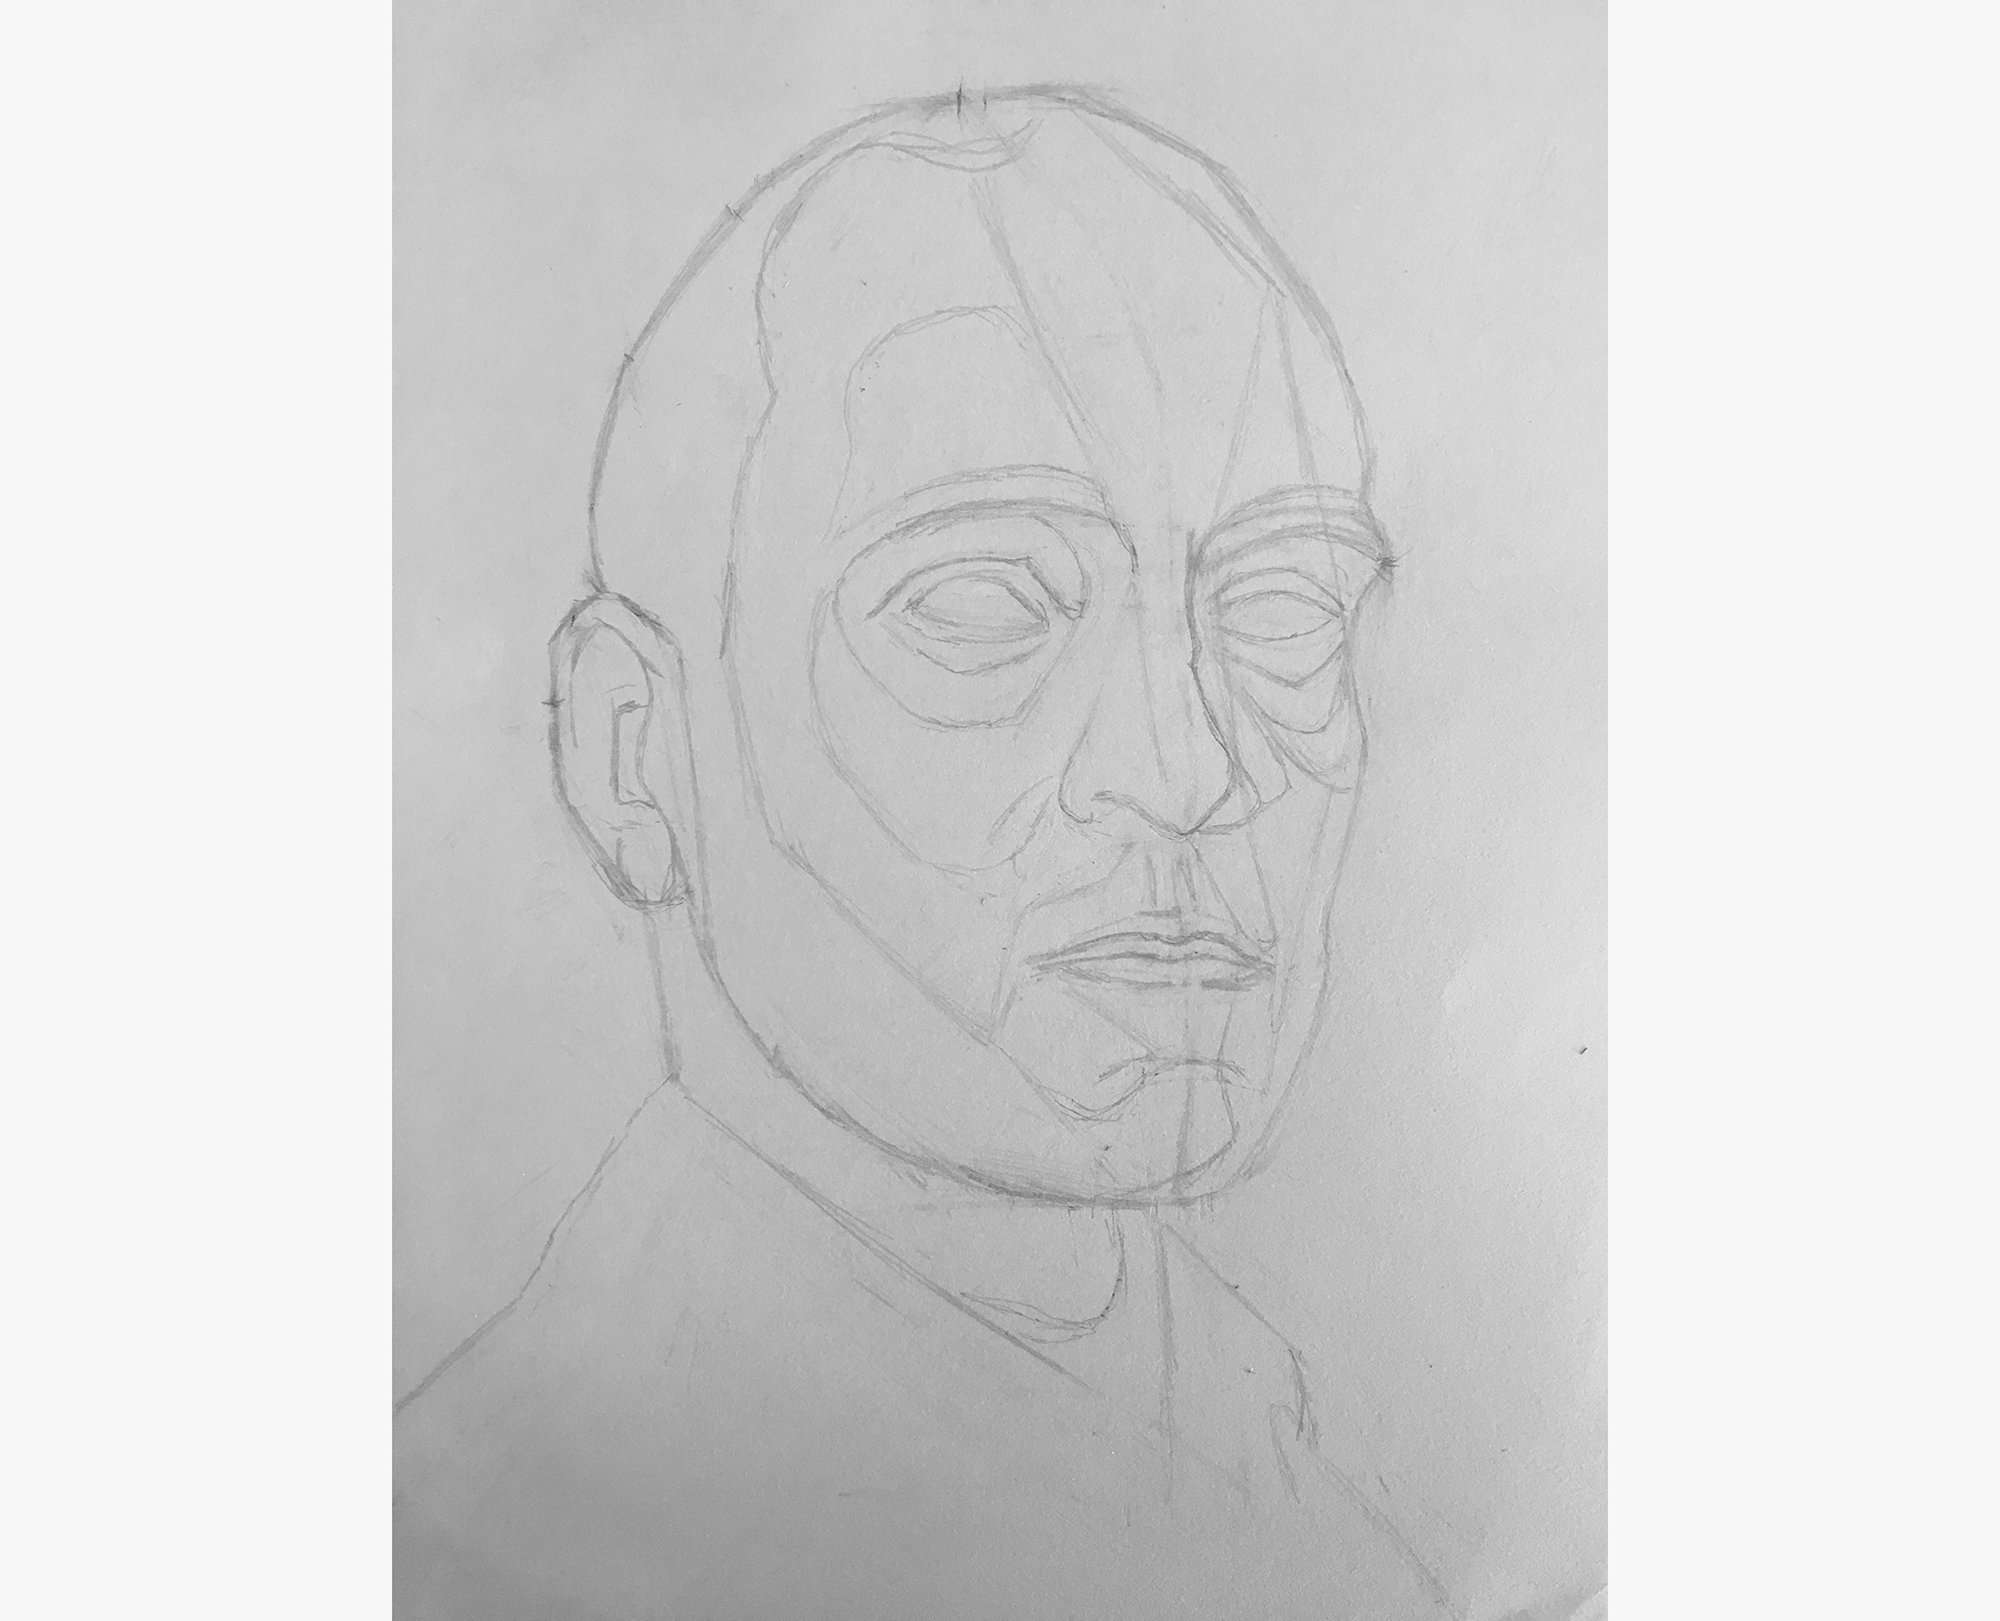
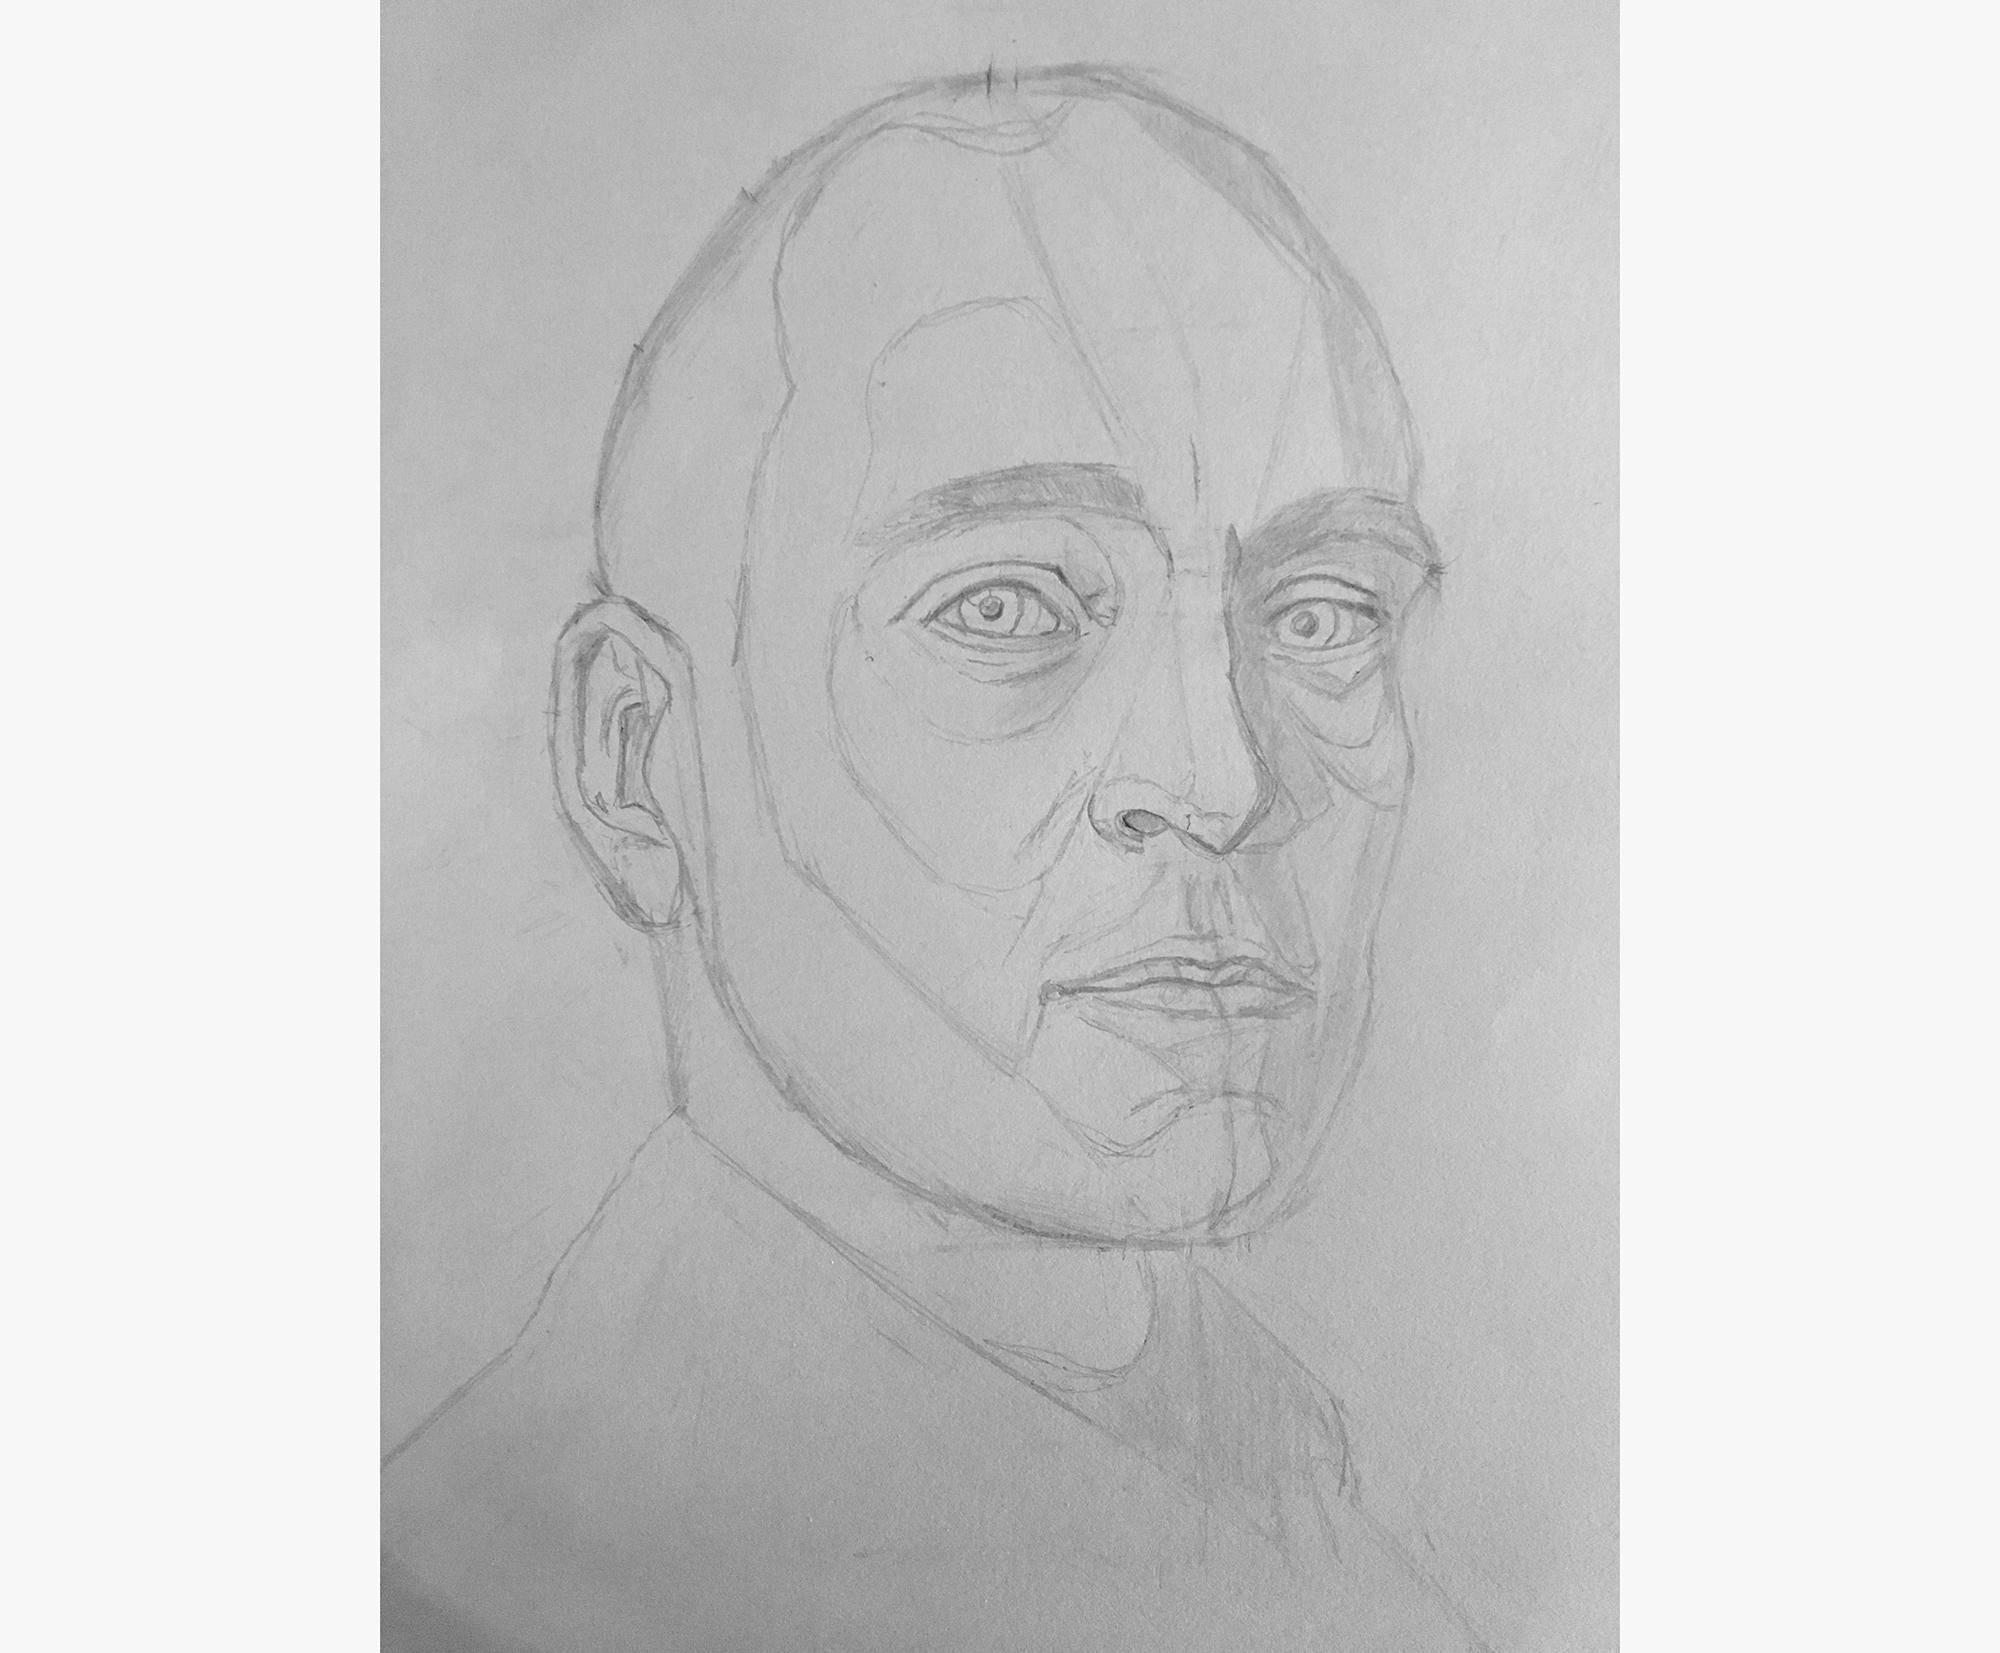
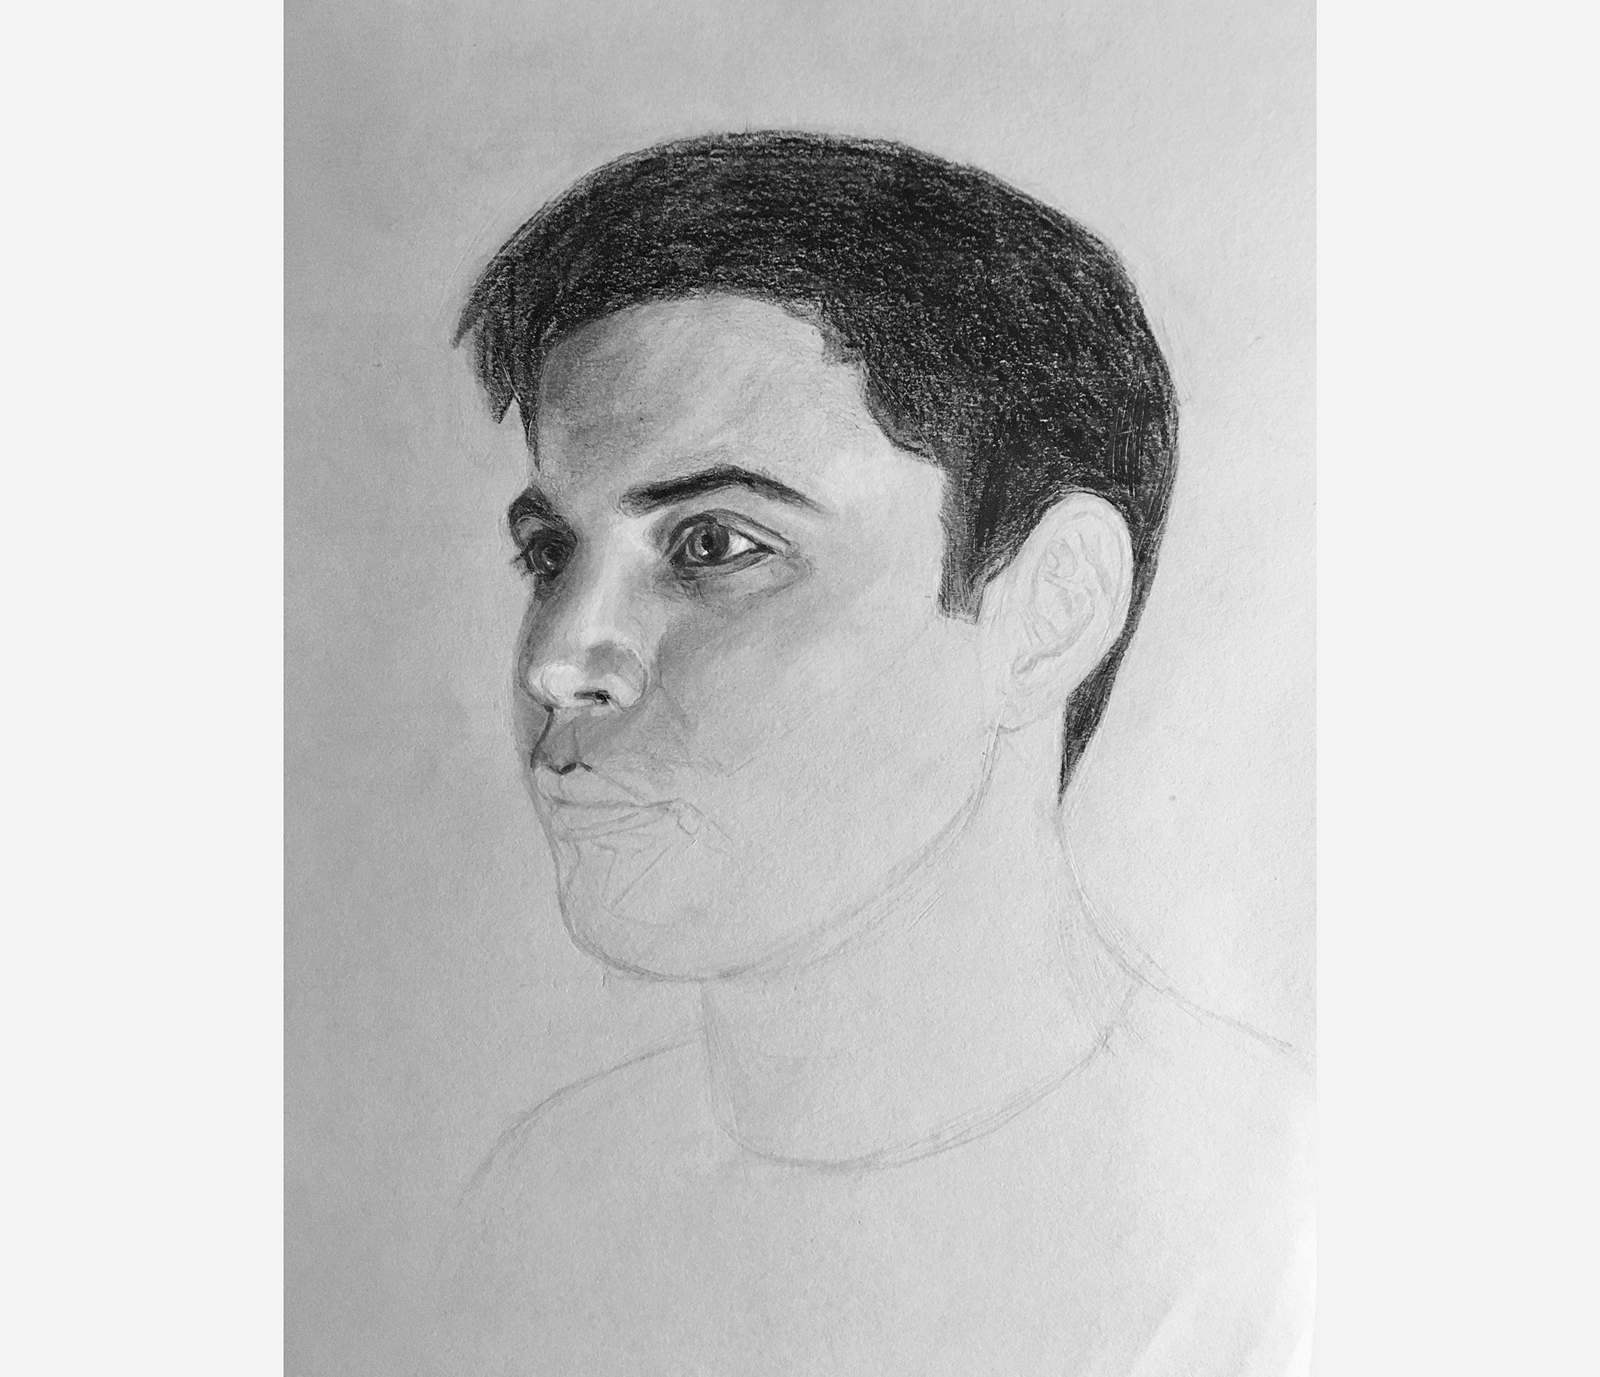
I added in the center line of the lips and the shadow on the nose.
I then finished the lips and added a line for the chin.
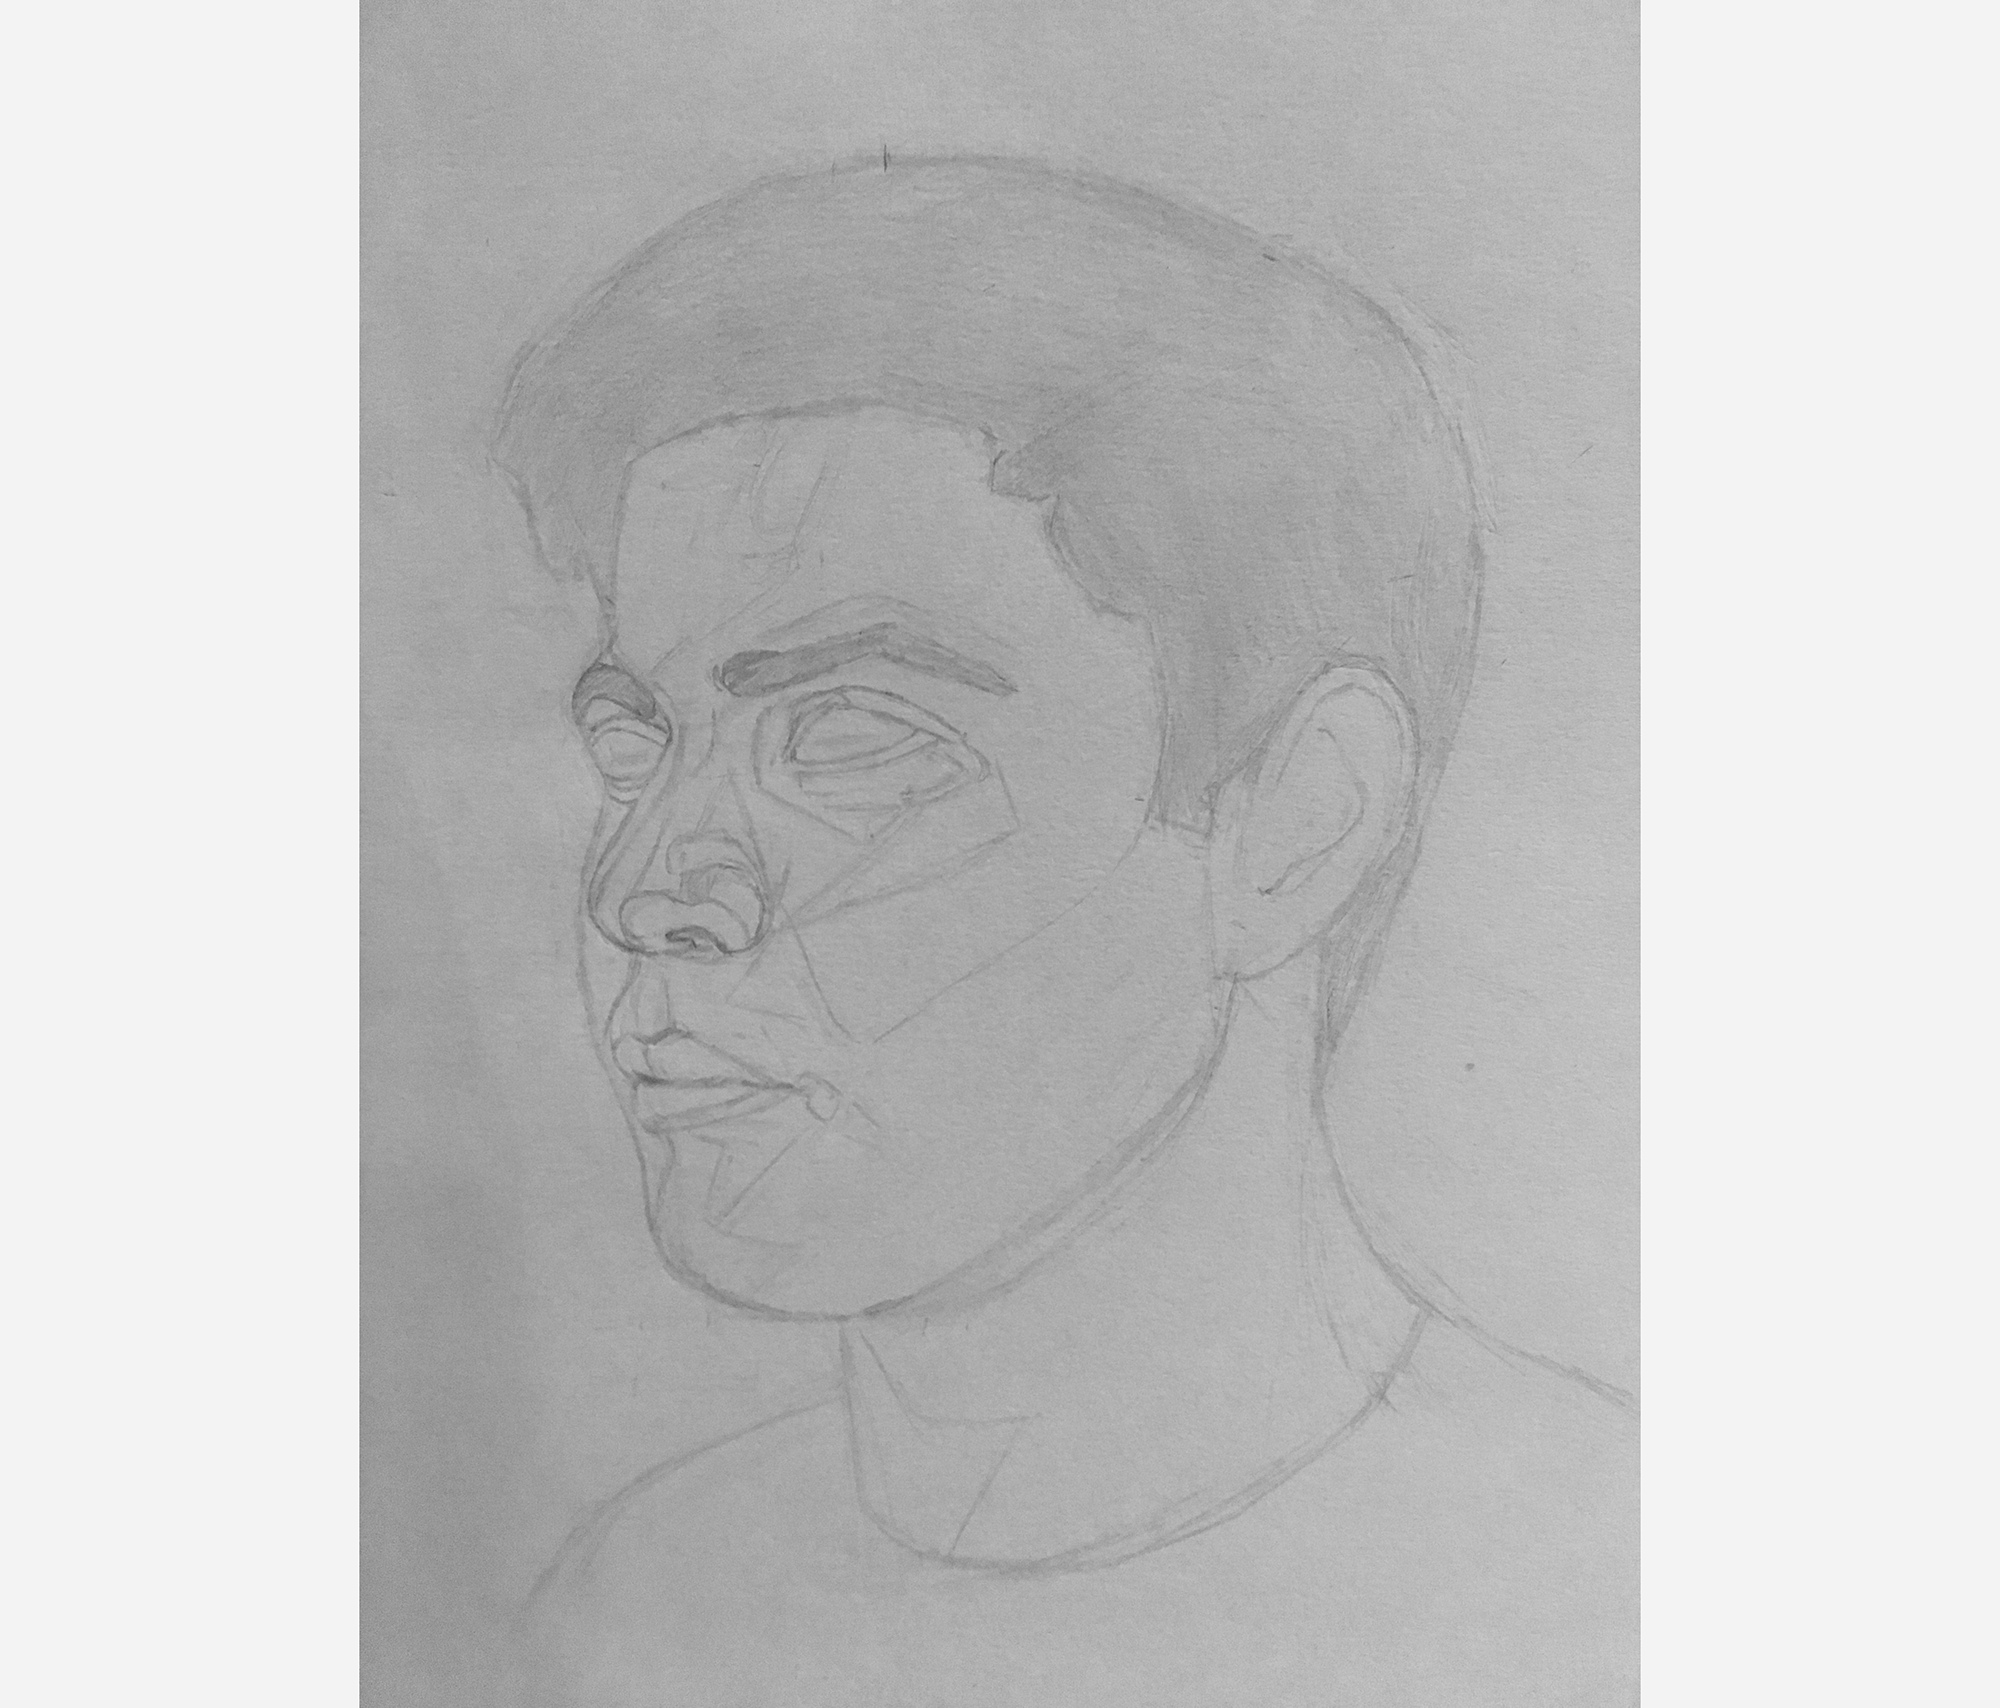
Lastly, I blocked in the main structures of the ear and added an outline for the beard.
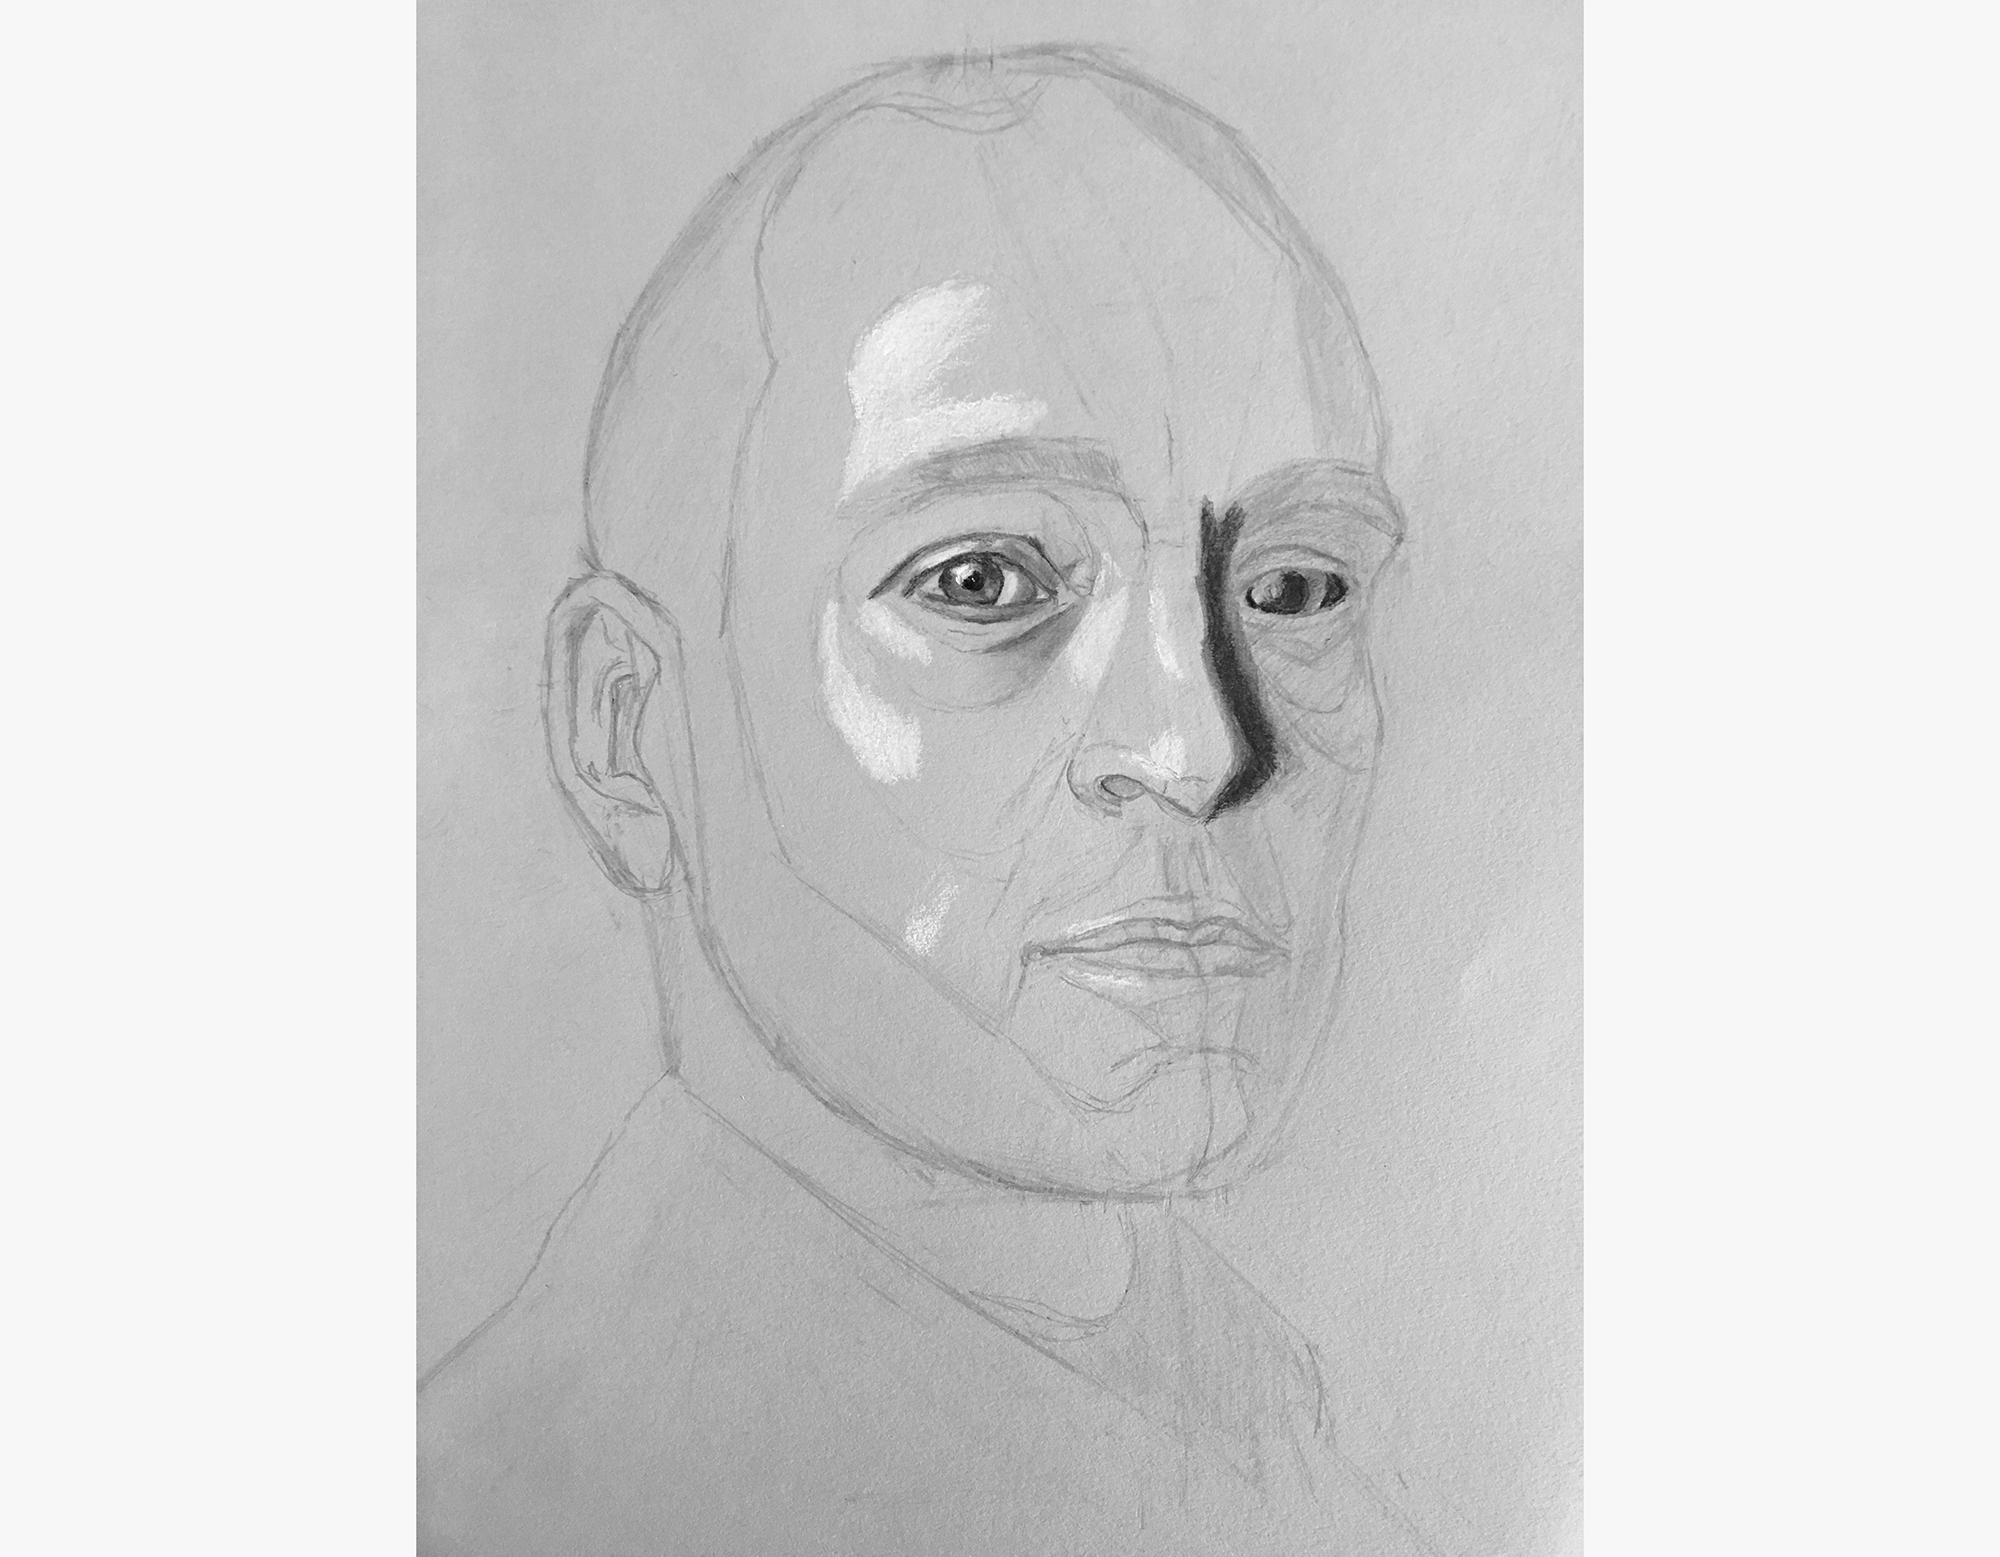
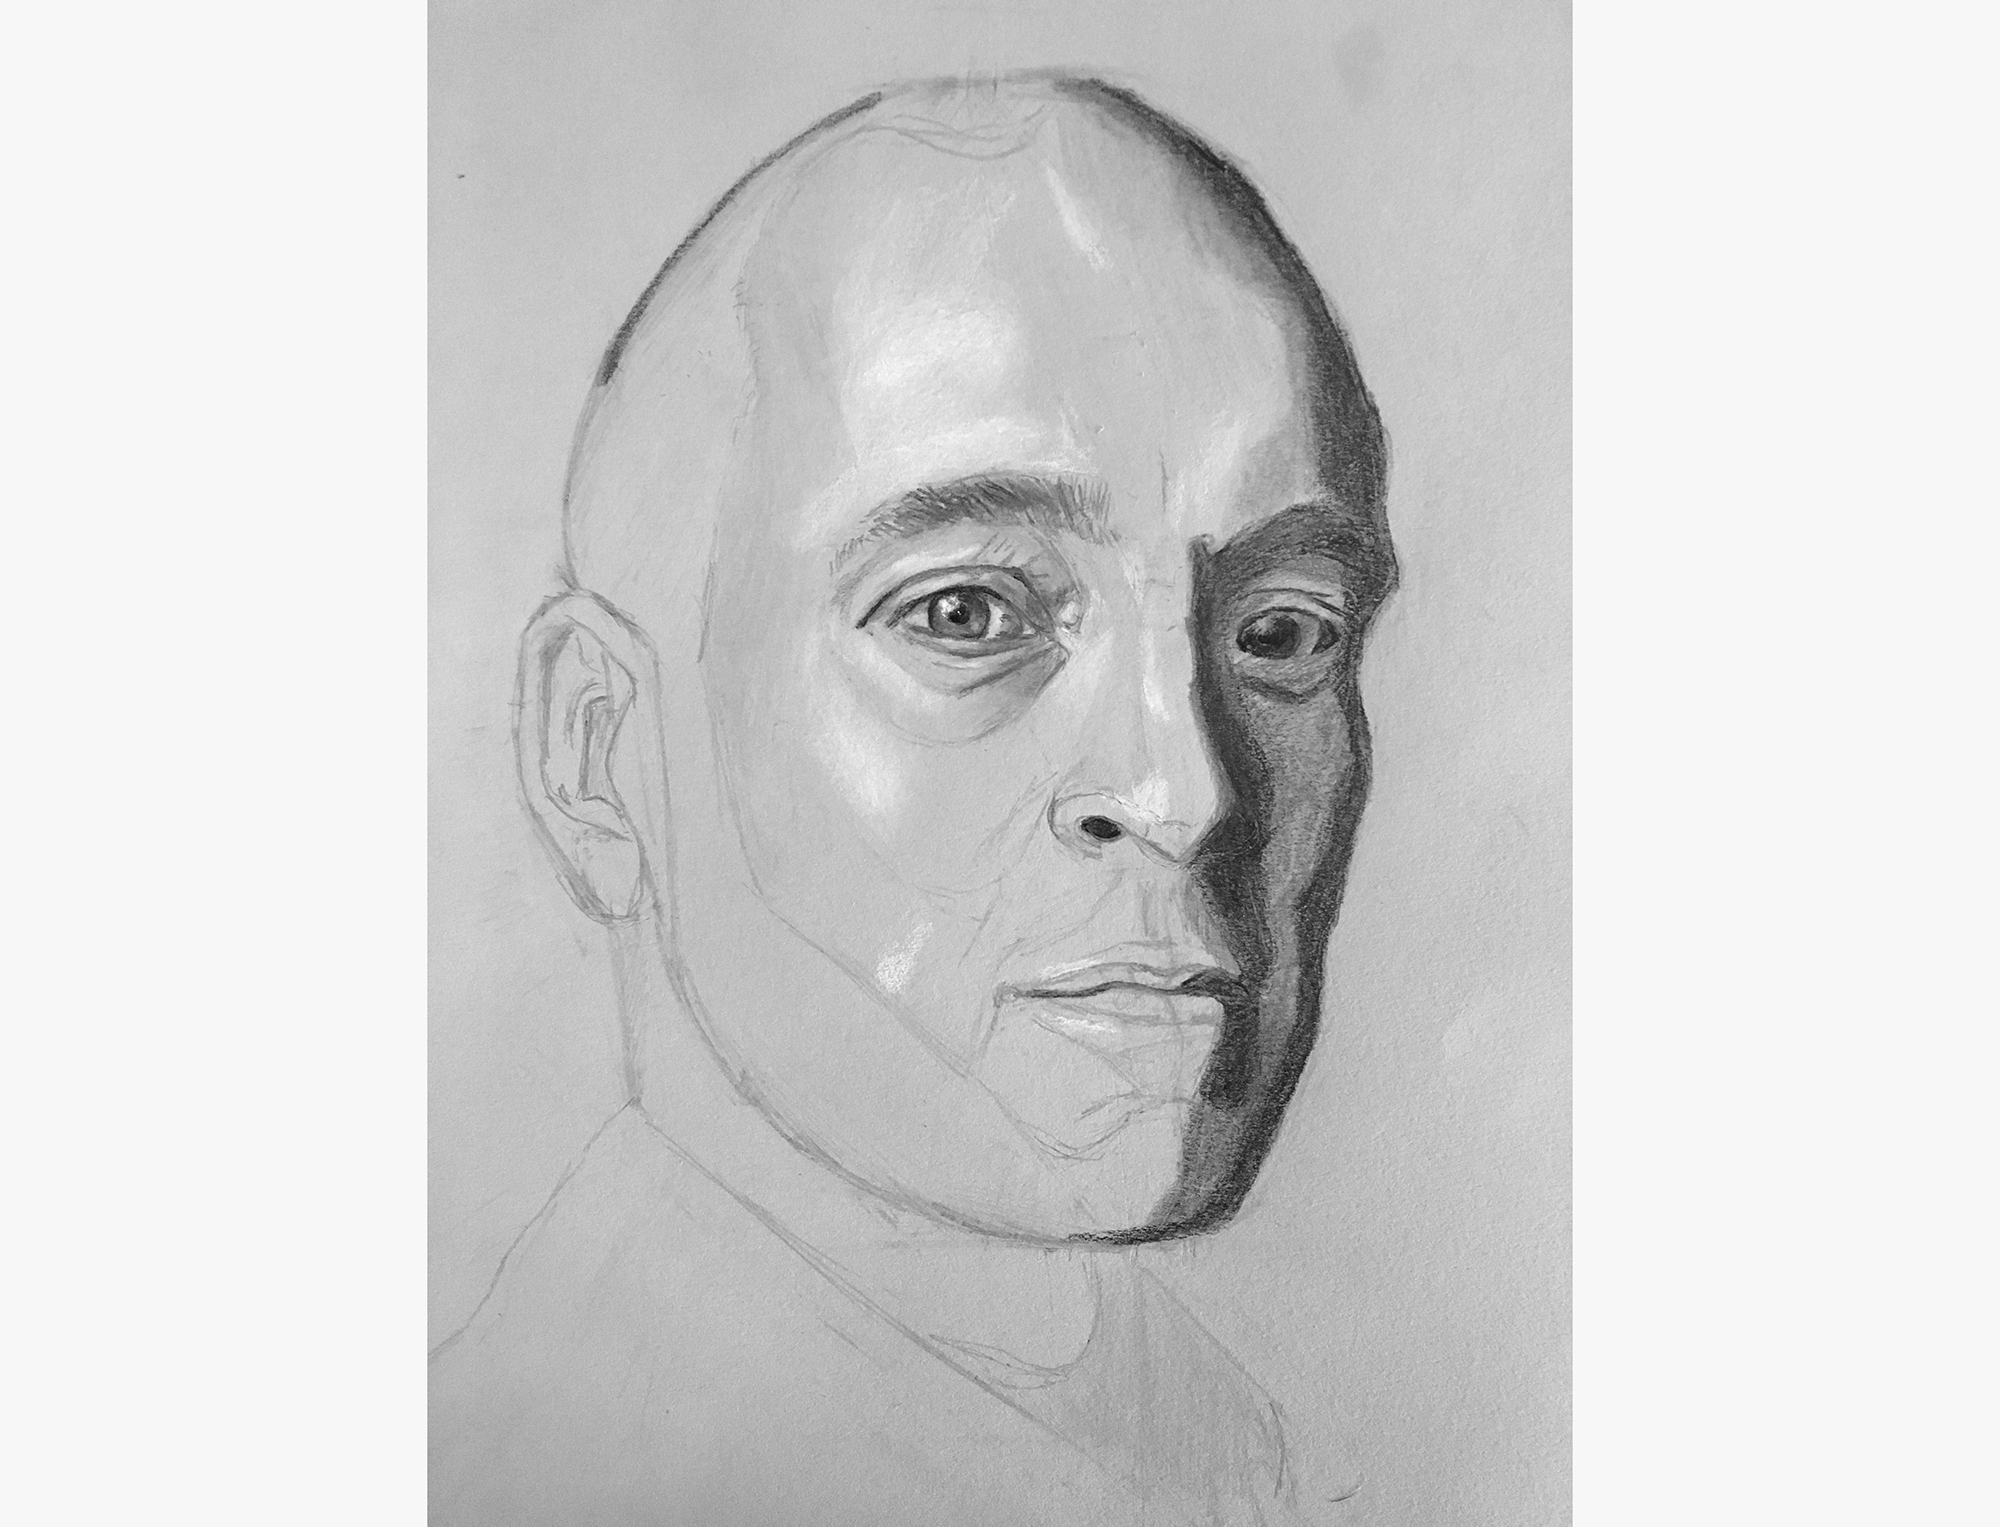
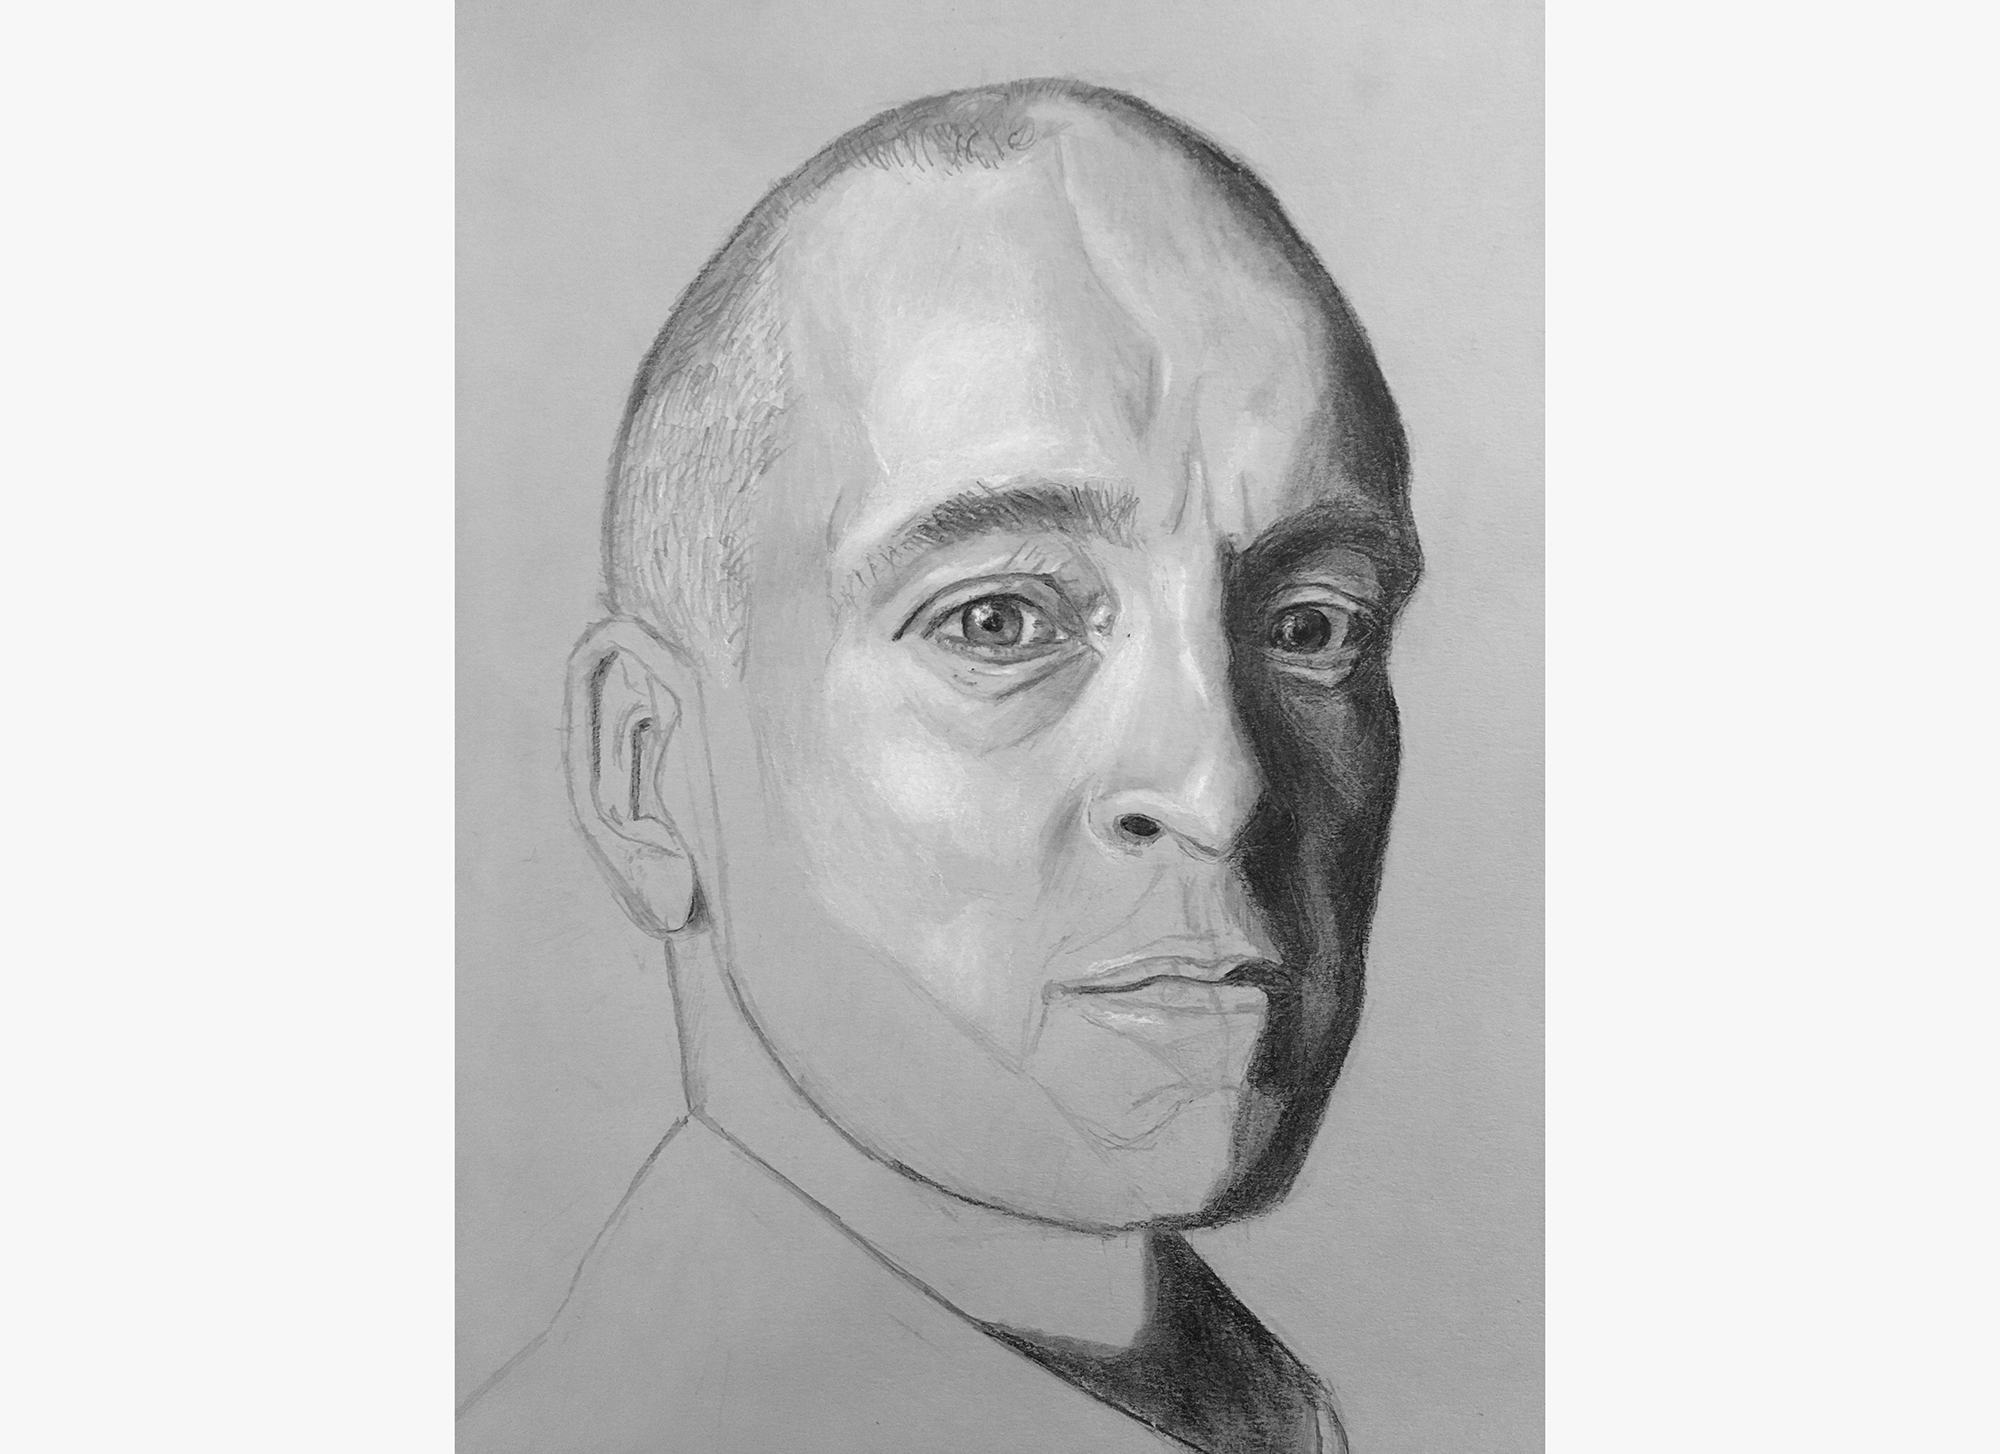
Drawing in shadow/highlight shapes
With the features in place, I next blocked in shapes for the shadows and highlights.
With these tonal contours in place, I darkened the shadow areas slightly, giving the portrait some roundness and three-dimensionality.
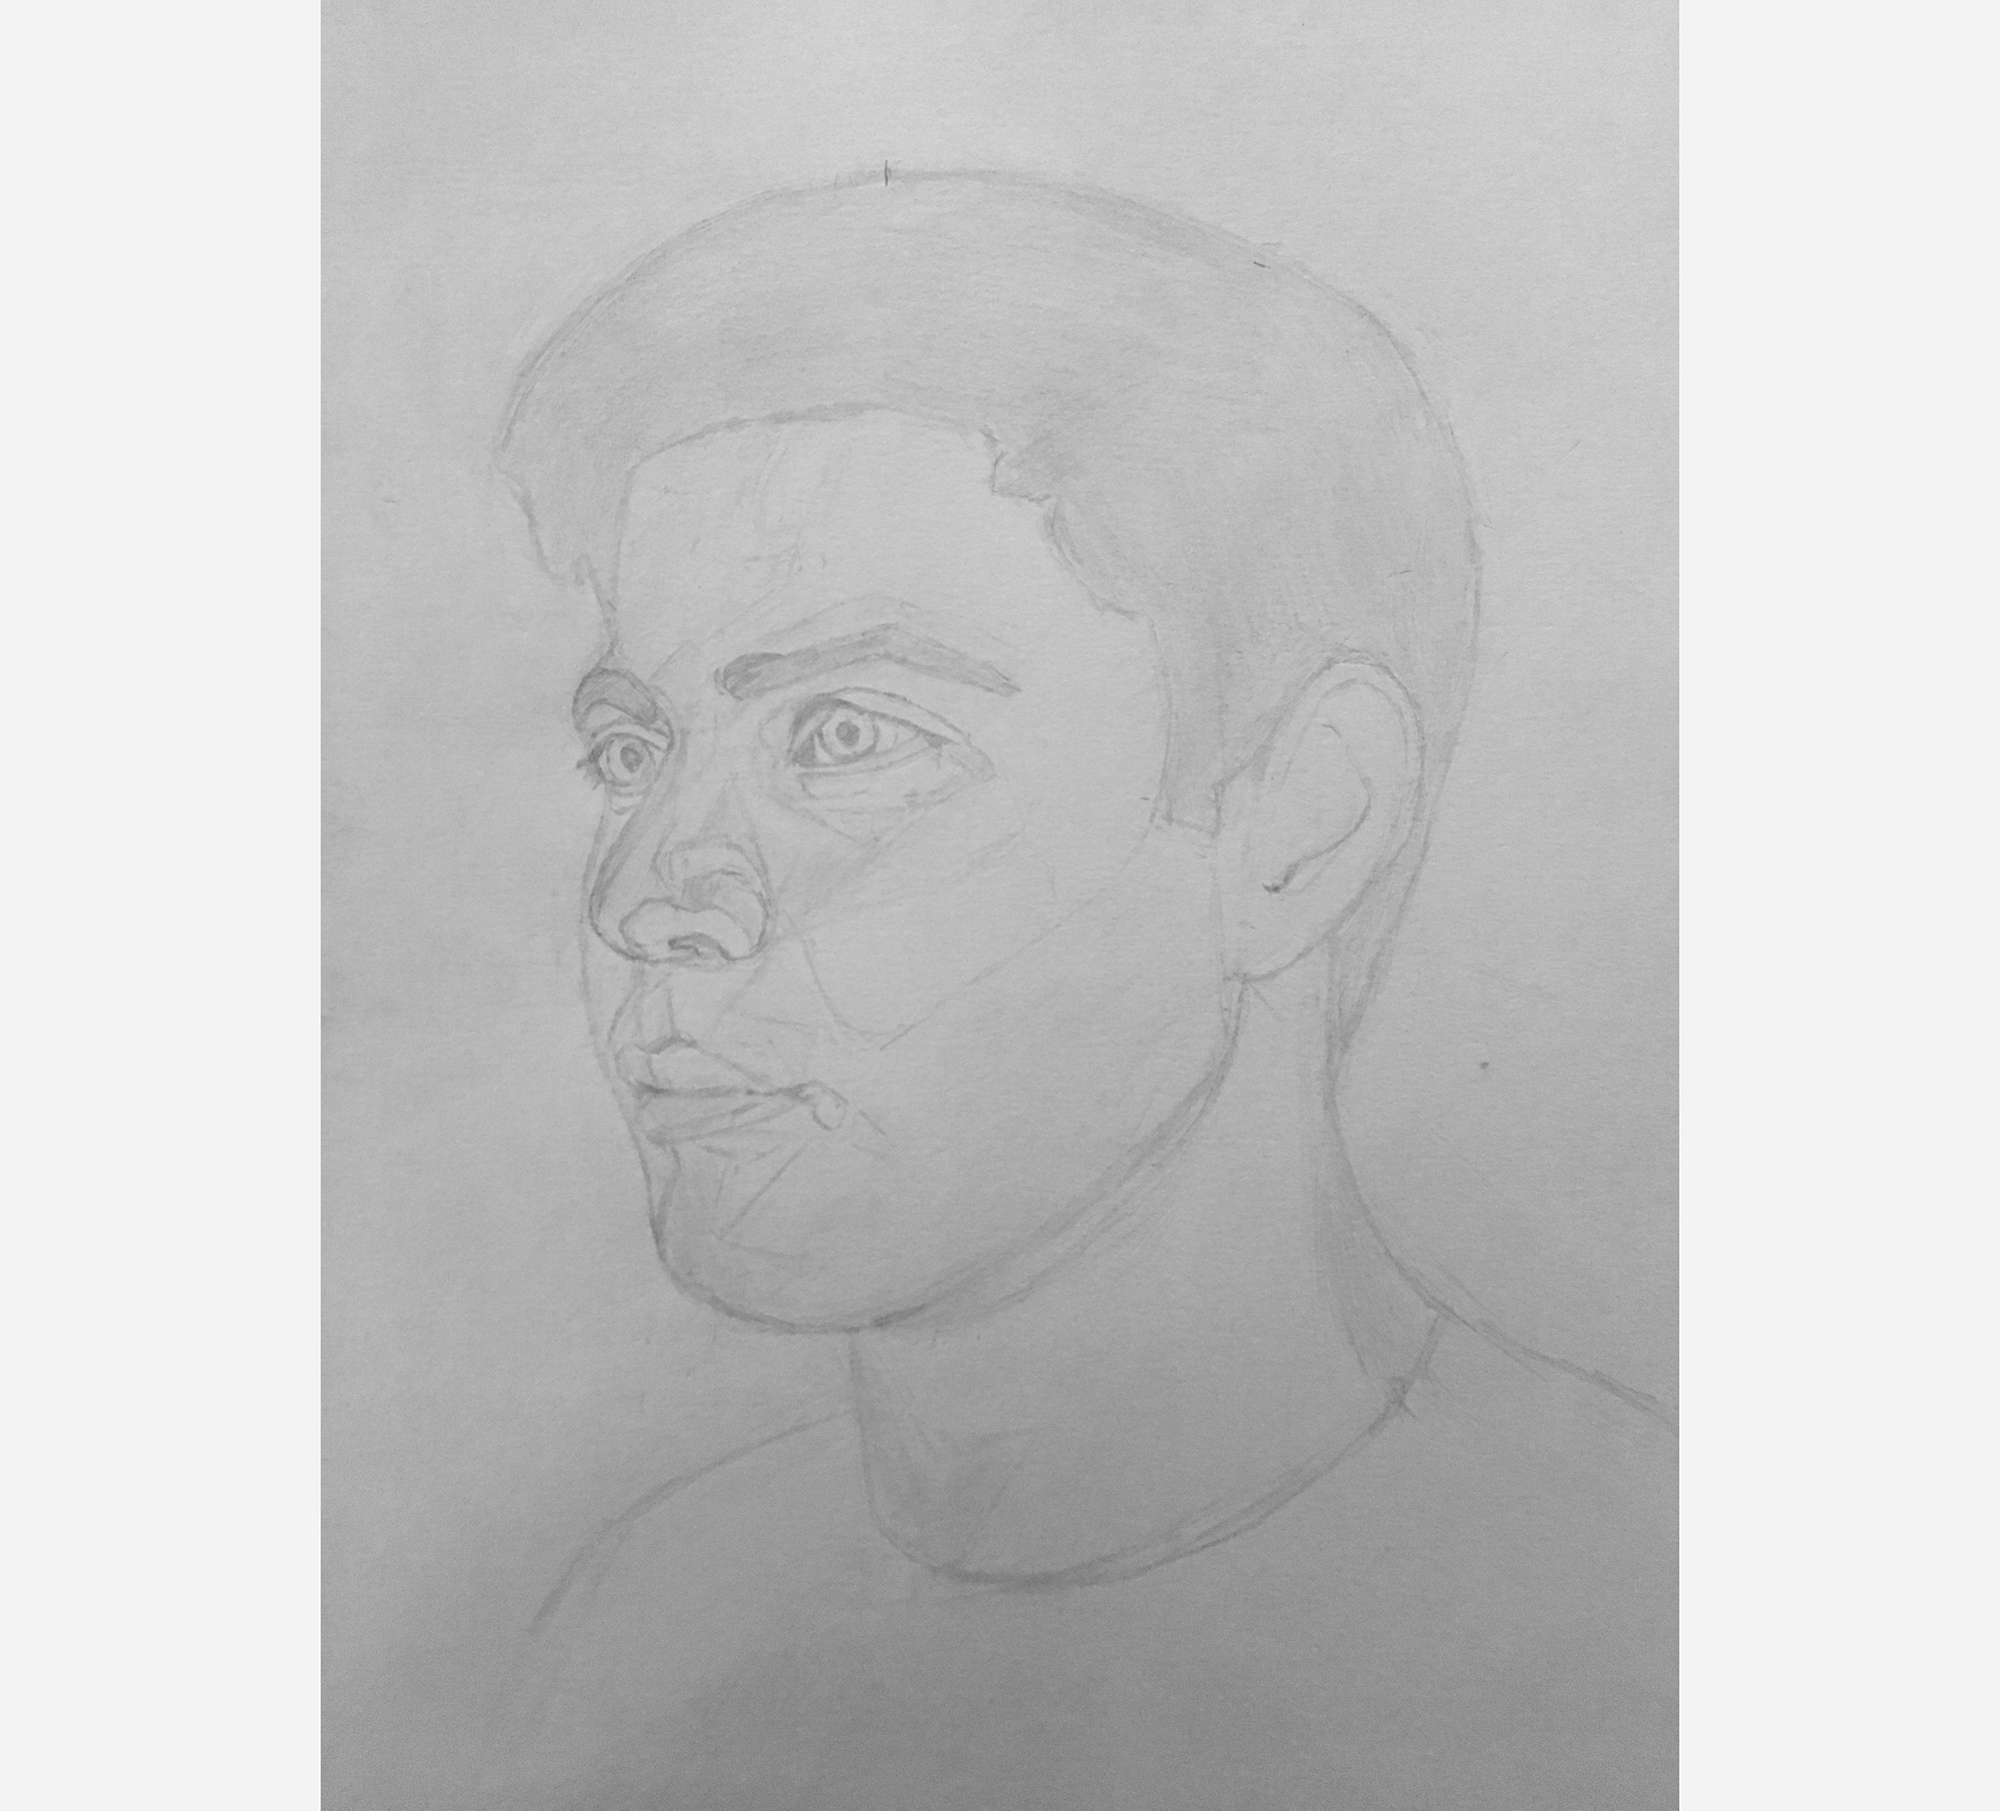
Detailing features
With the features and shadows blocked in, I detailed the features, starting with the eyes.
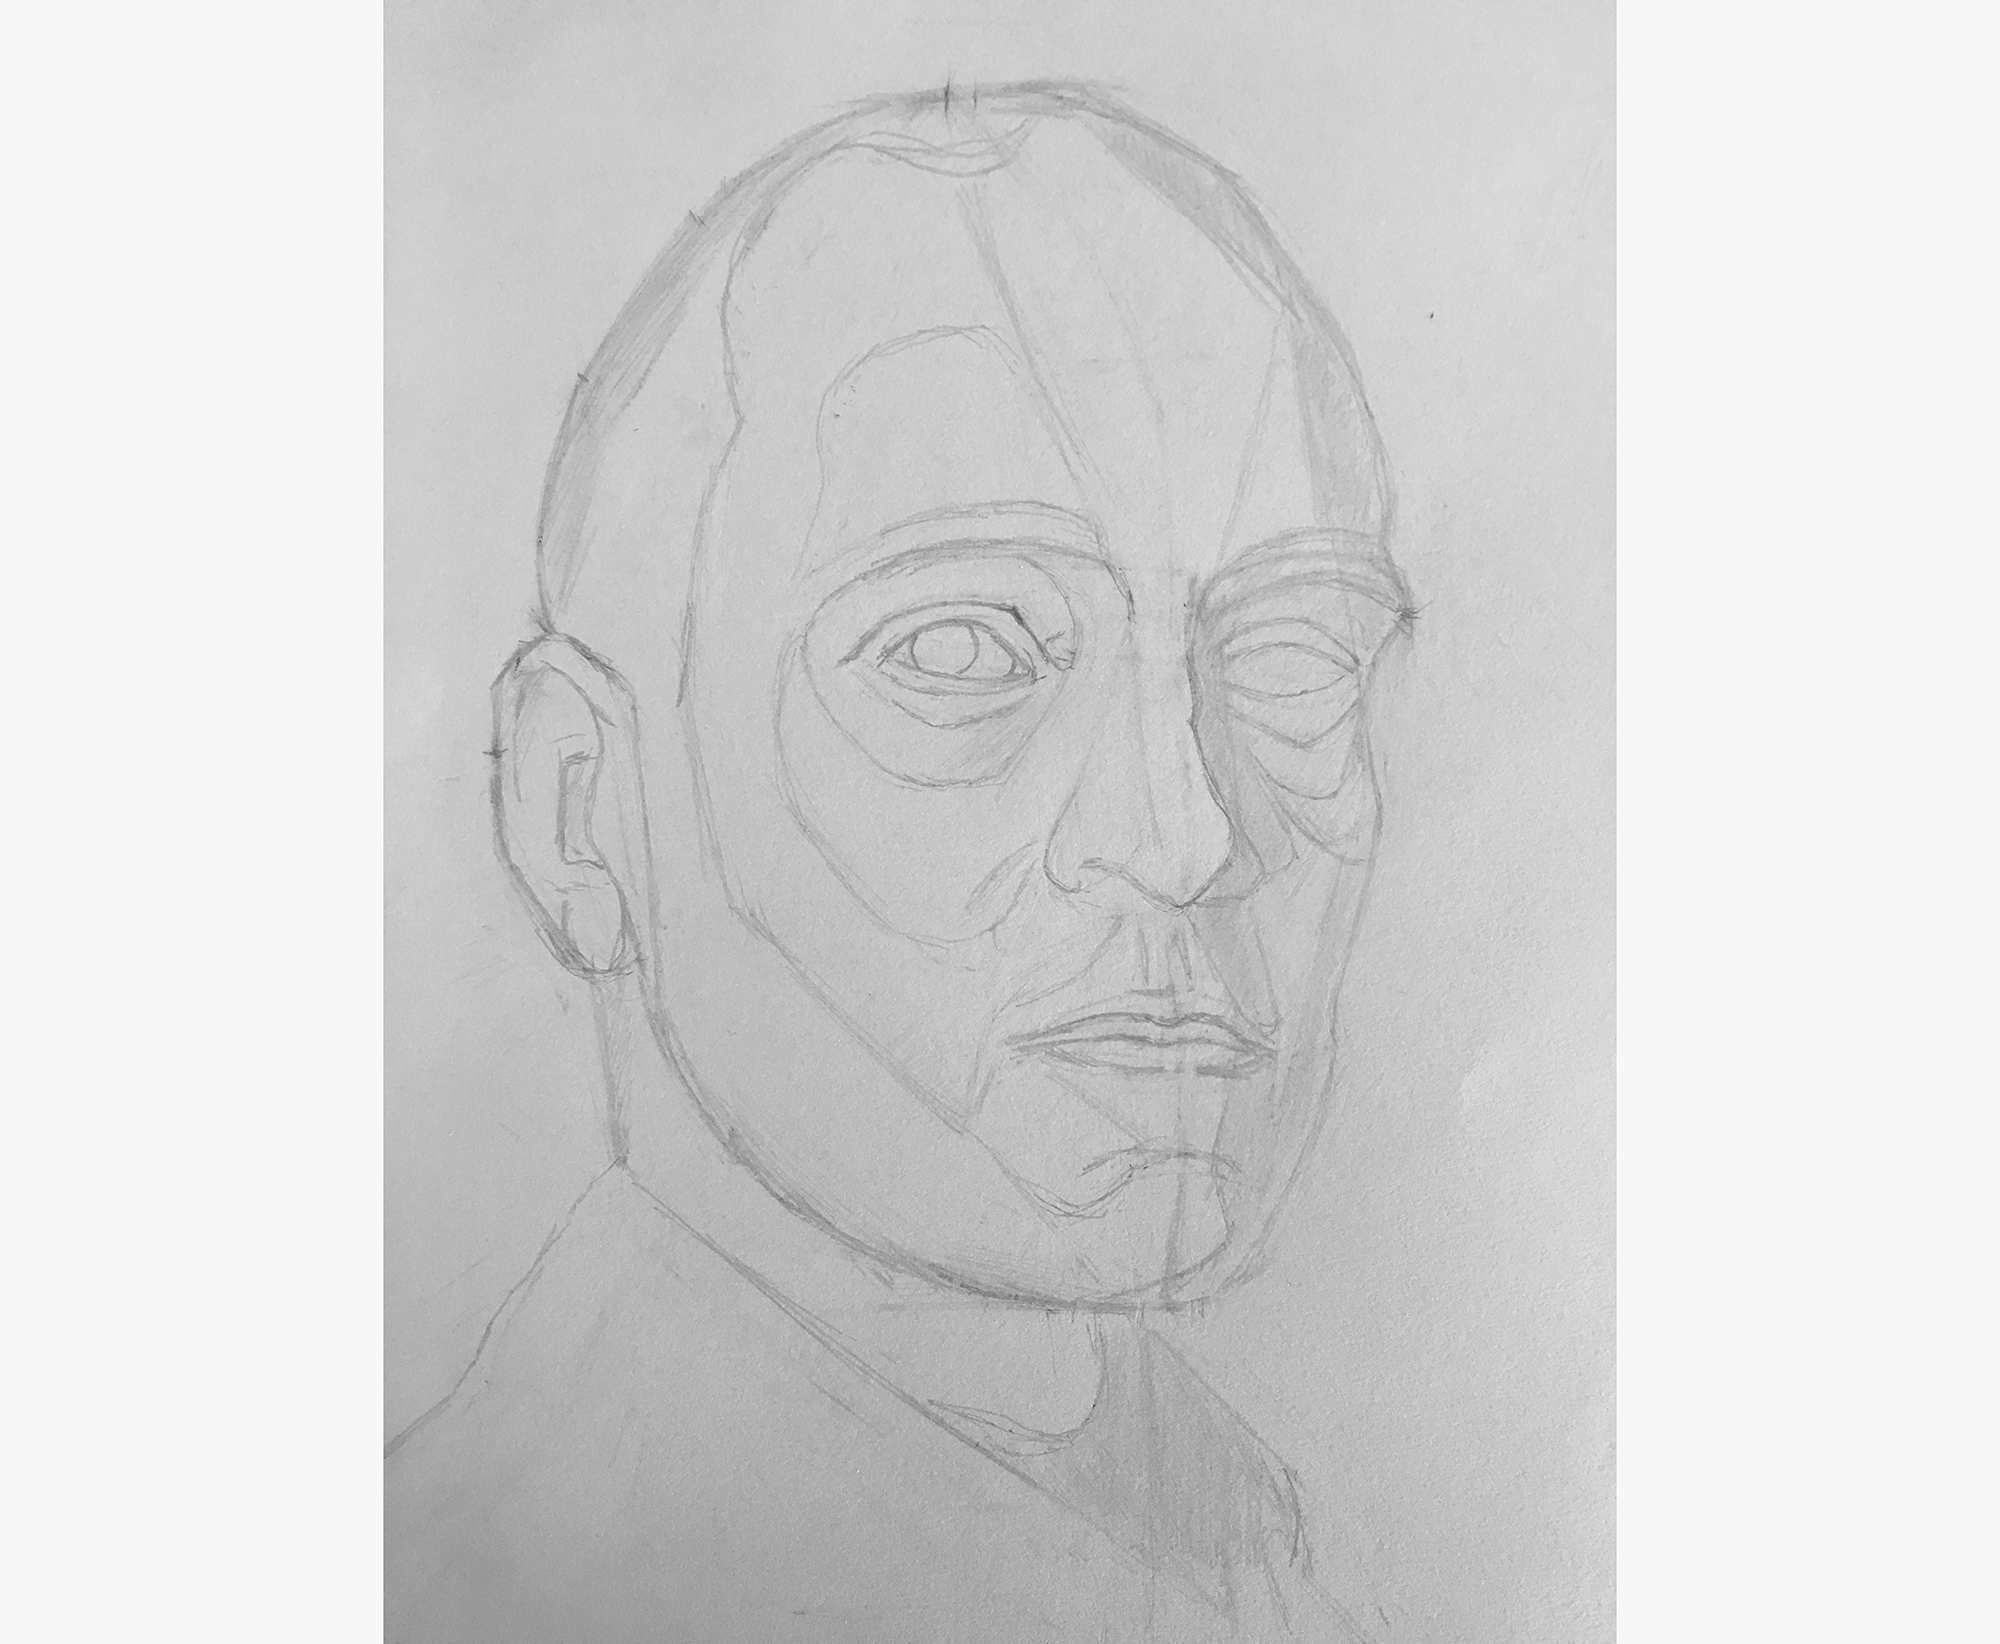
Left eye done.
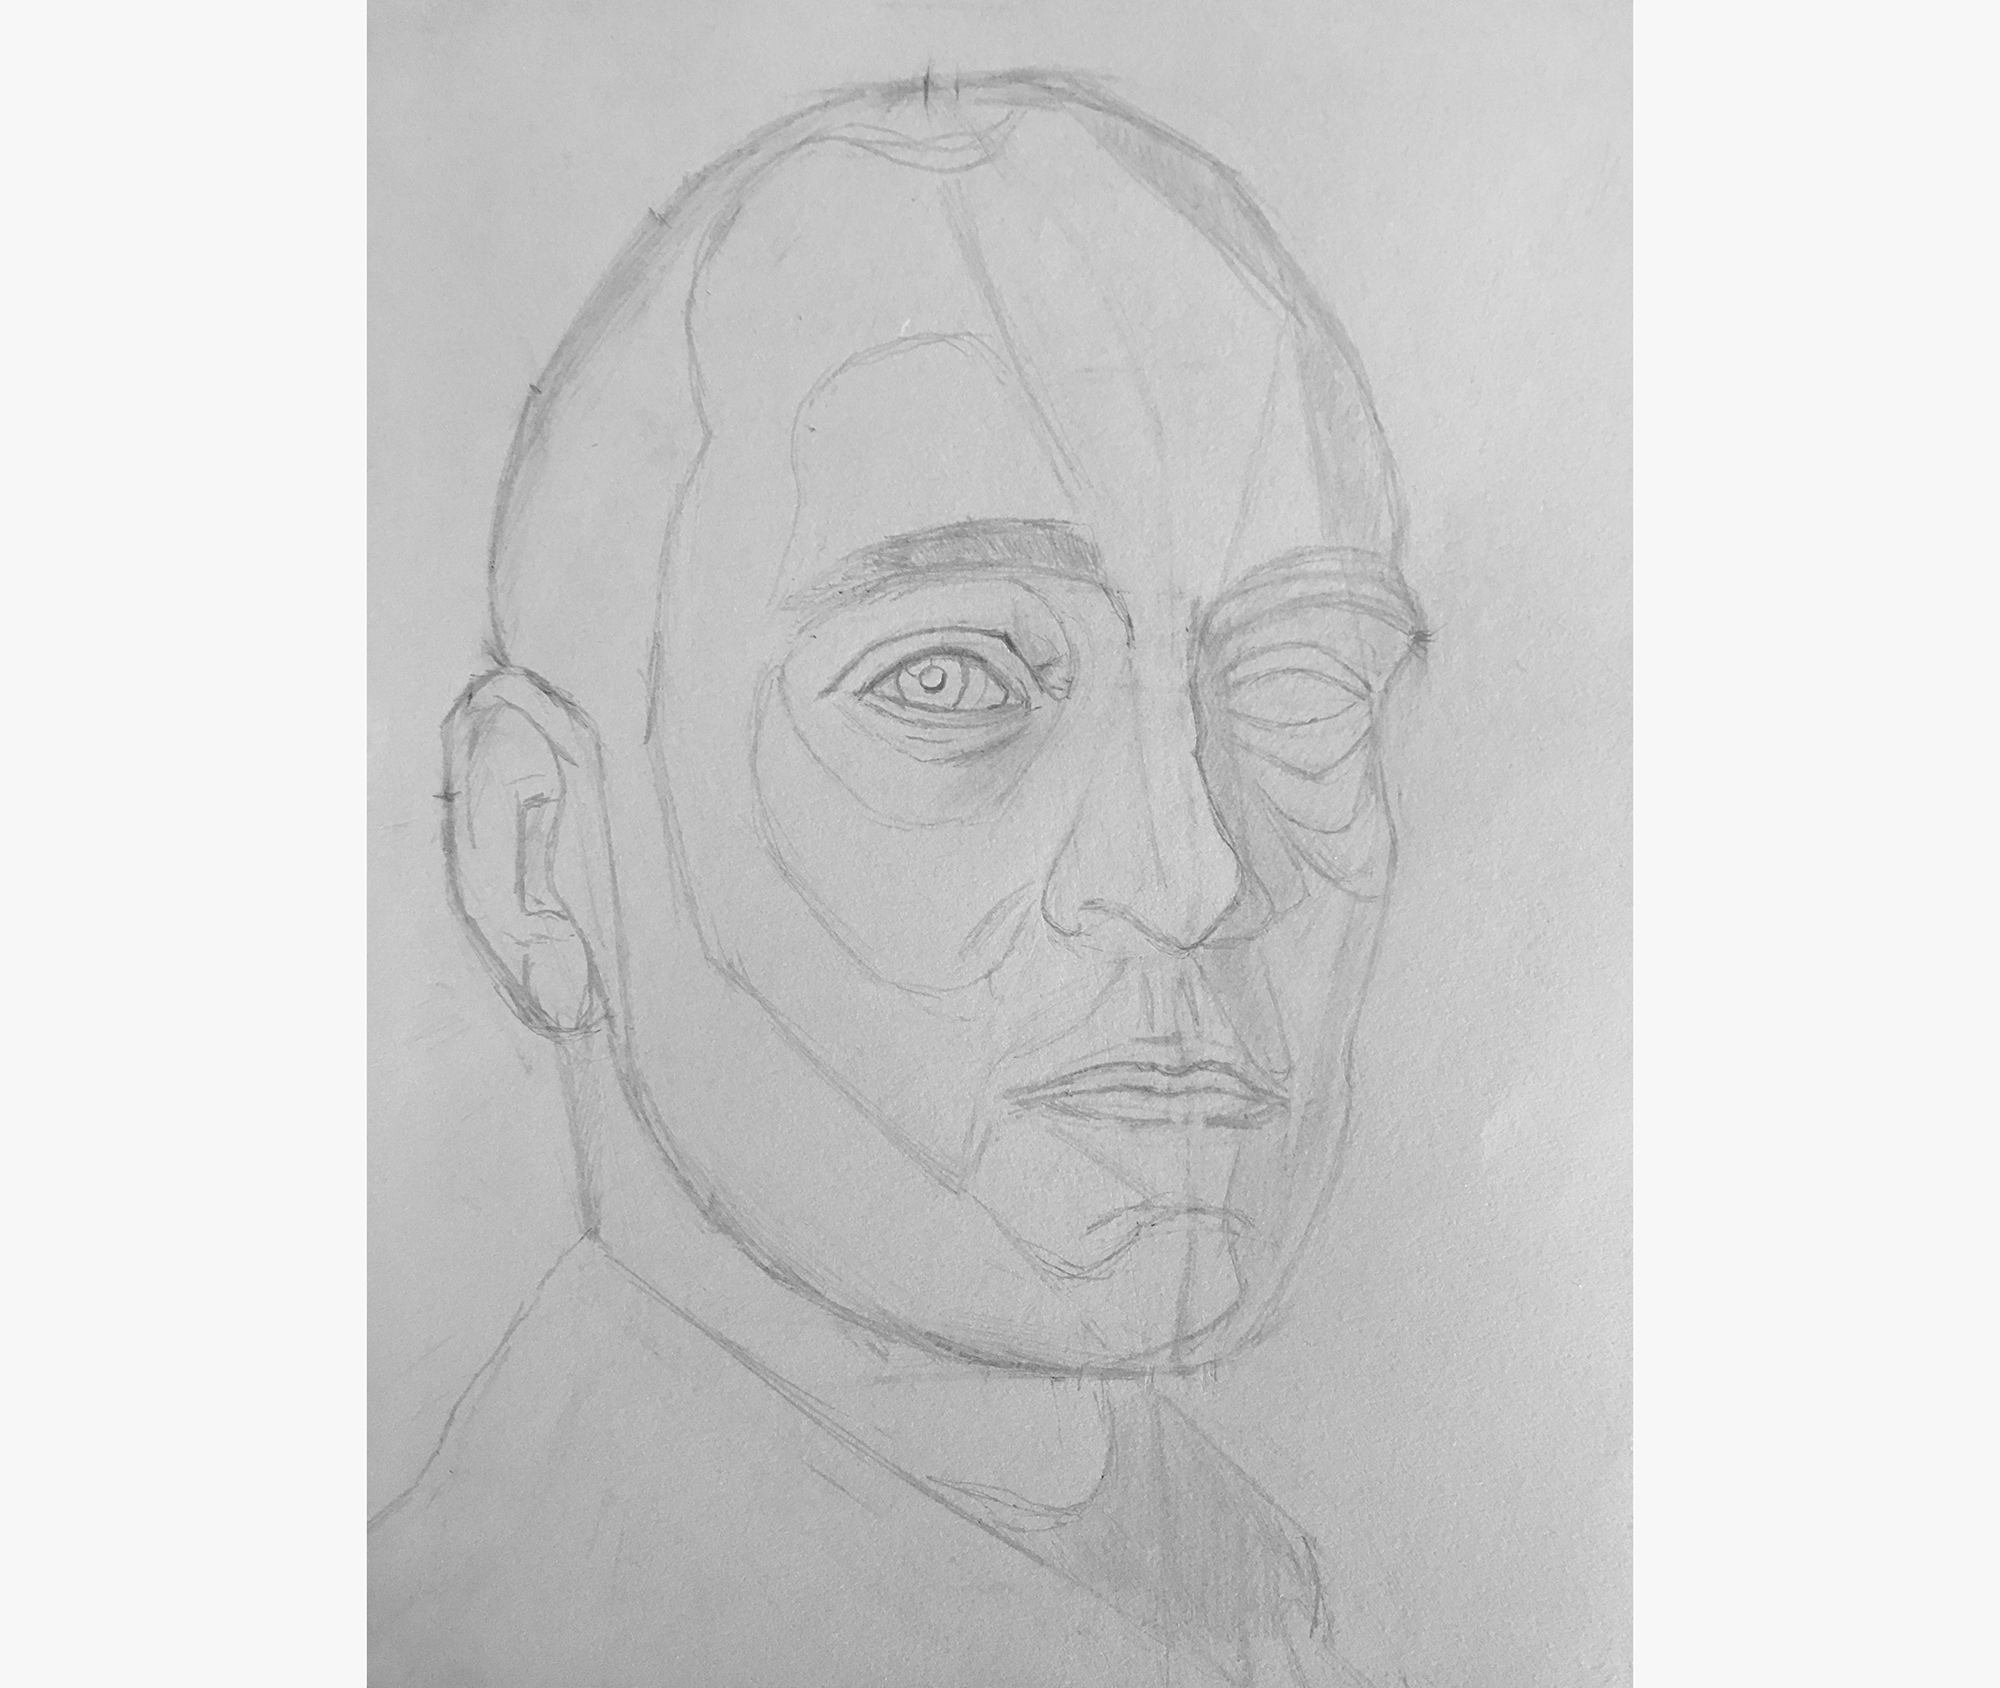
Right eye done.
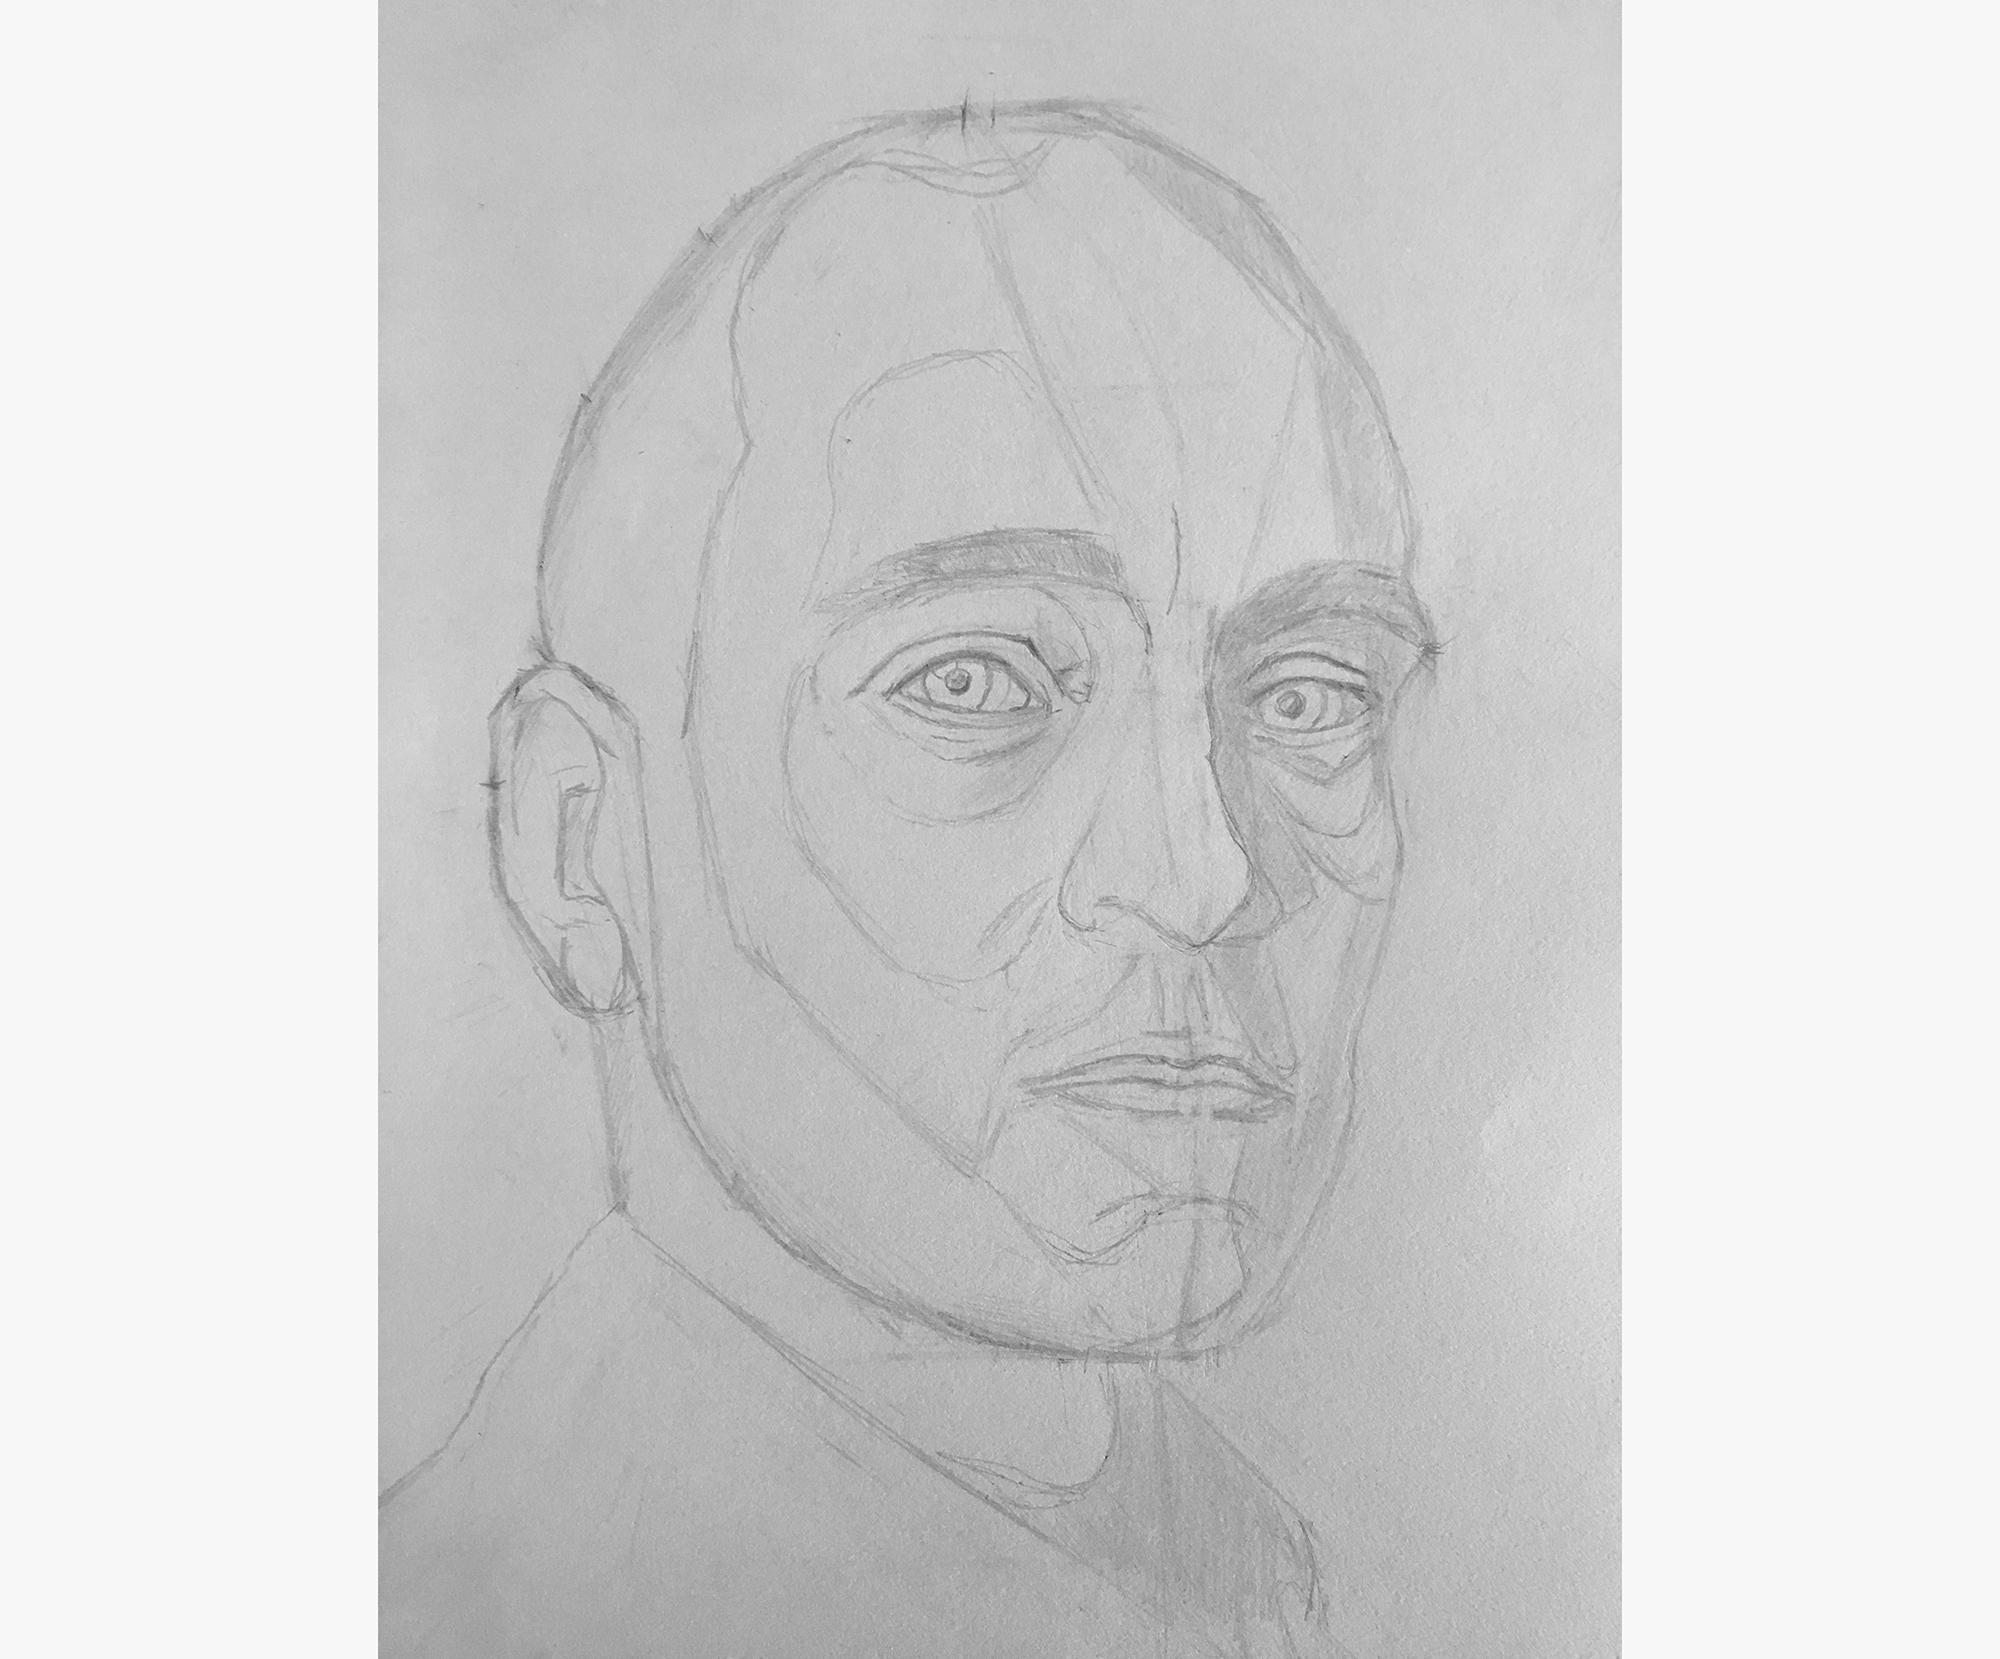
Nose done.
Lips done.
Finally, I finished up for the day with the ear.
After 7.5 hours of work (2.5 hours over the past three days), I?m finally hopefully that this portrait will resemble Derren Brown.
Tomorrow, I?ll starting adding tonal values (i.e. shading) to the drawing.
Observation about today?s session: Based on the output from today, it may seem like today?s drawing was the most technically challenging. But, in fact, I found just the opposite.
Because I spent the past two days meticulously locating and blocking in the features, it was very easy to add the incremental detail. (Trying to draw big shapes is much harder than trying to draw little shapes. Little shapes are a lot easier to visually understand and replicate)
In fact, I suspect that today was least consequential to the outcome of the portrait. If I mess up the shape of the head and the location of the features, I have very little chance of capturing a likeness. If the features are not quite accurately detailed, but in the right place, I still might have something?
Thus, instead of relying on visual inferences, tonal values can be better approximated through a simple, not-so-interpretative procedure.
Here?s how it works:
Start by identifying the absolute darkest and absolute lightest areas of the drawing. For the darkest areas, shade them as dark as you can/want. For the lightest areas, highlight them as light as you can/want.
This establishes the entire tonal range of the drawing, which is called the key of the drawing.
Establishing the key is straightforward, and doesn?t require much visual interpretation (i.e. it?s easy to find the lightest lights and the darkest darks).
Once the key is established, and the lightest and darkest values are in place, the intermediate values need to be introduced. Again, this can be done procedurally, by identifying and shading/highlighting the areas which are slightly lighter than the darkest darks and slightly darker than the lightest lights. Continuing recursively in this way, the tonal values eventually meet in the middle, and the drawing (or the relevant part of the drawing) is complete.
2. Squint to better see tonal shapes
When keying the drawing (and developing tonal values in general) it?s important that the shapes of the tonal areas are captured accurately.
In other words, if the highlight on the forehead is angular, drawing it with rounded edges wouldn?t properly capture the form.
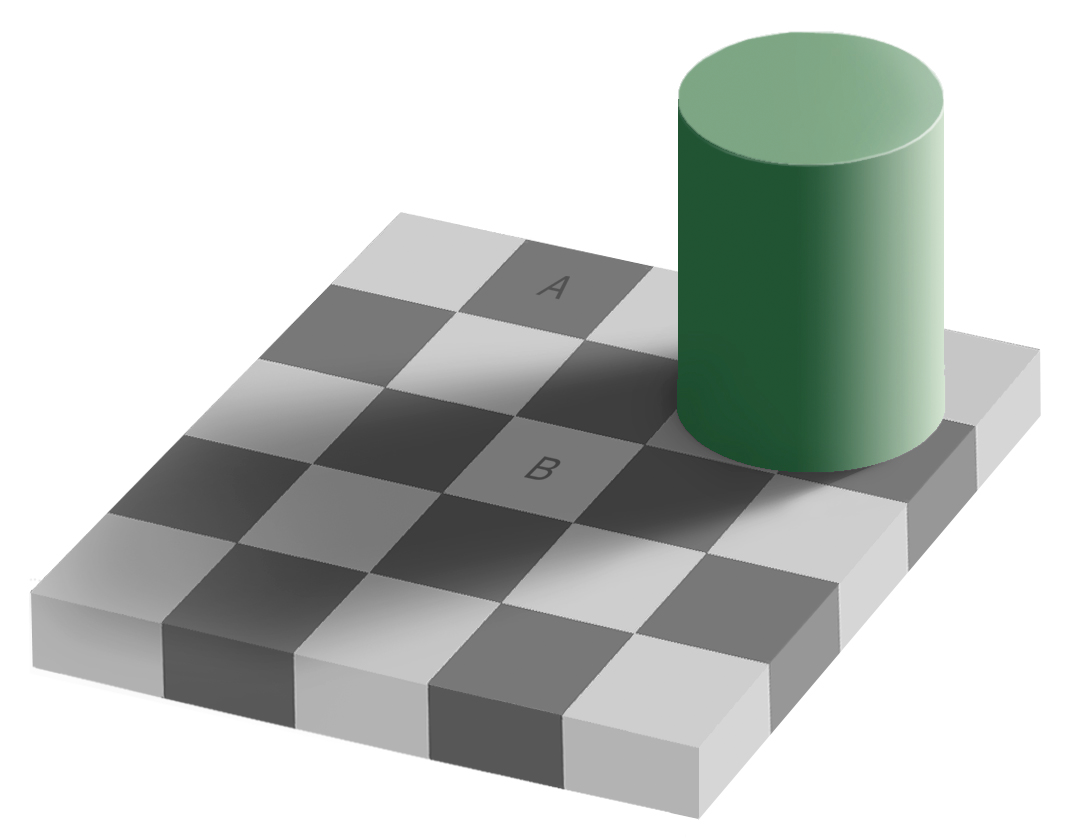
This sounds obvious, but again, your brain and visual system can play tricks on you. Your brain is attempting to see a face (via your psychologically skewed, emotions-based mental model of a face), and not just tonal blobs.
In fact, this psychological problem of misinterpreting faces is so common, there are entire drawing systems (like drawing upside down, drawing the negative space around the face, etc.) designed to combat these problems.
Side note: Here?s a video of Derren Brown, the subject of my portrait, when he used to have hair, experimenting with some of these alternative methods of painting. It?s a pretty cool trick.(If you?re going to watch, stick it out until the end).
In order to accurately see tonal shapes, and avoid psychological errors, I?ve found one method to be surprisingly successful: squinting.
Basically, you look at the area you want to draw, squint your eyes (so the image becomes blurred and your brain no longer sees a face), and identify the tonal shapes you see through your eyelashes. This works super well. (I didn?t invent this method, I?ve just validated that it works for me).
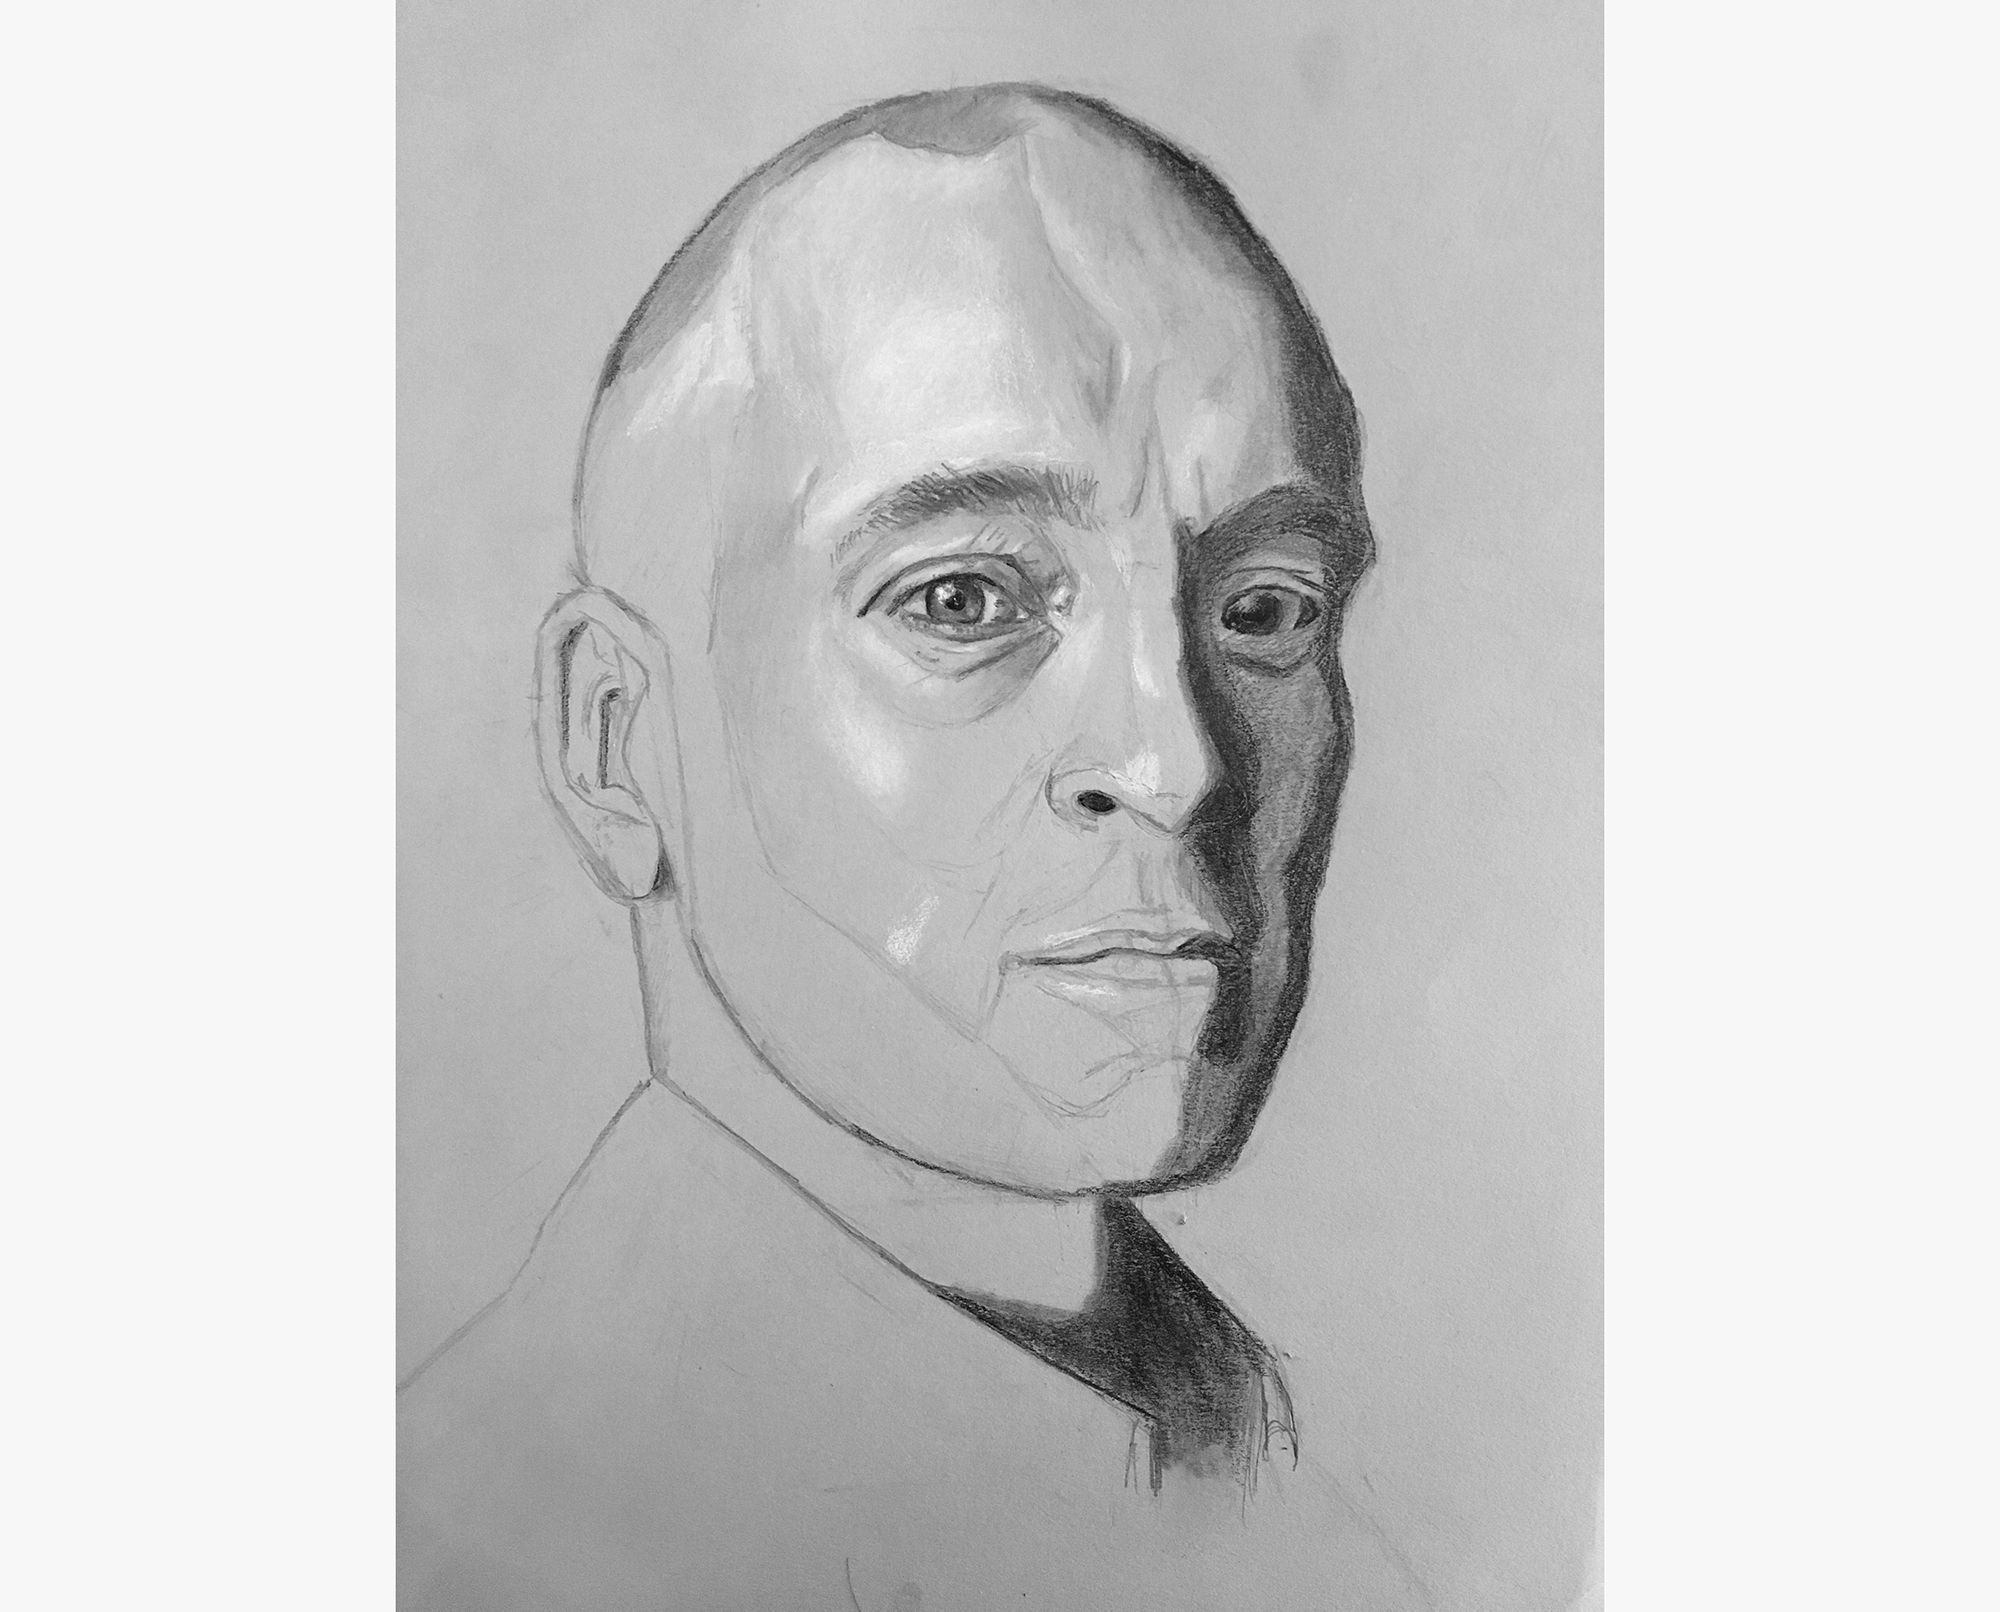
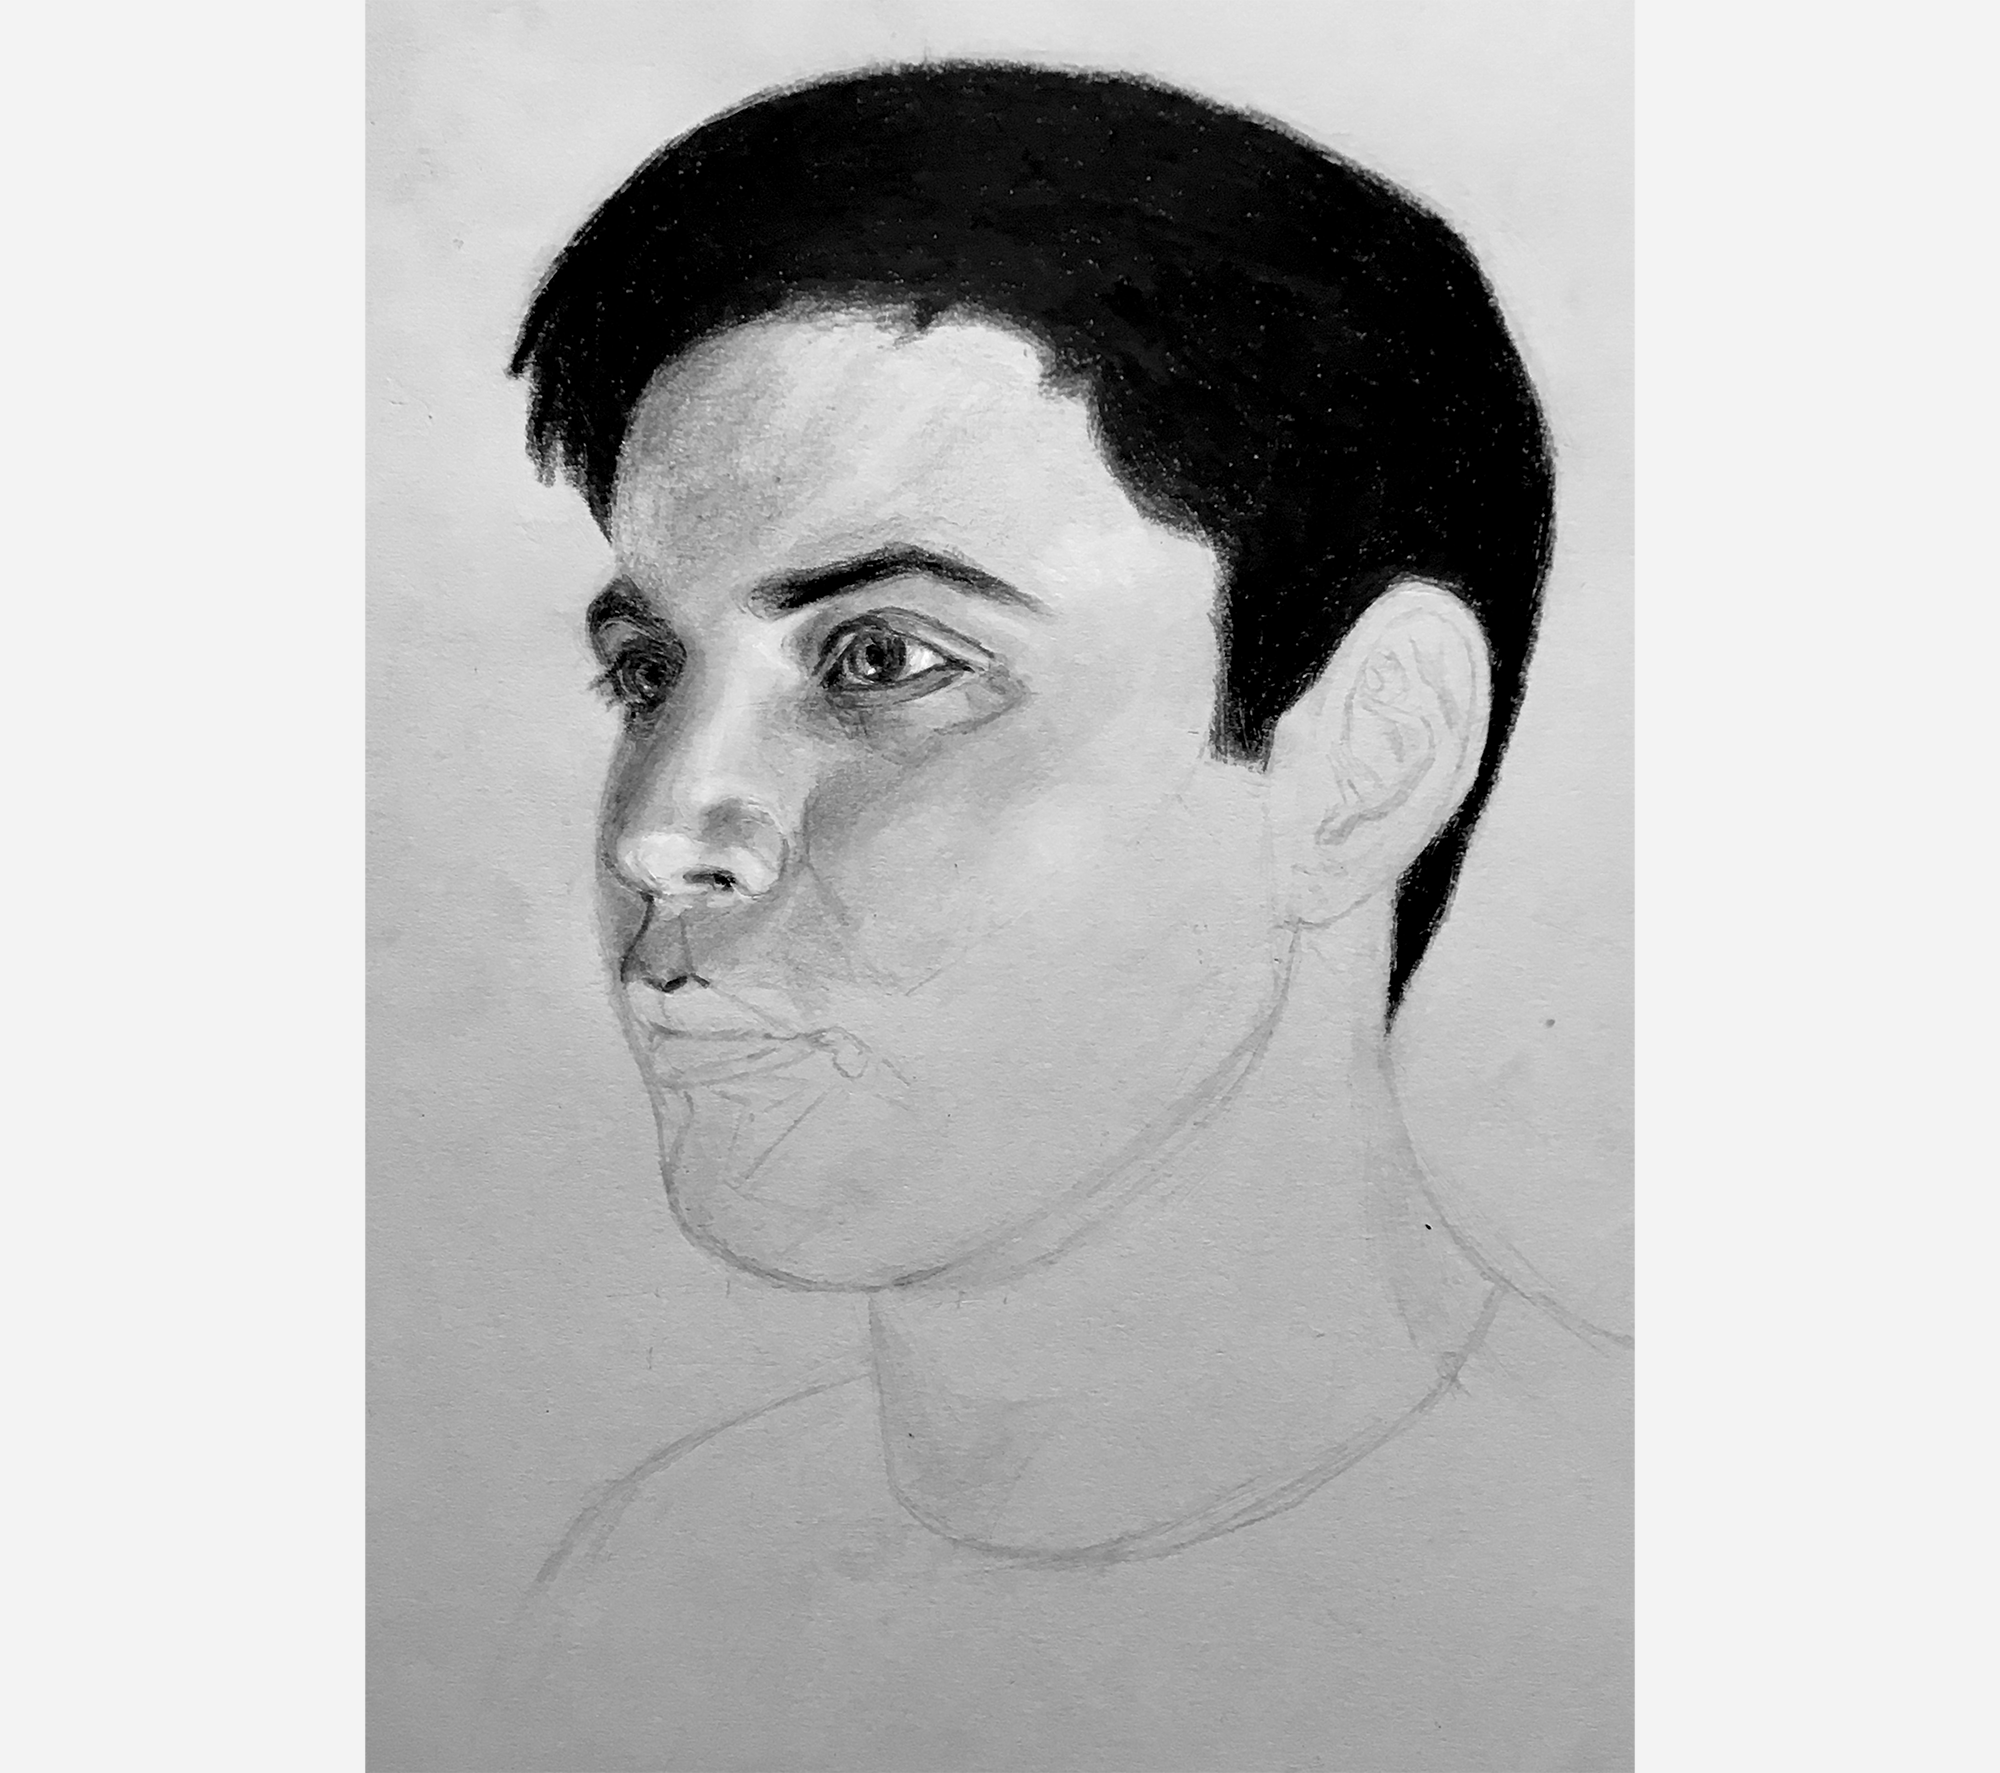
Today?s progress
With these techniques newly-learned, I began to add tonal values to my Derren Brown portrait.
First, I started with the eye.
In the course, the teacher mentioned that it?s good to start with a small area that exhibits the full range of tones.
However, the eye was too small to help effectively establish the key. So, I keyed the drawing more aggressively, starting with the shadow on the nose and the highlights on the forehead and cheek.
I continued shading the darkest areas along the right side of the face.
Additionally, while doing this, to check the accuracy of my key, I started developing the eye.
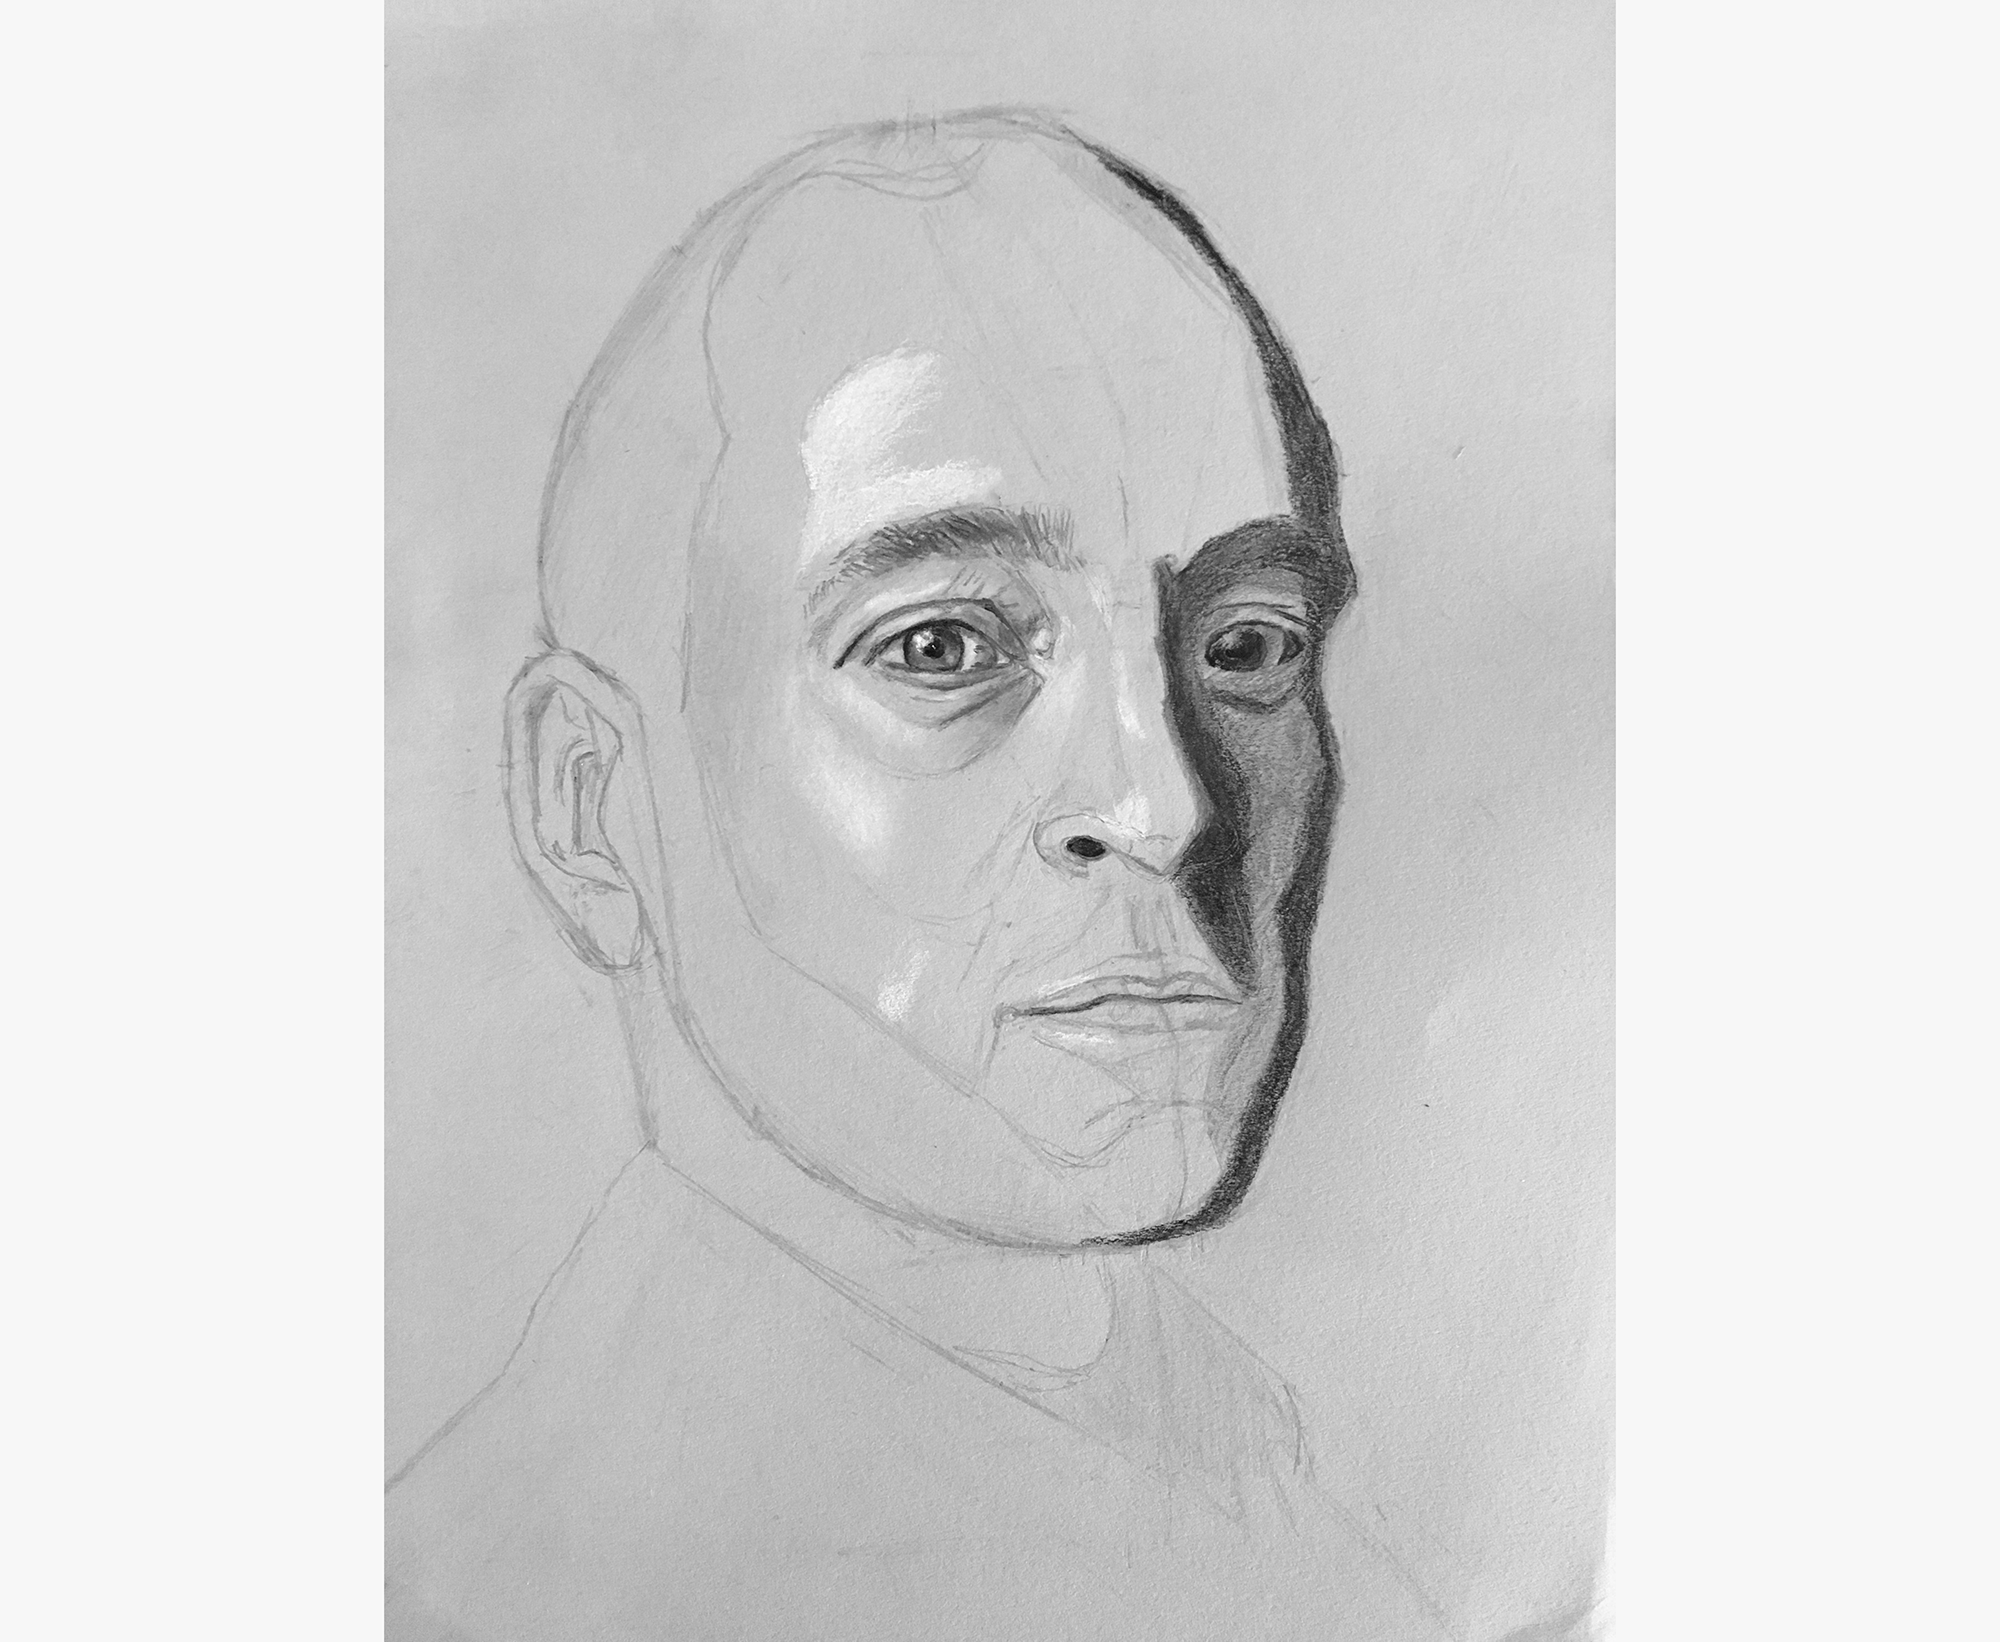
I finished up my key, by adding shadows to the lower face and the back of the head, and was ready to begin modeling the form (finding the intermediate values between the darks and lights).
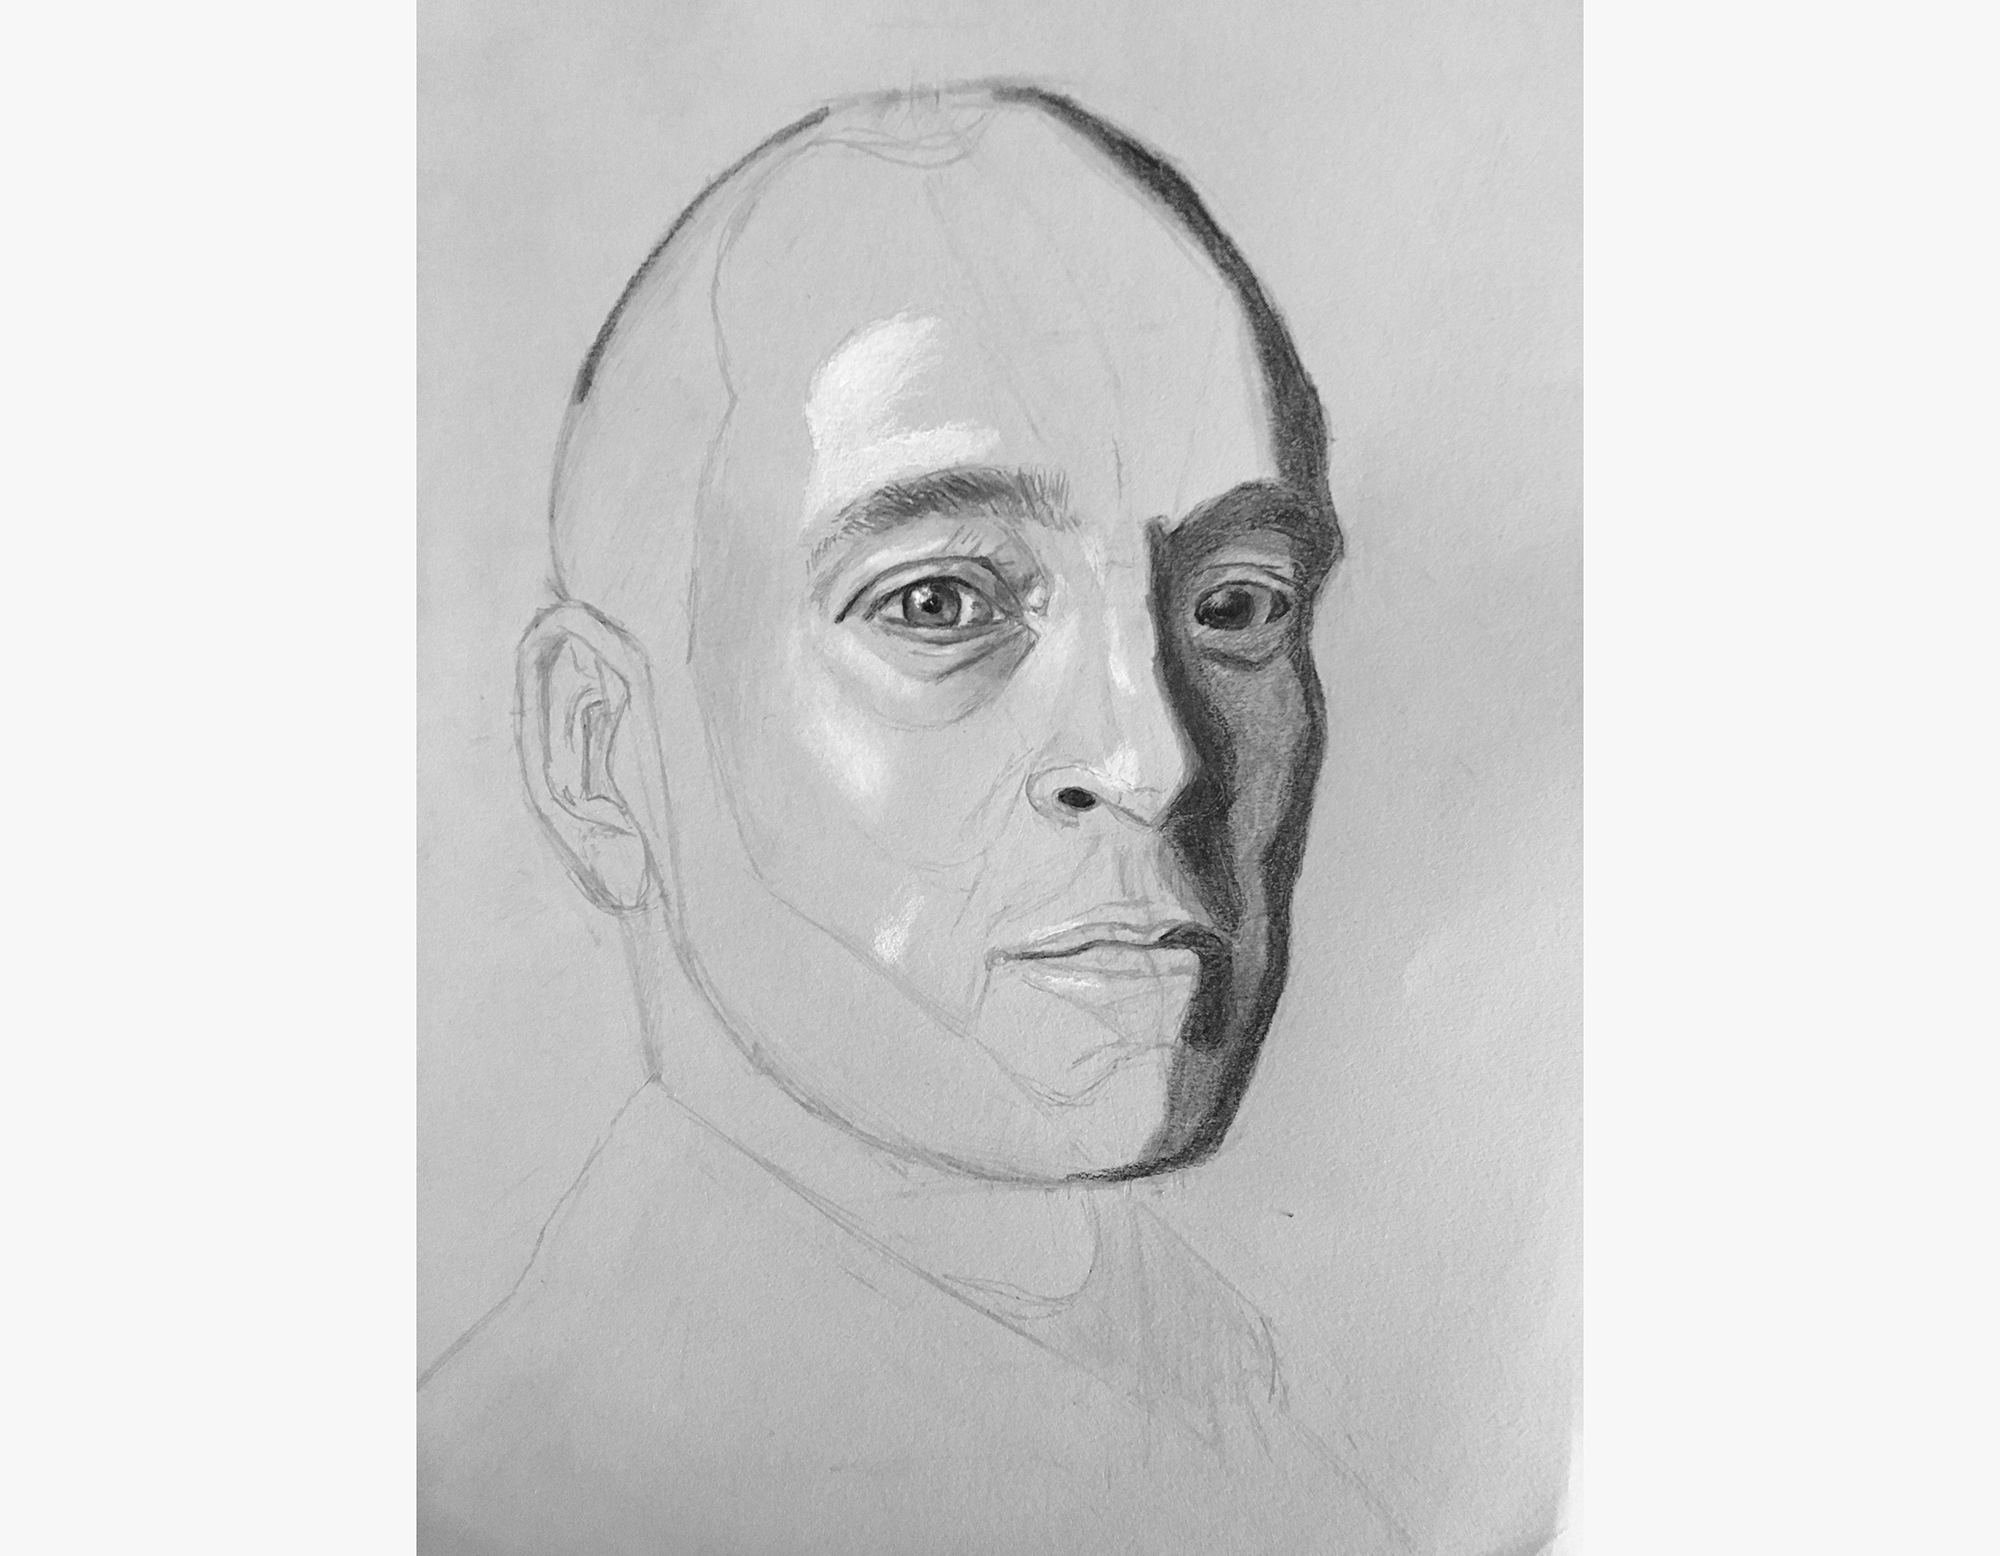
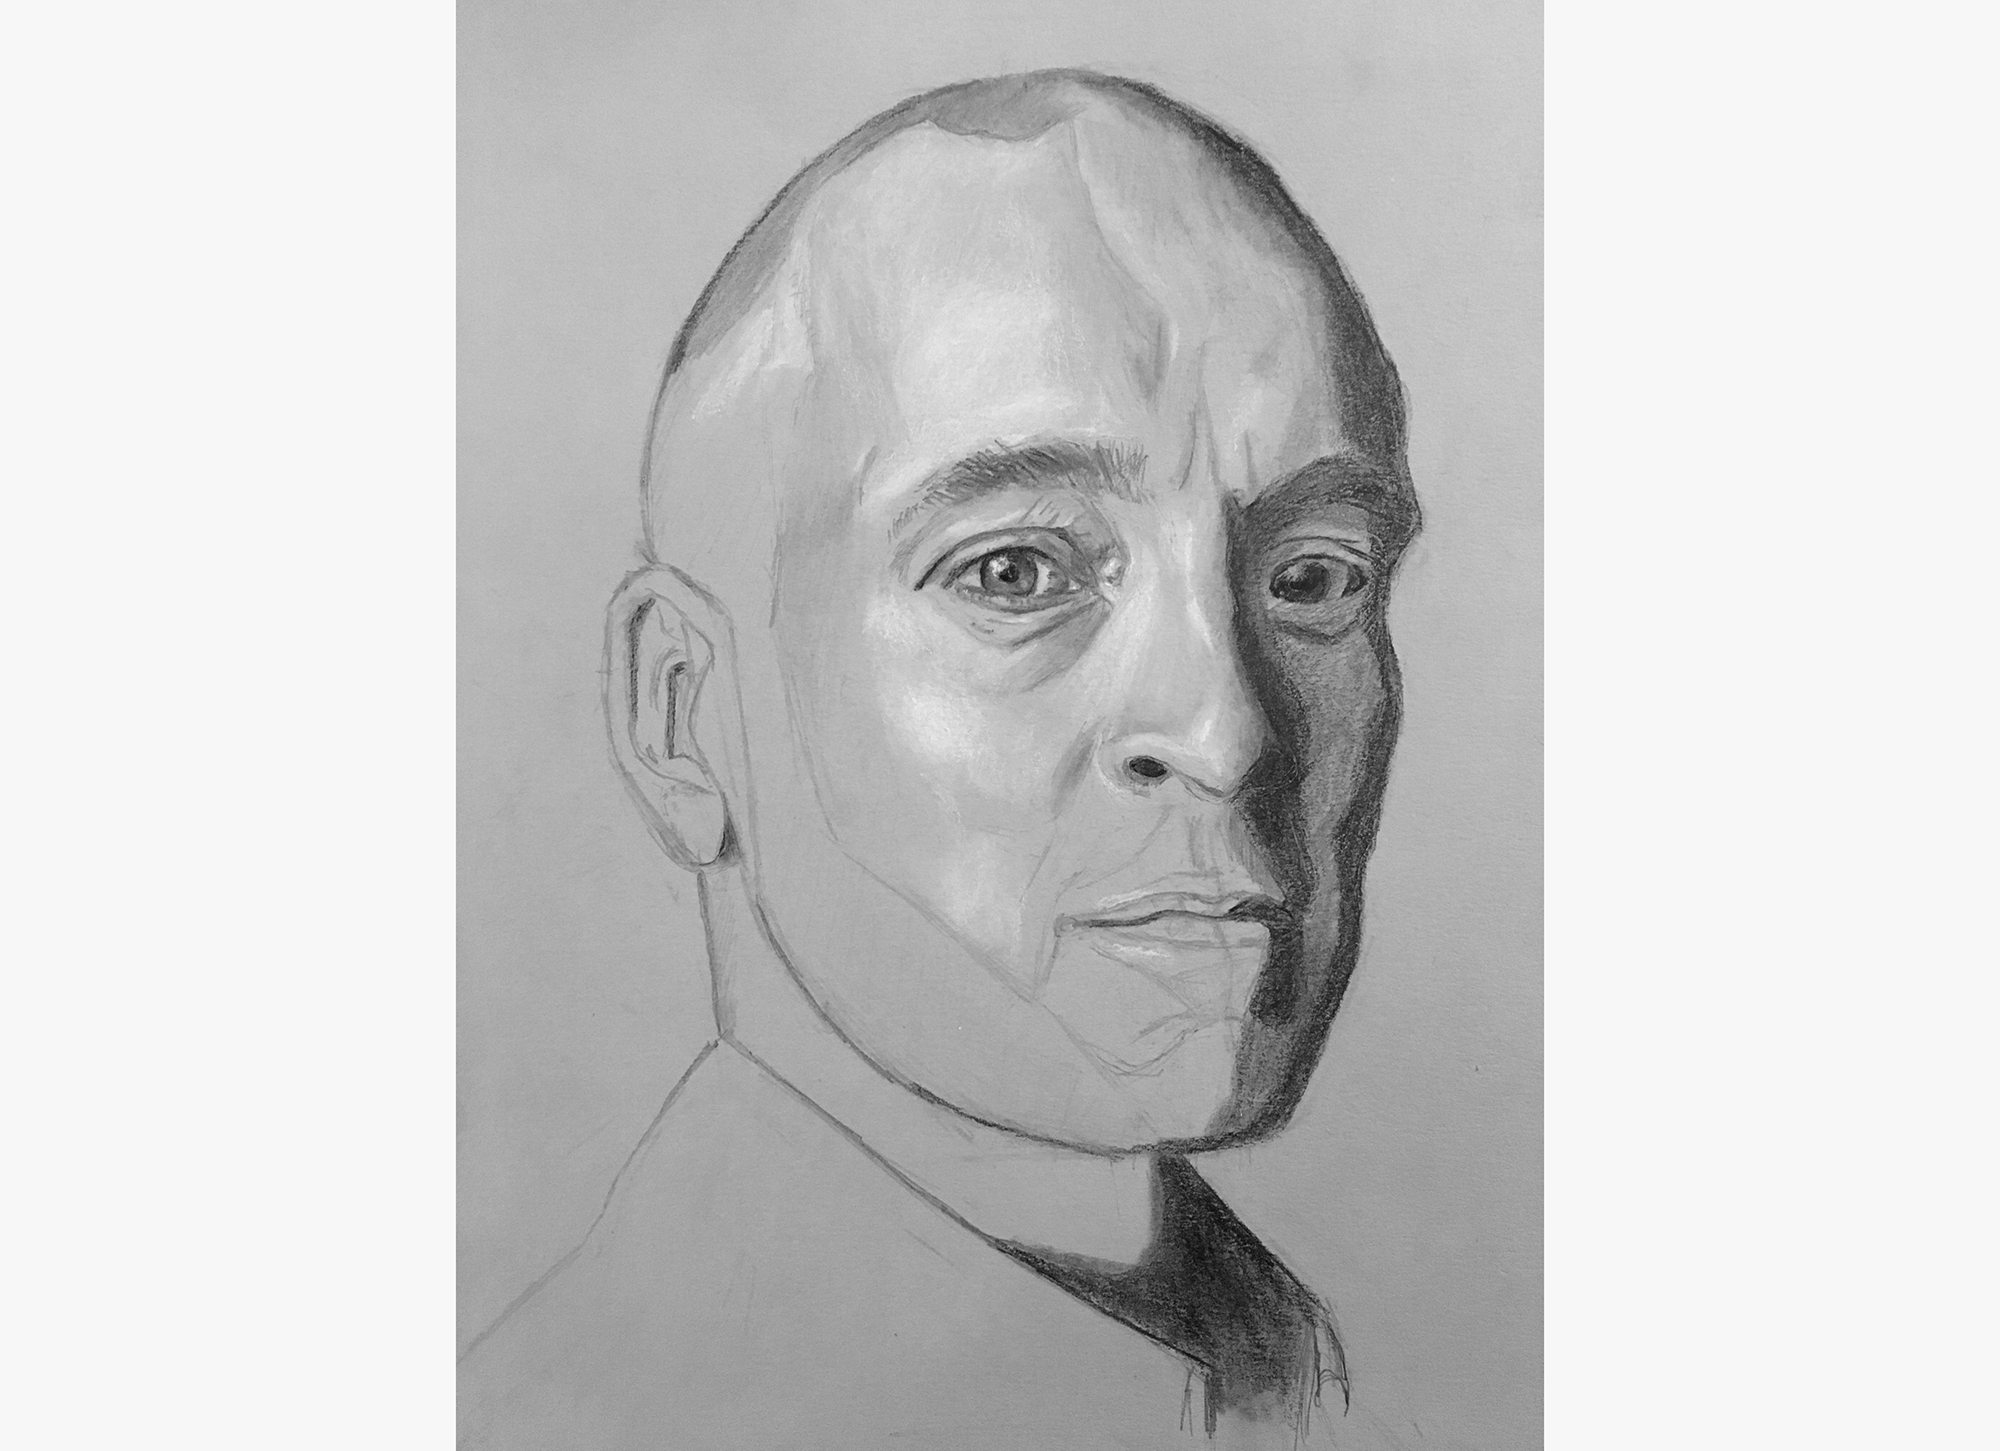
I started with the forehead.
Added a bit more detail.

And then smoothed everything out.
This is where I stopped for the day, after another 2.5 hours of working.
Derren looks a bit too shiny right now ? a bit like a mannequin or the Tin Man ? but I?m optimistic that this effect will vanish once I model the rest of the form.
I?m guessing I have another 5 hours of work left on this.
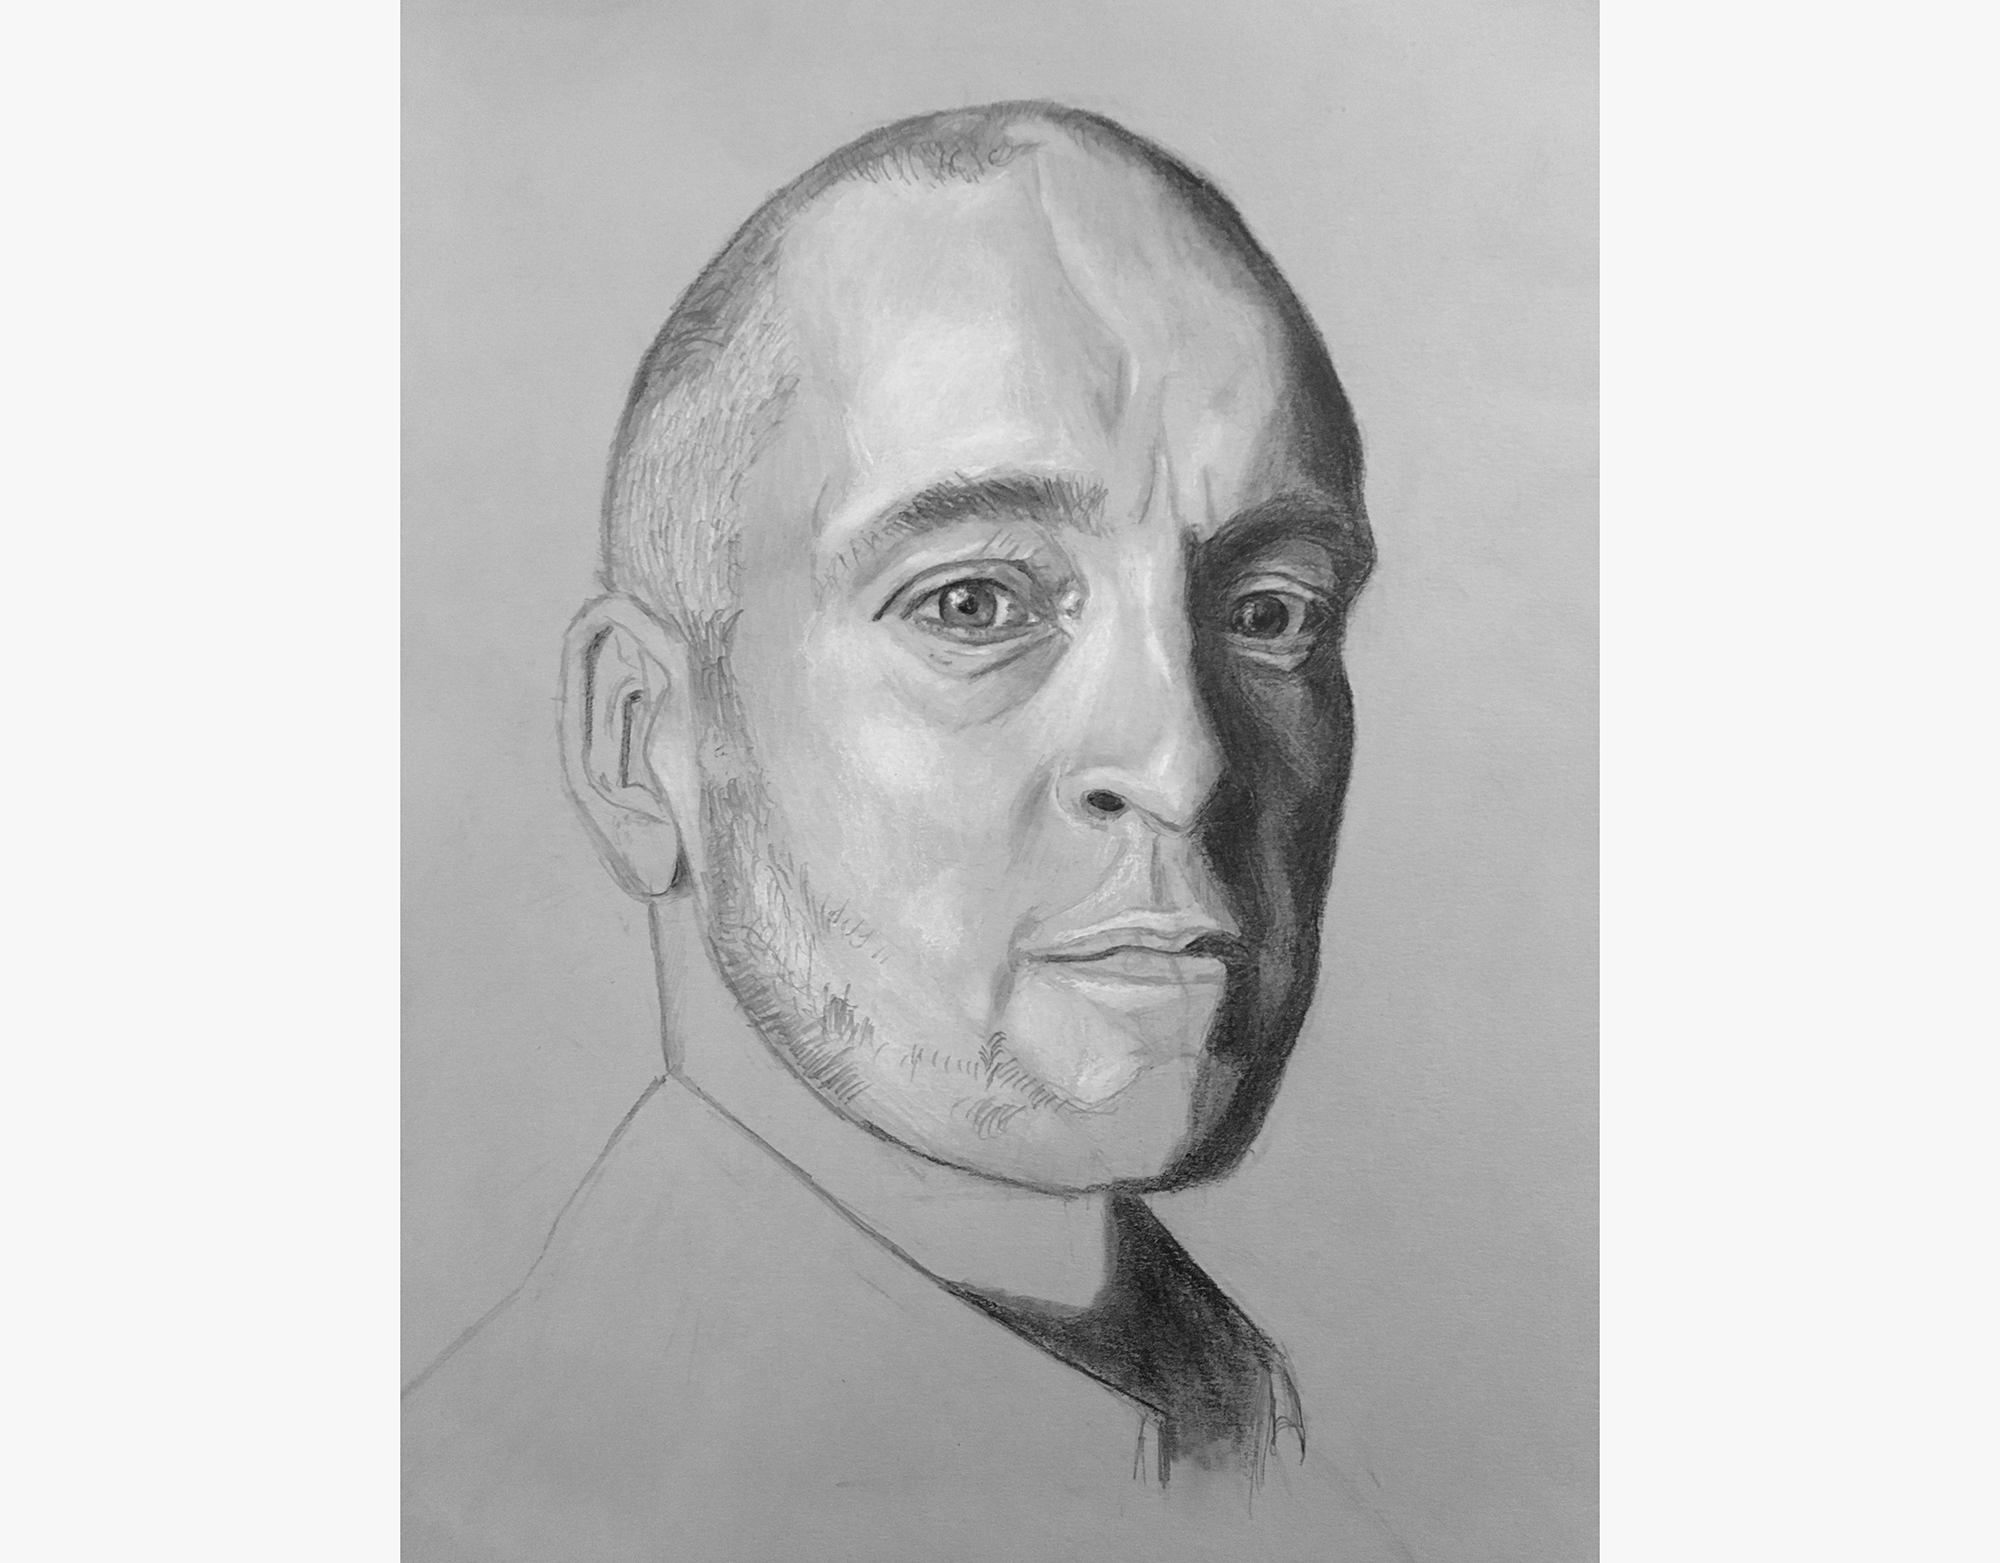
Then, I addressed the right half of the face ? further developing the shadow.
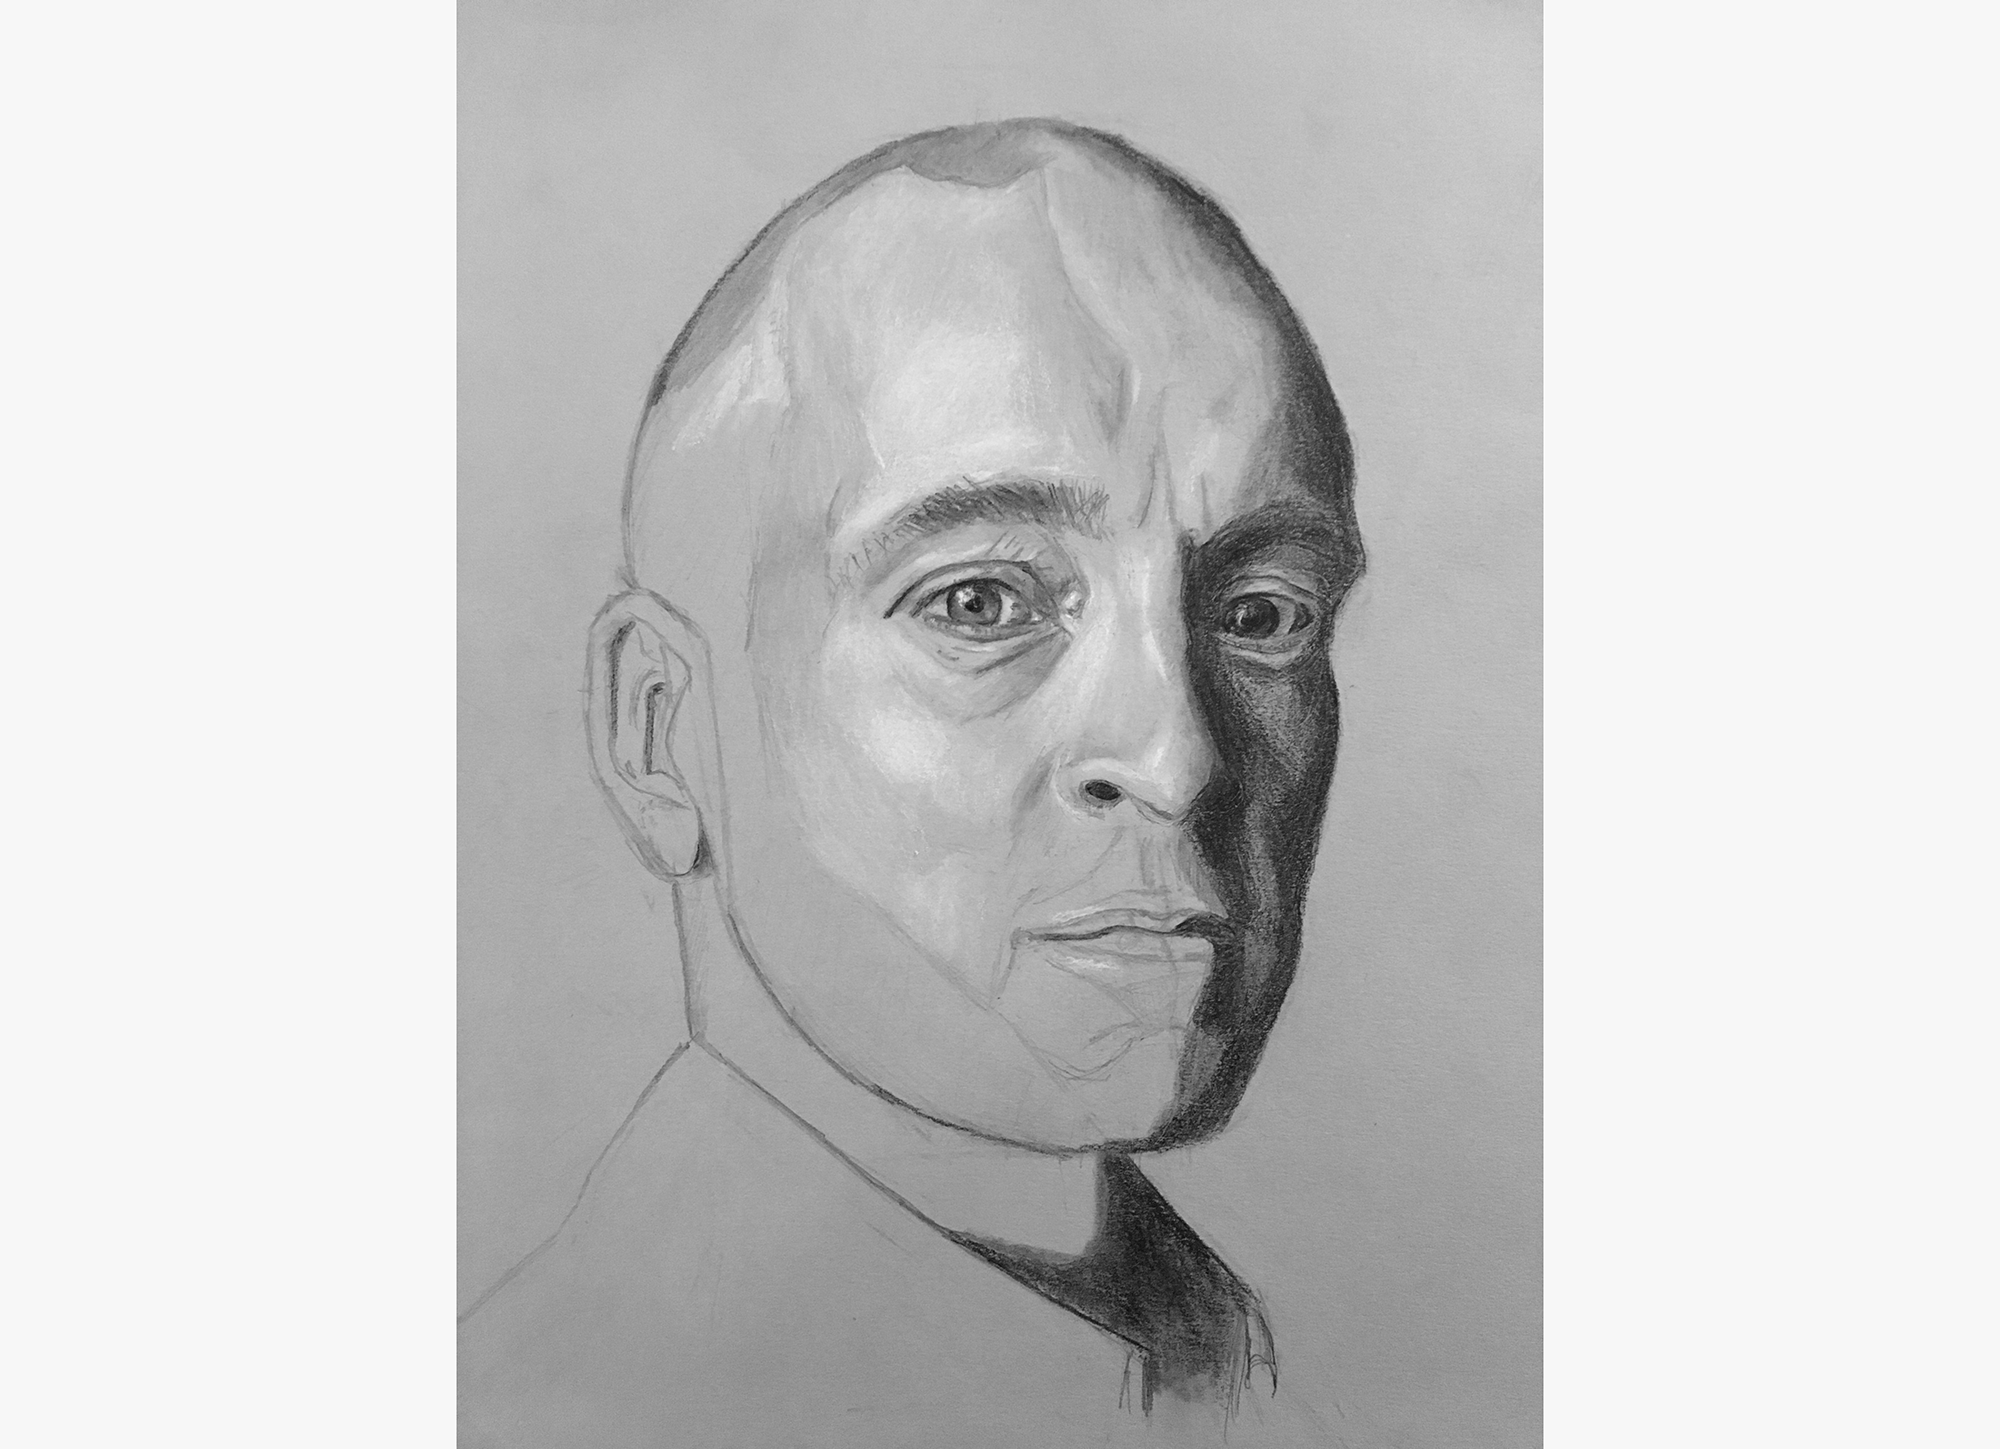
Next, I moved on to Derren?s hair and beard.
Since the demo portrait in course is based on a long-haired female model, I had to do a bit more freestyling at this point. I think it works.
I continued with the upper part of the beard, and finished up for the day.
Tomorrow, I need to finish the mouth, the ear, the neck, the lower part of the beard, and perhaps the clothing.
Getting close?
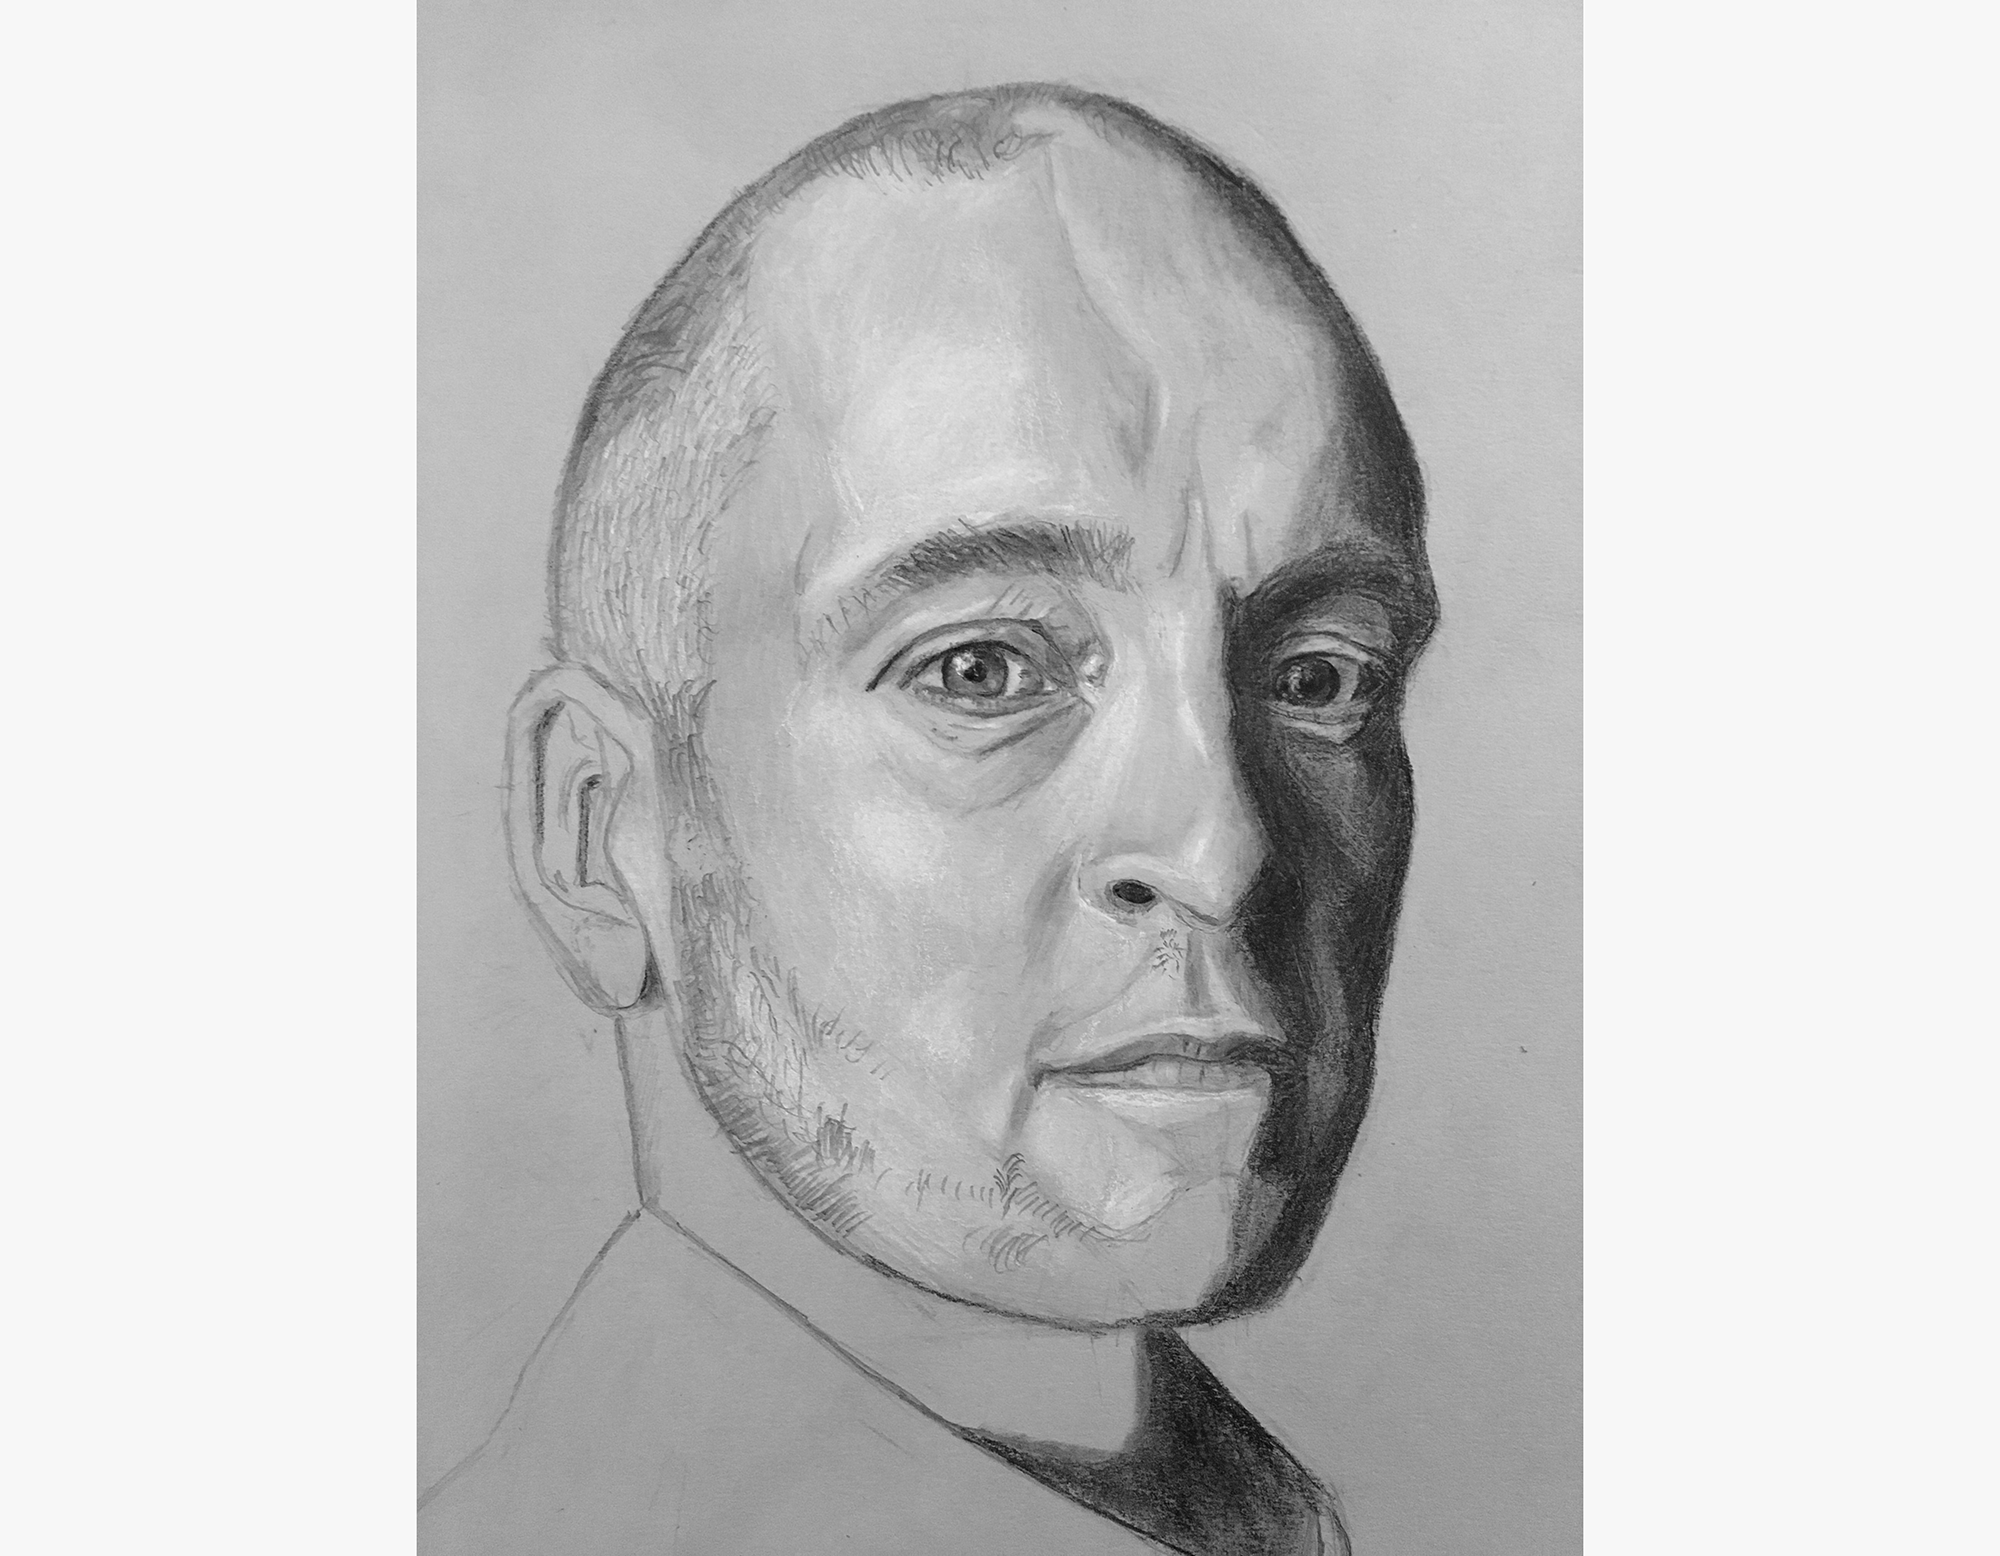
Then, I added the mustache.
With this facial hair momentum, I finished off the beard.
Then, the ear.
Finally, I completed the neck, decided not to address the clothes, signed it, and I was done.
For my first portrait of the month, I?m quite happy with how it turned out.
Here?s my attempt to locate the peak of his head, the lowest point of his chin (which is located on the chin?s left side), the leftmost point of his cheek, and the rightmost point of his ear.

In Photoshop, I overlaid my sketch on the photo to check. I was pretty accurate.
Natalie Portman
Here?s Natalie.
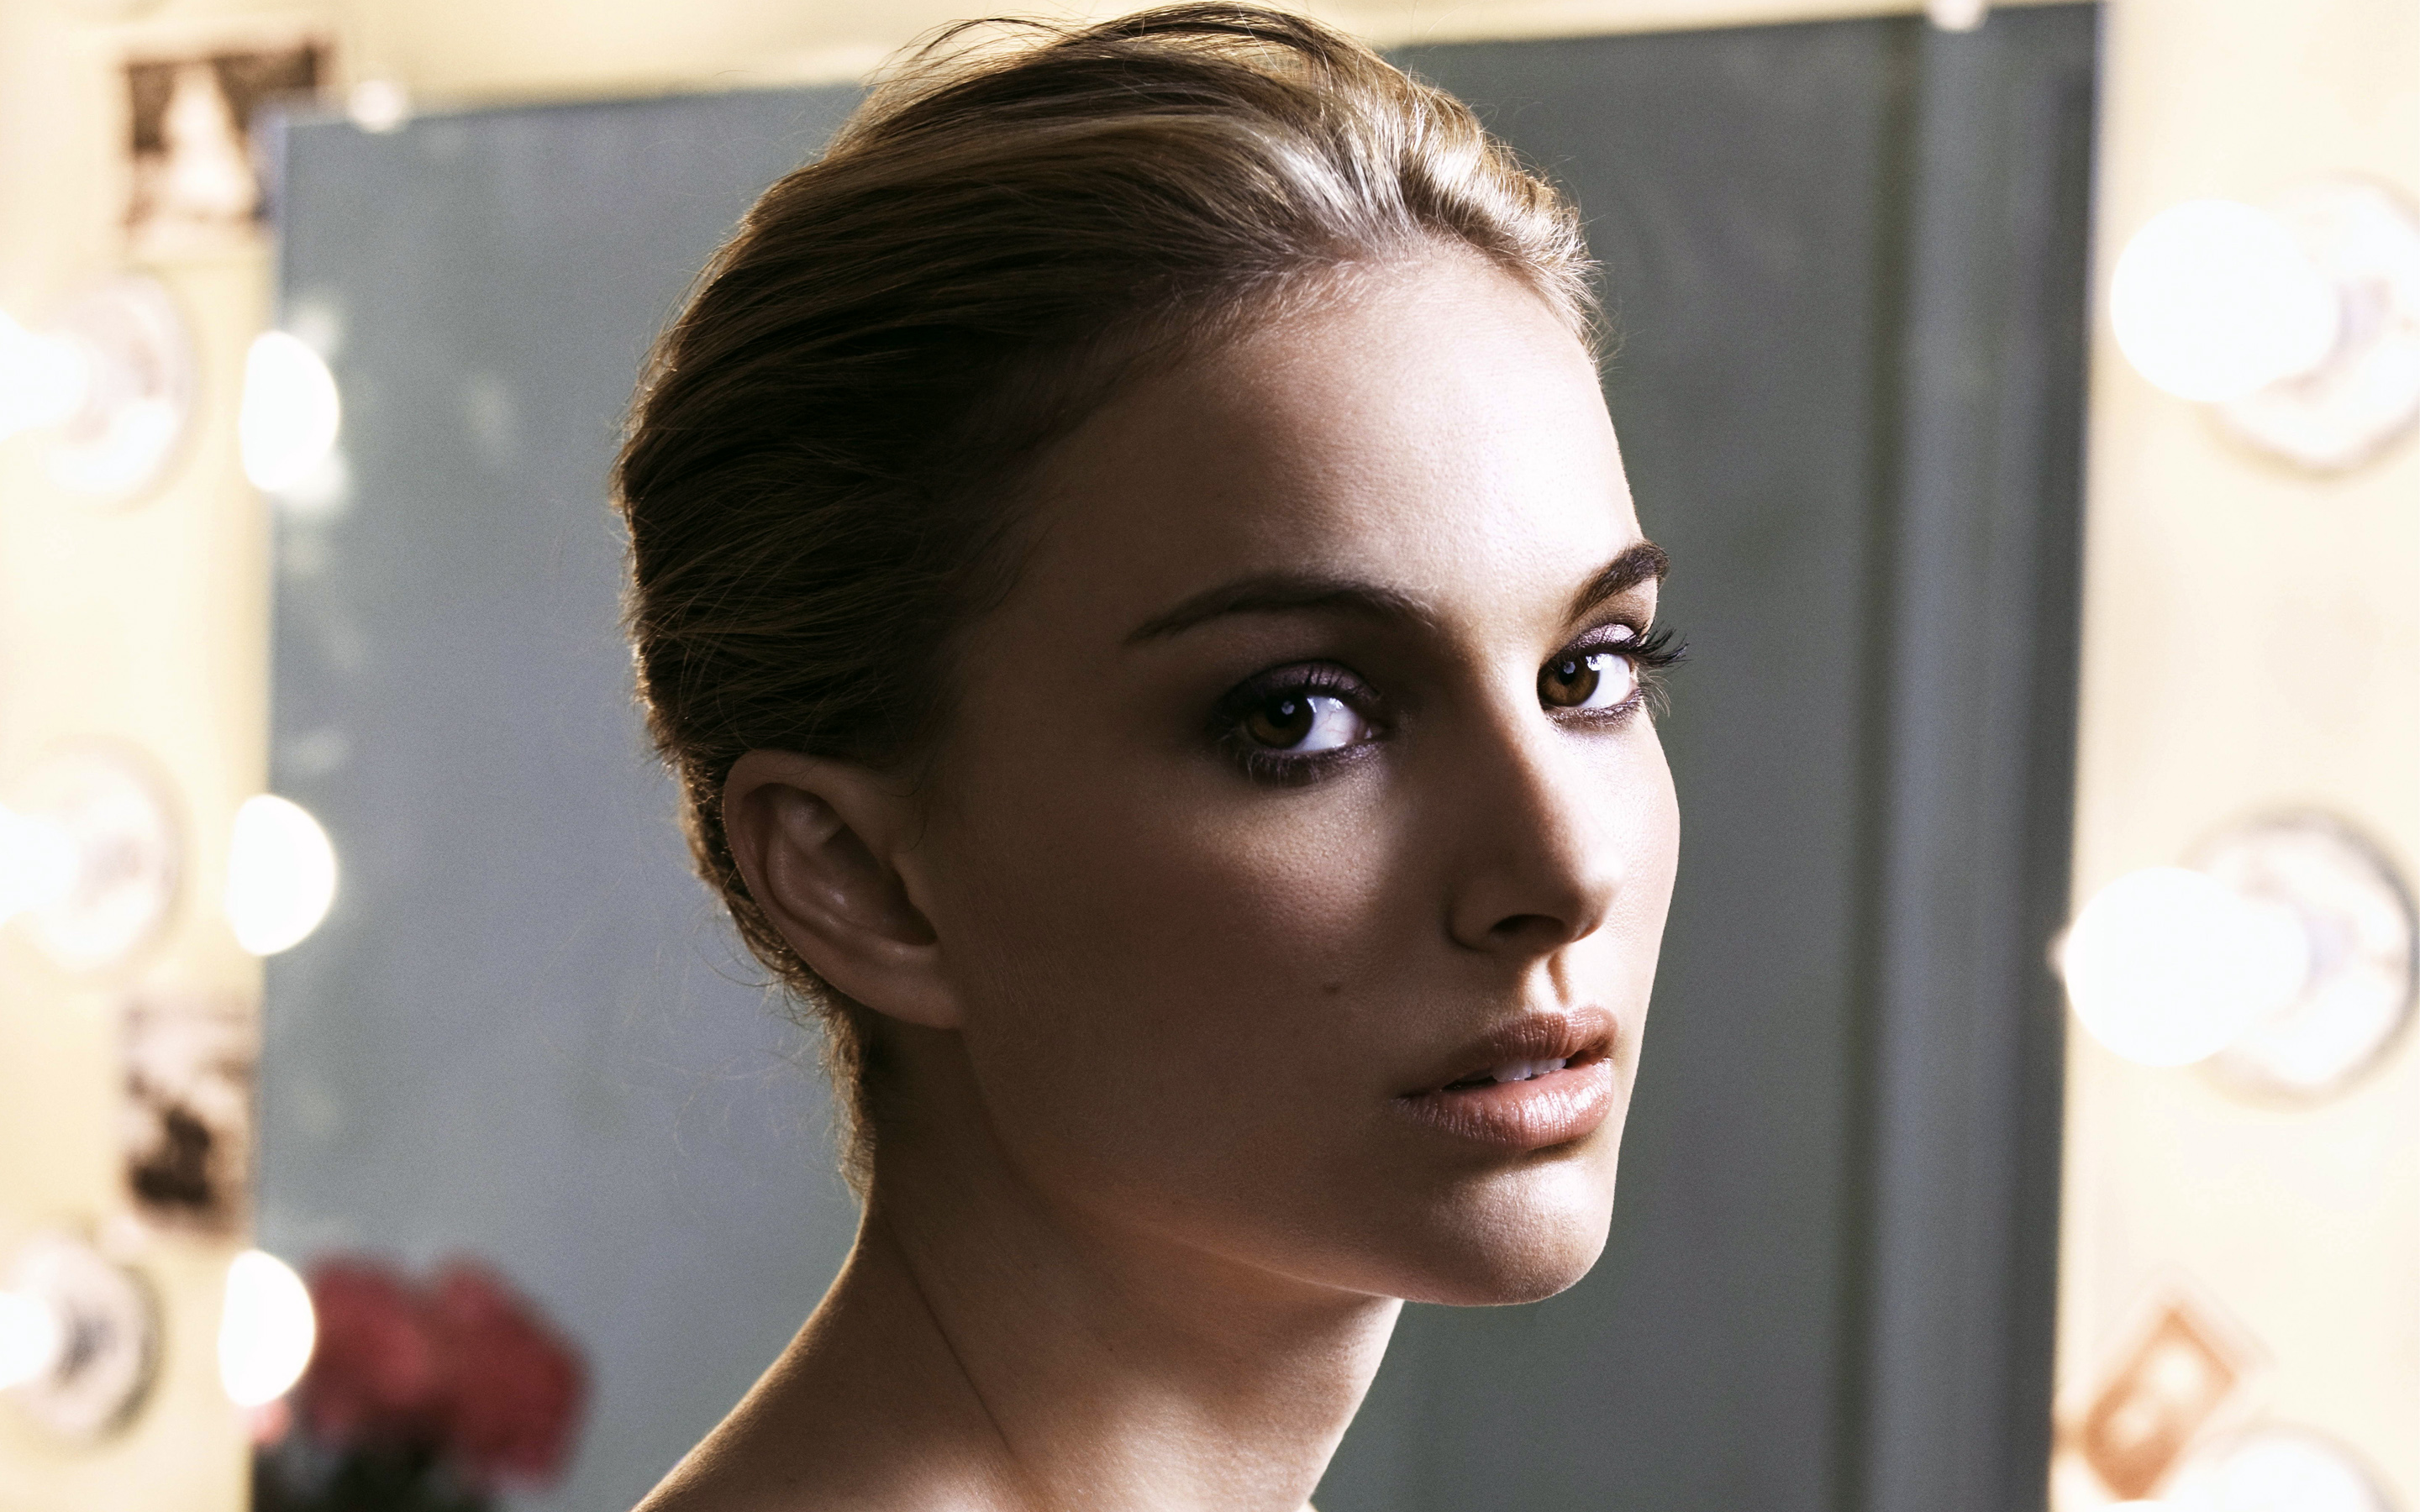
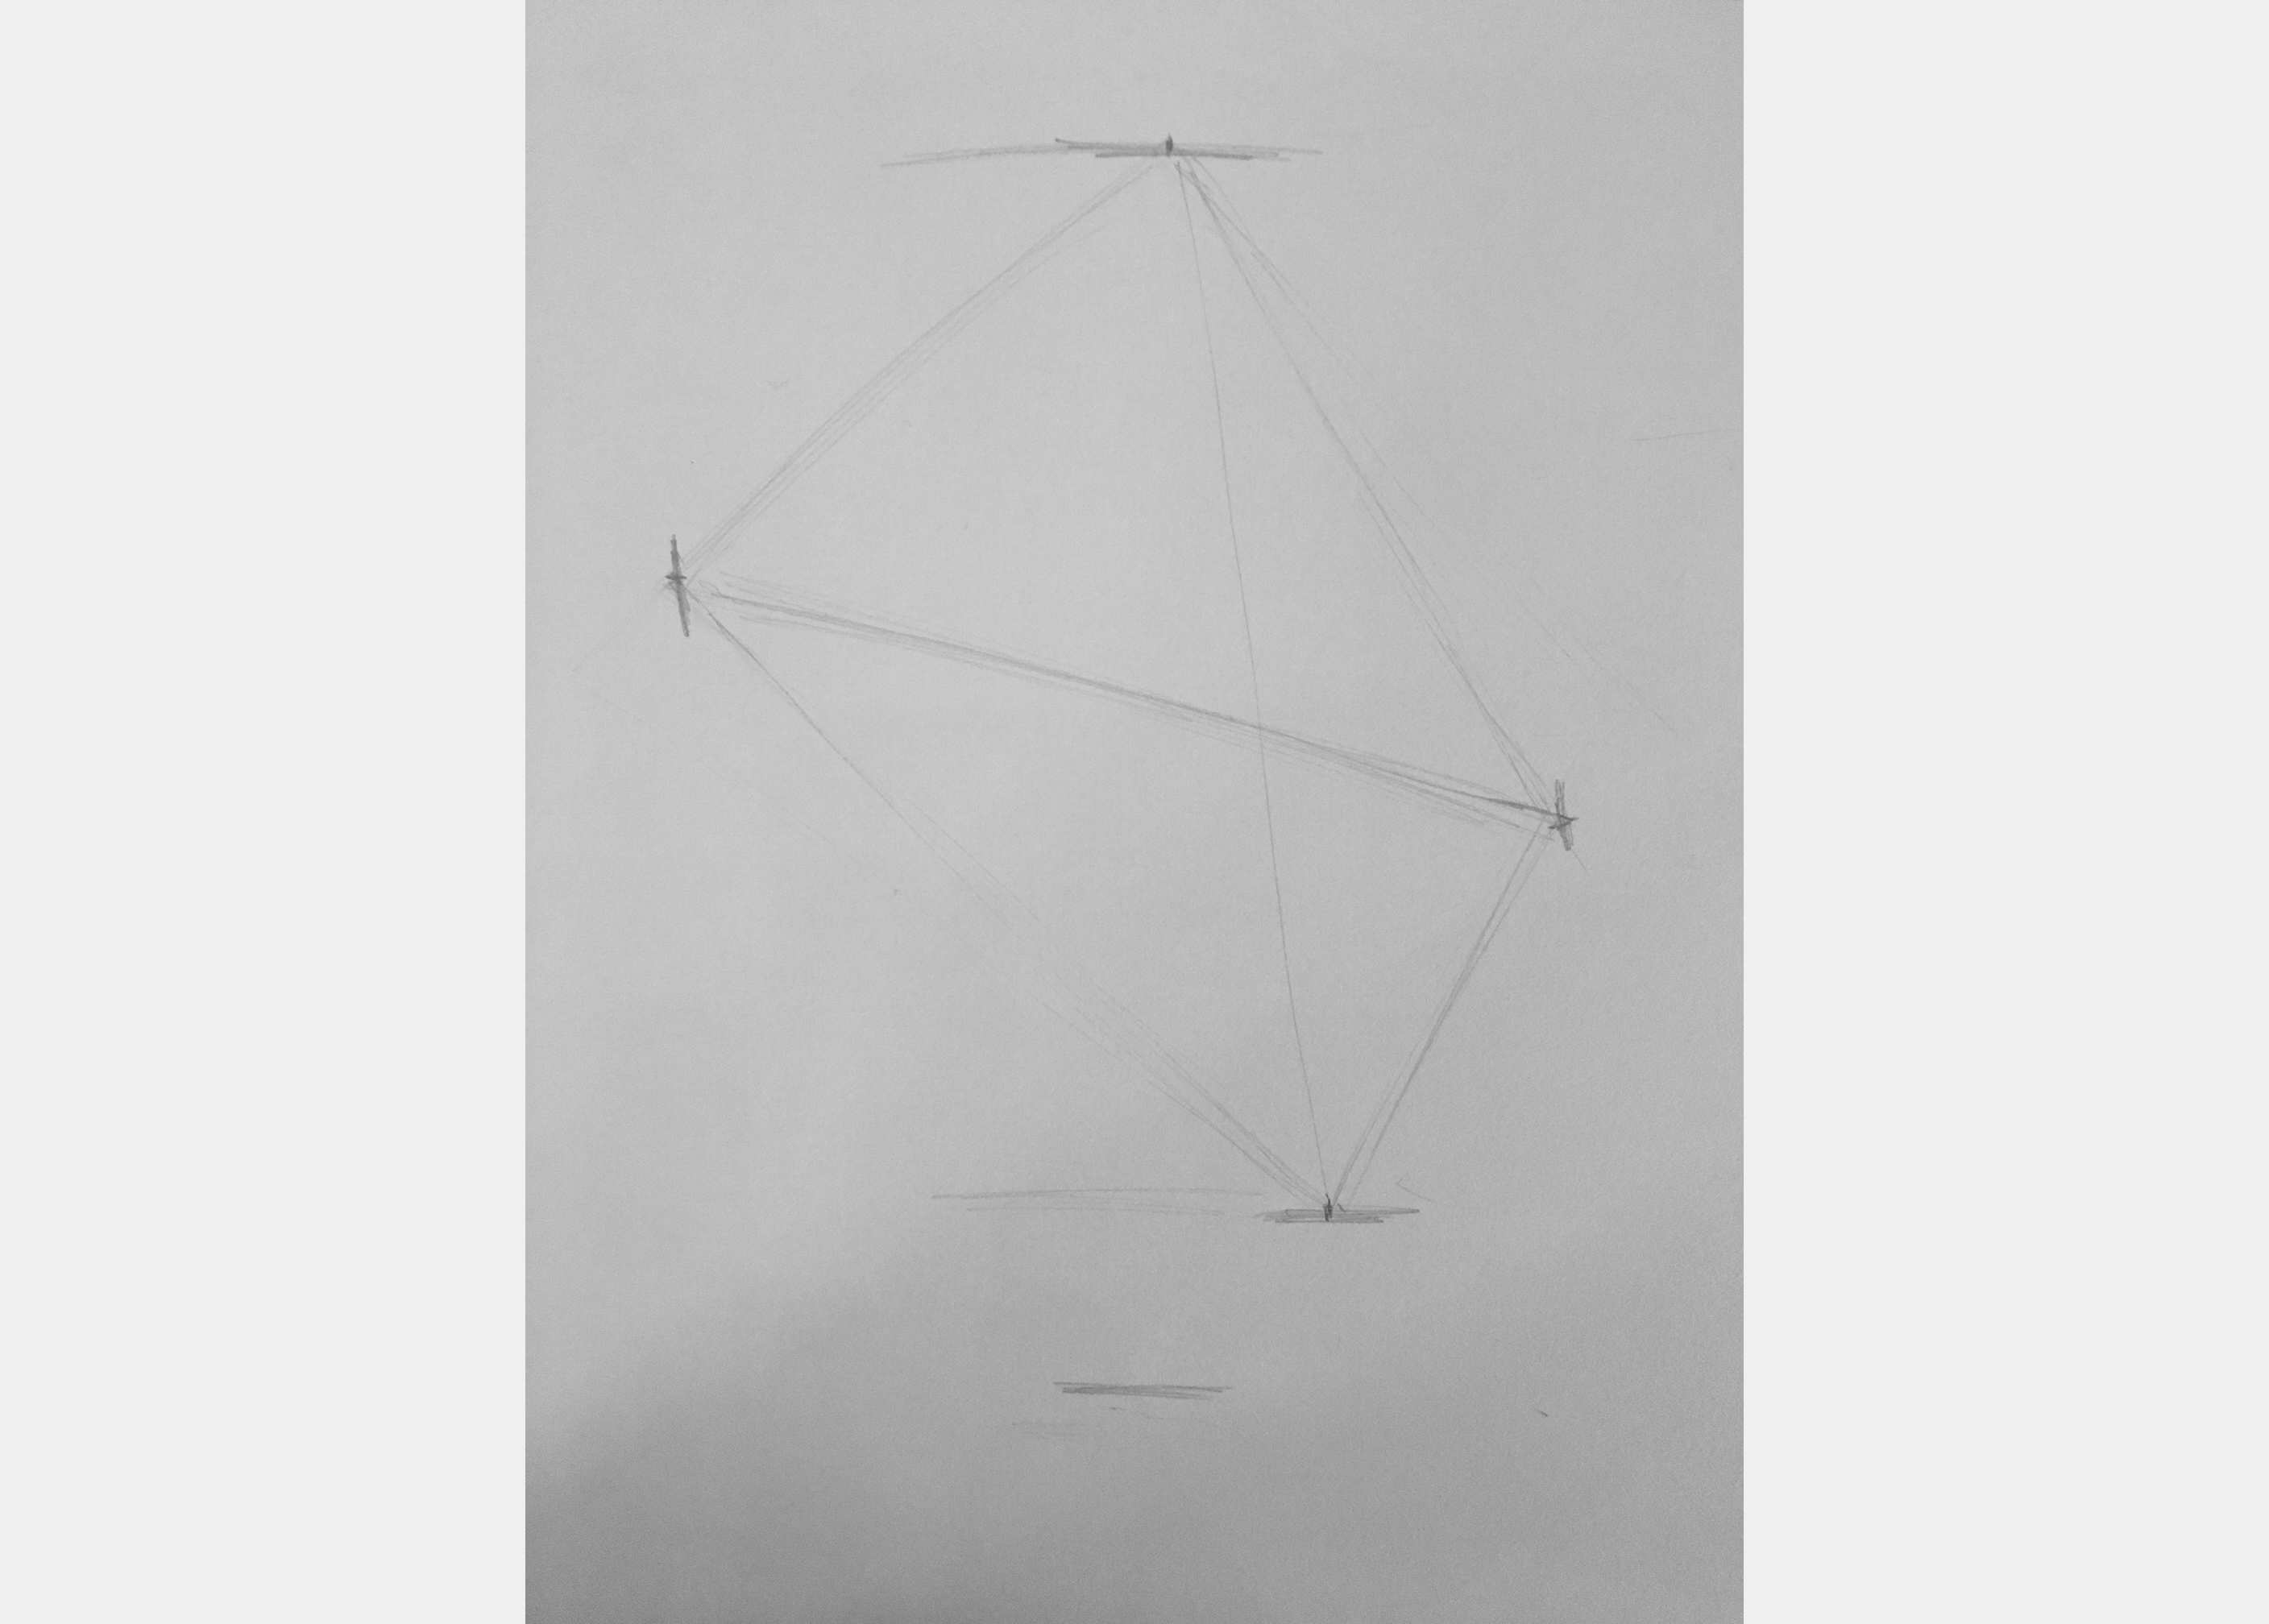
And here?s my attempt to locate the peak of her hair, the lowest point of her chin (again on the chin?s left side), the rightmost point of her cheek, the leftmost point of her hair, and the notch of her neck.
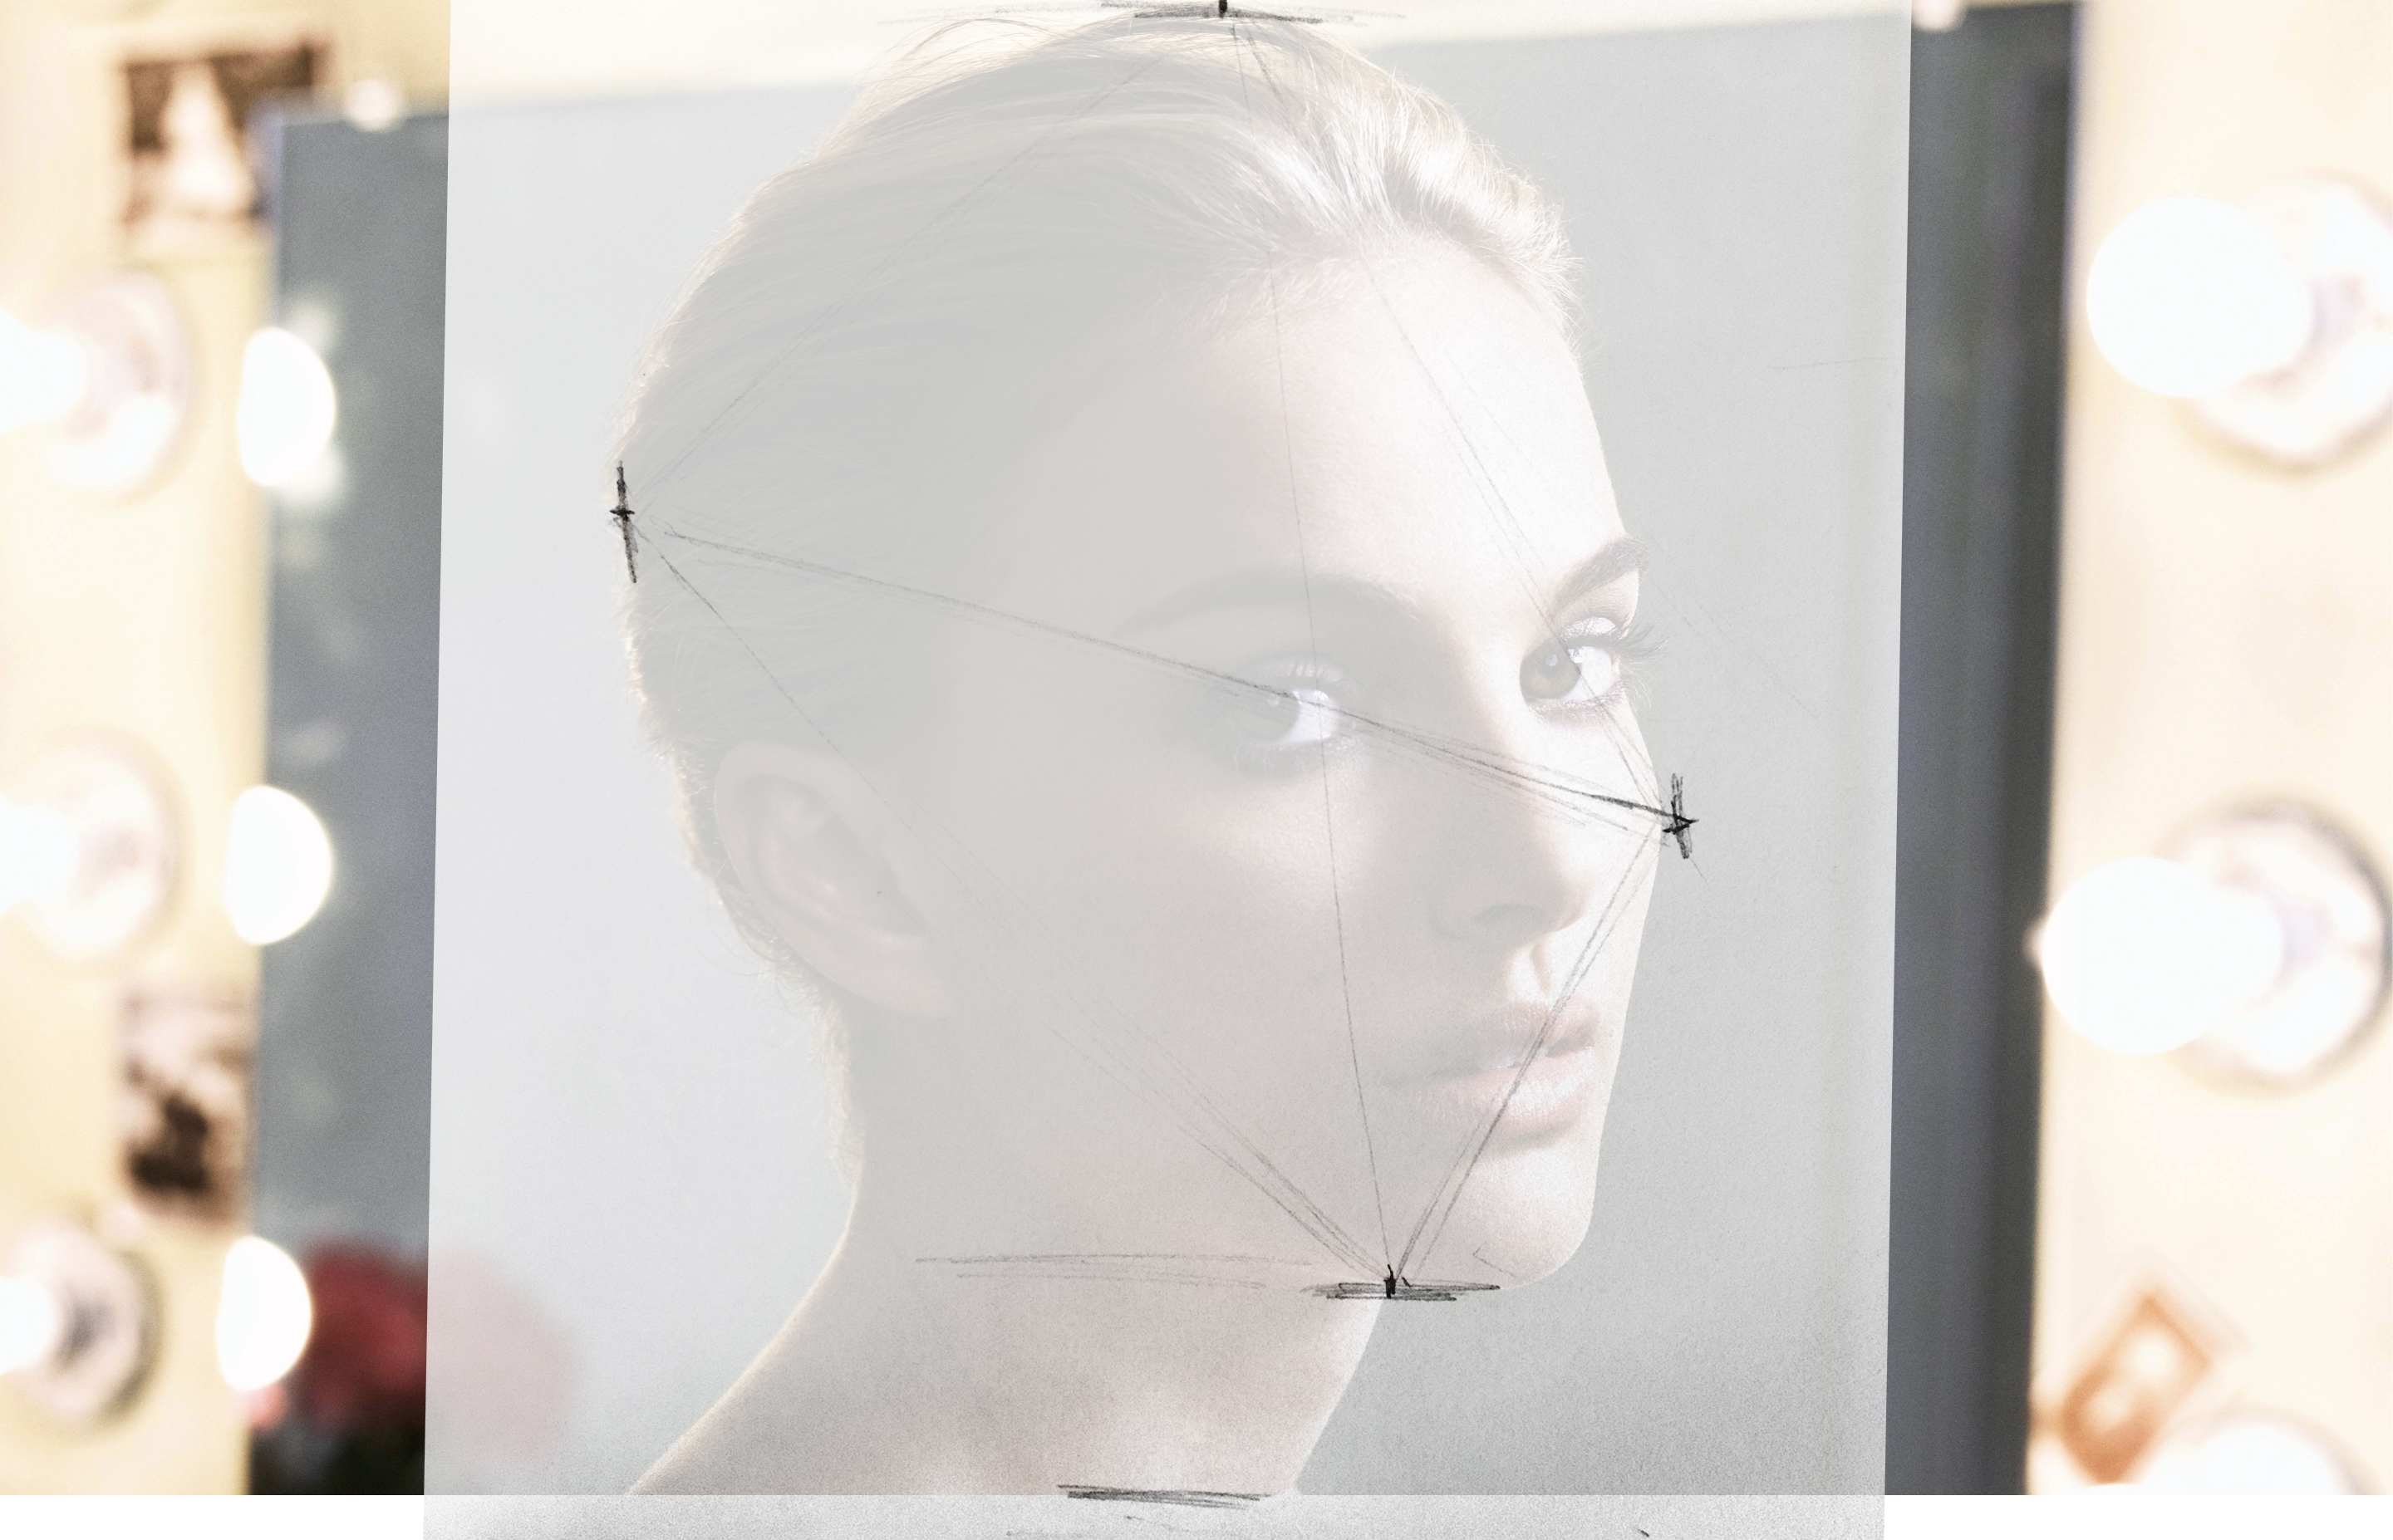
Checking in Photoshop, everything seems pretty accurate. Although, the low point of the chin may be slightly too far left.
Morgan Freeman
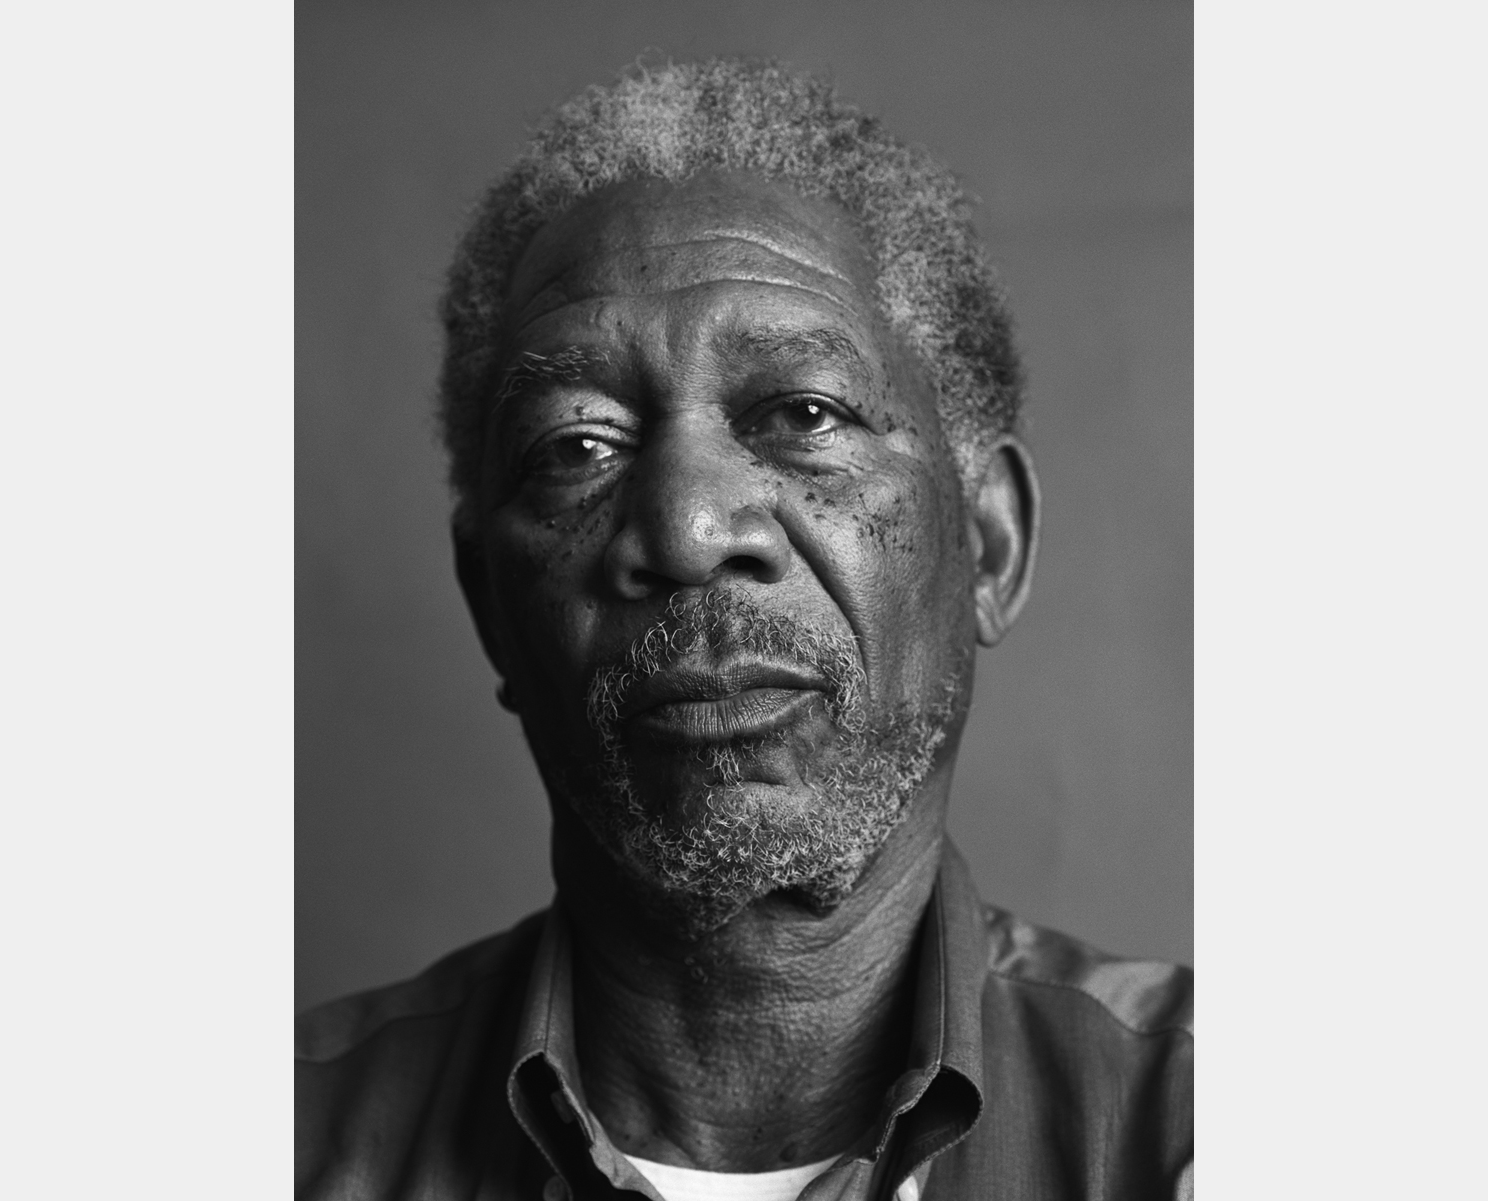
Here I try to locate the peak of his head, the lowest point of his chin, the rightmost point of his ear, the leftmost point of his ear, and the notch of his neck.
This one looks right on the money.
With each of the sketches, unlike with my Derren Brown portrait, I felt that I was able to see the angle on the subject and accurately replicate it on the page with limited effort.
This is a good sign?
To assess my work, I overlaid the sketch on Natalie.

My Critique
- The face shape is accurate
- The level of the features is accurate
- The angle of the features is accurate
- The center line curves a little too quickly as it moves up between the eyes
- The neck shape is inaccurate ? I especially misestimated the starting point of the neck on the right side.
- Above the right eye, the angle of the head/hair is too steep
- The peak of the head is too steep
- The angle of the hair above the ear isn?t steep enough
Overall, I?d give the sketch a B-.
Since I was accurate with the face shape and the level of features, if I continued working, I suspect I would develop the face fairly accurately. As a result, I would likely have enough accurate information to gradually correct the major mistakes with the head and hair shape.
Tomorrow, I?ll practice again on a different celebrity.
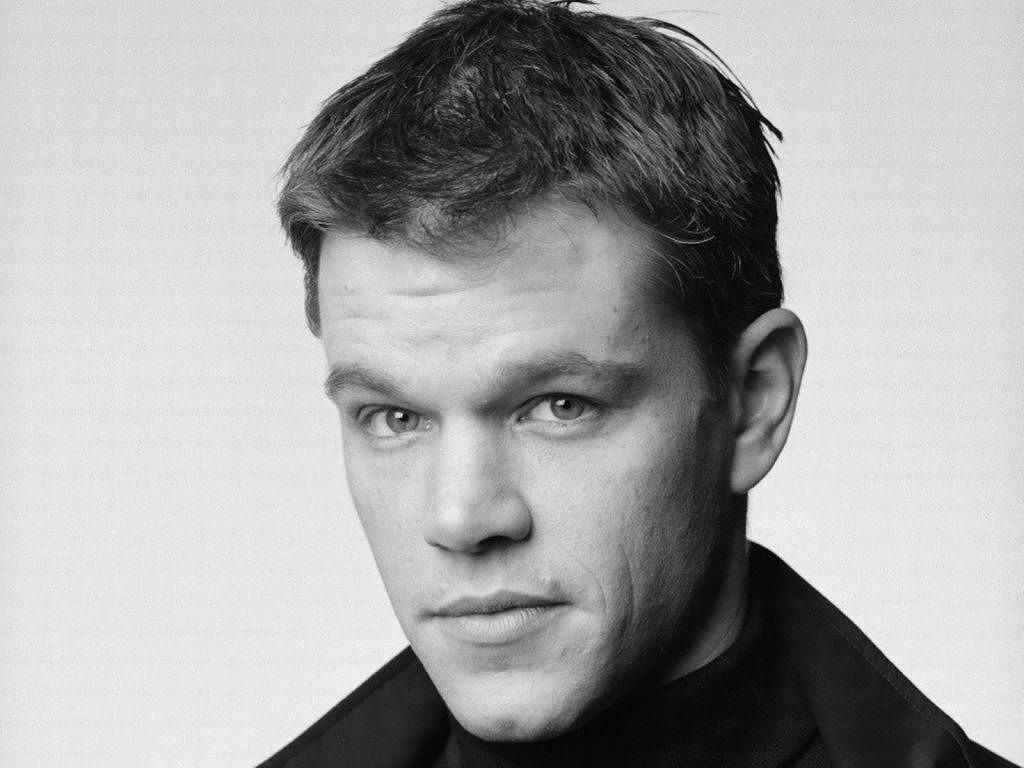
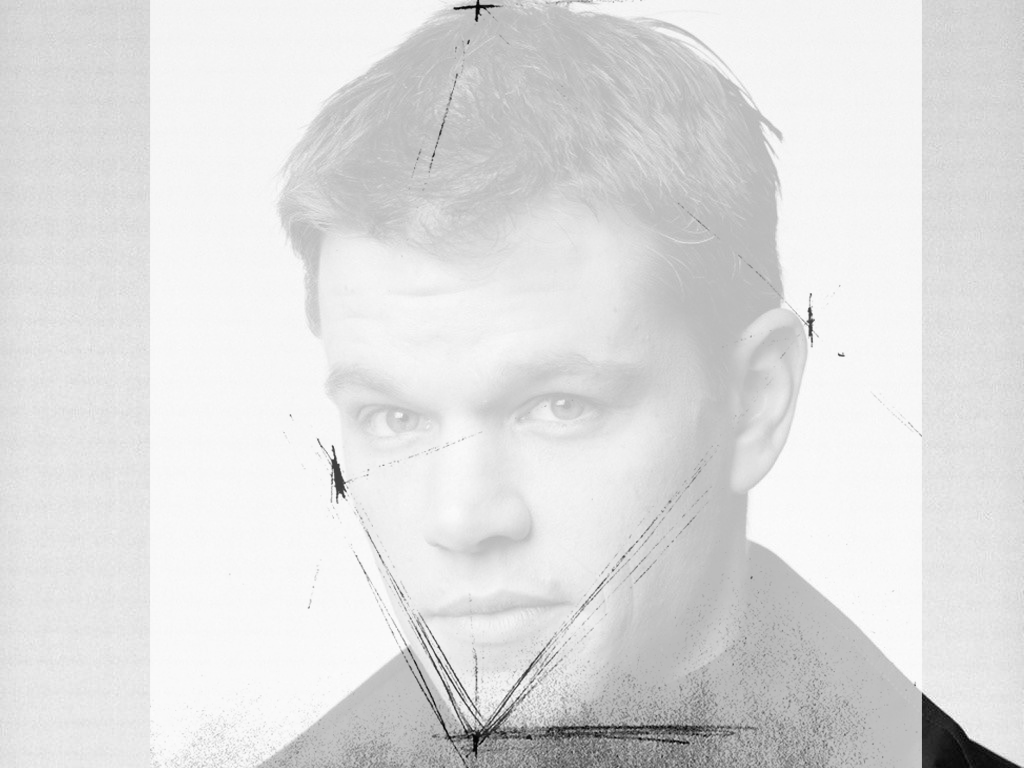
Just looking at the sketch, the head shapes seems a little narrow for Matt Damon. But, overlaid on the photo, it seems to match up.
With the exception of the oddly tiny ear, everything else seems to line up well. The head shape, face shape, and hair shape seem accurate. The level of the features and the center line seem accurate. The wing of the nose is a bit too far to the right, but I really just threw that in for fun.
Overall, I?m pretty happy with the outcome ? especially since I sketched this fairly quickly. I guess that means I?m improving?
Again, I think this is okay compositionally, but it?s still a bit of a problem ? particularly, for two reasons.
- A smaller drawing offers smaller margins for error. If I slightly misplace the corner of the mouth or the height of the brow, the distance between the correct and incorrect placements represents a proportionally larger difference on a smaller drawing. In other words, smaller drawings are less forgiving and errors are more pronounced.
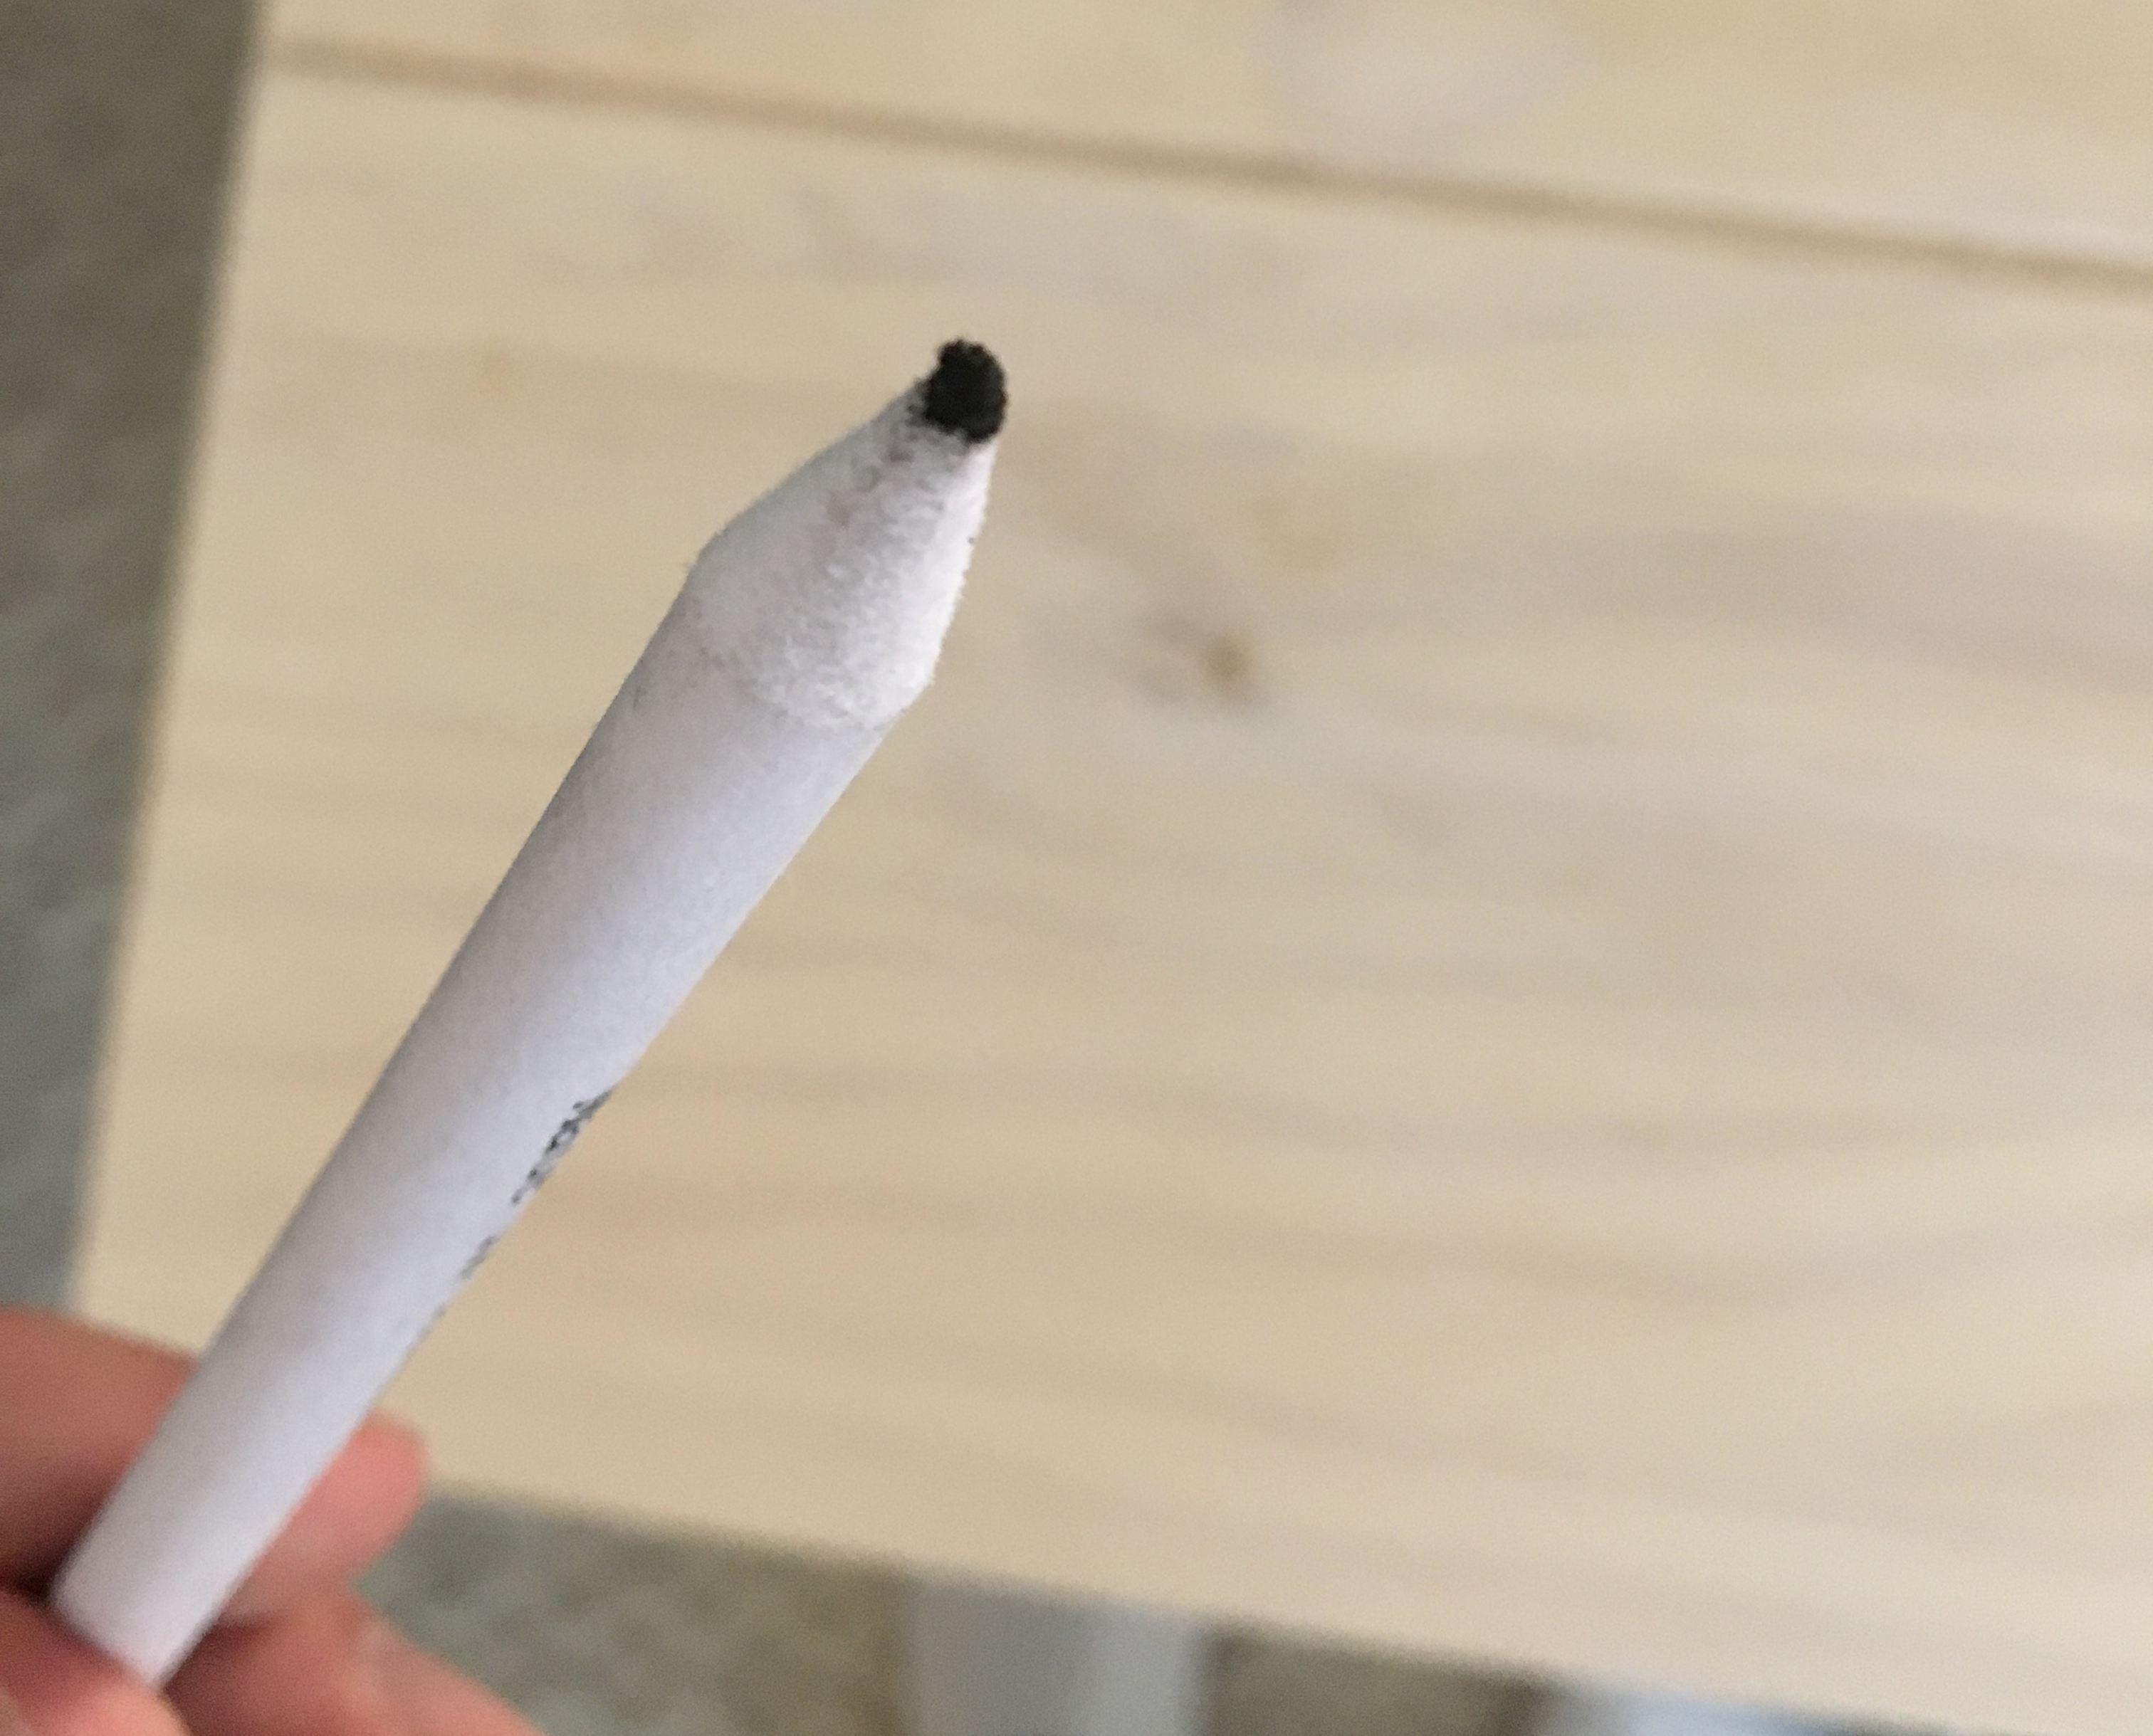
- A smaller drawing means finer details. My pencil sharpener doesn?t seem to work very well with the pencils I have, which means I?m drawing the tiny eyelids on my self-portrait with a tree trunk. Basically, the smaller drawing requires that I work in finer areas, which is challenging with the tools I have.
Nevertheless, I will persist, since, even with the sizing mistake (and the associated challenges), I?m quite happy with the portrait so far.
In fact, challenges are probably a good thing (I hope). Ideally, they push me to become a better artist.
Anyway, I think the takeaway is that I need to invest in a better pencil sharpener?

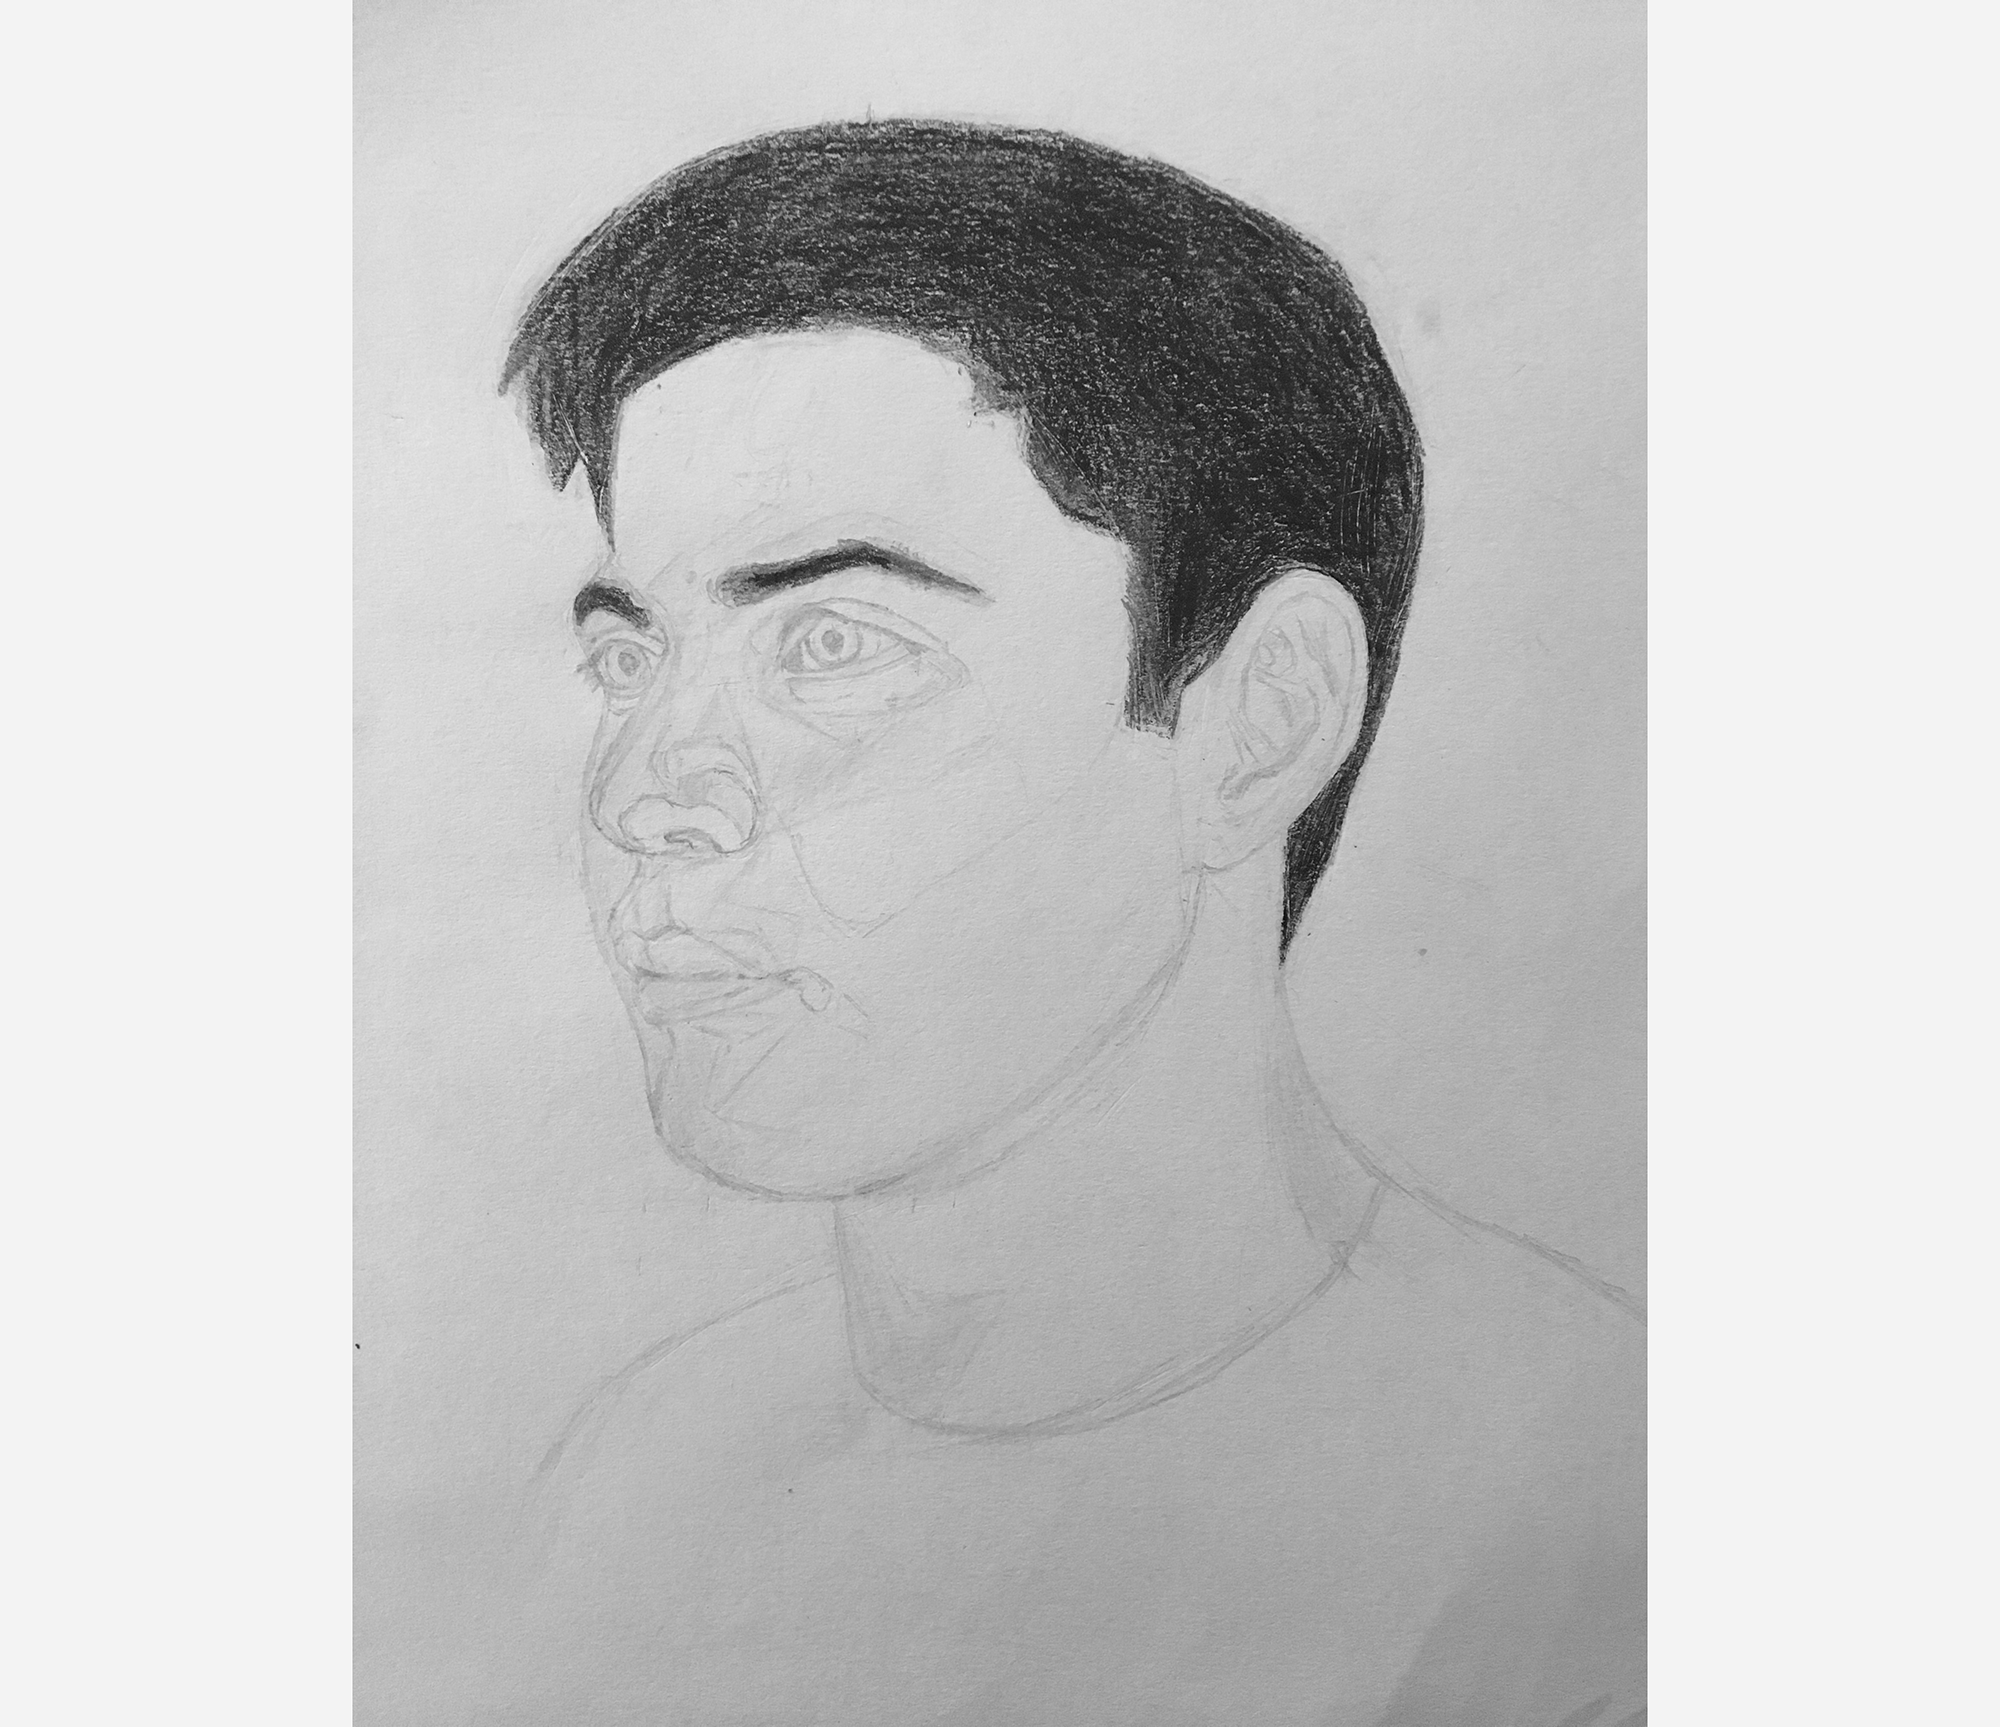
Then, I darken the hair and eyebrows.
I add detail to the eyes, and the portrait jumps to life.
Finally, I detail the ear, which is one of my favorite parts of the whole process. (Ears are just weird looking and fun to draw)
With the ear done, my sketch is complete.
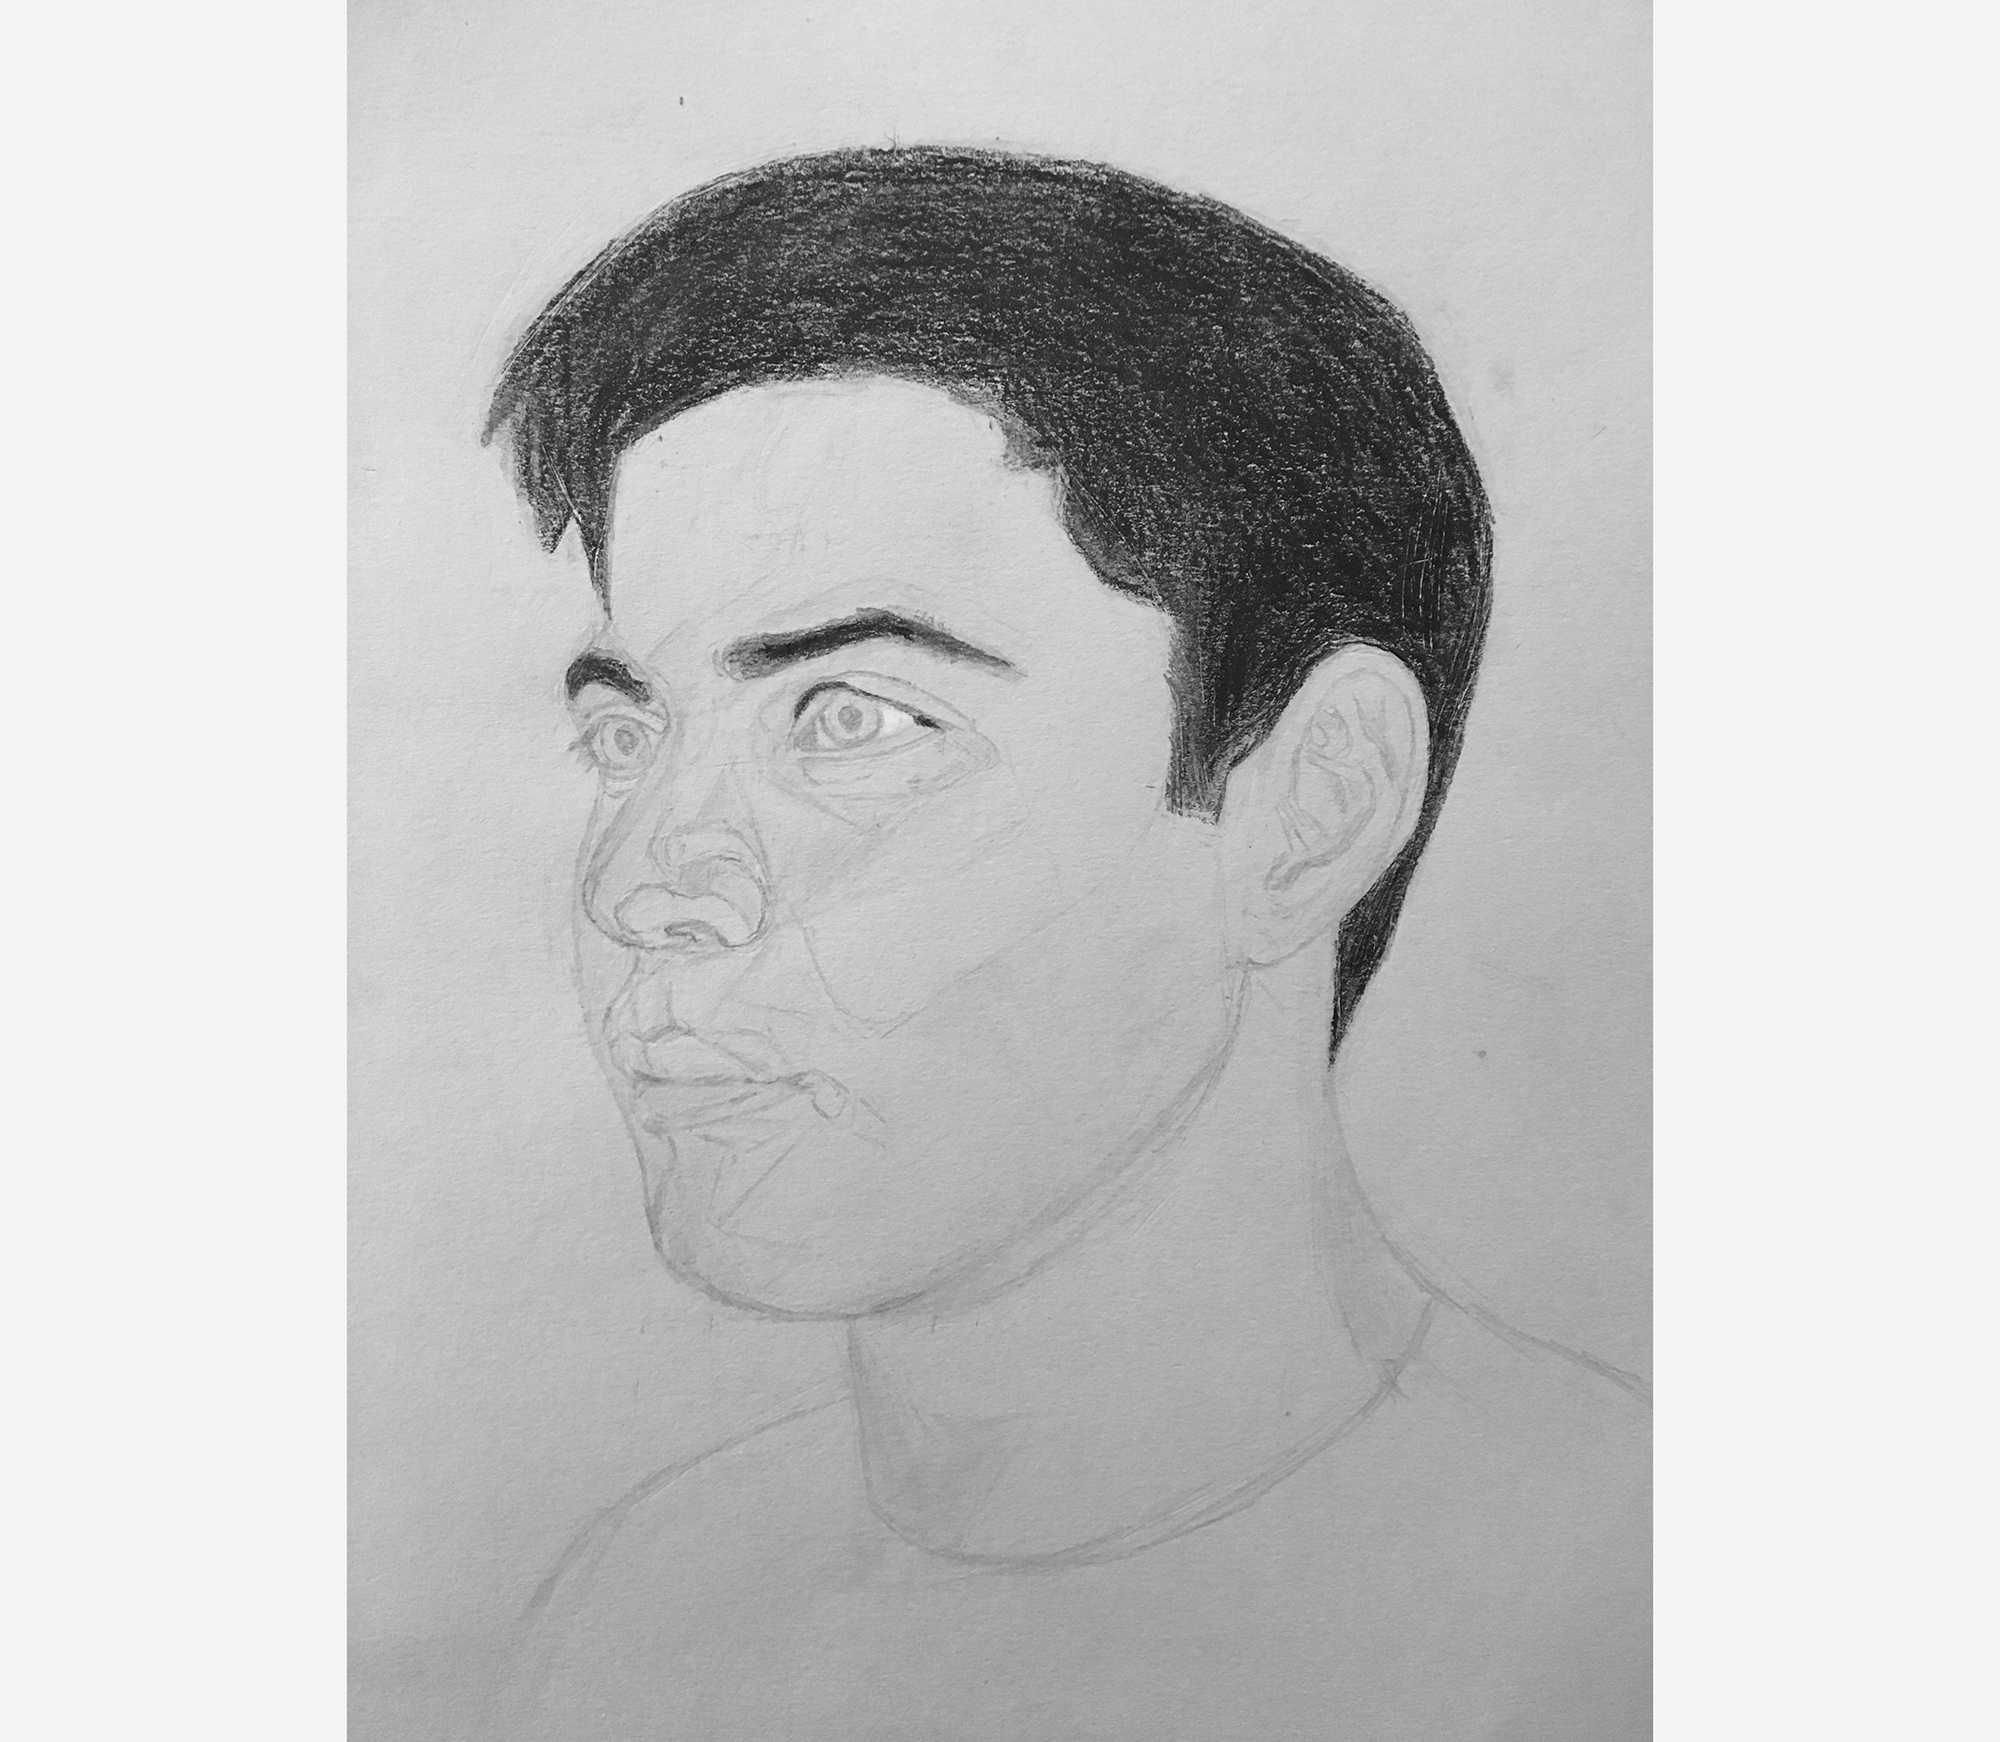
Interestingly, this completeness is a bit problematic: Because the sketch feels whole (and, from my perspective, represents an interesting, standalone piece of art), I struggle to continue working on it.
The portrait just feels balanced at this point. As soon as I start adding tonal values, that balance will be disrupted, and won?t return until I?m nearly done with the whole portrait.
It almost feels unnatural to add tonal values to the sketch, as if I?m defacing something I worked hard to create.
Nevertheless, I must continue. So, here I go? Time to temporarily deface my work.
Defacing my portrait
I start by blackening one of the eyebrows. This is easy, and hopefully will help me build momentum.

I continue with my black pencil, darkening the other eyebrow and the hair.
I can?t seem to easily get the hair to be one smooth black mass. Instead, the grain of the paper is very noticeable, giving me a nice salted look. Even after aggressive blending with a blending stump and a dry brush, I still can?t get the material distributed nicely on the paper.
I may need to invest in some powder graphite (but I?ll return to this later).
Next, I start on the prominent eye. This is where the real defacing starts, as it?s going to be a while until it doesn?t look like I?m wearing makeup.
After many more minutes of work on the eye, I stop for the night. I?ll continue more tomorrow.

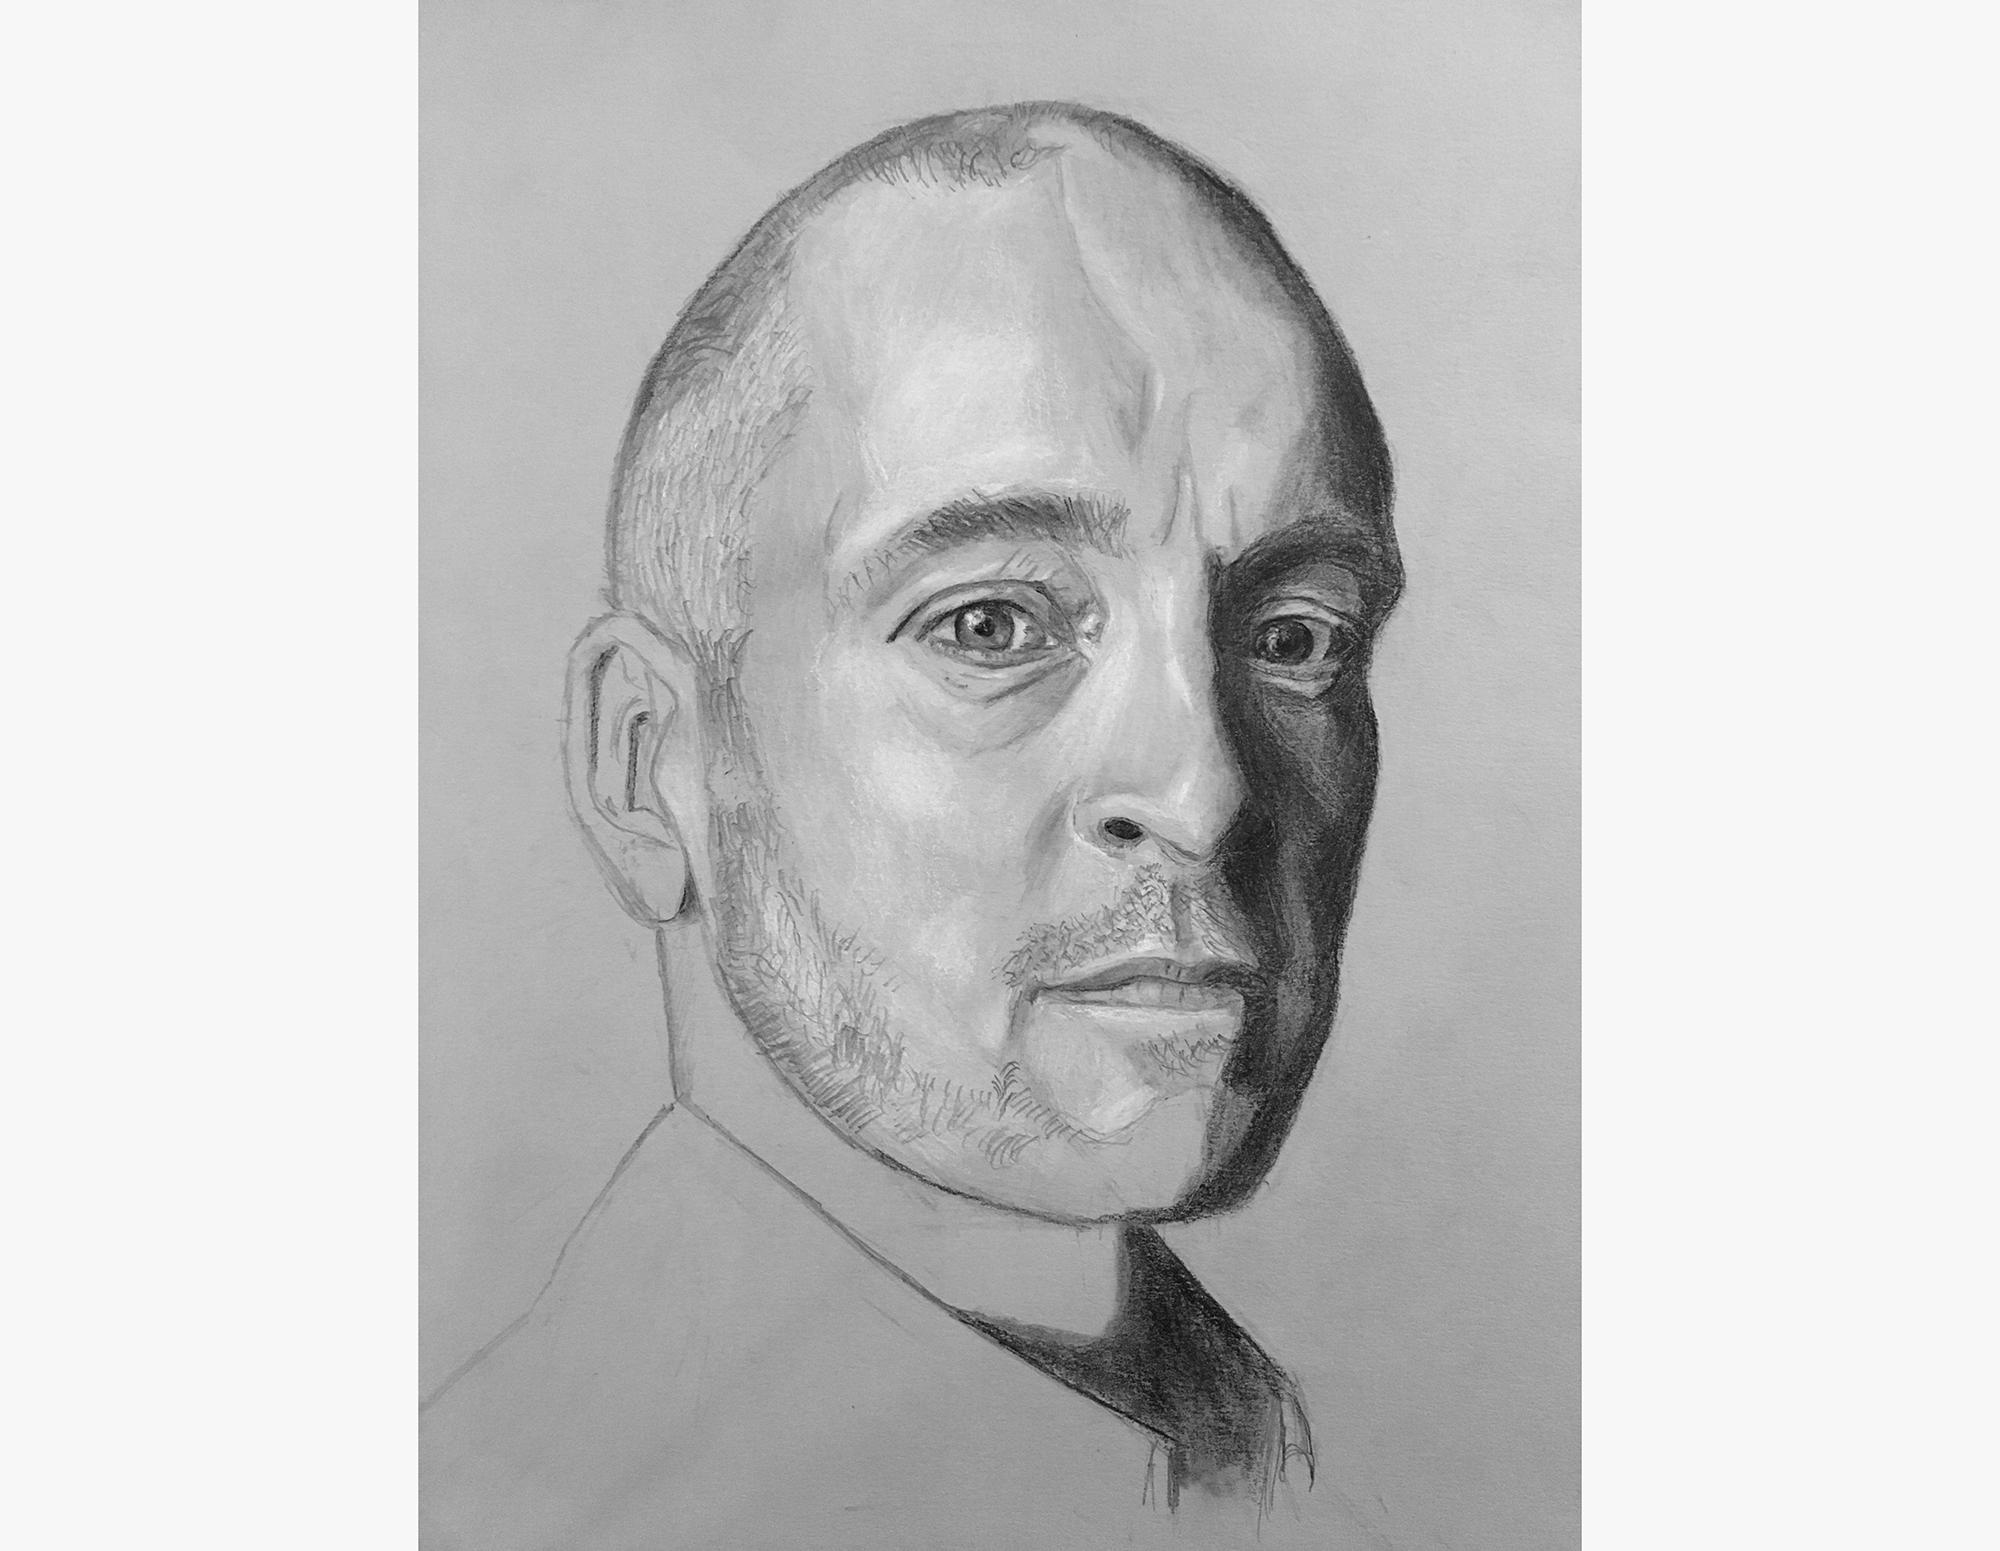
With Derren, I wanted to ensure the portrait emanated three-dimensionality, so I pushed aggressively on the contrast of the portrait. I also didn?t care much for the micro-gradations of shadow/light, as I was more concerned with the correctness of the bigger shapes.
As a result, the portrait definitely has a stunning roundness, but I wouldn?t call it photorealistic.
Thus, this time around, with my self-portrait, I?m aiming to more closely match tones, while also paying attention to the smaller areas of light fall-off. With this attention, my hope is to create a more realistic rendering of my face.
It?s still hard to tell whether I?ll be successful, but we?ll find out soon?

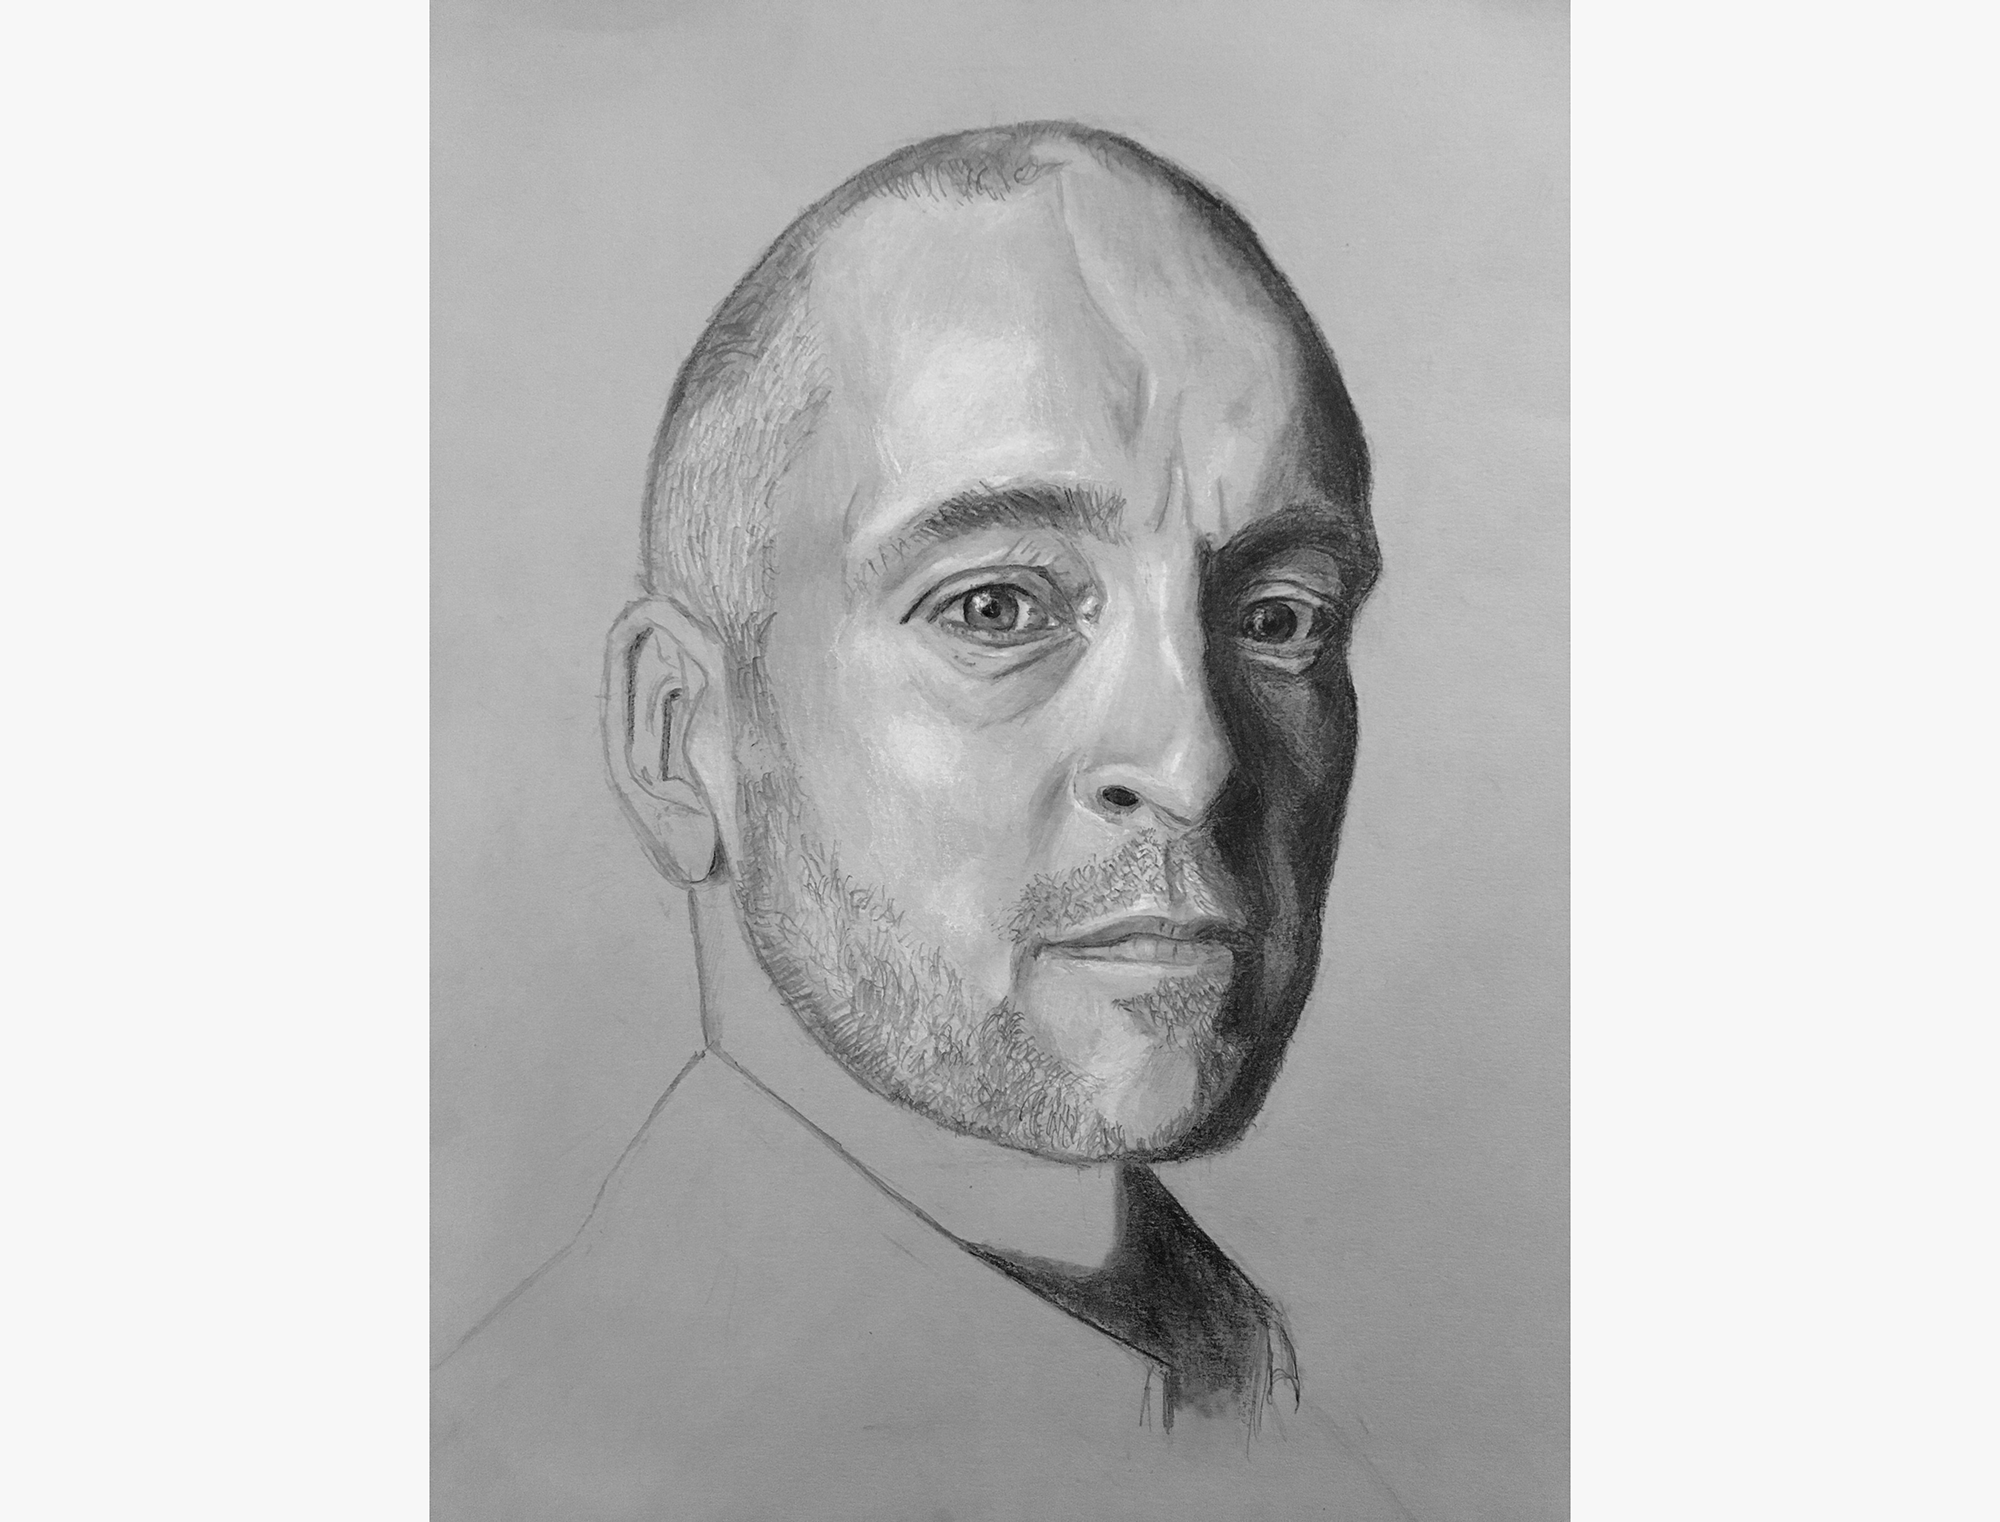
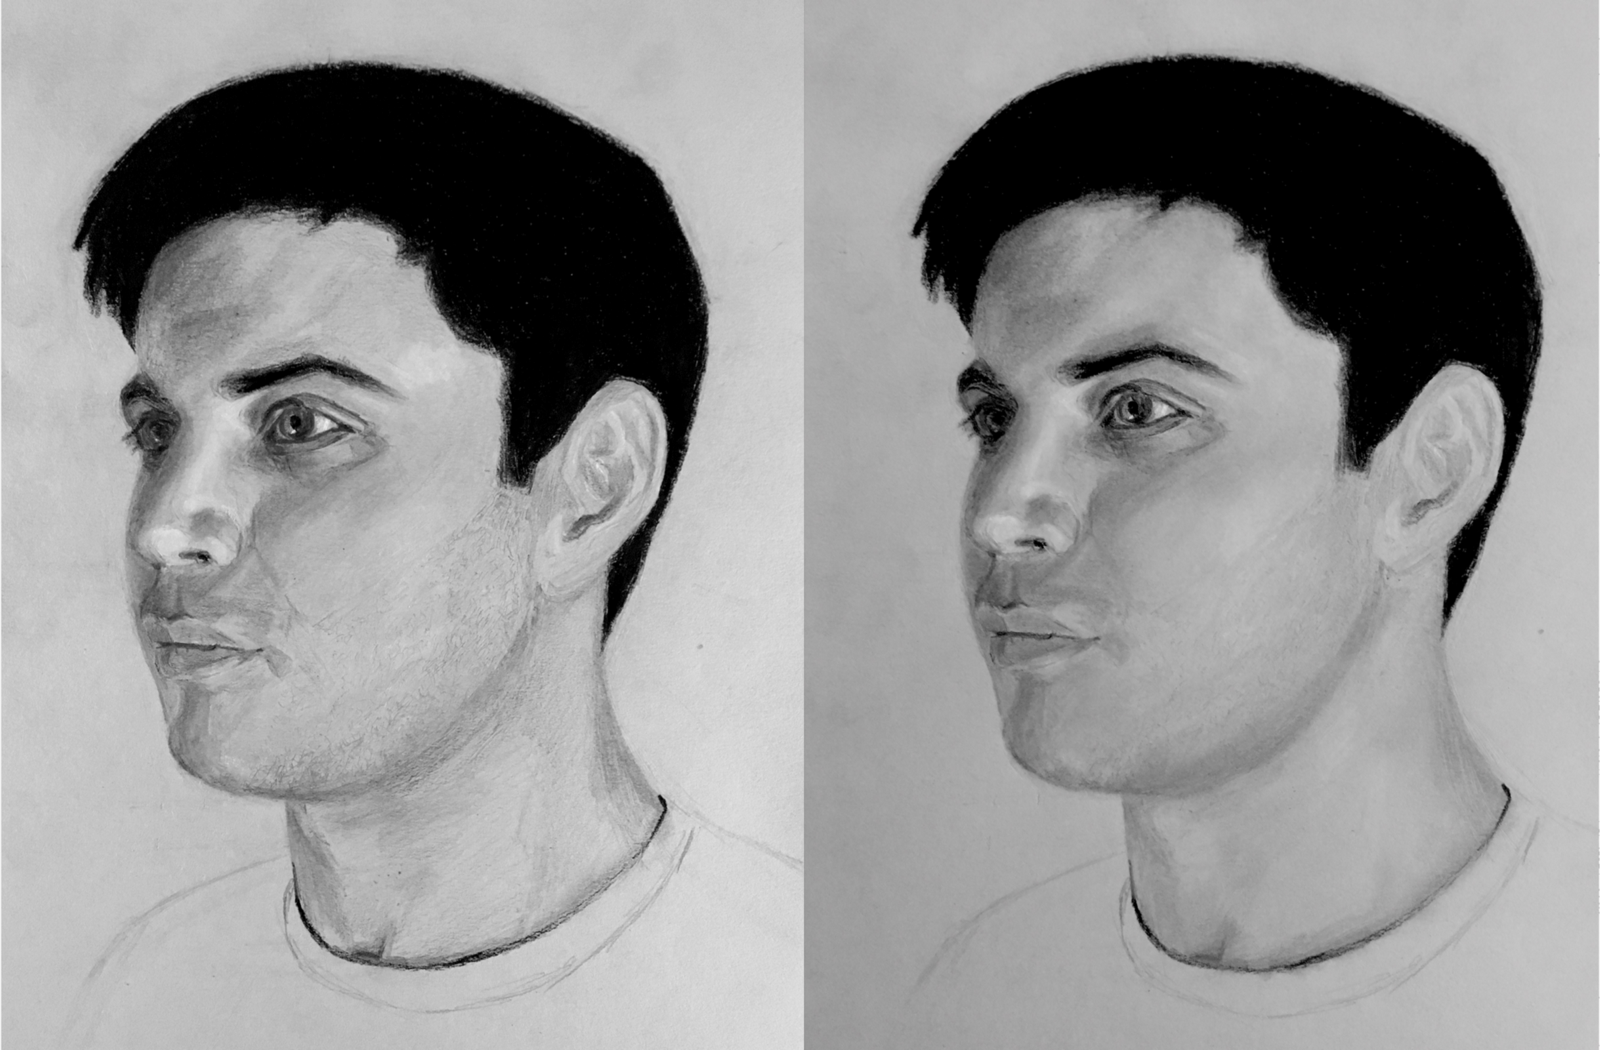
And the after
At first, the blackness of the hair is a bit jarring, but it accurately represents the ?exposure? I?m going for (where the hair is emitting no light, and thus, shows up as pure black).
Although today?s darkening session improved things, the portrait still seems a bit odd and unbalanced because of the nakedness of the mouth and cheek. I?ll start tackling those areas tomorrow.
It?s starting to look like me, but it still looks like a drawing ? mostly because I haven?t blended the newly developed areas like the neck, cheek, mouth, ear, forehead, etc. Pretty much the whole thing.
I?ve been holding off on the blending because my blending stump is unusably dirty.
Tomorrow, I?ll go swing by the art store and pick up a few fresh ones.

Tomorrow, I?ll make some minor tweaks, sign it, and hang it on the wall.
This portrait has two big advantages over my self-portrait: 1. The tonal range over the face is much greater, and 2. The midtone of the face matches the tone of the paper.
With my self-portrait, I strayed from both of these advantages. For one, on purpose. For the other, less so.
1. Narrow tonal range
Purposefully, I chose to base my self-portrait on a photo with a tighter tonal range, since I wanted to challenge and push my abilities (Drawing a portrait with heavy contrast requires less subtly and is, in my opinion, easier).
Arguably, the contrast of the Derren Brown portrait makes it a more visually compelling portrait, but this is another topic completely (first, I wanted to master accurate portraiture before tackling well-composed portraiture).
Even with the narrow tonal range, my self-portrait still maintains a believable roundness and depth.
2. Dark midtones
Less purposefully, I chose a photo where the midtone of my face was darker than the paper.
This was a bit of a mistake, but a good learning opportunity. As a result of this decision, unlike with my Derren portrait, I had to pencil-shade the mid-tones on my face, leading to a slightly dirtier portrait. (In the case with Derren, where there were midtones, I left the blank paper untouched and clean).
Especially before I smoothed out my face, it looked as if I had just been cleaning chimneys.
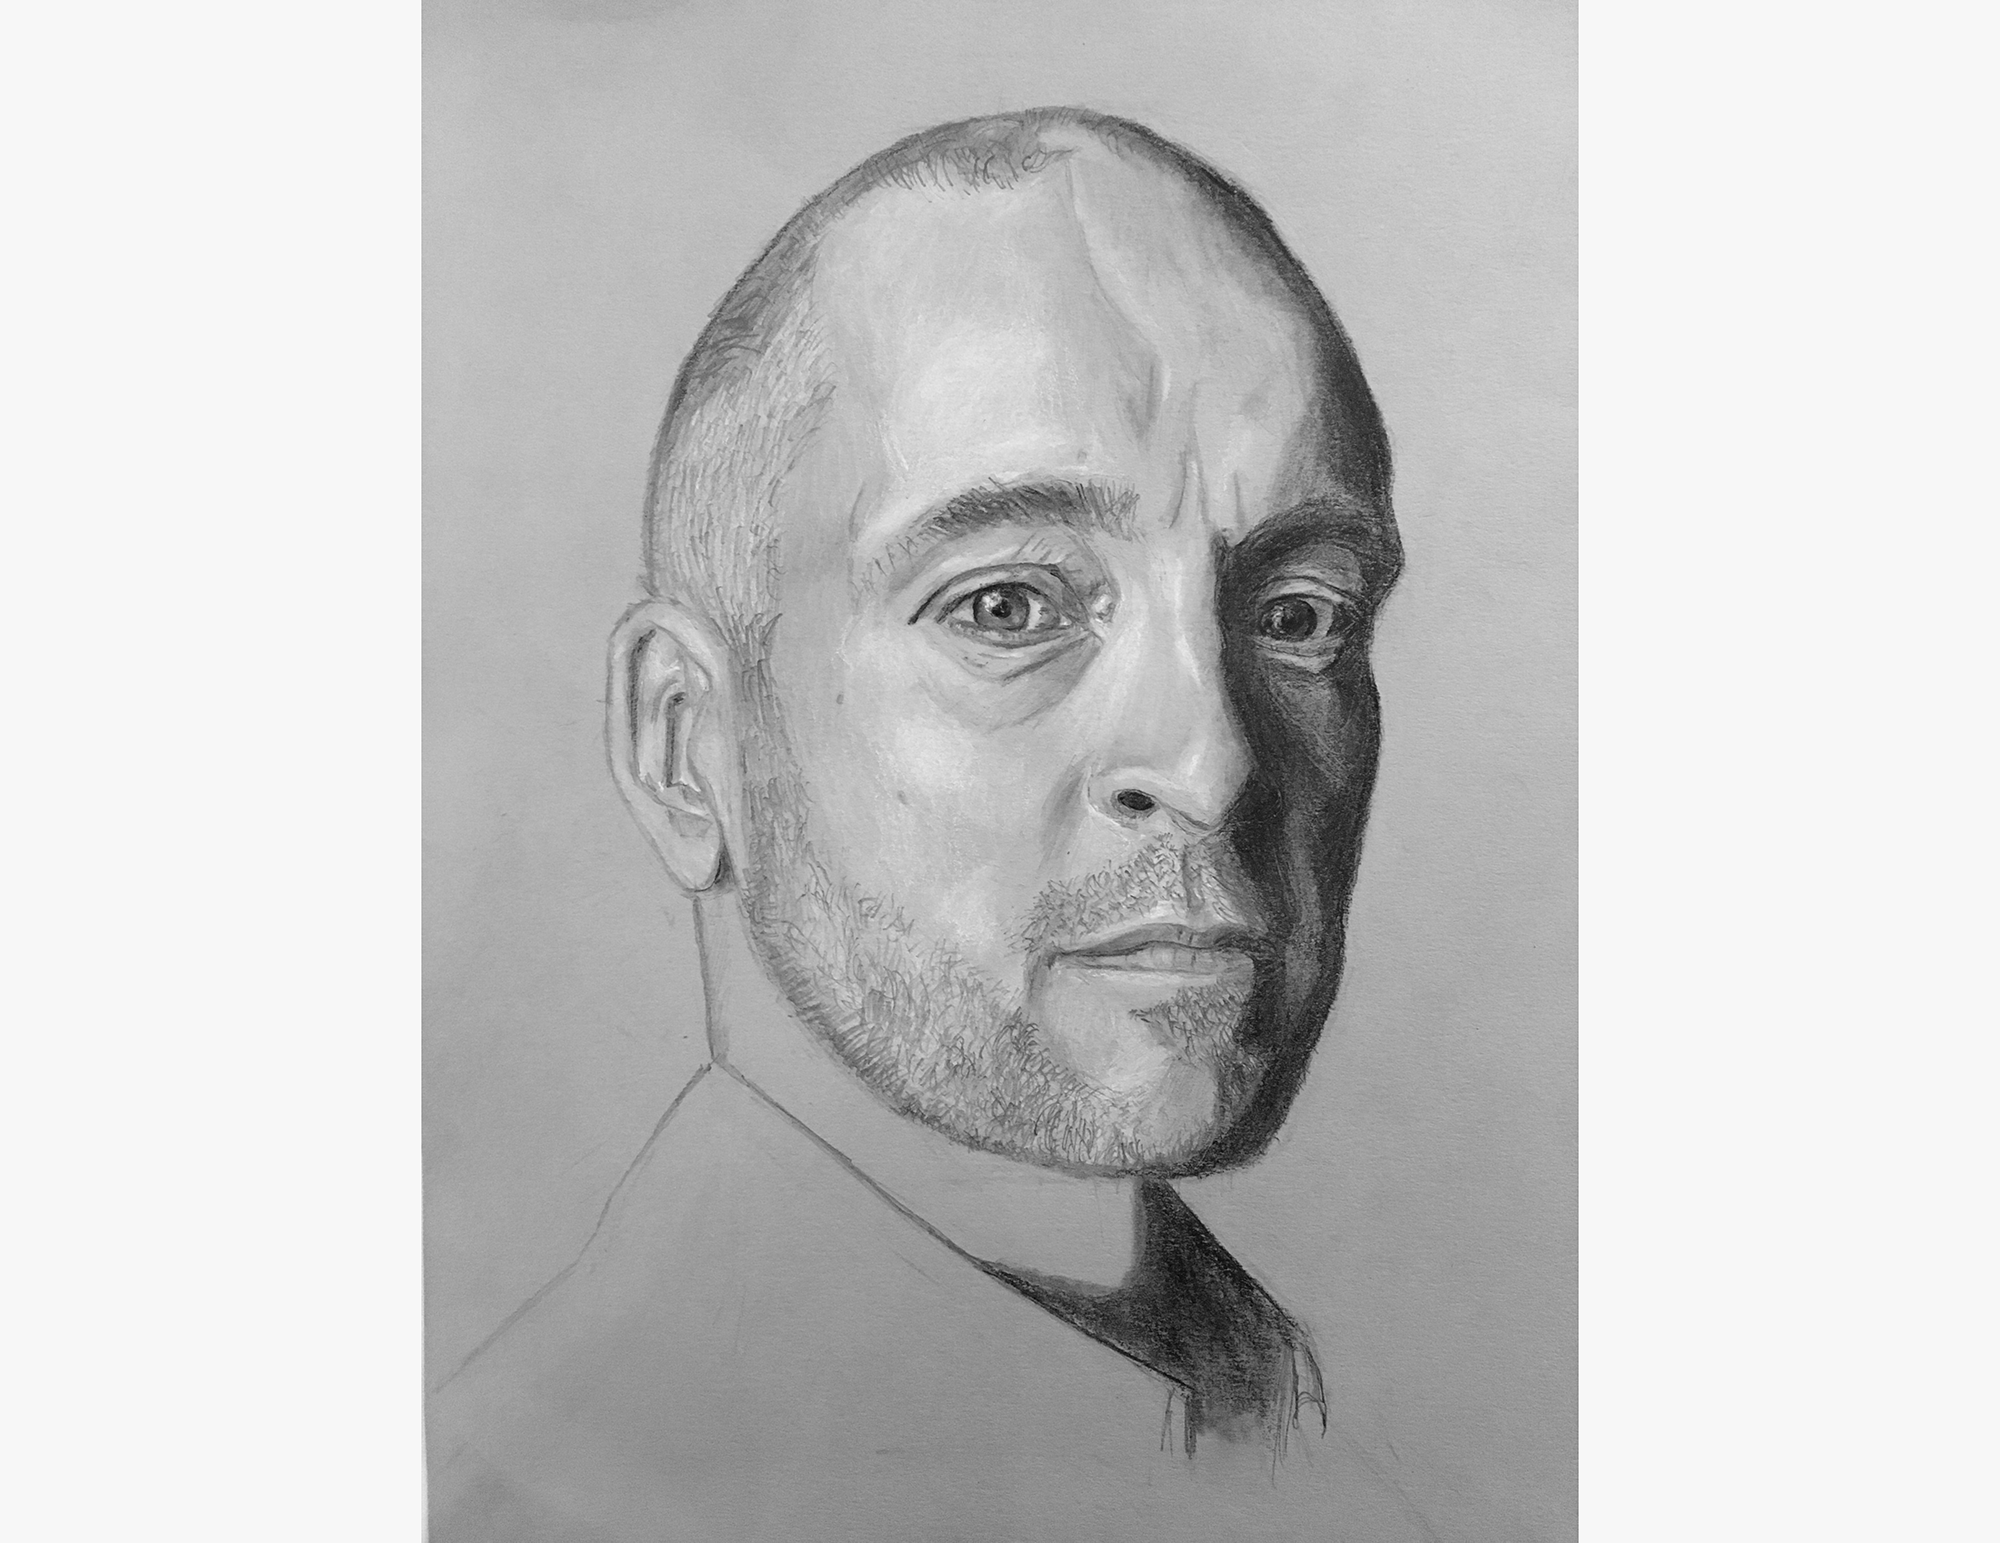
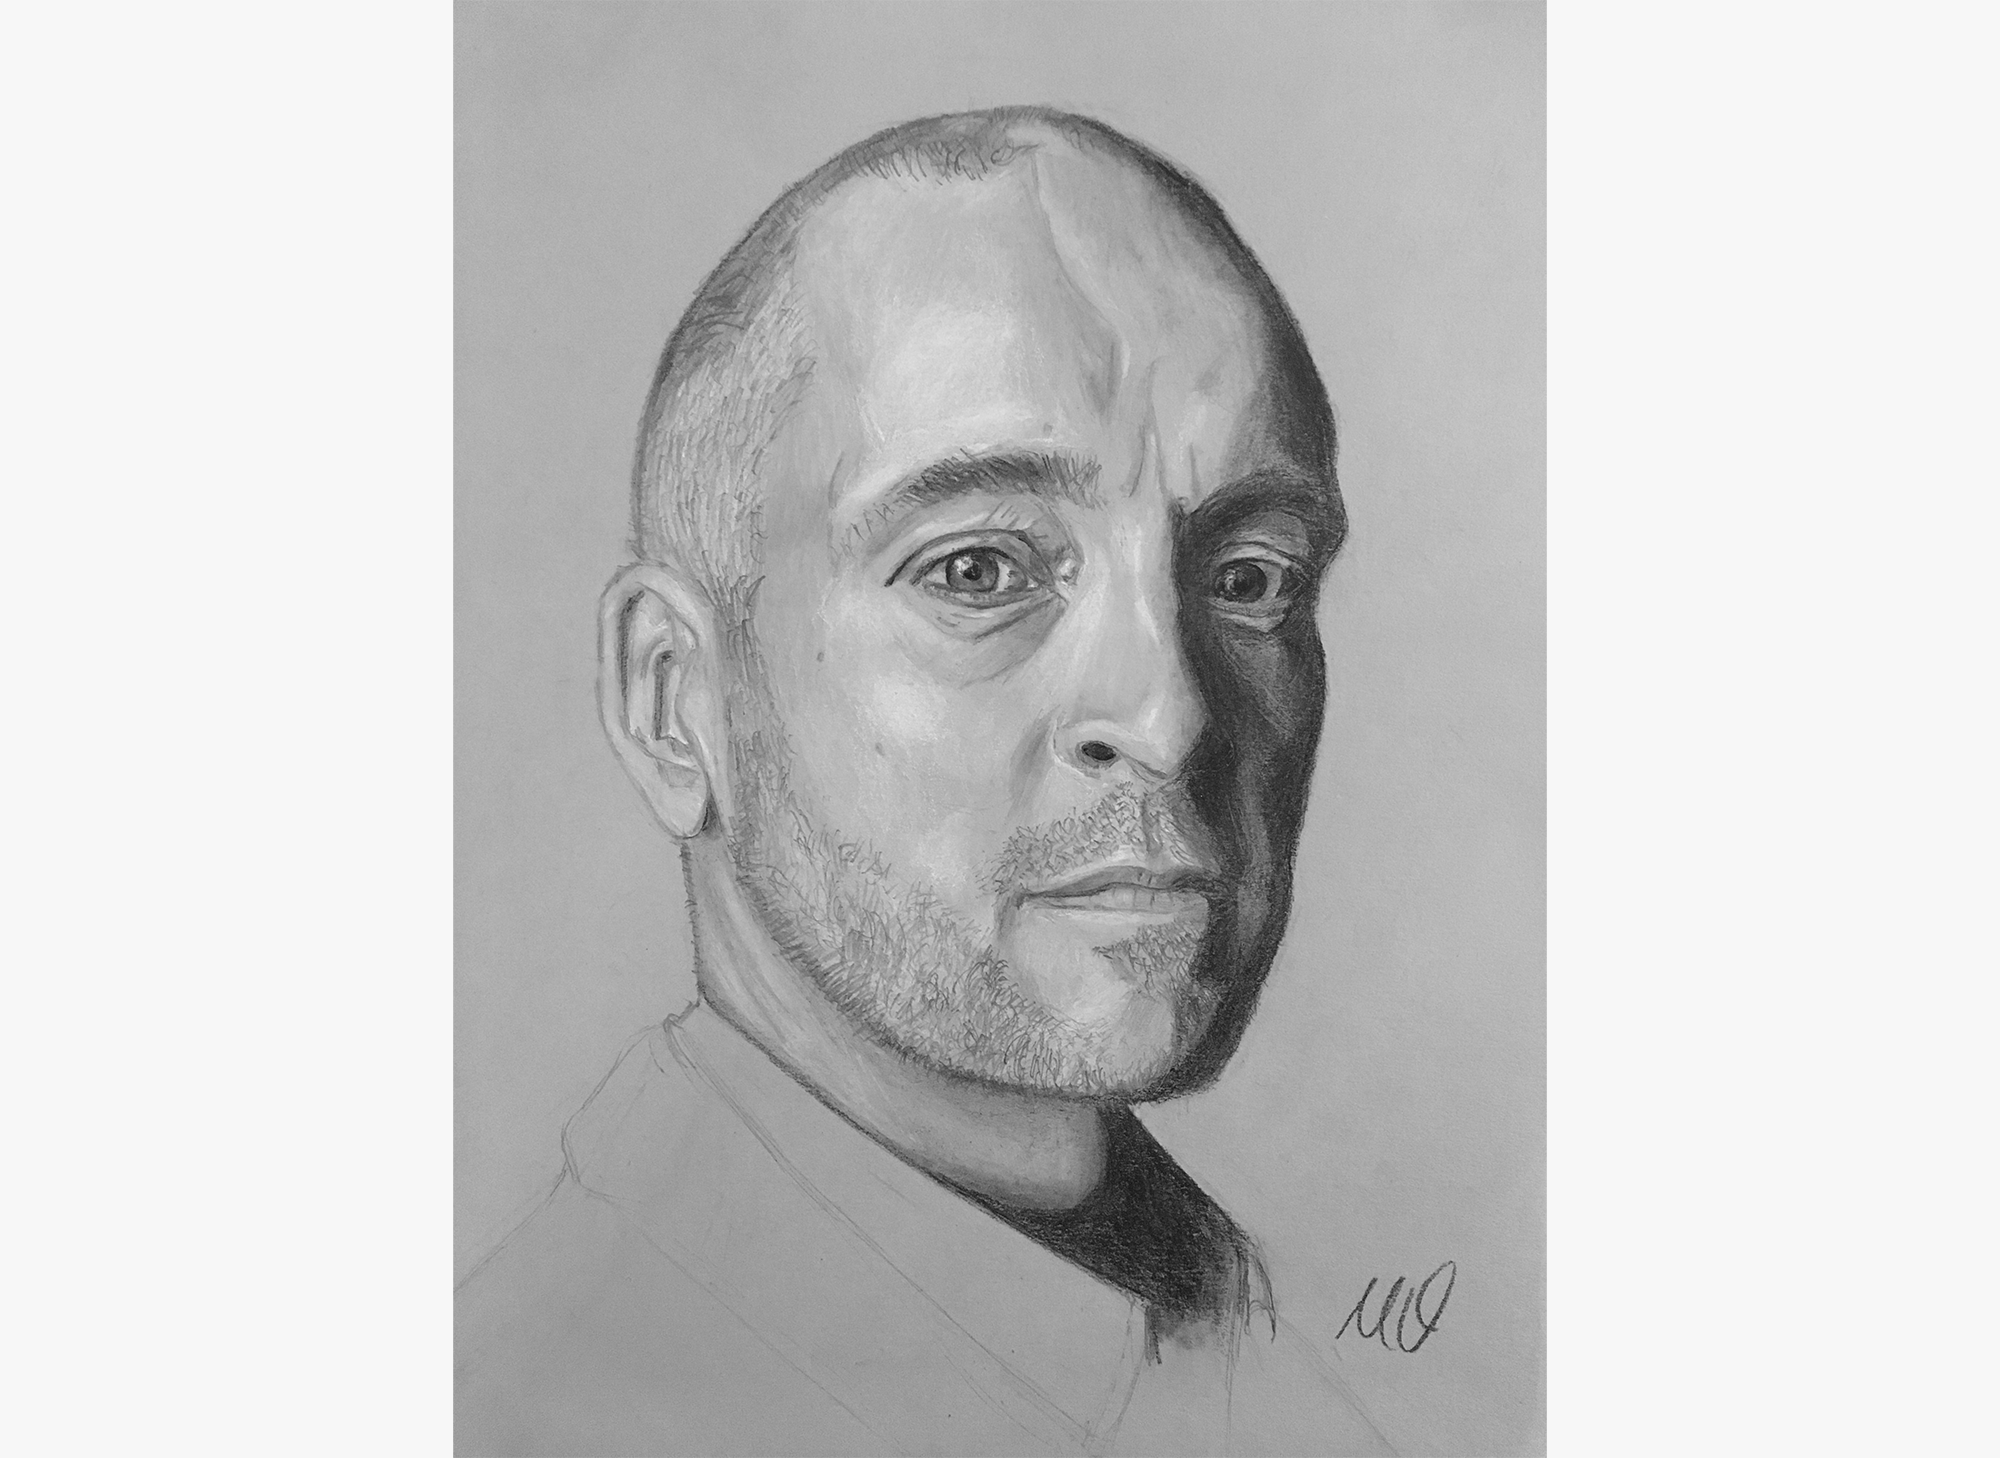
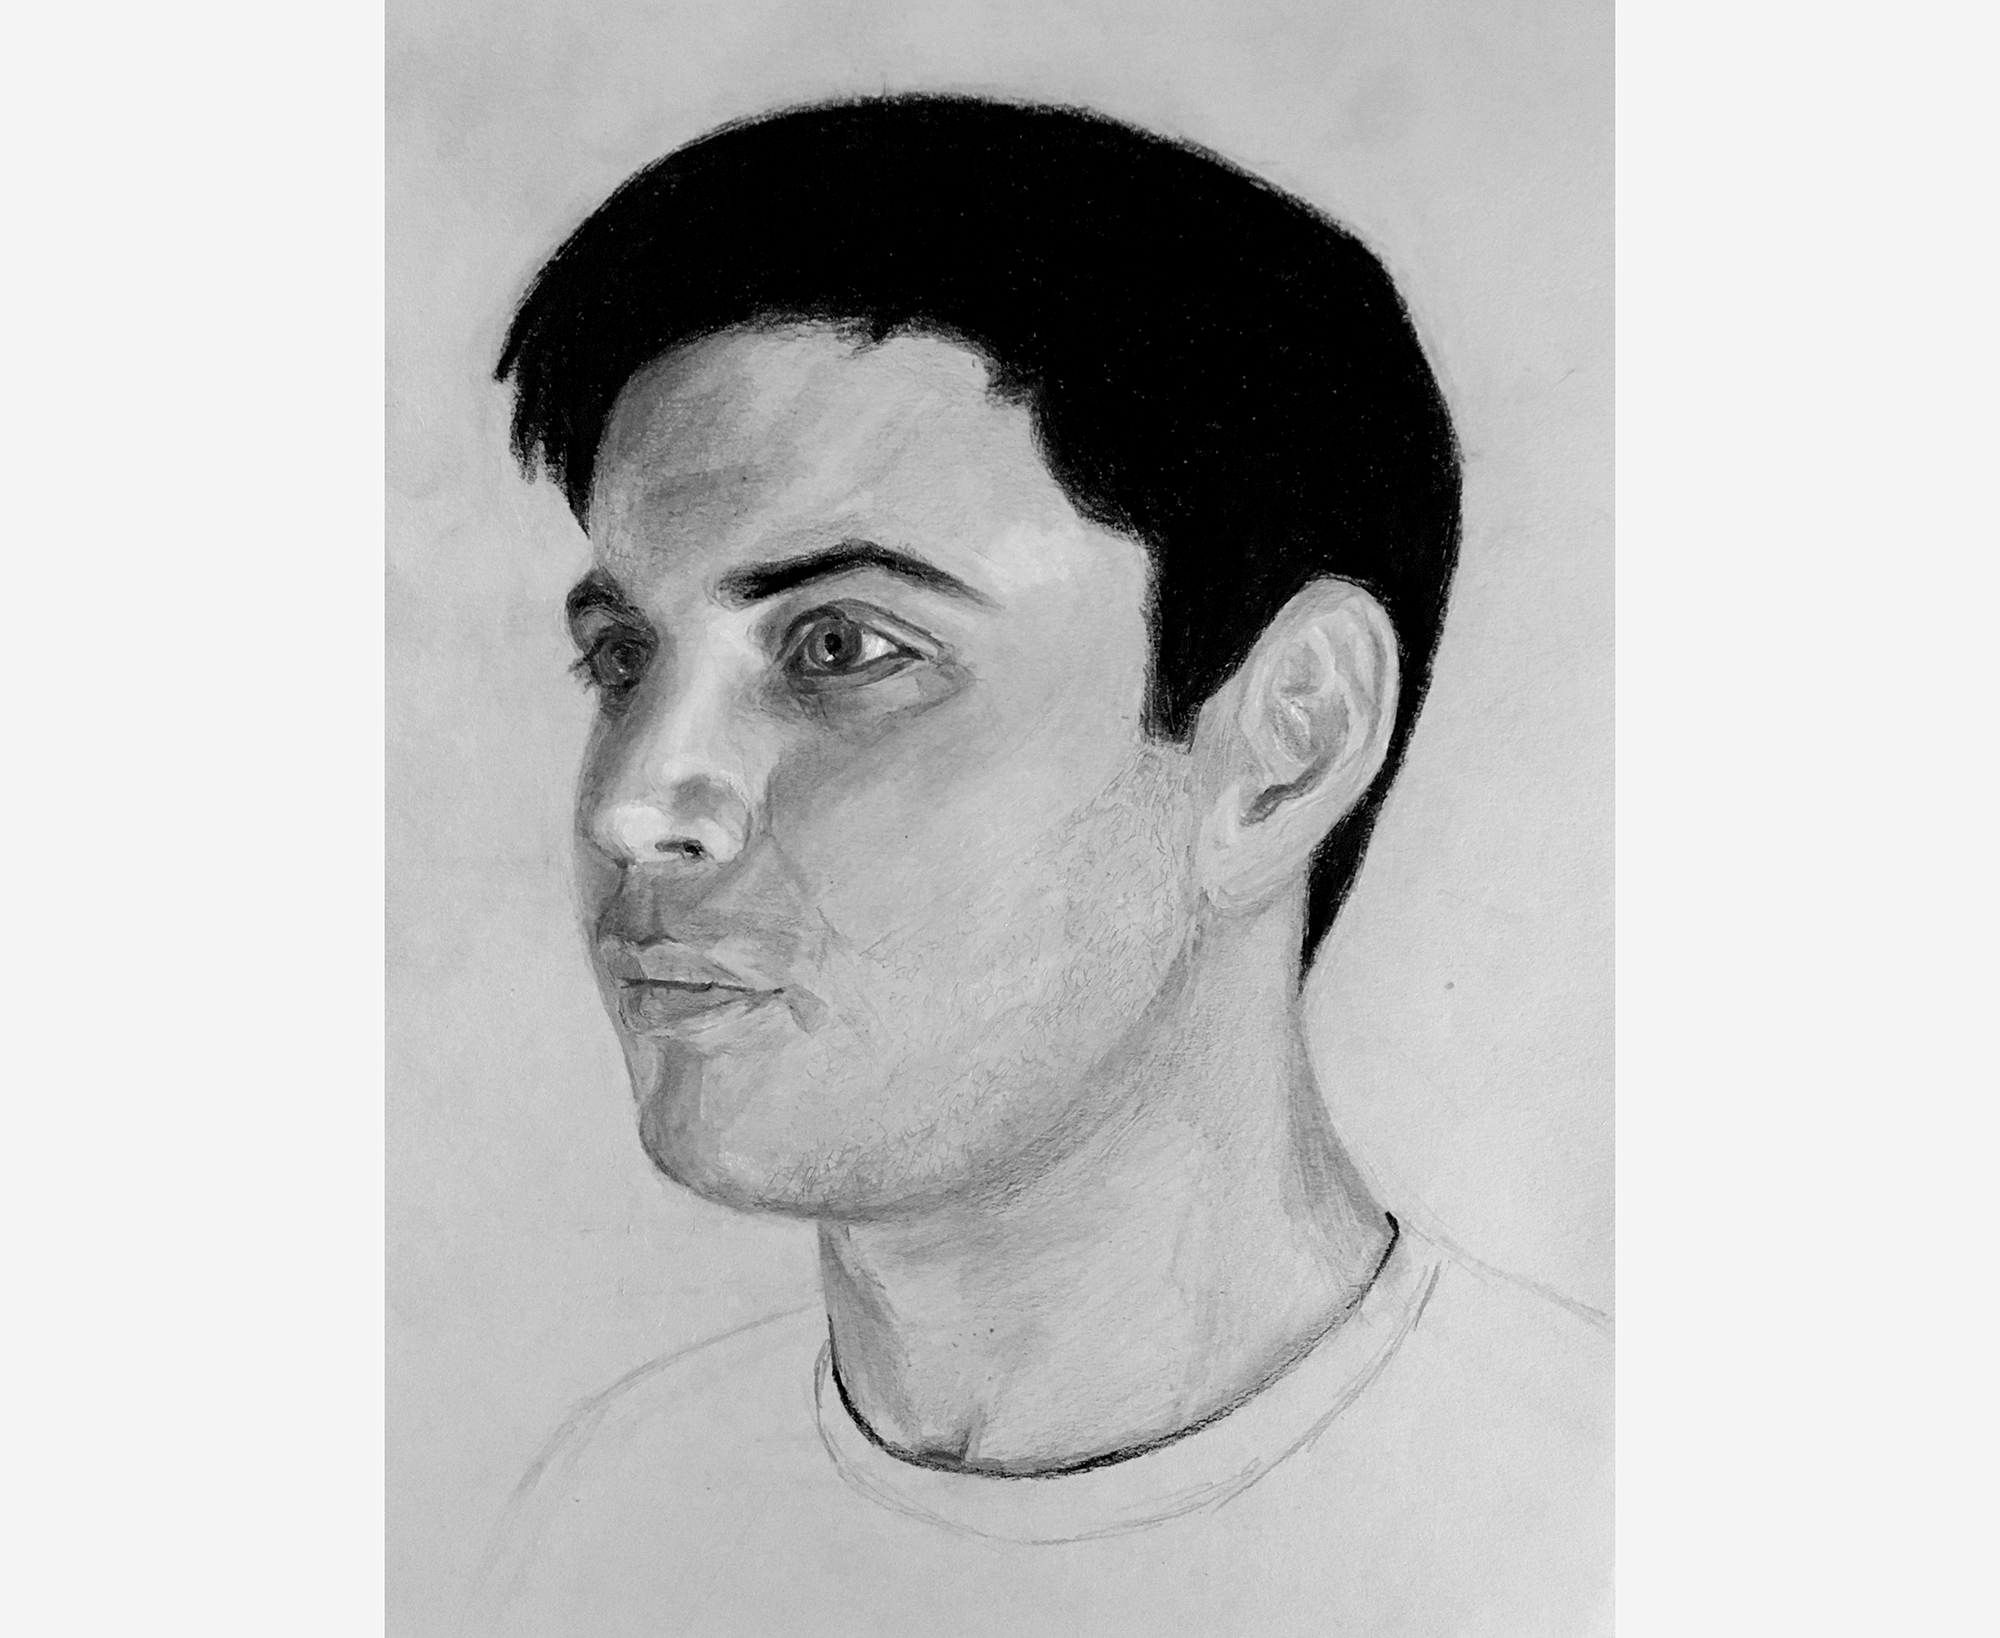
While the Derren Brown portrait (with its ultra-contrasty tonal range) may be a more dynamic portrait, my self portrait seems closer to photorealism, which is the main improvement I was aiming for.
Overall, I?m very happy with the result.
Of course, these paintings are built on a prerequisite foundation of drawing, but they also introduce a whole new skill set that I would love to cultivate.
Watching Derren paint, it seems like there are clear parallels between shading a drawing and painting a portrait: He sets a mid-tone color, adds the lights and darks, works his way towards the middle, and then adds detail.
There are also clearly major differences, like evaluating and mixing colors, general painting hygiene (letting paint dry, etc.), and best practices I?m probably not yet aware of.
And while this seems like a major leap from my drawing studies, I now have the artistic confidence to attempt a painting like this, without any (or very little) additional instruction.
In the coming months, I plan to start sketching a portrait on canvas, and then experimenting with paint.

In other words, after practicing for about an hour per day for 26 days, I majorly improved my portrait drawing skills.
Last month, it only took me 22 hours to become a grandmaster of memory.
I think this is going to be a theme for the entire Month to Master project: If my practice is deliberate and consistent, it?s going to take a lot less time than expected to master these seemingly expert-level skills.
The trick, then, is to create a mechanism to force deliberate and consistent practice month after month. This is the hard part about learning these new skills, not the time required.
Something to think about as you start planning your 2017 resolutions?

Today, I flew from San Francisco to Florida to meet up with my family for a few days. I?ll be here until January 4th.
I left all my drawing supplies behind, so I?m definitely not drawing any more this month.
I did, however, bring a Rubik?s Cube with me in preparation for January?s challenge (which starts in two days).
I?m definitely eager to start a new challenge, since I like the idea of always being in pursuit of something (which maybe suggests that I need to learn how to relax). Nevertheless, instead, these past two months, I?ve finished both challenges on Day 24 (of the month), and thus, needed to wait, without a challenge, for a week, until the next one began/begins.
Should I just start the next challenge once I finish the previous one? I?m not sure. On one hand, this seems reasonable and time-efficient. On the other hand, there is something very tidy about starting on the first of each month.
Clearly, I have some amount of obsessive compulsiveness going on, but I?m curious to know what you think?
Should I wait for the first of each month to start a new challenge, and enjoy my few days of relaxing (if available), or should I just use my extra time towards future challenges and start immediately?
Let me know.

Today, to celebrate the New Year, I decided to compile my personal highlights from 2016, which includes Month to Master, but also everything else from my life.
Rather than writing another M2M post today, I?ll encourage you to check out that post if you?re interested.
My 2016 highlights
2016 was my first full year living in San Francisco and also my first full year as a post-college ?working adult?.
medium.com
