This tutorial explains how to create a bootable Windows USB in macOS without any additional tools. The instructions are absolutely foolproof, no terminal is required and the resulting USB drive can be used to install Windows on any machine and is not limited to ?Boot Camp?.
Preparations
You need a USB stick with a capacity of 8 GB or more. All the data on the USB drive will be lost in the process, so make sure to save the data elsewhere before you continue.
Download Windows 10
In this step you have to download a rather old version of Windows 10. If you want to find out why this is necessary please refer to the section on the bottom of this article.
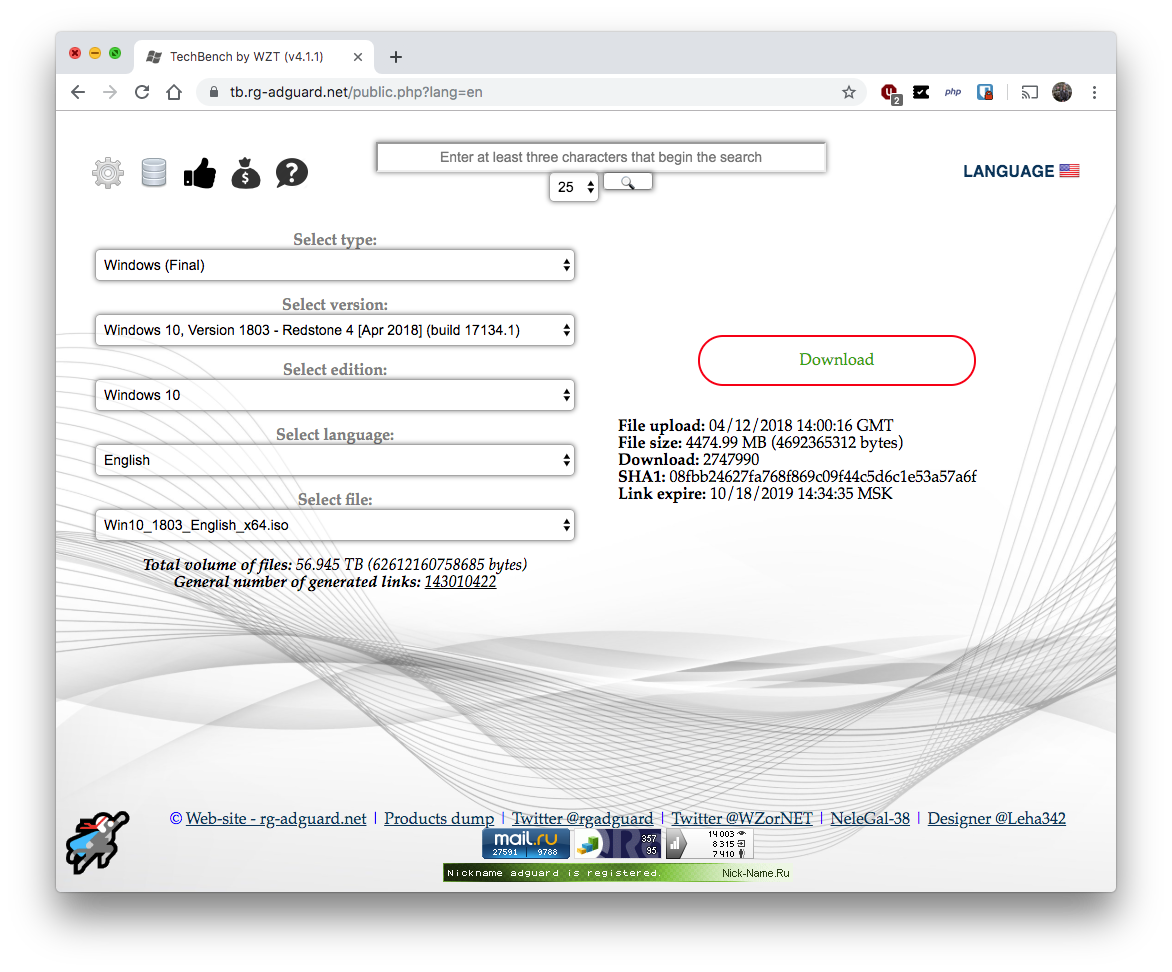
Go to https://tb.rg-adguard.net and select ?Windows (Final)? as type, ?Windows 10, Version 1803 ? Redstone 4 [Apr 2018] (build 17134.1)? as version (do not select a more recent version), ?Windows 10? as edition, a language of your choice and finally the file that ends on ?_x64.iso? if you don?t know any better. Finally click ?Download? and continue with the next step in the meantime.
WarningIt looks like this step is no longer working adequately, because the described ISO images are not available for download anymore. If you get stuck here please try to use the website?s search function on the top, search for ?Windows 10, Version 1803 (Updated Apr 2018) (x64)?. You will get to see the cryptic ?SHA1? key on the right which you can use to easily search the web for alternative download sources.
For the German version, for instance, the SHA1 key is ?537f817703323d28f673b4e36e377919e1ee034e? from which I found this download from ?ComputerBase?. If you don?t find a download for your language, give the German version a try. I believe you can install the language pack of your choice later on then.
Format the USB drive
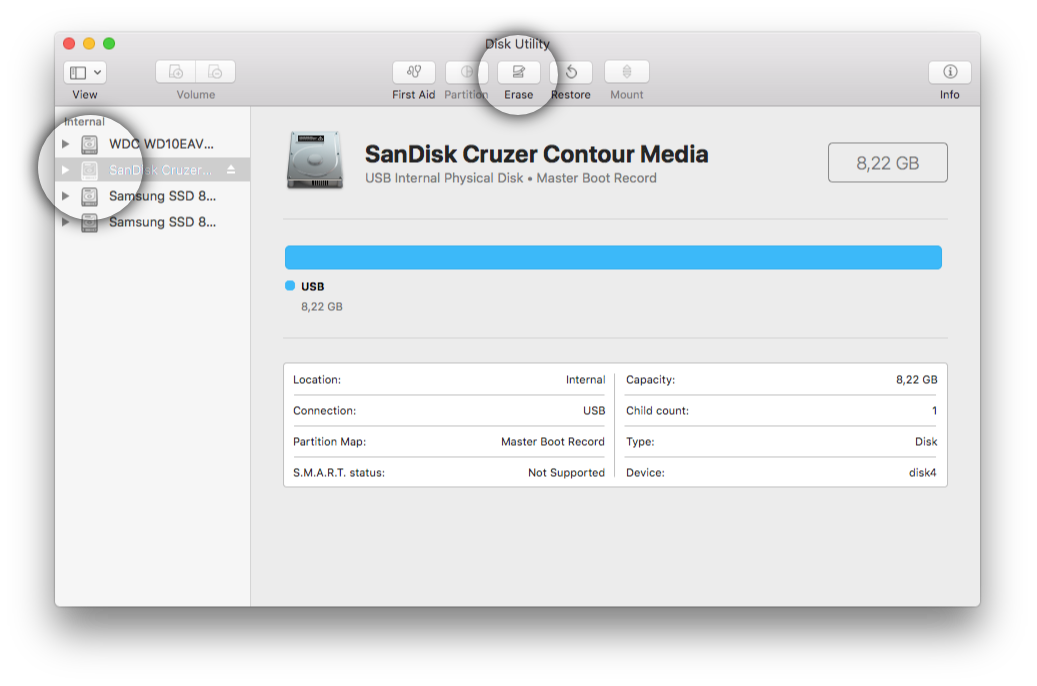
Make sure your USB drive is plugged into your Mac and continue by opening the ?Disk Utility? app by either searching for it or by navigating to /Applications/Utilities/Disk Utility.app manually.
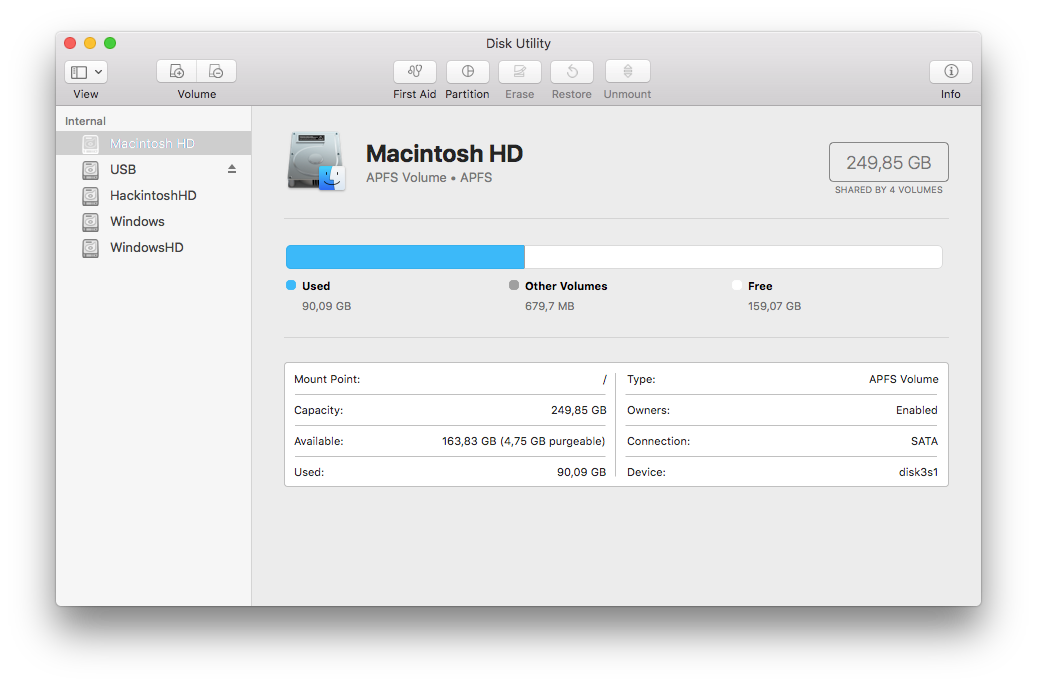
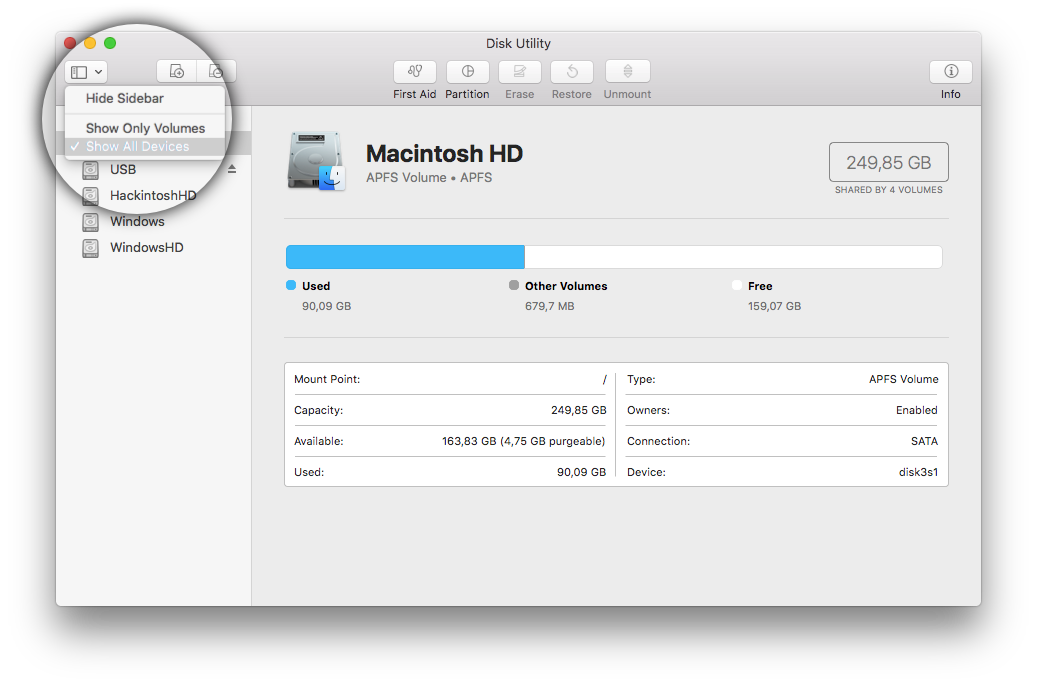
Click ?View? in the top left corner and make sure ?Show all devices? is enabled.
Select your thumb drive on the left and click ?Erase?.
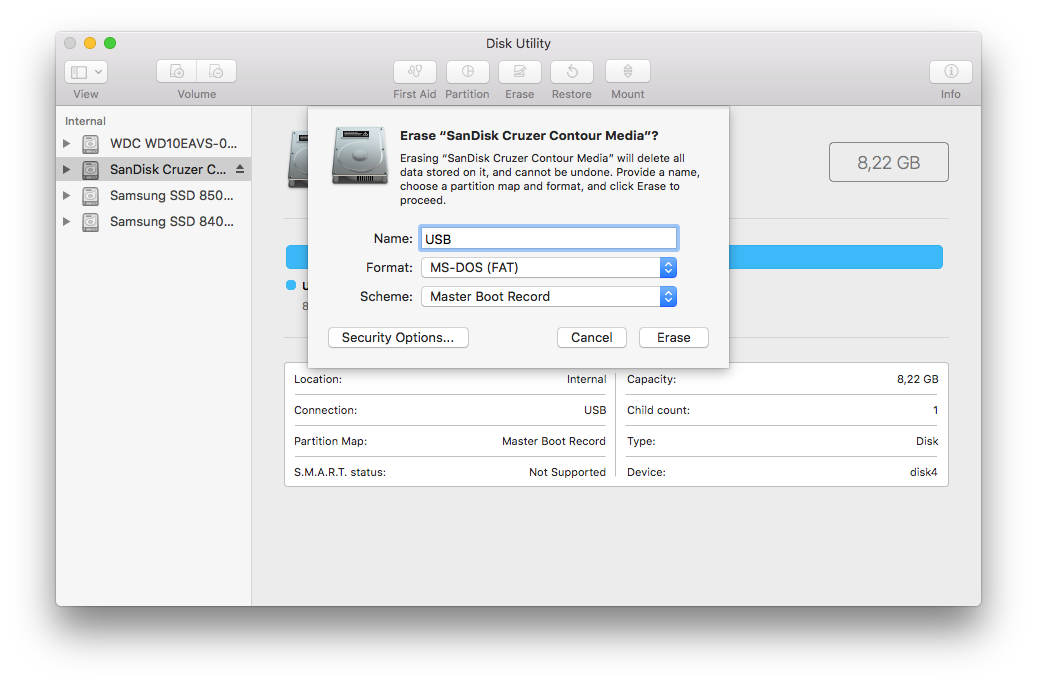
Insert an arbitrary name (e.g. ?USB?) but make sure to select the ?MS-DOS (FAT)? format and the ?Master Boot Record? scheme. If you don?t have an option to select the scheme please double check that you got the previous step to ?Show all devices? right. Now click ?Erase? and wait until the process is finished.
Create a bootable USB drive
When the Windows 10 ISO download is done, double click the file to open it. A new window will appear.
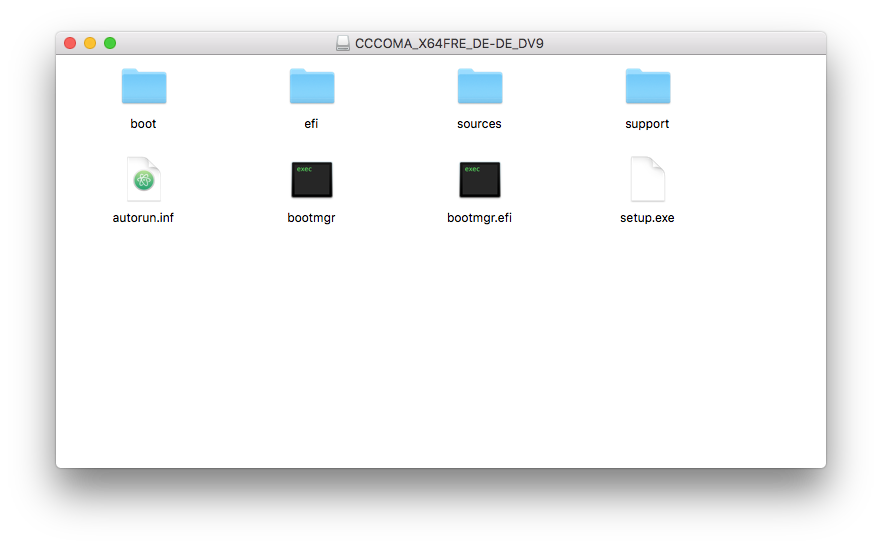
Now copy all files to your USB drive (e.g. via drag & drop). The copy process may take a little while, depending on the speed of your thumb drive. When this is done you can eject the USB stick. You are now ready to boot Windows 10!
Why is an old Windows ISO filenecessary?
Microsoft offers official downloads for Windows ISOs, but unfortunately you can not use them. On macOS you are forced to use the FAT32 filesystem for your thumb drive, because NTFS is not supported by macOS and ExFAT is probably not supported by your BIOS. But files in FAT32 are limited to a maximum size of 4 GB. The ISOs provided by Microsoft contain files that exceed that limit. Therefore you need to download an older version of Windows 10 from an alternative source. The website https://tb.rg-adguard.net gives us access to previous Windows releases. The files however are still coming from Microsoft directly, so there is nothing to worry about. Once the old Windows version is installed, you can use the integrated Windows updater to install the most recent version.
If you receive error messages while copying the Windows files to your USB drive saying ?install.wim: File too large? for your target medium, or you get an error during install saying that :\Sourcesinstall.wim can not be opened (error code 0x8007000D), then you picked a Windows ISO that contains files that exceed the FAT32 limit of 4 GB.
Alternative workarounds
If you don?t want to use an outdated Windows installer to work around the FAT32 issues there are a couple of alternative approaches that you may try. However, I did not use them and can only give you a pointer.
There are a few NTFS drivers for Mac available on the web (e.g. Fuse). Perhaps you can just walk through this tutorial by formatting your thumb drive to NTFS and using the latest Windows 10 ISO. Check out ?How to format a disk to NTFS using Mac OS X? on StackExchange to learn more.
There is a command line utility called split preinstalled on your Mac. This can be used to turn the oversized install.wim into a couple of smaller files. However, there are a few advanced steps more you have to deal with during installation then. Check out ?How to create a Windows 10 bootable USB on a Mac for PC without Bootcamp, when install.wim is too large? on StackExchange to learn more.